The Spring 12 release of Site.com introduced a host of powerful features designed to help you build compelling, powerful sites. We covered using repeaters and data tables in a prior post. Now we’ll take the next logical step. Site.com helps you create and manage forms, allowing your visitors to submit new leads, cases, registration submissions, or any other object on the Force.com platform.
Developing a Palette for Site.com Forms
In my last Site.com-related post, I detailed how to create product listing page and a product details page using repeaters.

This is a common pattern on many commercial sites. Visitors expect to browse your products and then drill down to a page listing that product’s details. Our laptop details page does a great job of giving a description and specifications of a laptop, but now it’s time to start generating leads for our Sales organization.
We’ll put a simple form on our product detail page that captures a lead. Open the Site.com Studio and you’ll probably notice many more elements in the Page Elements palette, including forms and form elements. Add a form to the product detail page by opening the palette at a leaf node on the page:

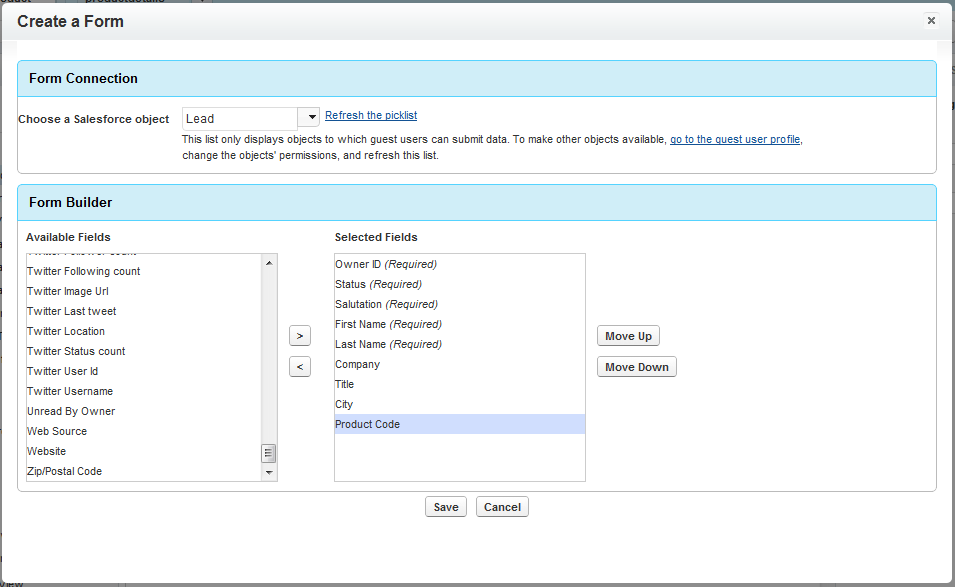
When you add a form element to a page, Site.com shows the Form Builder dialog. Select the Object to bind the form to, select the fields to add to the form, and click Save:
NOTE: You may need to go to the guest user profile and set appropriate CRUD and field-level security for the Lead object.
This places a fully-functional form on the page. You can see this form and manipulate it in the studio:
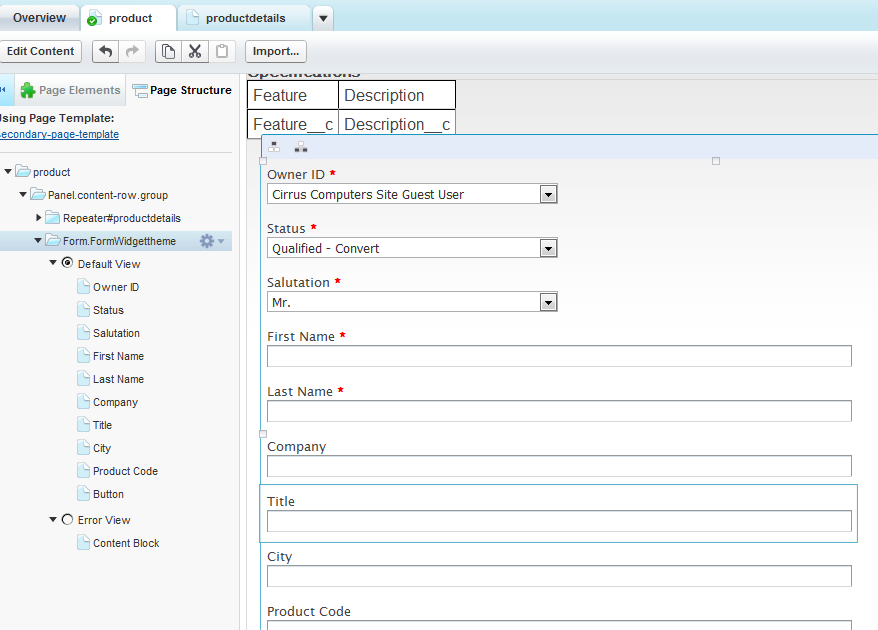
The form Builder added several required fields from the Lead object. We don’t want fields like Owner ID, Product Code, and Status to appear, so you can check the hidden checkbox in the Properties pane on the right of the studio. You can also configure a default value for these fields … a static value for Lead Status, and the product code from the querystring:
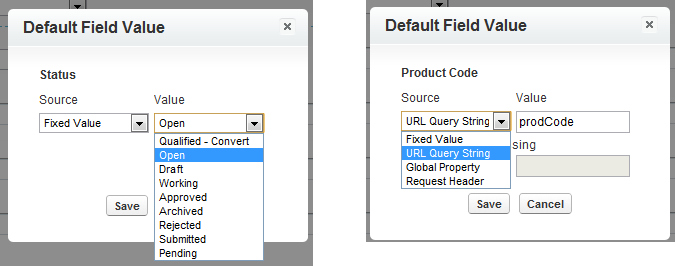
These configurations will give you a form that submits not only the Lead’s contact information, but also the product interest … and any other field you choose to add to the Lead form.
Giving Thanks from Site.com Forms
It’s always polite to say thanks. When a visitor submits our form, Site.com provides two ways to say thanks: with a quick message on the form itself, or by redirecting the visitor to a new page. Select the form in the Page Structure pane. The Properties tab will show configuration options for when the user submits the form. Use the simple Display a Message option here:

The finished product is a compelling product page, complete with a form where a visitor can get request more information on the product:
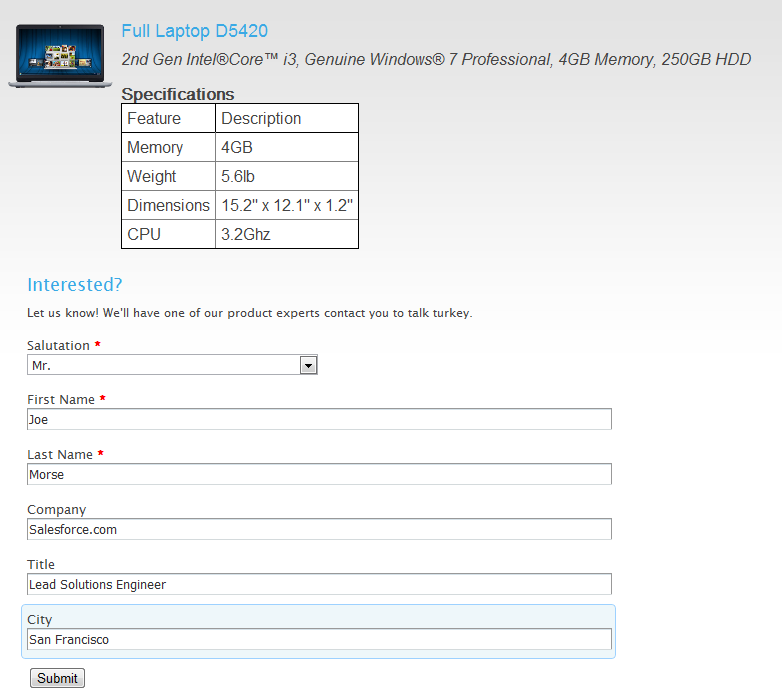
Submitting this form creates a new lead in the Sales Cloud … complete with lead details and product interest. Ambitious readers can easily augment this form with JavaScript to create a very rich and compelling visitor experience.
Site.com makes it easy to create a rich, interactive web experience with just a few clicks. And it’s pre-integrated with your existing Force.com data. Want to get started? Sign up for a free Developer Edition org today and give it a try!