 Yesterday, a valued member of the Force.com developer community asked me, “Does
 Chatter Mobile 4.2 Salesforce1 include the necessary bits to let a Visualforce tab use PhoneGap to hook up the camera?”. The short answer is ‘no’, but it is possible for JavaScript on a Visualforce tab in Salesforce1 to use HTML5 to achieve the same end.
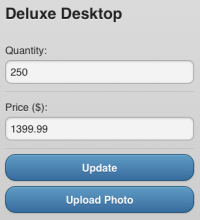
Today, I rewrote the ELEVATE Mobile Workshop ‘Mobile Inventory’ sample page to demonstrate the approach. The previous version of the page, designed for use in a Salesforce Mobile SDK ‘hybrid remote’ app, used PhoneGap’s navigator.camera API to retrieve a photo from the camera or photo library. With the advent of iOS 6.0 last year, it became possible to use the HTML <input> element to do the same job, resulting in a page that will work pretty much anywhere – I’ve tested it in a hybrid mobile app, Safari on iOS, Chrome on Android, Chrome on the desktop and, yes, Salesforce1.
The complete source code is available in this gist; in the remainder of this post, I’ll cover the highlights of HTML5 file handling.
The HTML <input> element allows users to supply data, typically in an HTML form. We’ve all been using it for years. From iOS 6.0 on, the following HTML will allow the user to upload an image:
The main drawback with the default HTML file input element, particularly in a mobile app, is that you can’t style it to match the remainder of your page. The solution is to hide it, have the user click another, more attractive element, and wire up the clicks in JavaScript. My page has the following HTML to implement the button:
Because this is a jQuery Mobile (jQM) page, we can’t just style the <input> element to be invisible, since jQM inserts its own elements in the DOM at runtime. Instead, in the $(document).on(‘pageinit’) handler, we hide the parent jQM element:
Now we need to wire the controls together, so that clicking on our visible button will actually activate the invisible <input>. We can navigate from the button to the <input> via an HTML5 data attribute:
When the user selects a file, the <input> element will fire a change event, so we need to provide a handler.
The handlePhoto() function is where the real magic happens:
The function receives an event parameter containing an array of HTML5 File objects. Since we’re only dealing with a single file, we take the first entry in the array and use an HTML5 FileReader to read the image file’s content into memory as a data URL. The data URL contains a prefix containing the media type, a comma, then the base64-encoded content of the file. In this example, we’re uploading the image data to a Chatter File (represented in the API by ContentVersion), which, handily, accepts base64 data, so it’s a snap to split the dataURL on the comma and create the ContentVersion record. FileReader also implements readAsArrayBuffer(), readAsText() and readAsBinaryString(), so it’s possible to get the file content pretty much any way you want it.
As I mentioned above, the big advantage of this approach is that it has no dependency on PhoneGap, so you can use it pretty much anywhere that HTML5 is supported. If you’re working on a Dreamforce Hackathon entry that’s capturing image files from a mobile device, this is a pretty handy hack to have up your sleeve…