You have probably heard that the Salesforce1 Platform is the fastest path from idea to app. I have been working with the Salesforce platform over the last seven years as a customer, admin, in salesforce.com customer support, and as a sales engineer, and I have seen over and over how fast app development can be.
I want to walk you through what it’s like to create an app so you can experience exactly how fast it is. I’ll assume you are brand new to the Salesforce1 Platform and don’t have all day. I will start from the beginning and work through the process in short exercises and examples. You should be able to complete this exercise in less than 20 minutes. You can follow along with these lessons by getting a Free Developer Edition.
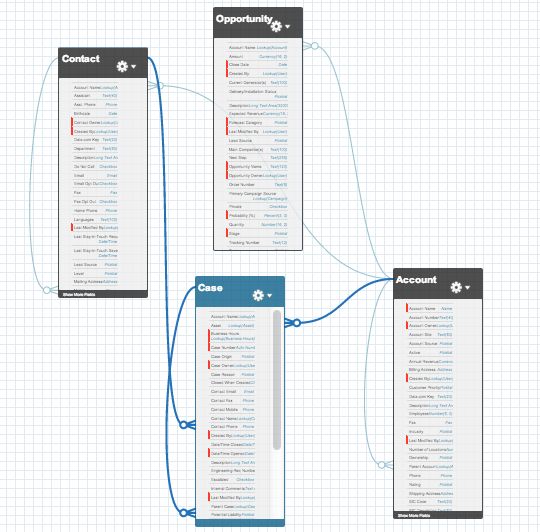
Let’s talk about the Salesforce Data Model first.
The first step to building your app is to design your data model. If you already use the Sales Cloud or the Service Cloud, you know what the data model is. There are Accounts, Contacts, Opportunities, Cases and your other standard objects. These are objects and they have fields. The data model determines how and where you will capture data in your app, and how this data is related.
Here is a view of some of the standard objects and their relationships in your data model today.
Add a Custom Field
Let’s try adding a new custom field to one of those standard objects first. Here is a helpful video showing custom field creation. You will be adding a new custom field to my account object to track the account tier.
Setup > Customize > Accounts > Fields
You can view all of the standard fields for accounts, the fields that were automatically created. At the bottom of the page you can see an area for Custom Fields. This is where you will be able to add custom fields to the account object.
To create a new custom field Select New in the custom field area . Field types determine what kind of data you can store in it. Since the type of field you want to create should only have three data options, you will select a Picklist. More about the custom field types here
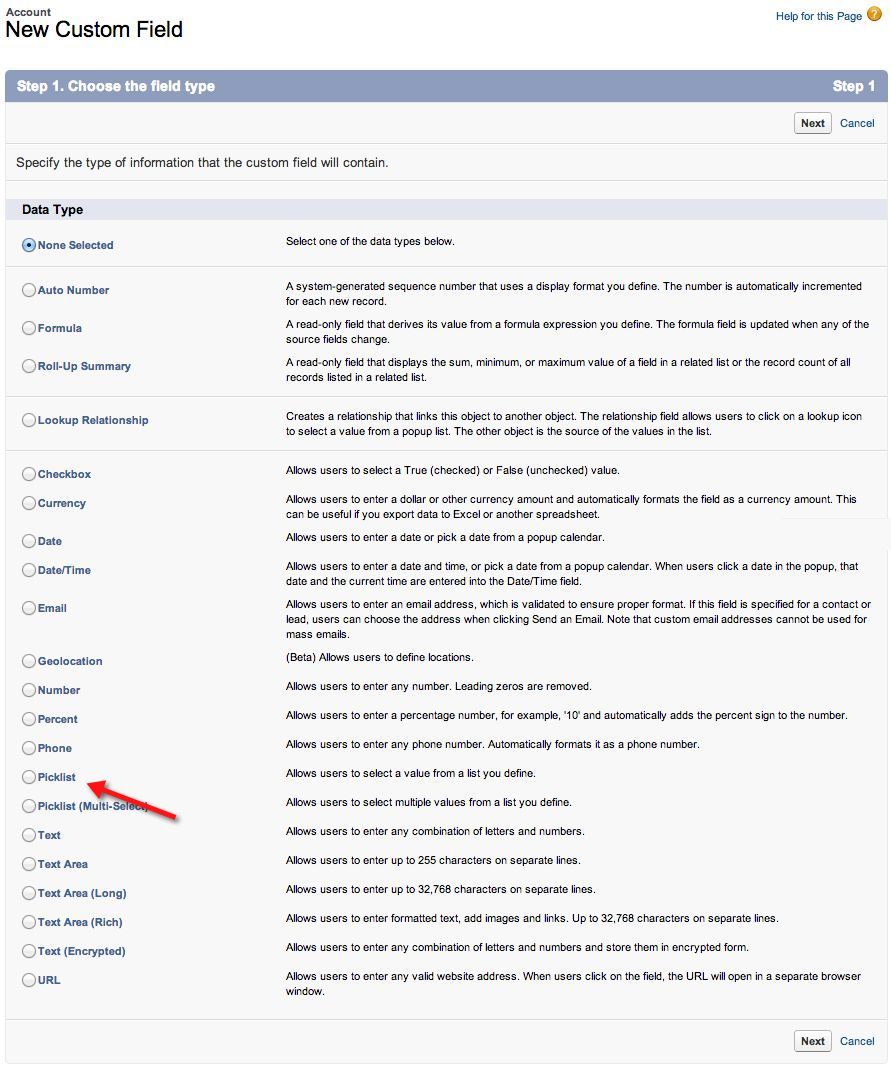
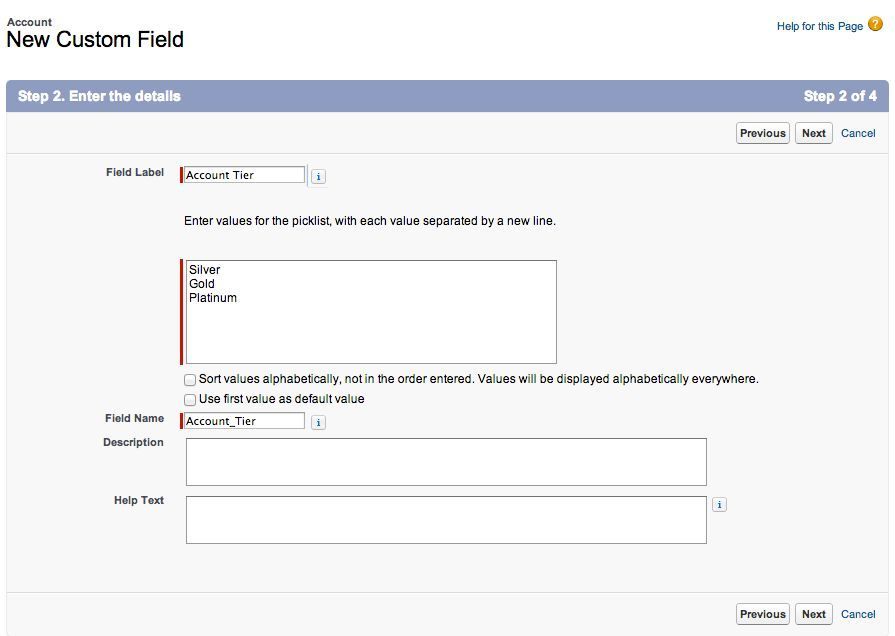
Select Picklist type and click Next. Then input the name of the field, and the three options for this picklist: Silver, Gold, Platinum. The field label is what you will see on your page layout. The field name is used internally. You should focus on making your label easy to understand by your users. When ready, click Next again.
Step 3 gives me the option to select visibility and security for this new field. I’ll cover this in detail in a later lesson but for today’s exercise you will just select Visible to all profiles and click Next. For more information about profiles and visibility
Step 4 gives us the option to select which page layouts my new field is included on. Select all the page layouts and click Save.
Now lets go check out your new field in action! Go to the Accounts tab, then select View for All Accounts.
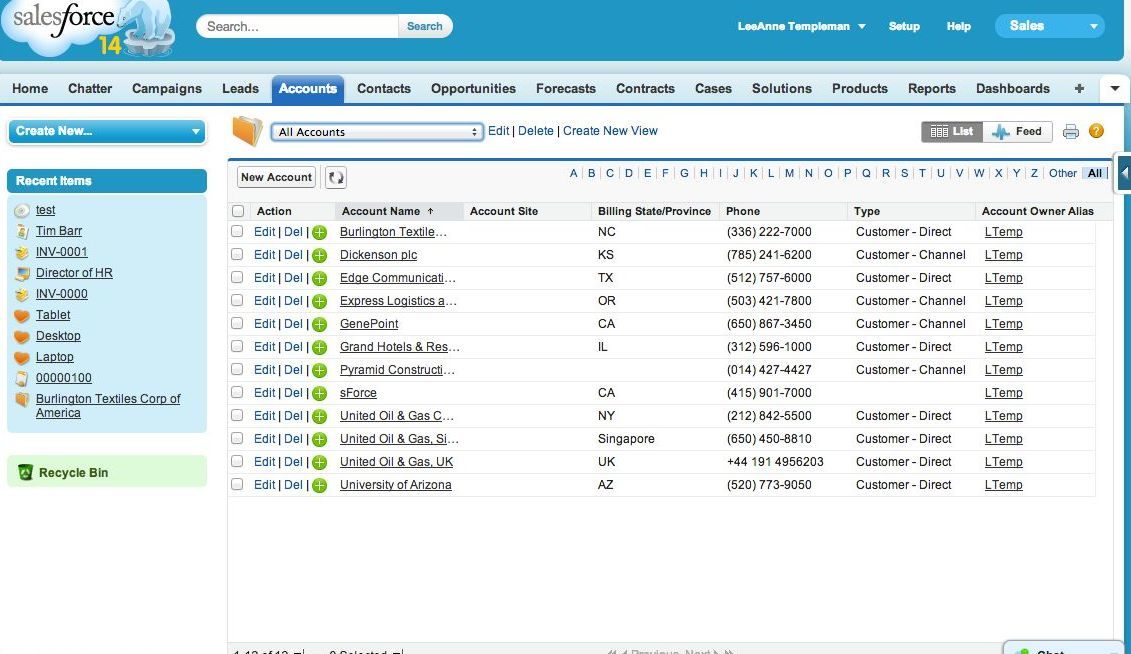
If you click on one of your accounts you should see your new field has been added to the page layout.

Create a Custom Object
Now that you know how to create custom fields on standard objects, let’s start building a custom object to track Time Off Requests from employees.
Navigate back to the Setup area

Go to Setup > Create > Objects
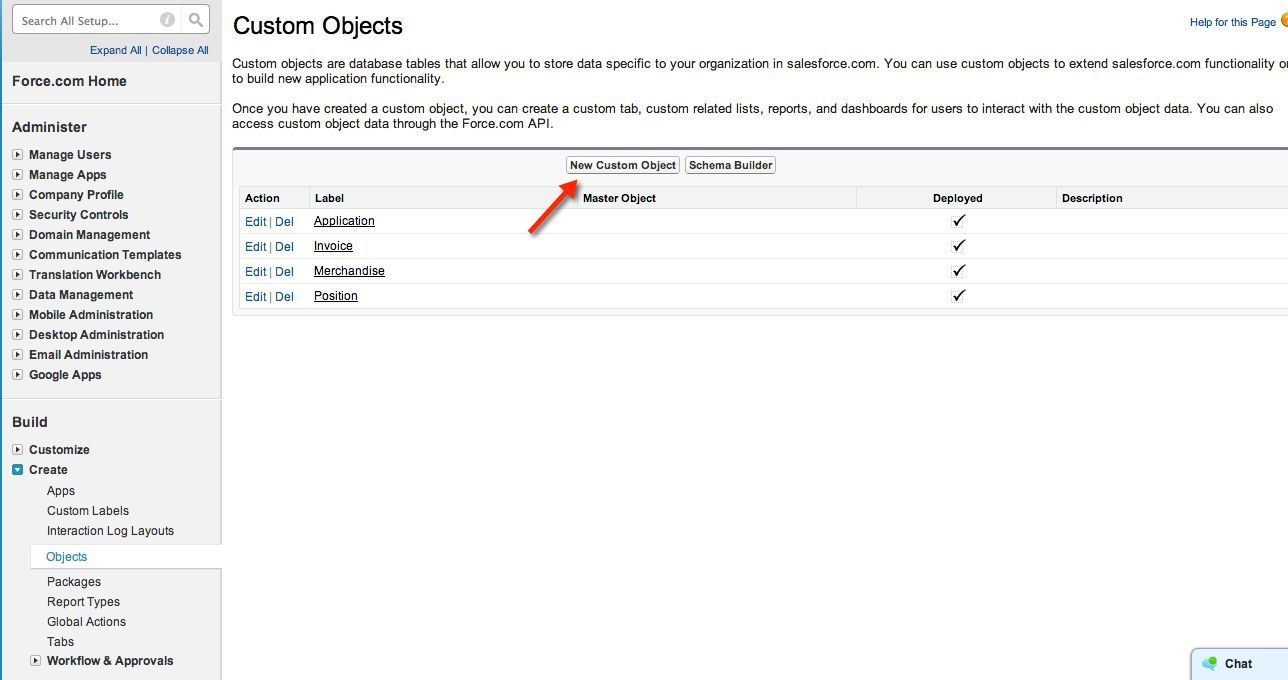
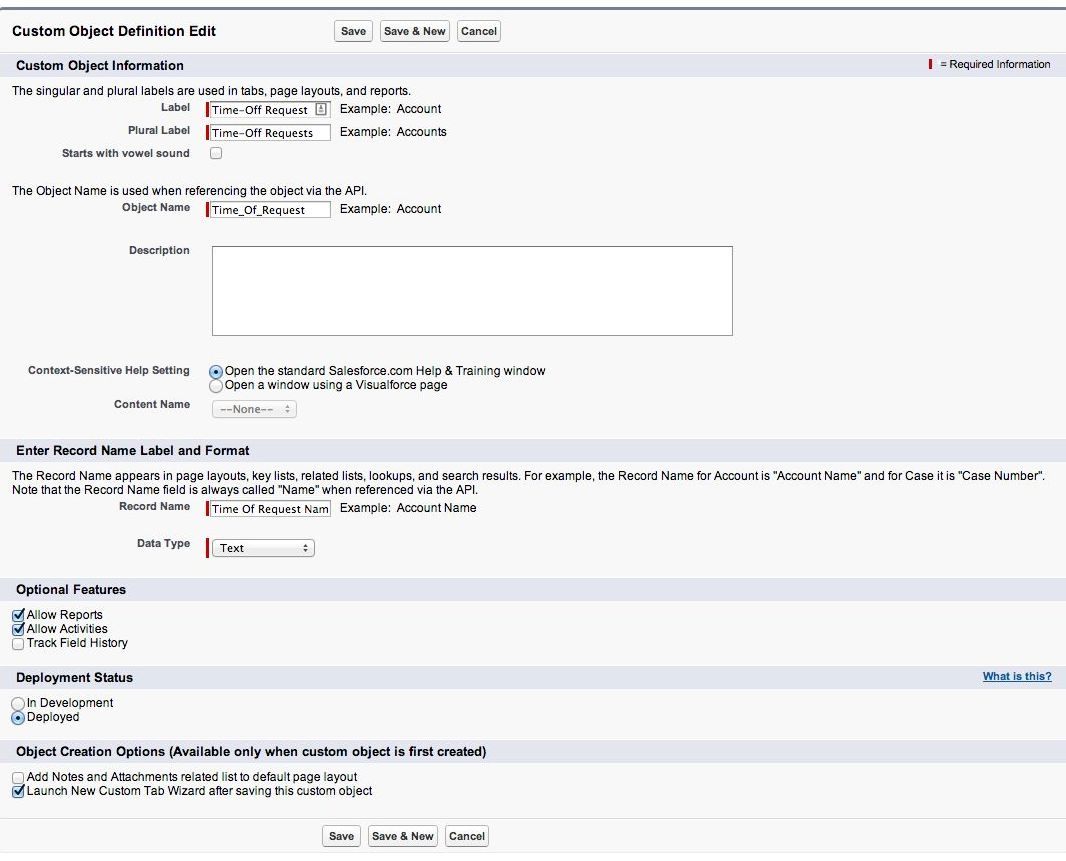
Click New Custom Object. You want to call your new object “Time-Off Request”. On this object creation page you have some checkbox options at the bottom. Make sure to check:
- Allow Reports
- Deployed
- Launch New Custom Tab Wizard
This will ensure it’s visible to users, available for reports, and that you can easily access it via a tab. (More on all those options later.)
Click Save
You opted to run the custom tab wizard in the last step, so now you are taken to the Tab creator. Select a Tab Style (I picked Airplane).
Click Next.

Step 2 gives us options for tab visibility, stay with the default option and click Next.
Step 3 asks us which apps to add this too. For this exercise you will include it in all apps.
Click Save
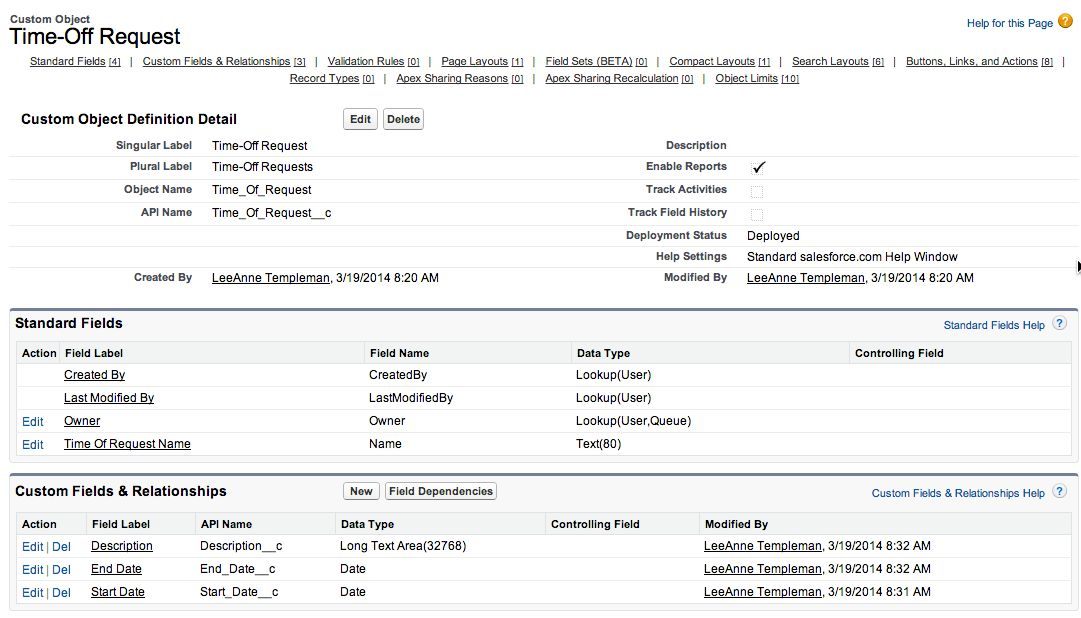
You just created a custom object on the Salesforce1 platform!
On this page, you can view all of the details for your new custom object. Standard fields that were created by default, like Owner, Name, and Created By.

Now let’s have some fun adding a few of the custom fields you might need. Using the New Custom Field button, let’s add the following fields:
- Start Date (Date Field Type)
- End Date (Date Field Type)
- Description (Text Area Long)
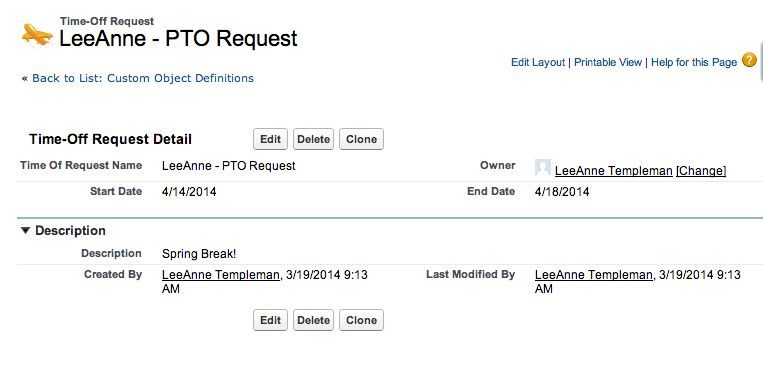
Once you have added your new fields, your custom object detail page should look like this. Your new custom fields are visible.
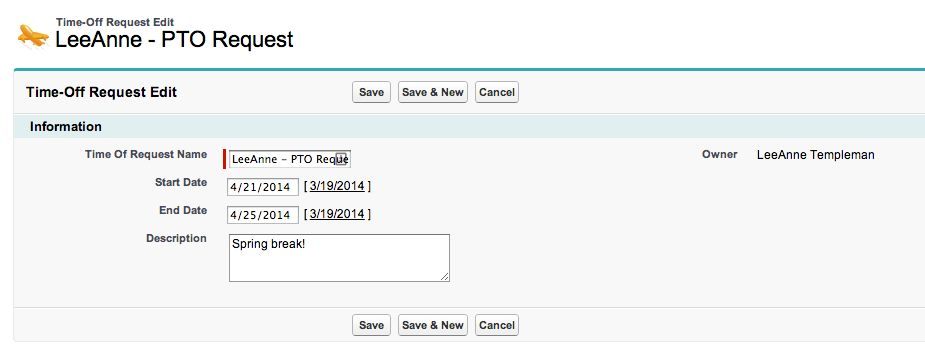
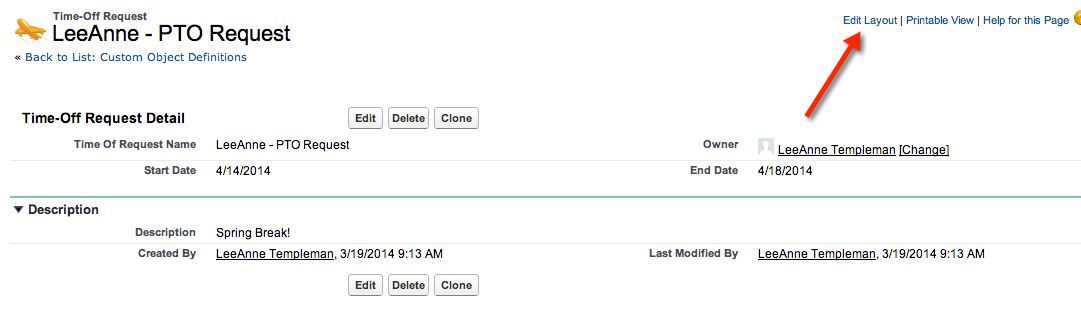
Let’s see what your new object looks like to a user. Since you created a tab earlier, you should have a Time-Off Requests tab visible near the top of your page. Click on this tab and select New to create a new Time-Off Request record. After entering your details, click Save.
Once you Save this record you can customize the view by selecting the Edit Layout link in the upper right.
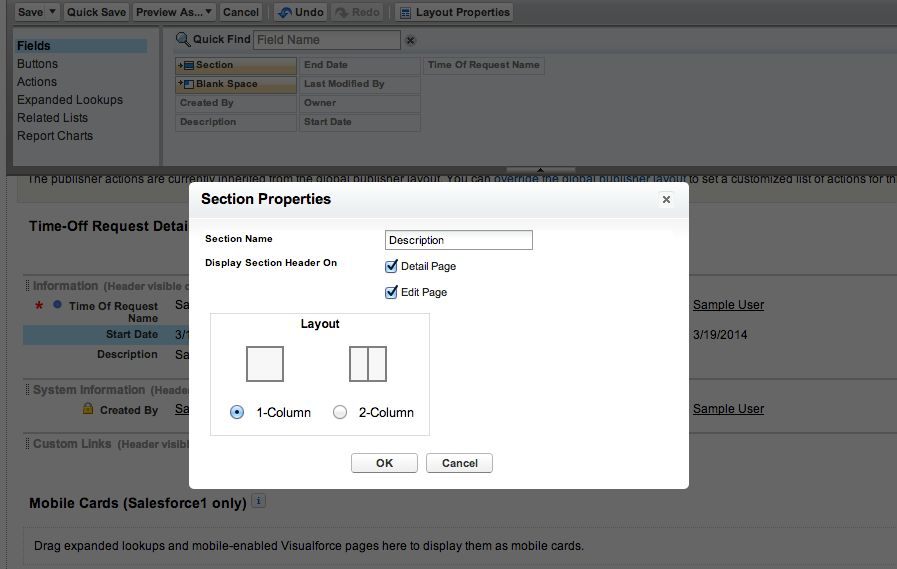
This drag and drop page layout editor allows us to modify how fields and related objects are represented on the page.

You want your description to have a separate section. Drag the orange Section item from the page layout editor down to your page. Let’s name this Description and also select the 1-column option. Click OK
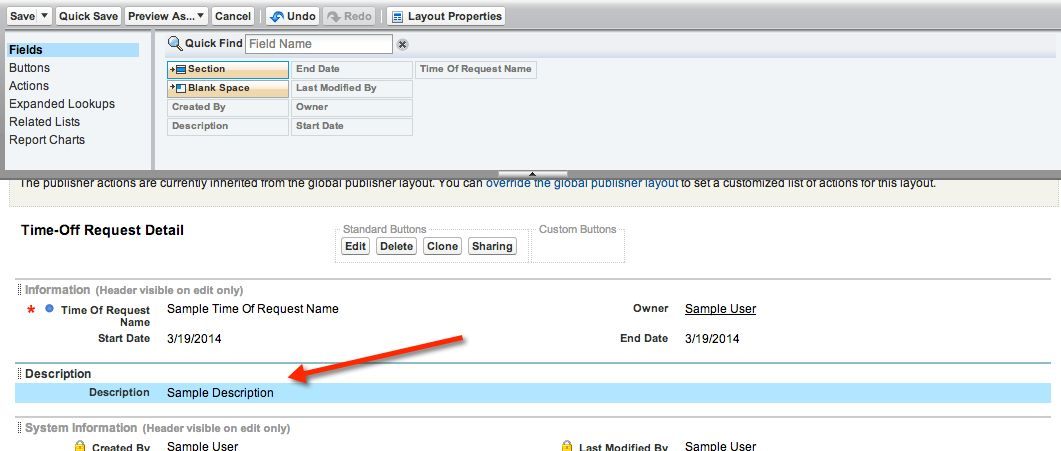
Now drag your Description field down to the Description section and click Save.
Congratulations! You just modified your data model, created a custom object, built 3 kinds of custom fields, and optimized your page layout. Finished!
Have some fun with this, to view the object you created as well as other objects in your salesforce org, try out the Schema Builder and if you don’t already have one, get yourself a Free Developer Edition.