 j
jUse HTML Templates
Bind Data in a Template
Bind HTML Classes
Bind Inline Styles
Render HTML Conditionally
Render Lists
Render Multiple Templates
TypeScript (Developer Preview)
Mobile-Ready Components
Develop Secure Code
The legacy if:true and if:false directives are no longer recommended. To future-proof your code, replace them with the lwc:if|elseif|else conditional directives.
Note
Directives are special HTML attributes that let you manipulate the DOM using markup. To render different HTML depending on a {property}, add conditional directives to a tag that encloses your conditional content.
Lightning Web Components supports the conditional directives lwc:if={property}, lwc:elseif={property}, and lwc:else. The lwc:if|elseif directives bind {property} to the template, removing and inserting DOM elements based on whether the data is a truthy or falsy value.
You can use conditional directives on nested <template> tags and HTML standard tags such as <div>. You can also use conditional directives with your custom component tags like <c-custom-cmp> or base component tags like <lightning-spinner>.
For a full list of guidelines for conditional directive usage, see HTML Template Directives: lwc
The following example has two properties: property1 and property2.
<template>
  <template lwc:if={property1}> Statement1 </template>
  <template lwc:elseif={property2}> Statement2 </template>
  <template lwc:else> Statement3 </template>
</template>
Only one of the three statements renders based on this logic:
Statement1 renders if property1 is true.Statement2 renders if property1 is false and property2 is true.Statement3 renders if property1 and property2 are false.Although the example uses all three directives, lwc:elseif and lwc:else are optional.
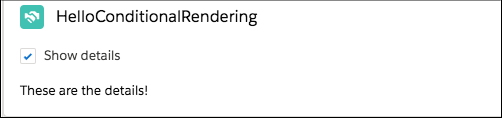
Let’s look at another example. This template contains a checkbox labeled Show details. When a user selects or deselects the checkbox, the handleChange function sets the value of the areDetailsVisible property. If the areDetailsVisible property is true, the lwc:if directive renders the nested template, which displays These are the details!.
<!-- helloConditionalRendering.html -->
<template>
  <lightning-card title="HelloConditionalRendering" icon-name="custom:custom14">
    <div class="slds-m-around_medium">
      <lightning-input
        type="checkbox"
        label="Show details"
        onchange={handleChange}
      ></lightning-input>
      <template lwc:if={areDetailsVisible}>
        <div class="slds-m-vertical_medium">These are the details!</div>
      </template>
    </div>
  </lightning-card>
</template>
Notice that the JavaScript doesn’t manipulate the DOM, it simply changes the value of a property.
// helloConditionalRendering.js
import { LightningElement } from "lwc";

export default class HelloConditionalRendering extends LightningElement {
  areDetailsVisible = false;

  handleChange(event) {
    this.areDetailsVisible = event.target.checked;
  }
}
To toggle the value of a boolean property in markup, default the value to false. See Boolean Properties.
Note
This sample code is the helloConditionalRendering component from the github.com/trailheadapps/lwc-recipes repo. For an example that uses a conditional directive on an HTML element, such as a div element, see the helloIterator component.
Tip
You can nest conditional statements within one another to create complex custom logic. For example, the following code checks if a user is logged in, and if they are, it subsequently checks if they have new notifications.
<template>
    <template lwc:if={isLoggedIn}>
        <p>Welcome back, User!</p>
        <template lwc:if={hasNewNotifications}>
            <strong>You have new notifications!</strong>
        </template>
        <template lwc:else>
            No new notifications at this time.
        </template>
    </template>
    <template lwc:else>
        <p>Welcome, Guest!</p>
    </template>
</template>You can nest conditional directives inside components. In this example, if property1 is true, <c-child-1> is rendered inside <c-parent>. If property1 is false and property2 is true, <c-child> renders <c-child-2> instead.
<!-- VALID CODE -->
<c-parent>
  <template lwc:if={property1}>
    <c-child-1></c-child-1>
  </template>
  <template lwc:elseif={property2}>
    <c-child-2></c-child-2>
  </template>
</c-parent>
However, preceding lwc:elseif or lwc:else with text or another element isn't allowed. The following sample code throws an error because the lwc:elseif directive must be used immediately after an element with lwc:if or lwc:elseif.
<!-- INVALID CODE -->
<template lwc:if={property1}>
  <c-child-1></c-child-1>
</template>
<div>This preceding div element before lwc:elseif makes the code invalid.</div>
<template lwc:elseif={property2}>
<c-child-2></c-child-2>
</template>
See Also
Release Preview
j