 The Salesforce Mobile SDK gives developers a head start in creating mobile apps that leverage the Salesforce APIs, in particular by implementing authentication in the SDK. The default app created by the SDK uses OAuth to pop up a login page and obtain an access token, so you can get straight to the business of building an awesome app that calls Salesforce APIs.
This default support gets you started quickly, but enterprise developers face bigger challenges. Your Information Security team might mandate strong control over mobile assets, for instance, requiring single sign-on (SSO) against a corporate identity system, such as Microsoft Active Directory, and application-level PIN protection.
Even after you’ve satisfied InfoSec, you’re still faced with the question of how to get your app into users’ hands. You don’t want to put your app in the AppStore or Google Play, and you can’t have your users lining up to plug their phone into your laptop to provision your app via the USB cable!
Chuck Mortimore and I answered these questions and more in our Dreamforce 2014 session, ‘Implementing Single Sign-On in Mobile Applications with Salesforce Identity‘, building an enterprise mobile app live on stage. This blog entry explains the process and provides links to resources.
Setting up Single Sign-On
Salesforce Identity Connect provides a bridge between Active Directory and Salesforce, allowing administrators to automatically synchronize user records between Active Directory and Salesforce, and users to log in to Salesforce using their Active Directory credentials. Setting up Identity Connect is outside the scope of this article, but the Dreamforce 2014 session Deploying Single Sign-on and Provisioning for Active Directory gives an excellent overview.
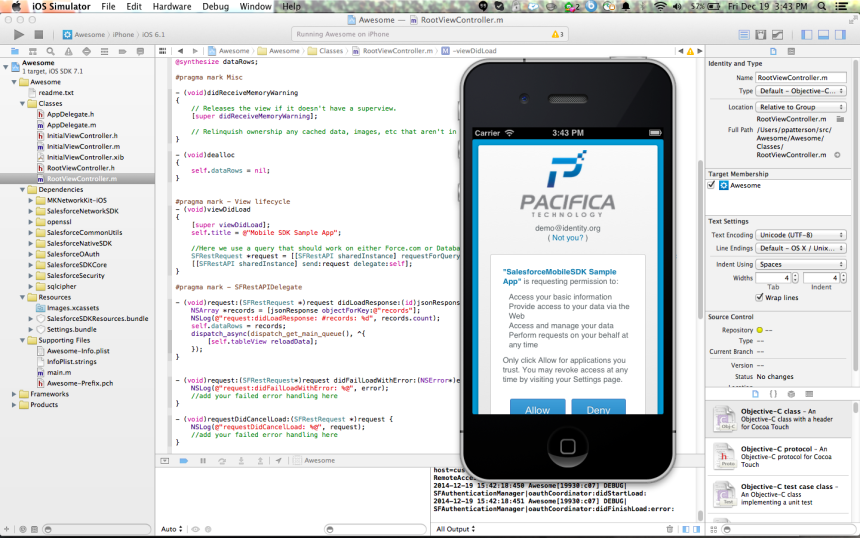
When you create an app with the Mobile SDK, it defaults to the standard login process, popping up a login page from login.salesforce.com.

This is just fine when users login to Salesforce directly, but we want them to go through the single sign-on flow, authenticating via Identity Connect using their Active Directory credentials.
The first step is to ensure that My Domain is enabled. My Domain gives a Salesforce org its own unique DNS domain, of the form customer.my.salesforce.com. When users or apps use My Domain in a URL, Salesforce can authenticate them using whatever mechanism is configured for the org.

Once My Domain is enabled, the org’s login page can be customized to use Identity Connect for authentication:
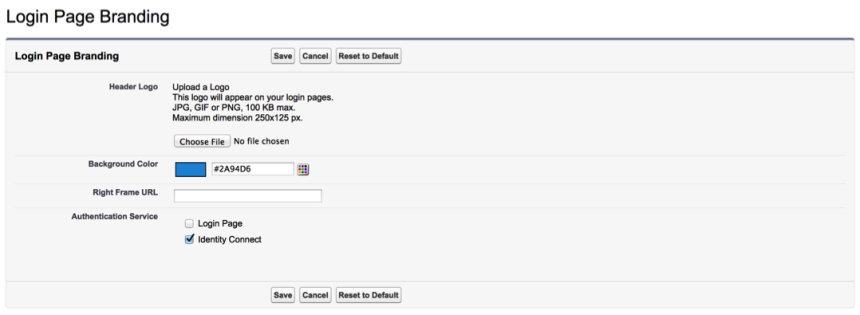
With that in place, we just need to tell the Mobile SDK to use the My Domain URL, rather than the default login.salesforce.com.
For iOS apps, open your app’s property list and set SFDCOAuthLoginHost to the My Domain value, for example, customer.my.salesforce.com.
For Android apps, you must creating a res/xml/servers.xml file in your application project. The root XML element for this file is <servers>. This root can contain any number of <server> entries. Each <server> entry requires two attributes: name (an arbitrary human-friendly label) and url (the web address of the login server.)
For example:
Now when we start the app, it shows the Identity Connect login page, and users can enter their Active Directory credentials.

Access Control Policy for Mobile Apps
Now users can authenticate to the app, we can think about who should be authorized to use the app. By default, users click through a page prompting them to allow the app to access their data in salesforce – self-authorization. (We didn’t actually show this in the Dreamforce session since a previous rehearsal left the app in a non-default configuration.)
In contrast, in an enterprise setting, rather than having individual users make access control decisions, we often want the admin to set policy on who can use the app to access data in the org. You can go to Setup | Manage Apps | Connected Apps to see the connected apps in use in your org, and click into one to set the policy. Here we’re managing the ‘Awesome’ app, configuring it for access only by admin-approved users.
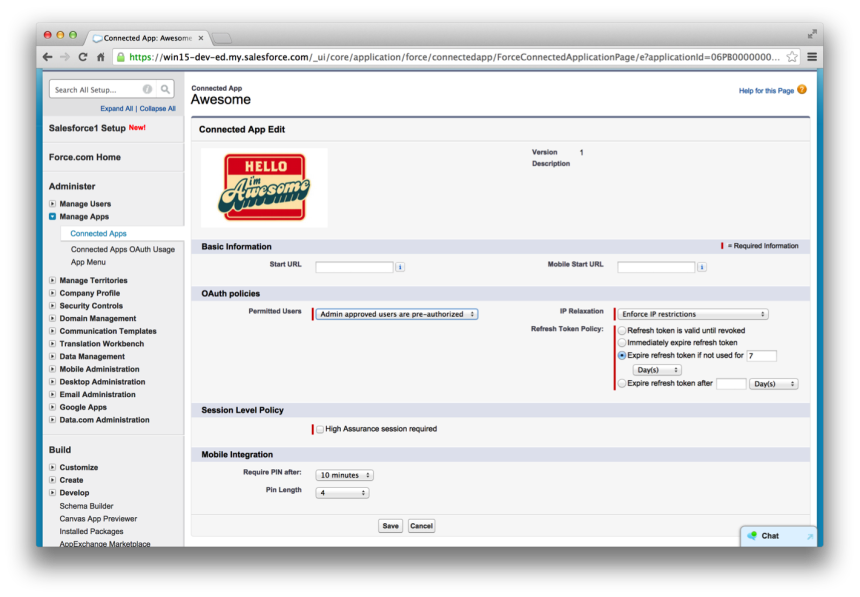
Having made that change, no one in our org can access the app any more! We need to add permitted users to a permission set. That done, when users access the app, they will be able to access the app, but no longer see the authorization screen, since the admin has authorized access on their behalf.
As well as deciding who can use the app, the admin can configure a number of other policies:
- Where an org is restricting access by IP range, the admin can choose to relax this restriction for the app.
- When a user authenticates via OAuth, the app gets a refresh token. The refresh token allows persistent access to Salesforce on behalf of the user, and is securely stored on the device by the Mobile SDK. After an initial login, whenever the app starts, the Mobile SDK will retrieve the refresh token and exchange it for a fresh access token. By default, refresh tokens are valid indefinitely, or until they are explicitly revoked by the app, the user, or an admin, but admins can set policy on refresh token lifetime, forcing users to re-authenticate after a given time period or even every time they start the app.
- Admins can require an app-level PIN, configuring a timeout interval and PIN length. No changes are needed in the app – the Mobile SDK handles PIN protection.
- You can even mandate two-factor authentication for the app, by specifying that a high assurance session is required.
App Distribution
Now we have secured our Awesome app, we need to get it onto our users’ devices! For iOS, the first step is to build the app for distribution, creating an ‘IPA’ file:
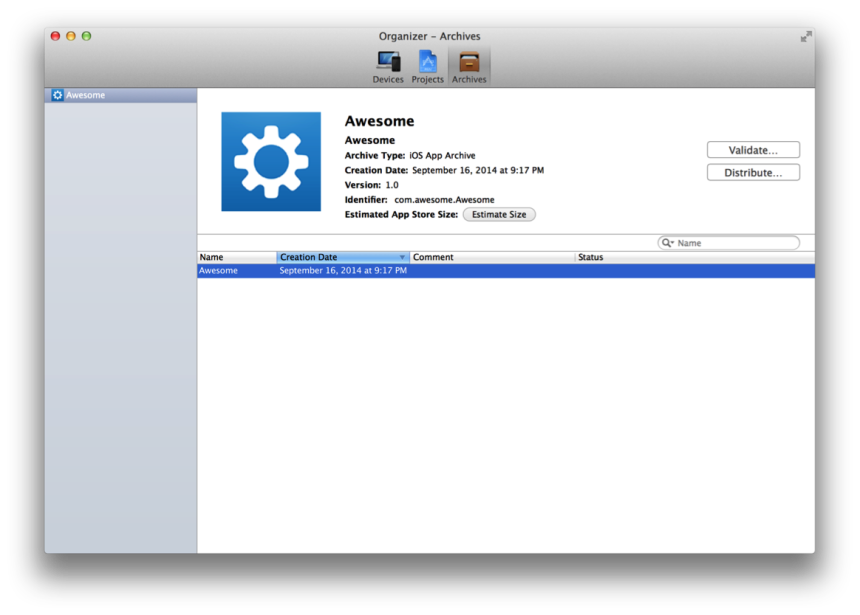
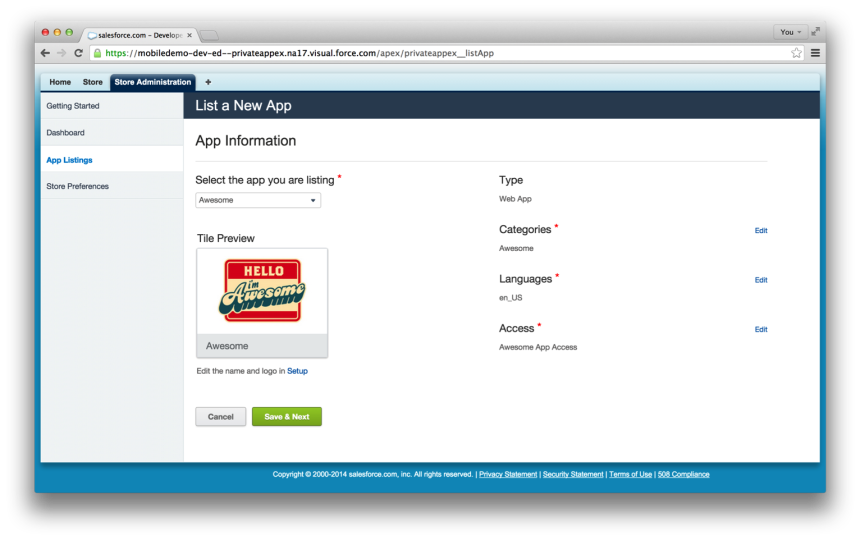
Independent software vendors (ISVs) can list their mobile apps in the Salesforce AppExchange, but we want to distribute this app solely to users within our org. Private AppExchange allows us to do exactly that. We can upload the application archive file and make it available within the org. Unfortunately, demo gremlins struck during the Dreamforce session, but I can assure you this worked just fine in rehearsal!
Conclusion
In the session, Chuck and I enabled a Mobile SDK app for single sign-on, set access control policy, and (almost) distributed it to users via the Private AppExchange, all in less than 30 minutes. The Salesforce1 Platform allows you to focus on writing your app, leaving authentication, policy and distribution to the Salesforce Mobile SDK, Salesforce Identity and the Private AppExchange.
Dreamforce 2014 Session Video
Join me and Chuck as we (almost) get this all working!
//www.youtube.com/watch?v=W3okdu8nJHY