Guest Post: Daniel Peter is a Lead Applications Engineer at Kenandy, Inc., building the next generation of ERP on the Salesforce Cloud. You can reach him on Twitter @danieljpeter or www.linkedin.com/in/danieljpeter.
 In my previous article I introduced Lightning Components and the Reporting API for Apex. Now let’s start using them to build an app!
I’m going to start as close to the data as possible, and work my way back up the stack. The first step is to construct a utility or service class that can access and transform the data for a given report. The AnalyticsUtils class will have a method in it that takes in a tabular report ID, and returns a two-dimensional string array with all the data in it. As you saw in the previous article, the ReportResult object is fairly complex. We just want to extract a simple grid of data out of it, like an Excel spreadsheet. In Salesforce speak, we are going to represent it as a list of string lists (List<List>).
Here is the code to do this:
Now we need to build an Apex controller to connect our lightning component bundle to this method, which extracts and transforms the report data:
You might notice it is different from a Visualforce controller in that it doesn’t have a constructor or properties. It is just a static method! It looks a lot like a Visualforce page that exclusively uses JavaScript Remoting, so hopefully that looks familiar. The @AuraEnabled annotation is the main difference between this and the @RemoteAction we are used to seeing for JavaScript Remoting. The report ID is just hard coded for now. We will introduce navigation in Part 4 of this series.
On to the Lightning Component Bundles
We will be using a component that represents the overall report we are displaying, plus a subcomponent that is contained in the main component, which we use to render a row of data. This is a lot like using a Visualforce page with a custom component. In addition to this, we will have a couple of JavaScript files, a controller, plus a helper. The helper isn’t totally necessary, but it lets us architect our code in a more maintainable and testable fashion.
Helper (reportComponentHelper.js)
reportComponentHelper.js sets up an action to call the getReportRows method in our Apex controller. It sets a callback function that populates the value of the v.reportRows attribute in our component (v stands for view). It then displays a toast message with the success or failure. This is a mobile-friendly Salesforce1 UI widget that displays messages that easily go away. Finally, this is passed to $A.enqueueAction(), which handles the batch execution. Basically, this means the platform will attempt to optimize multiple events and minimize calls to the server. $A stands for Aura and is the top-level object in the JavaScript API for Aura, which we are using. There are some functions that inject our CSS and JS static resource files into the DOM.
JavaScript Controller (reportComponentController.js)
reportComponentController.js contains a handler for the init event that is fired when the component initializes. This calls the action in the helper we just saw. There are also a couple of functions that toggle a spinner UI on when the component is waiting, and off when it is done waiting.
Lightning Component (reportComponent.cmp)
This is the top of the stack of our application. It is the closest thing to a Visualforce page in Lightning. LIGHTNINGREPORT.LightningReportsController is referring to our Apex controller with a LIGHTNINGREPORT namespace that we created in our org. implements=”force:appHostable” means that we can create a tab for this component and add it to our navigation. Components included in this component don’t need to implement force:appHostable. This calls a subcomponent that renders the row of data.
Lightning Component (reportRowComponent.cmp)
This component takes in a row of data, iterates over the cells, and properly displays it, depending on if it is a header or not.
Trying it out
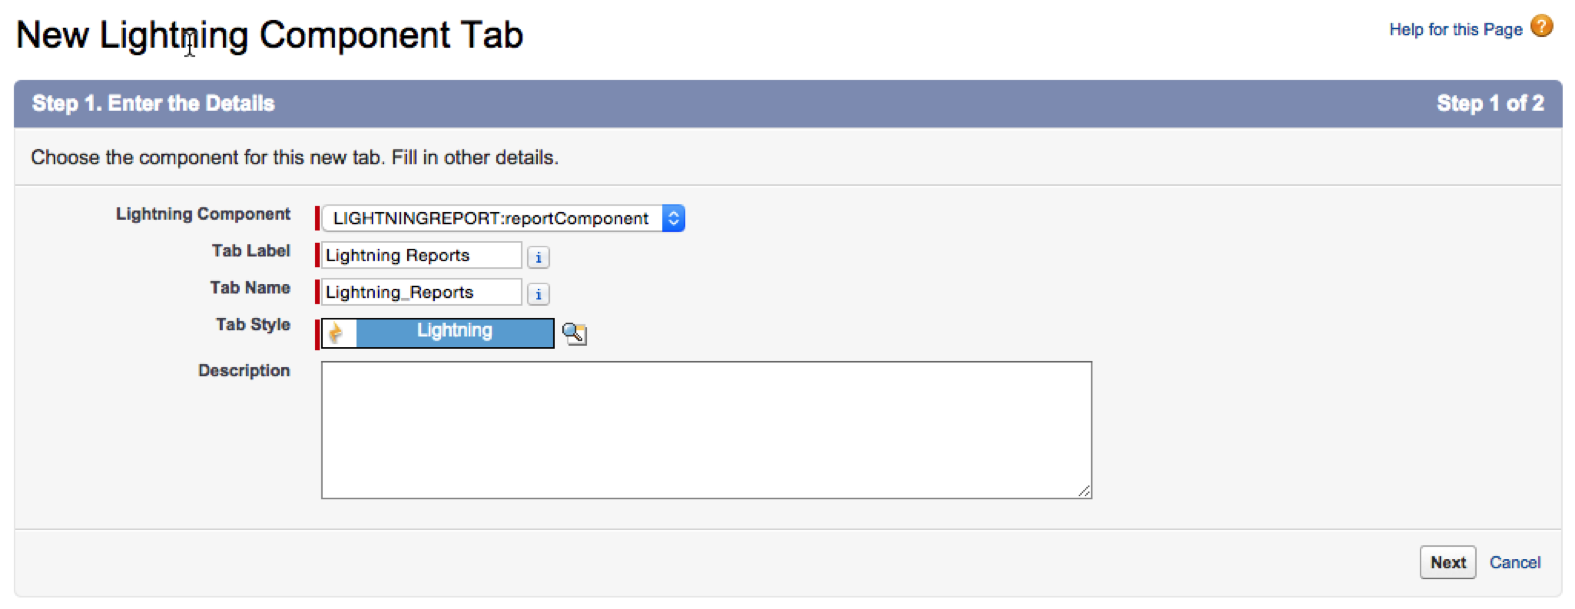
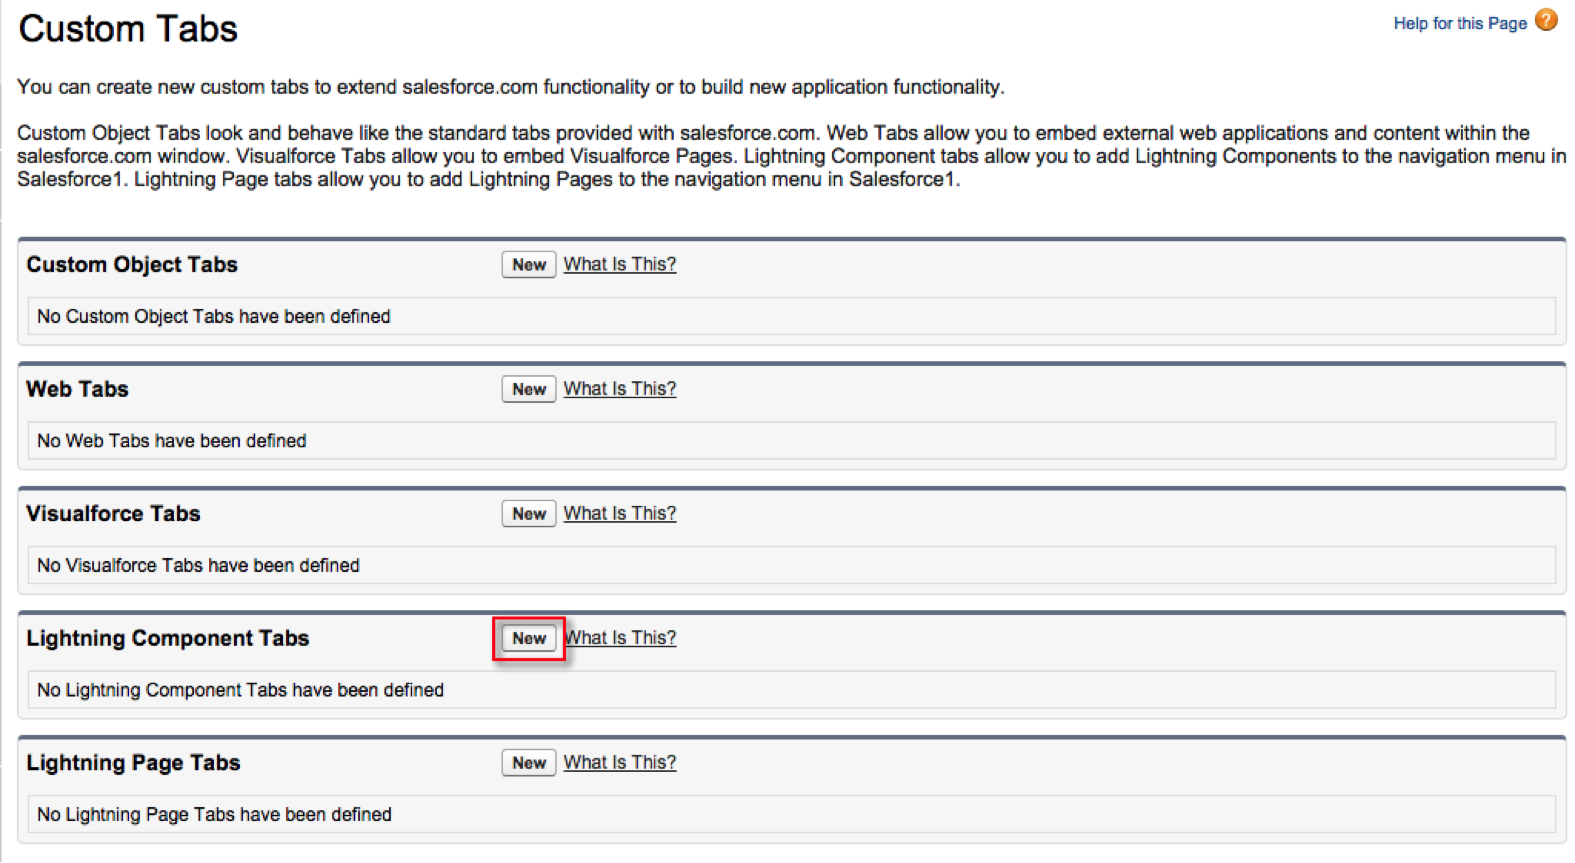
In order to test the reporting app, we need to make a Lightning Component Tab for it. Navigate to Setup->Create->Tabs and create a new Lightning Component Tab for our Lightning Component:

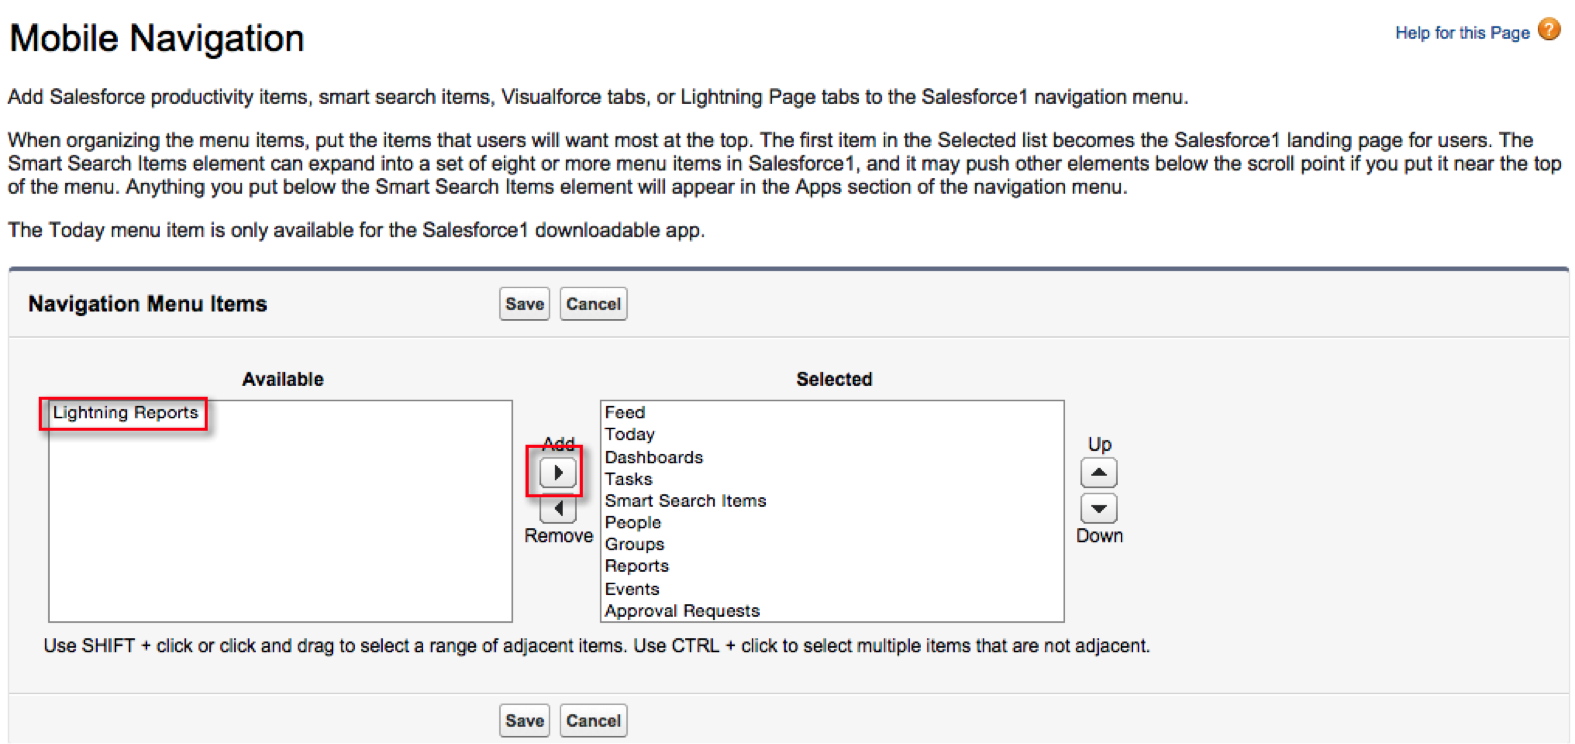
Then add it under Setup->Mobile Administration->Mobile Navigation:
Fire up Salesforce1 and you can now see the report loaded!

|

|
Resources for Lightning Components
For a quick overview and introduction to Lightning Components, visit the Lightning Components page on Salesforce Developers. If you’re ready to learn hands-on while earning badges to demonstrate your skills, start the Lightning Components module in Trailhead. For detailed information on the Lightning Component Framework, refer to the Lightning Component Developer’s Guide.

