The most common way to interact with an operating system is through a user interface (UI), where familiar windows, labels, forms, and buttons make an appealing user experience (but not always … that’s why UX visual design is a dedicated science now). But, a UI is not the only way; more technical users (like us developers) prefer to use a command line to interact with the operating system.
Windows, macOS, Linux, and other operating systems come with a way to interact through commands using a terminal application. You can perform multiple sets of tasks, from navigating the filesystem to manipulating files and folders to performing more complex tasks. These command line interfaces, or shells, come with a Turing-complete programming language, so you can create your commands and automate specific tasks or even an application that interacts with an API.
In this post, you’ll learn how to create a command line application using a Node.js framework created here at Salesforce called oclif, the Open CLI Framework. We will not discuss those native programming languages like Bash (Linux, macOS) or Power Shell (Windows); instead, we will use a more familiar language, TypeScript (or JavaScript), to create a simple but powerful command-line application.
What is oclif and why does it matter?
oclif is an open source framework for Node.js for creating command-line applications. It was created back in 2018 by Salesforce, and it’s the one that powers not only our Salesforce CLIs, but also the Heroku CLI. Other companies like Twilio, Adobe, and Shopify also rely on oclif for their CLI applications.
Our Salesforce CLI project is open source and can be extended through plugins, and these plugins are created using oclif. If, as a Salesforce Developer, you need to create a custom plugin for your workflow, or an application or utility that relies on our open-source libraries, learning oclif is an excellent starting point.
Designing a CLI application
Before we build our CLI application, let’s see exactly what we will build. Let’s say that we want to build a command to create Salesforce Tasks. This command will store tasks locally and provide a sub-command to synchronize local tasks with remote tasks on Salesforce, which means pushing local not-synced tasks and pulling remote tasks.
Let’s design the commands we want to implement and their different arguments and flags.
oclif commands can either be added as a stand-alone commands or multiple commands grouped by topics. For our task application, we will create a tasks topic to group all the related commands. If you want to add other functionality to this application, think about the type of commands and topics you can create to organize your app better.
Create a new task
The new command creates a task in a local database, and the task consists of the following fields: Subject, Comment, Priority, and Status.
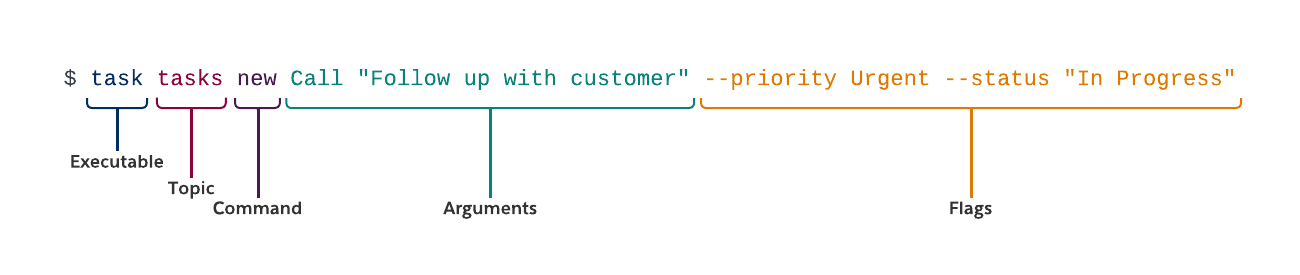
1task tasks new <Subject> [Comment] [--priority] [--status]
2task tasks new Email
3    # Creates a Task with Subject=Email, default priority, and no comment
4task tasks new Call "Follow up" --priority Urgent
5    # Creates a Task with Subject=Call, a comment, and priority=Urgent
Note: A common pattern found in CLI documentation is that arguments enclosed in <> are required, and those enclosed in [] are optional.
List tasks
List the tasks that are stored in the local database.
1task tasks list # Show a list of tasks
2task tasks list --extended # Show a list of tasks with extended information
Synchronize tasks
The sync command synchronizes with Salesforce, pushing local, not-synced tasks, and pulling remote tasks. If a task already exists, it will be updated.
1task tasks syncGenerating a CLI application
oclif comes with a project generator that will scaffold what’s needed to start building a CLI application. It will create a Node.js project with TypeScript support and a handy “hello world” command to show you how a command works.
Let’s generate a project by running: npx generate oclif tasks-cli

This will create a tasks-cli folder with the source code needed to start building your oclif CLI. Let’s explore it before we start with our app.
Go to the directory by running cd tasks-cli and run the development executable: ./bin/dev
Note: On a *NIX operative system like Linux or macOS, you run local executables by using ./; on Windows, you do it by using .\, e.g., .\bin\dev.

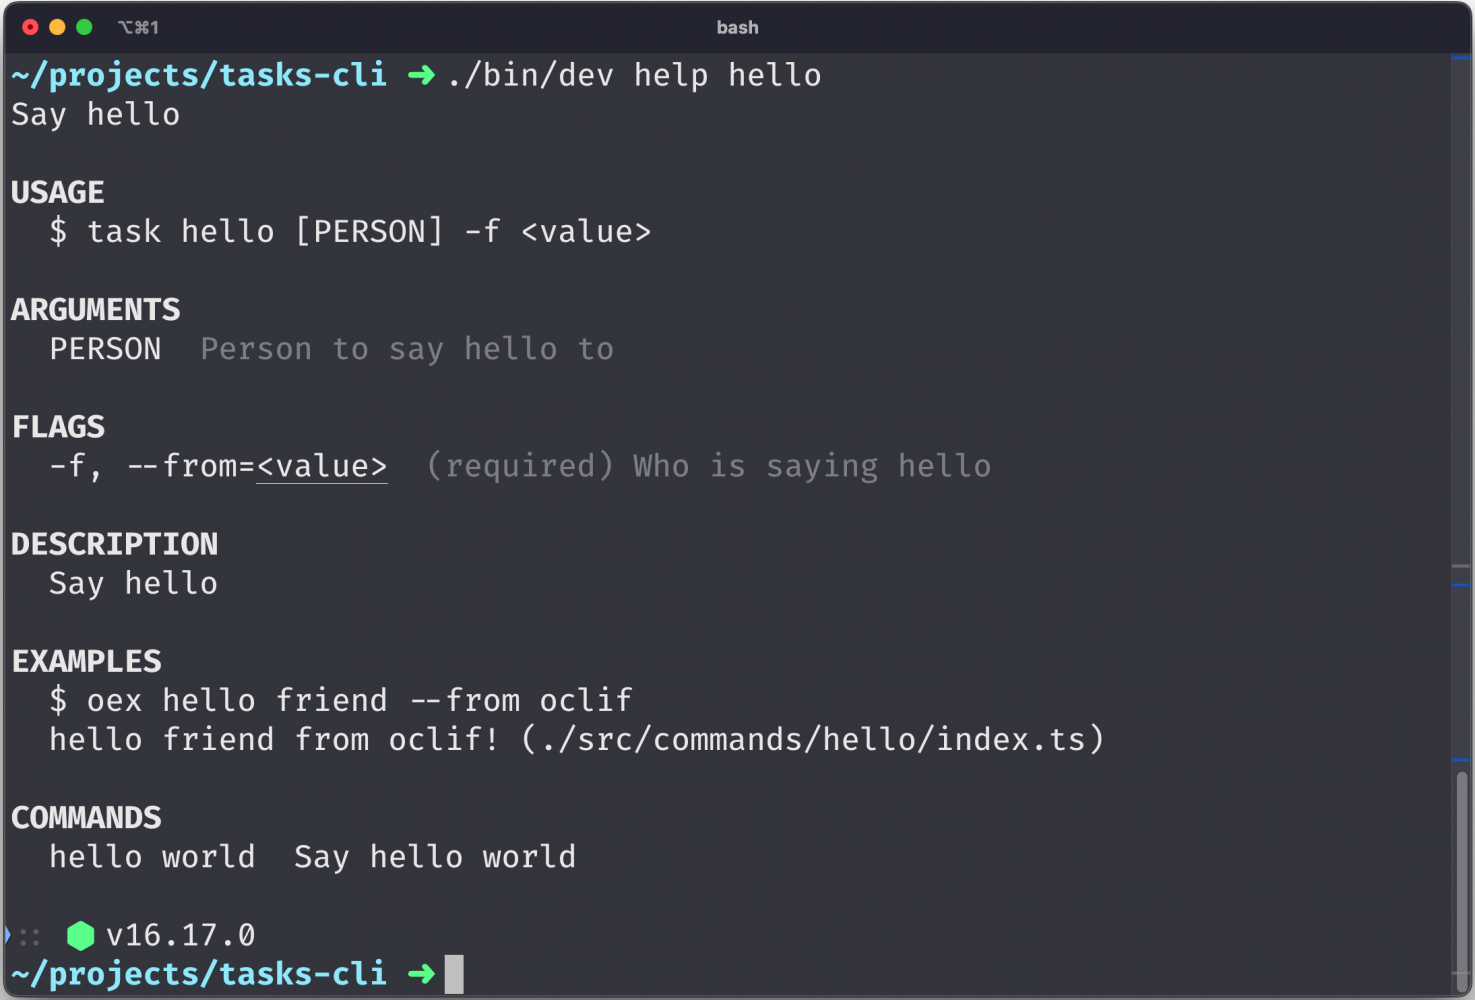
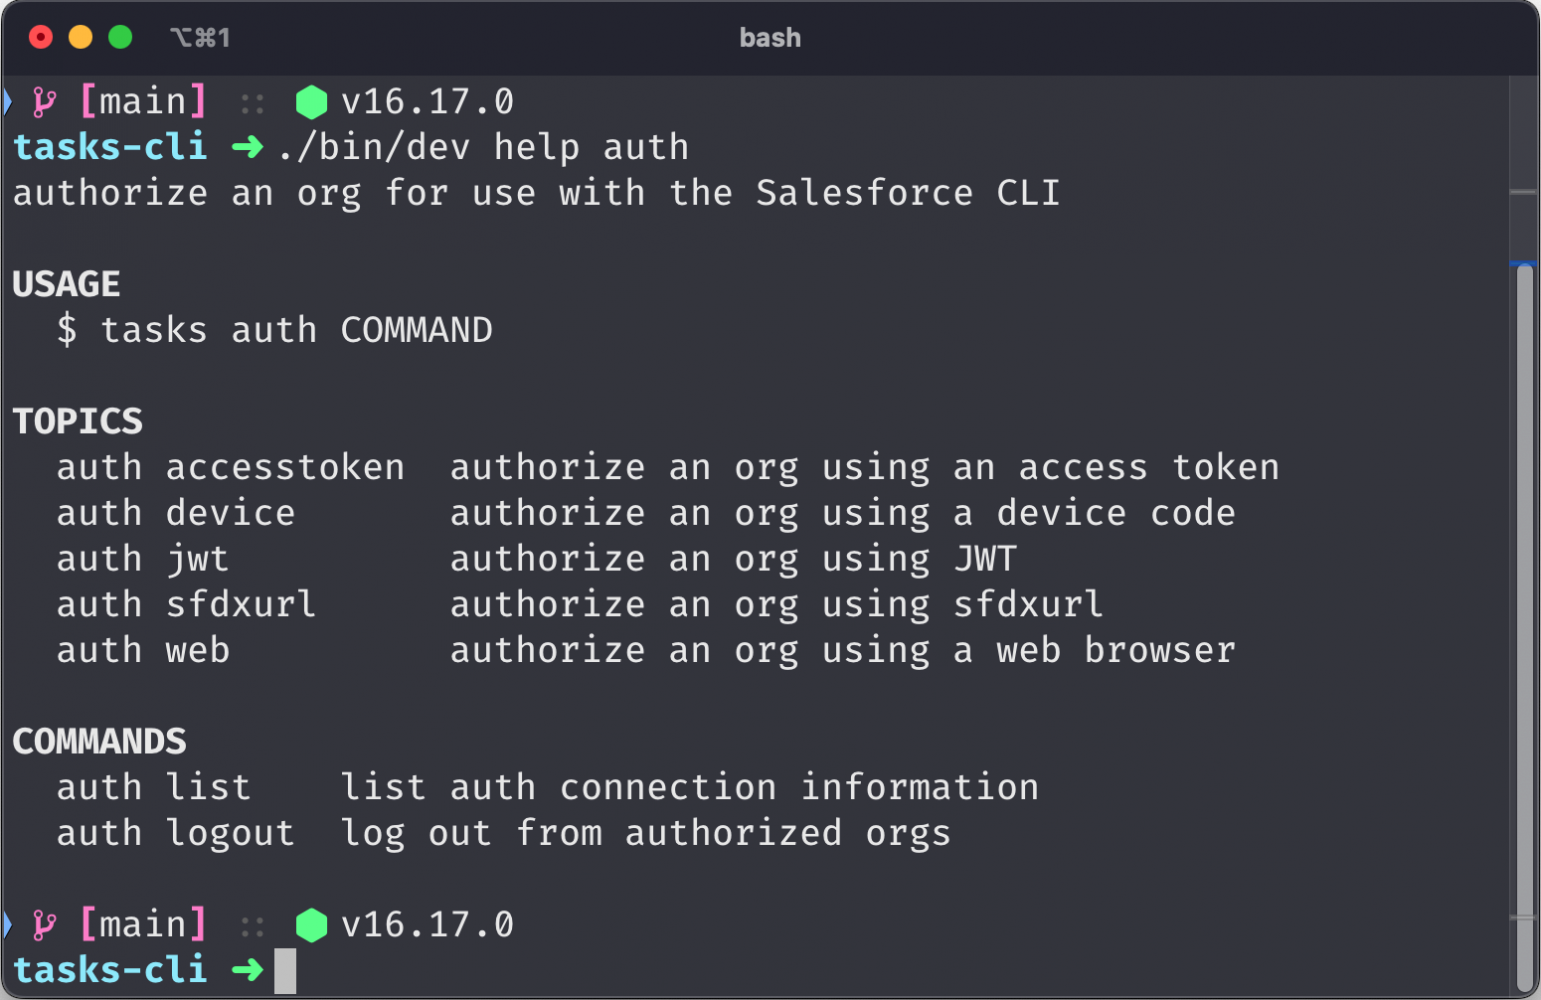
You’ll see the help that oclif generates for you — how cool is that?! Here you can see the available topics and commands that you can execute; if you want to learn more about a command, you can run ./bin/dev help [command].
Now, we can jump into the source code of our project; the topics and commands logic lives under the src/commands folder. A topic is just a subdirectory with command files. You can nest as many sub-commands as you want, but isn’t recommended to go more than one or two levels deep.
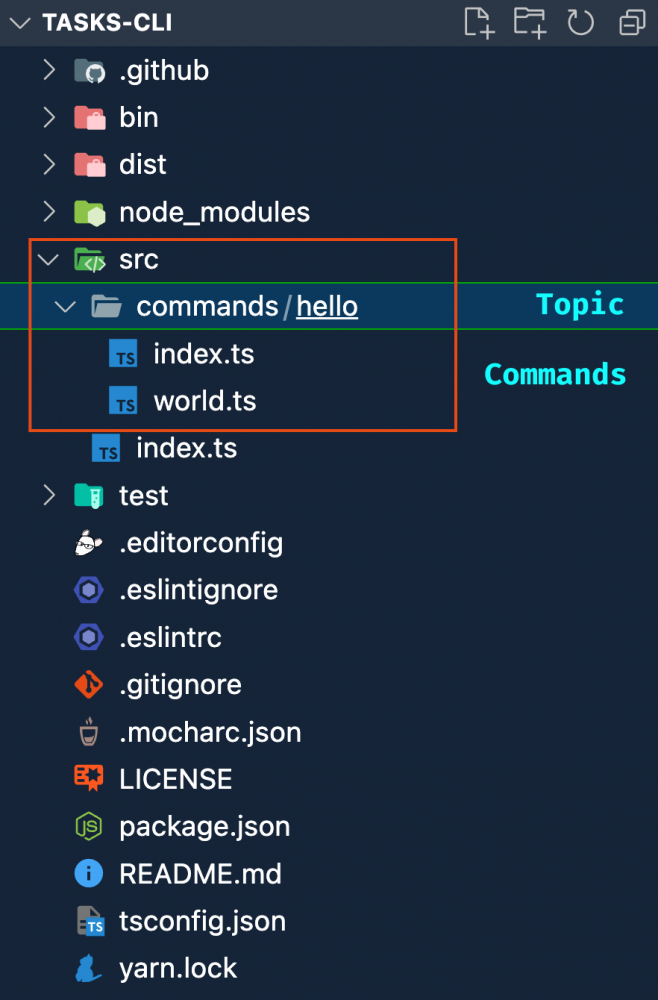
For the tasks-cli project, we don’t need the hello topic; go ahead and delete it, but before, take a look at the commands/hello/index.ts source code and see what it does. If you don’t understand it, it’s ok, we will explore the structure of an oclif command in the next section.
Creating new commands
We want to create the following folder structure for the tasks-cli application, but don’t do it manually, oclif provides a generator for commands.
1src/
2├─ commands/
3│  ├─ tasks/
4│  │  ├─ list.ts
5│  │  ├─ new.ts
6│  │  ├─ sync.ts
7├─ lib/
8│  ├─ task.ts
9│  ├─ tasks-db.ts
Note: Don’t worry about the lib/ folder, we are not covering its contents in this post. You can get the full source code from the julianduque/sf-tasks-cli GitHub repository. This contains a class with the required methods to store the data locally using sqlite3.
To generate a command, you can run the following: npx oclif generate command <command name>
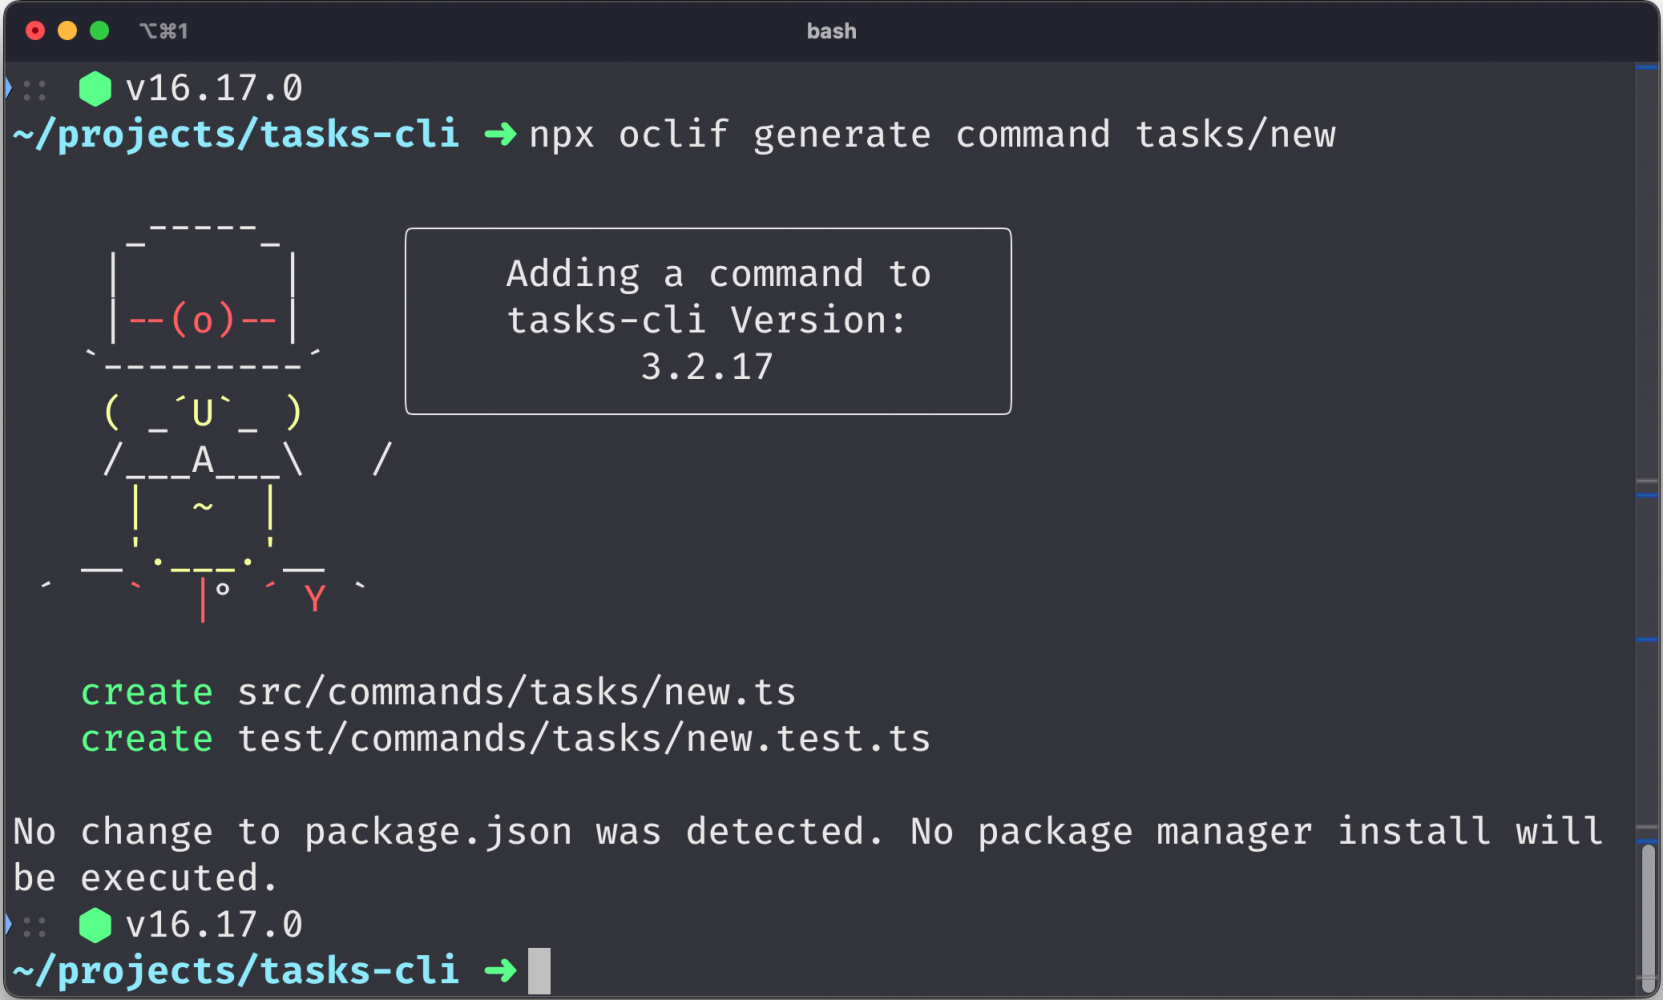
Now, we have two new files, our command class, and a test file. We will cover testing in a future post; for now, let’s focus on the command class structure.
We’re using here a slightly simplified version of the new command used in the final application. Let’s comment on the most important bits of this code.
1import {Command, Flags} from '@oclif/core'
2import TasksDb from '../../lib/tasks-db'
3import {Task} from '../../lib/task'
4
5export default class TasksNew extends Command {
6  // Get the local database instance
7  #db = new TasksDb(this.config.dataDir)
8
9  // Define aliases for the command
10  static aliases = ['new', 'create']
11
12  // Describe the command
13  static description = 'Create a new Salesforce Task'
14
15  // Provide examples of how to use the command
16  static examples = [
17    '<%= config.bin %> <%= command.id %> "Email" --priority "Normal" --status "Not Started"',
18    '<%= config.bin %> <%= command.id %> "Call" "This is a comment" -p "Urgent" -s "Not Started"',
19  ]
20
21  // Define the arguments and flags for the command
22  static flags = {
23    priority: Flags.string({char: 'p', description: 'Priority of the task', default: 'Normal'}),
24    status: Flags.string({char: 's', description: 'Status of the task', default: 'Not Started'}),
25  }
26
27  static args = [{
28    name: 'subject',
29    options: ['Call', 'Email', 'Send Letter', 'Send Quote', 'Other'],
30    required: true,
31  }, {
32    name: 'comment',
33    required: false,
34  }]
35
36  // Main method to run the command
37  public async run(): Promise<void> {
38    // Parse both arguments and flags
39    const {args, flags} = await this.parse(TasksNew)
40
41    // Create a new Task object
42    const task : Task = {
43      subject: args.subject,
44      priority: flags.priority,
45      status: flags.status,
46      comment: args.comment || '',
47      sfid: null,
48    }
49
50    // Store task in the local database
51    const {id} = this.#db.createTask(task)
52
53    // Use the logger to notify the user
54    this.log(`Task created successfully with subject: ${subject} and id: ${id}`)
55  }
56}- an oclif command extends from the
Commandclass that is imported from@oclif/core - the
aliasesproperty is useful for creating aliases for the command; those can be mapped to the root if no topic is specified - the
descriptionproperty is used to document the command; this text is shown in the help and documentation - the
examplesproperty defines different ways to use this command, which is useful for the help information and documentation - the
argsproperty defines the arguments for this command; we will expand on arguments in the following section - the
flagsproperty defines the flags for this command; we will expand on flags in the following section - the
run()method is where the magic happens; here we write the command logic
For more information about commands, check the official oclif documentation.
Arguments and flags — how to interact with commands?
A command can receive both arguments and flags, but what are those? Let’s define them and see how we can set them up in an oclif application.
Arguments
Arguments are positional strings that can be passed to a command, for example task new Call "Follow up with the customer". In the previous example, both Call and Follow up with the customer are arguments. To define those in oclif, you define the args property with an array of arguments and its properties:
1static args = [{
2    name: 'subject',
3    options: ['Call', 'Email', 'Send Letter', 'Send Quote', 'Other'],
4    required: true,
5  }, {
6    name: 'comment',
7    required: false,
8  }]
Note: Remember the positional part of the definition? Well, here, the position matters; the arguments order is specified in the args array.
To learn more about arguments and their properties, check the oclif documentation.
Flags
Flags, on the other hand, are non-positional; they can be passed in any order and receive either a string value or a boolean value if the flag is present. To define flags in oclif, you can use the Flag class that is imported from @oclif/core and set them in the flags property.
1static flags = {
2    priority: Flags.string({
3      char: 'p',
4      description: 'Priority of the task',
5      default: 'Normal'
6    }),
7    status: Flags.string({
8      char: 's',
9      description: 'Status of the task',
10      default: 'Not Started'}
11    ),
12  }
Note: If you want to create a boolean flag, you can do so by using Flags.boolean.
The char property is a shorthand version for that flag, so, instead of passing --priority Urgent you can pass -p Urgent.
To learn more about flags and their properties, check the oclif documentation.
Parsing arguments and flags
We’ve learned how to define arguments and flags, but how can we extract the values passed to our command? We do that in our run() method by running this.parse().
1const {args, flags} = await this.parse(TasksNew)The arguments and flags values are set in the args and flags objects, and you can access them using the JavaScript dot notation, e.g., flags.priority or args.subject.
UX is everything!
oclif comes with handy tools to improve the experience of both our application users and the systems that will rely on it.
Sometimes, the users of our applications aren’t humans but other commands that rely on our output.
For that, oclif offers a handy way to return data as a JSON object. To achieve this, you’ll need to set the enableJsonFlag to true.

When interacting with humans, the CliUx class from @oclif/core offers utilities to prompt for information, render data as a table, and show a spinner while our application performs a task.
1public static enableJsonFlag = true
2
3  public async run(): Promise<Task[]> {
4    const {flags} = await this.parse(TasksList)
5    const tasks = this.#db.listTasks()
6    CliUx.ux.table(tasks, {
7      id: {
8        header: 'ID',
9        extended: true,
10      },
11      subject: {},
12      priority: {},
13      status: {},
14      comment: {
15        extended: true,
16      },
17      sfid: {
18        header: 'Synced',
19        get: (row: Task) => row.sfid ? `Yes (${row.sfid})` : 'No',
20        extended: true,
21      },
22    }, {
23      printLine: this.log.bind(this),
24      ...flags,
25    })
26    return tasks
27  }
Note: You can find the full source code of the command/tasks/list.ts in the julianduque/sf-tasks-cli GitHub repository.

You can also rely on more advanced CLI UX components from the npm ecosystem, such as inquirer (see docs), which offers more options for prompting, like a select box.
1let subject = args.subject
2if (!subject) {
3  const result = await inquirer.prompt([{
4    type: 'list',
5    name: 'subject',
6    message: 'What is the subject of your task?',
7    choices: ['Call', 'Email', 'Send Letter', 'Send Quote', 'Other'],
8  }])
9  subject = result.subject
10}
Note: You can find the full source code of the command/tasks/new.ts in the julianduque/sf-tasks-cli GitHub repository.

Using plugins
One of the main advantages oclif has is its plugin capabilities. You’ll be able to not only write plugins for your applications, but also use plugins published by others. For our tasks application, we will use the @salesforce/plugin-auth to allow our application to authenticate into a Salesforce org; this plugin is the same one the sfdx CLI uses.
Let’s install the plugin by running ./bin/dev plugins install @salesforce/plugin-auth. This will install the plugin on our application, and add a new auth topic. Now, we can authenticate into a Salesforce org the same way we do with the sfdx CLI.
Connecting to Salesforce
Another useful open source project from the Salesforce CLI team is @salesforce/core (see GitHub repo). With this, we can both create an authentication object and create a connection to an org.
1import {AuthInfo, Connection} from '@salesforce/core'
2
3...
4
5const authInfo = await AuthInfo.create({username: flags['target-org']})
6const conn = await Connection.create({authInfo})
7
8...
9// Fetch tasks from Salesforce
10const tasks =
11  await conn.query('SELECT Id, Subject, Priority, Status, Description FROM Task')
Note: You can find the full source code of the command/tasks/sync.ts in the julianduque/sf-tasks-cli GitHub repository.
The AuthInfo.create method requires a username to get the org information from the ones you have authenticated previously (for example, with the auth command we just added). To provide a good UX, we are asking for it as a --target-org flag.
Connection.create returns a JSforce Connection object, so that you can perform any operation available on that object.
Note: JSforce is a powerful JavaScript library to develop Salesforce applications.
Conclusion
oclif is a powerful framework for creating CLI applications. We haven’t discussed everything it can do. For example, you’ll be able to publish this application and make it available to the public, and even package it for different operative systems. If you want to learn more about it, you can read the Release section from the oclif documentation.
I’ve created a series of videos where I built this tasks-cli application live on YouTube. You can find a link in the Learning Resources section below.
What’s next?
In an upcoming post, you’ll learn how to create a custom plugin for the Salesforce CLI and publish it to the npm repository.
Learning resources
- Getting Started with oclif
- codeLive: Building a CLI Application with oclif (4 videos)
- How to Build a Simple CLI with oclif
- tasks-cli GitHub repository
About the author

Julián Duque is a Principal Developer Advocate at Salesforce. He is a developer and educator and spends his spare time running TTRPG games online and playing and training his Mini Aussie, Cumbia.