 The Electric Imp platform allows you to easily connect devices to the cloud via wifi. I first came across the imp back in 2013, when I bought their ‘April’ developer kit from the fabulous Adafruit. I did the basic ‘hook up a button’ and ‘light an LED’ exercises, and left it at that until Electric Imp came onboard as a sponsor for the Internet of Things Zone at Dreamforce last year. Their hands-on workshop showed how to build a ‘connected conference badge’, allowing attendees to exchange contact details via infra-red signals, sending data directly into Salesforce via the Force.com REST API. Fun stuff!
Since then, Electric Imp have been busy building libraries for a variety of devices and services, including Salesforce. In this blog entry I’ll explain how I got started with the Salesforce library; next time I’ll go a little deeper and show you how to implement OAuth 2.0 web server flow with Electric Imp and then log telemetry data.
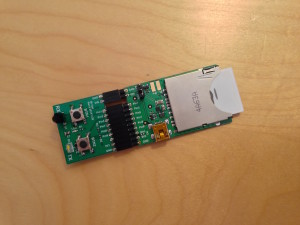
My first task was to perform a simple smoke test: trigger creation of a record via the Salesforce library from a button-press. Luckily, the DF14 tail contained a pair of buttons, so I got straight to work.
Electric Imp apps are written in Squirrel, “a high level imperative, object-oriented programming language, designed to be a light-weight scripting language that fits in the size, memory bandwidth, and real-time requirements of applications like video games”. Apps comprise 2 modules: the Device module runs, obviously enough, on the device itself, while the Agent module runs in the Electric Imp cloud. The platform provides a secure communication channel between the two; as a developer, to send a message from the device to the agent, you simply have the device call
On the agent, you listen for messages with
Since the device side of this app is very vanilla Electric Imp, I won’t list it here – if you’re interested, the full source code is in a gist. Let’s focus on the agent side – how do we turn the notification of a button press into an upsert of a record?
As usual, the first step is authentication. The Salesforce library supports OAuth 2.0 username/password flow, so we provide our Connected App credentials and login with a username and password:
On successful login, we listen for button clicks, and upsert a Button record with the state of the physical button. Upsert is a very natural operation for this use case – we want to keep a record updated with the current button state, but we don’t want to worry about whether a record has been created or not. We use the device’s unique ID as an external ID for the Button:
force.request() is a utility function that wraps an HTTP call with the Authorization header; to upsert a record, we pass “post” as the method (since the Imp HTTP library doesn’t support PATCH), the Force.com REST API URL for the relevant SObject (appending ?_HttpMethod=PATCH to tell the API that we really want this to be a PATCH), JSON-encoded record payload (the button state), and a callback.
And that’s all there is to it! Salesforce will create a new ‘Button’ record if one does not already exist, and set the state as requested. Here’s the device in action:
Stay tuned for part 2, when we will implement OAuth 2.0 web server flow on the agent, and read telemetry data from a very cool sensor package!