I first heard about using mind mapping during a documentation refactoring project. And I admit that at first, I had a very Scrooge-like reaction. “Bah humbug! What is this new-fangled mind map thing? I’m sure it’ll turn out to be a lot of work and won’t help us at all.” I stand corrected on both counts.
What is a mind map?
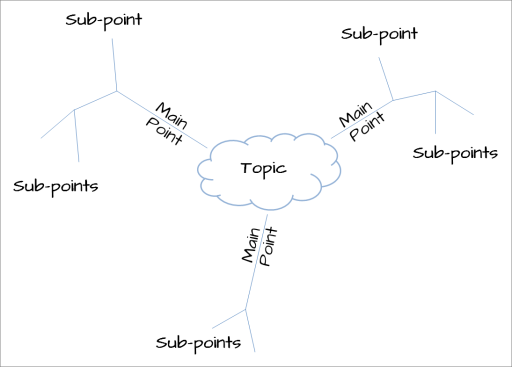
Before I talk about how the salesforce.com doc team uses mind maps, let’s first start with what they are. A mind map is a visual representation of information. Now, that’s a very general definition and could encompass many different formats. With a mind map, you’re diagramming related information. This graphic is a generic example of a mind map that shows how information is represented visually and how it branches. Using a mind map, you can move a main point into sub-points or vice versa, before you’ve written a word.

What all mind maps have in common is a similar structure, no matter what information you’re diagramming. This image shows a draft snippet of the mind map for the Salesforce Spring ’14 release notes. We used this mind map to create the outline and fill it in. We moved nodes around, added new ones, and changed the order several times before committing to the final outline.
As you can see, mind maps make it easy to organize content. Because information is represented graphically, it’s easy to understand the structure of even highly-nested information.

Why mind map
A primary benefit of mind maps is how easy they make sharing information. For example, if I’m refactoring some documentation, I’ll create a mind map of my proposed changes and post it internally on Chatter for review by the feature team. If you use a cloud-based mind mapping tool (like MindMeister, for example), you can just post the link. The graphical nature of mind maps make them a great way to convey the structure of documentation. This is much more effective than, say, posting an outline of the proposed changes.
The first time I used mind mapping for documentation was on a large project to refactor our online help. Our goal was to organize the content so that it was less feature-based and more task-based and thus modeled the tasks that users perform. The final goal was to make it easier for users to find the help they need.
Each writer on the project was assigned an area of content and we each created a mind map for that area. After refining the structure, each mind map was translated into a ditamap. The mind maps made it much easier to visualize the content as opposed to looking at the tree view in a ditamap or a standard outline. In addition, it’s super simple to modify a mind map. For example, you can copy a mind map and do some “what-if” scenarios and compare them.
Tools you can use
There are many mind mapping tools available. I’ve used both FreeMind and MindMeister and liked both of them. That’s not to say those are the best tools out there, just ones that I’ve used before. FreeMind is a free, open source mind mapping tool that you can download here. You’ll need to have the JRE installed on your machine to run it. MindMeister is a cloud-based mind mapping tool that you can access here. You can try it out for free, but there’s a charge for full-featured access. There are lots of other options for mind mapping software, so if you decide to implement mind mapping and standardize on one tool, you’ll want to do a bit of research first.
You might hesitate at first (like I did) and think mind mapping is just more overhead added to your already tight schedule. But I think you’ll find (like I did) that mind mapping is a first step for creating great documentation. First, mind maps are great for brainstorming and seeing your content visually. Second, they’re ideal for sharing so other team members can see how content is organized.
Next time you need to create new documentation or refactor some existing content, start with mind mapping. A picture truly is worth a thousand words.