The author of this article is Courtney Dascenzo, Principal Technical Evangelist with ISV Partner Enablement Team.
In part one of this series, we covered how to leverage some of the settings from the user’s profile in Salesforce to control the locale settings in angularJS. In part two, we extended that example to include Time Zones and looked at other options for displaying data in the logged in user’s time zone. In this post, we will again leverage the profile settings of the logged in user to display the page content (titles, descriptions, etc. – not data contained in Salesforce objects) in the language selected by the user. We cover two options in this post: how to do the language conversion in angular and how to do it using the Salesforce translation workbench. The POC code leverages the second approach.
Note: Be sure to reference the assumptions from part one of this series before continuing.
Languages
The default behavior in angularJS is to leverage the language setting in the browser. You do not want to depend on this to be correct so you are going to use the user’s language setting from their profile. In part one of this series, we stored this setting into a $rootScope variable:
Now you can leverage the variable dynamically to change the language in your app. To do this, utilize an angular module such as angular translate available on Github. This module, along with most others, requires a user to perform the translations and store them. In this case, translations are stored into a translation table within an angular service. Full code samples, documentation, and installation instructions for this module are listed in the project repository at: http://angular-translate.github.io/docs/#/guide/00_installation
1. Inject the module into the app.js file and prepare the translations.
2. Configure the angular service (still in the app.js file) to use the appropriate language based on a language code. You can also set what your preferred language is and what your fallback language is (in case there is no translation).
3. In the angular controller, leverage the language from the user’s profile to set the language to be displayed using the $rootScope variable defined earlier. Don’t forget to inject the $translate service into the controller.
4. Lastly, update the HTML to include the variables to be translated (instead of the hard coded text) as well as the translation directives and filters.
Alternatively, and the option we decided to leverage in the POC code, was to use the Salesforce translation workbench. The Salesforce translation workbench needs to be enabled in the org. Once enabled, translations are created directly in the Salesforce org. There is no need to select the language from the user’s profile. Salesforce will perform the translation automatically if one exists.
1. Enable the translation workbench inside Salesforce and add the supported languages. Detailed instructions on how to do this can be found here: https://help.salesforce.com/apex/HTViewHelpDoc?id=customize_wbench.htm
2. Enter the translated terms in the appropriate languages as Custom Labels in Salesforce. Below is an example of the label for the Description field in our app with its translations.
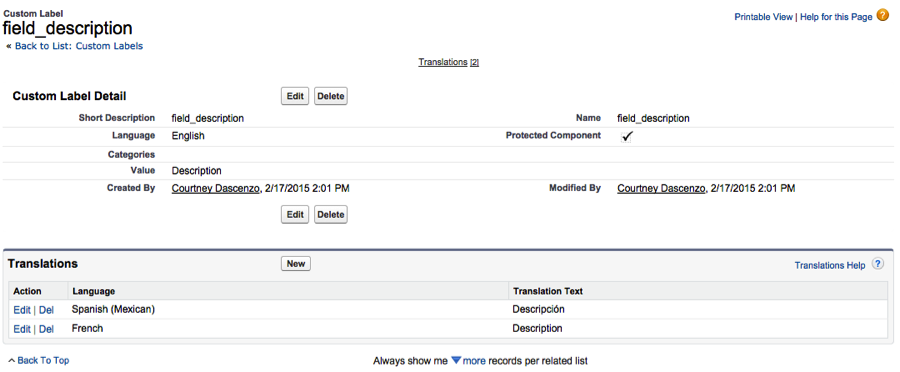
3. Update the Visualforce page to remove all static text and replace with the custom labels defined above using the !$Label global variable. The label will display the language chosen in the logged in user’s profile. If the language in the logged in user’s profile does not have a translation, the corporate language for the org will be displayed.
4. If you are not using a Visualforce page and only using HTML with angular, pass these labels through the Apex Controller within a Remote Action.
This concludes part three on Internationalization Options in angularJS and Salesforce. Be sure to check out the next post in this series on Currency conversions.
Code samples for the whole series can be found in Github at https://github.com/cdascenzo/salesforce_angular_internationalization.
Don’t want to mess with the code? Spin up a trial and see the demo in action (some images do not resolve on the Heroku site, don’t worry, the signup still works): https://pacific-inlet-1581.herokuapp.com/.