 Site.com is all about building once, then reusing. Whether you’re building a page template to base site pages on, or creating a cascading style sheet (CSS) to centralize control of your site’s appearance, you create the item once and then reuse it throughout the site. This fundamental build-once-then-reuse approach saves you time.
The new widgets feature, available in Summer ’13, takes advantage of the same time-saving model. By combining existing Site.com page elements, such as panels, content blocks, custom code, and data repeaters, you can build widgets—in essence, your own custom page elements—to suit your unique requirements. And just like any other page element, you can reuse custom widgets on any site page or page template in your site.
In addition, when you edit the widget, your changes are reflected immediately on every page that references it. So one quick modification, such as changing the widget’s background color, could update tens of pages in your site. (Just imagine if you had to edit every…single…page!)
When you open a site in Site.com Studio, you’ll notice we’ve added a new Widgets view to the Overview tab, where you can add and manage your site’s widgets.

When you create a widget, it’s also added to the Page Elements pane, where you and your team can easily drag it onto the page.

Real-World Example: Creating a Twitter Follow Button Widget
Let’s look at a real-world example by creating a Twitter Follow Button widget that allows users to follow a Twitter account easily from any page in your site.
First, import a 16×16 pixel icon that will represent the widget in the Page Elements pane—for example,
![]() .
.
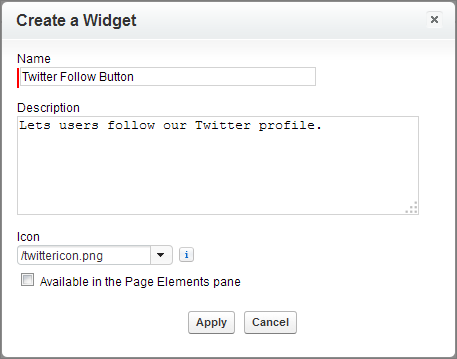
Then, in the Widgets view on the Overview tab, click New Widget and enter a name. Also add a description and select the imported Twitter icon.
The widget isn’t ready to use just yet, so deselect Available in the Page Elements pane and save the changes.
That’s the first step to creating a widget, but it doesn’t yet contain any content or page elements, so click the widget to open it in a new tab. Your work area is the same whether you’re building pages or widgets, so the usual Page Elements pane, Properties pane, and so on are available on either side of the canvas.
Drag a Custom Code page element from the Page Elements pane onto the canvas, and paste the following code into the dialog box:
This code creates the button when the page loads, so to specify which user profile to follow, replace twitterapi in the URL with the profile you want to link to—for example, https://twitter.com/bitswest.
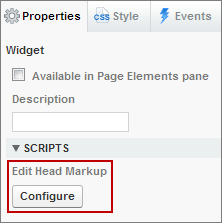
Now you need to include Twitter’s JavaScript library, so click Configure in the Edit Head Markup section of the Properties pane.
Paste the following JavaScript into the dialog box:
And that’s it—you’ve built a simple Twitter widget! To test the widget, preview it and click the button to ensure it links to the Twitter profile page you specified.
![]()
The final step is to make the widget available for use, so in the Properties pane, select Available in the Page Elements pane.
Now you and your team can use the widget on any site page or page template in your site. You can even use it to create other widgets, such as a page header widget that contains your company logo and the Twitter widget. How you decide to combine page elements, custom code, CSS, or other widgets to create new widgets is entirely up to you!
Top Tips for Working with Widgets
- Wherever possible, use widgets to reduce duplication in your site design. This is particularly important when working with complex designs or site elements, where maintenance can be time consuming.
- Use widgets to store commonly used pieces of text, such as company names, addresses, legal text, and so on. Simply create a widget that contains a content block with the relevant text.
- When using CSS to style widgets, add the styles to the Site Style Sheet, which is the site’s global style sheet. Because every page automatically references the style sheet, you can ensure each widget will appear correctly on the page.
- If you plan to use the same widgets across several sites, consider creating a basic site to contain all the required widgets. Then, for each new site you need, just create a copy of that site. That way, each new site automatically includes all of the widgets you created.
Related Resources
- For more information about widgets, see “Widgets Overview” in the online help, and check out the Salesforce Summer ’13 Release Notes.
- For information about customizing the Twitter Follow Button widget further, check out the Twitter Developer documentation.