Manage an Agent with Agentforce DX
You can activate or deactivate an agent right from VS Code or with a CLI command.
Activating an agent makes it available to users on the channels that your agent is connected to. Deactivating the agent ends its open interactions, and makes it unreachable for all connections.
-
In VS Code, open your Salesforce DX project.
-
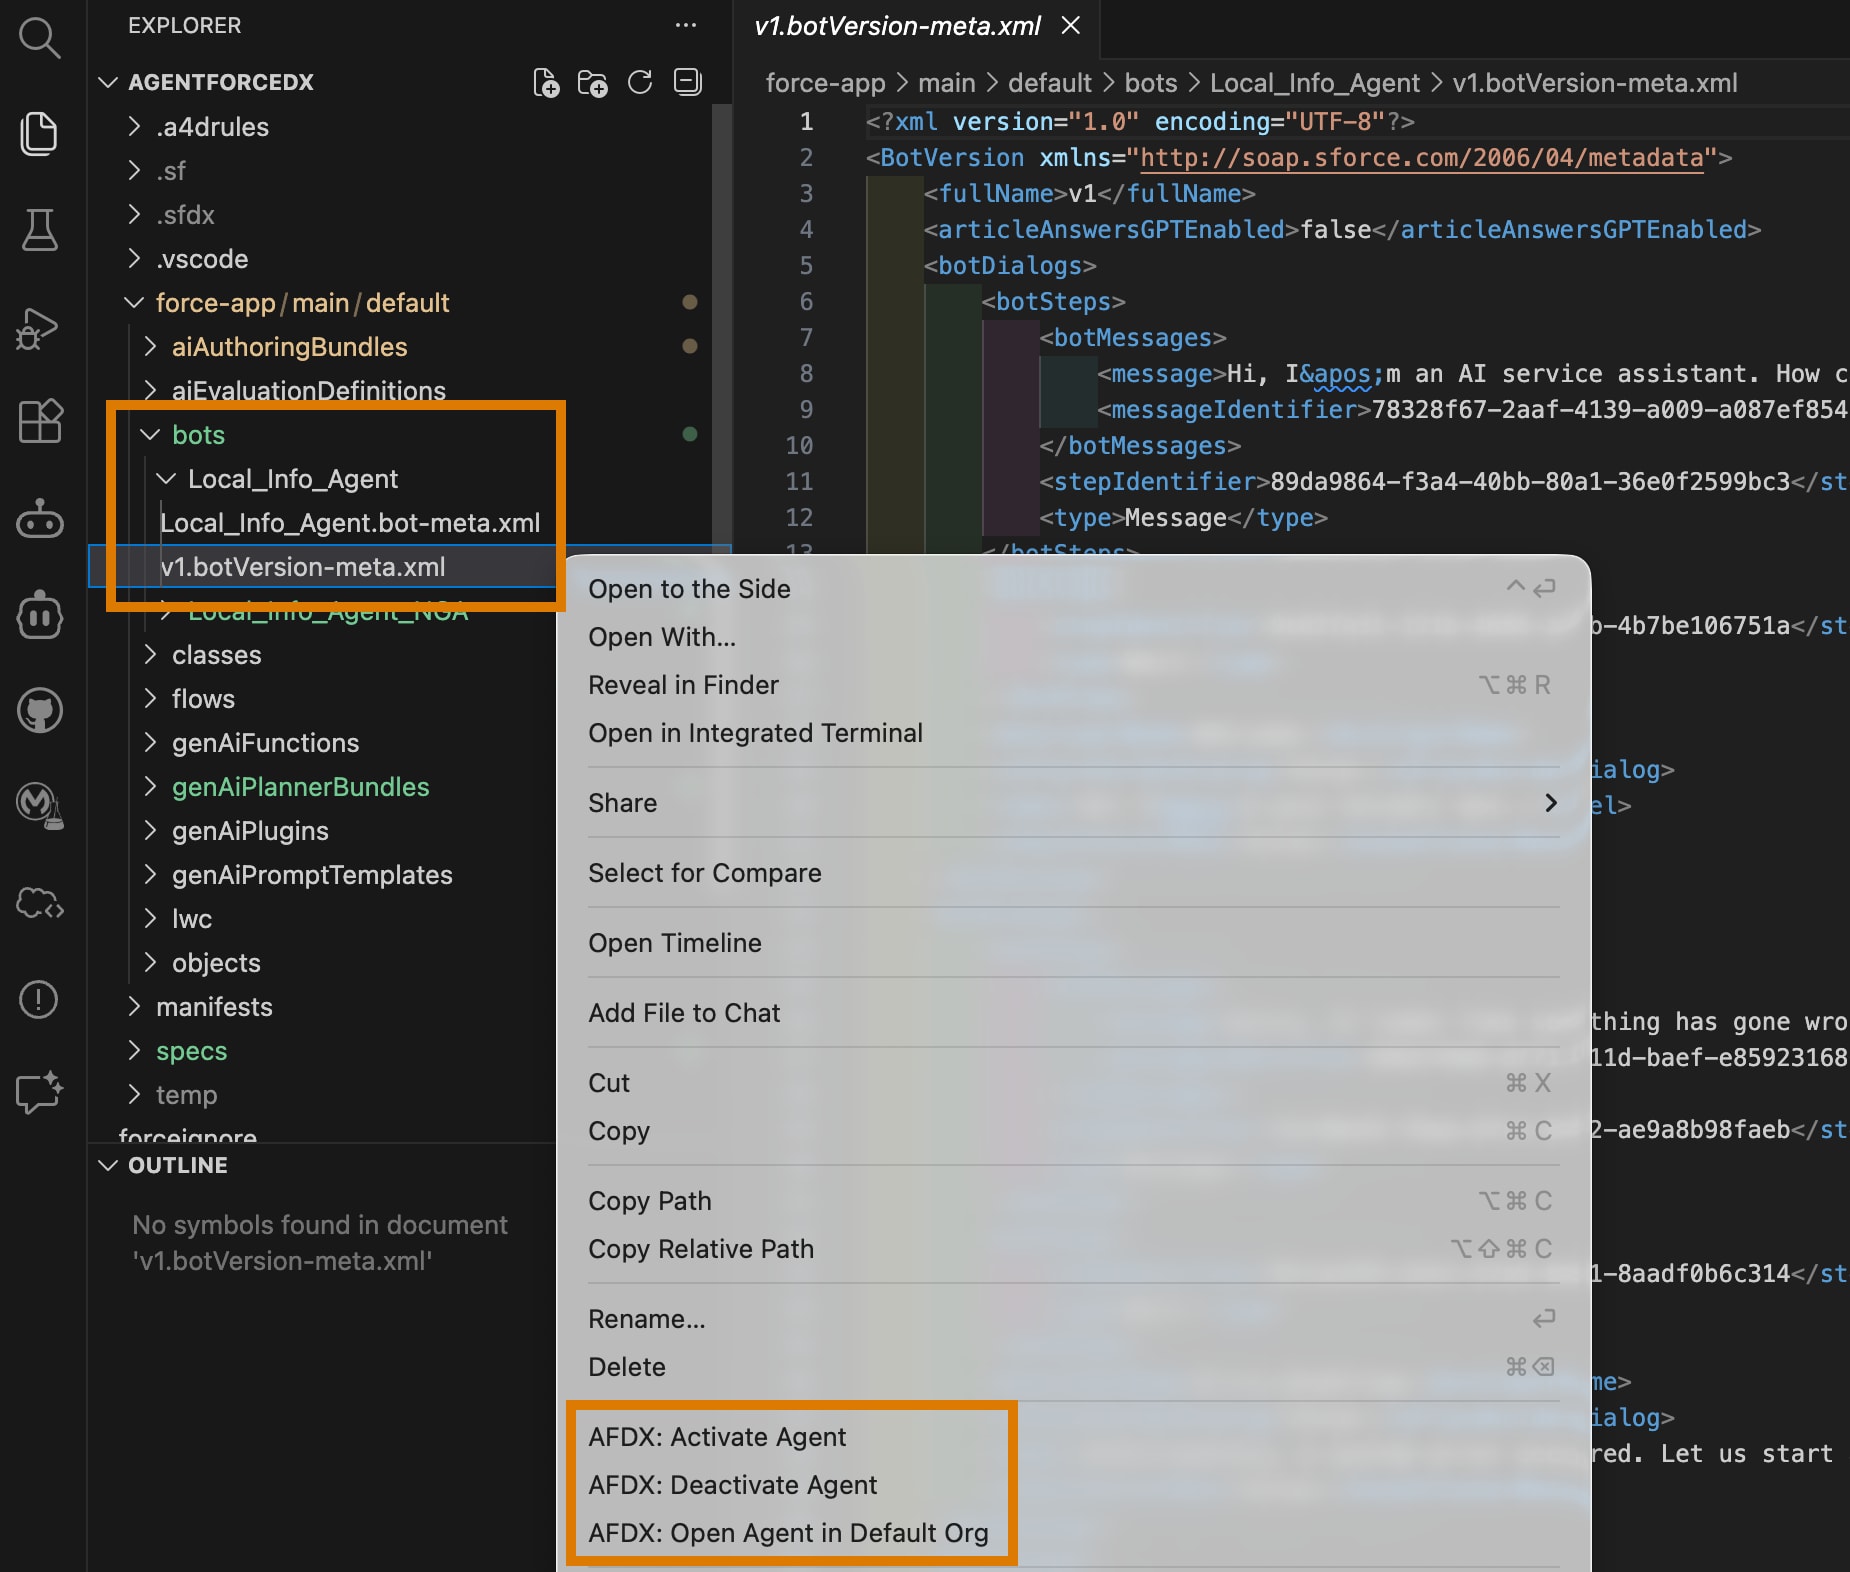
In Explorer, navigate in your DX project’s package directory to one of the metadata component files that makes up your agent:
- Bot (file extension
.bot-meta.xmlin thebotsdirectory) - BotVersion (file extension
.botVersion-meta.xmlin thebotsdirectory)
- Bot (file extension
-
Right-click the metadata component file and select AFDX: Activate Agent or AFDX: Deactivate Agent.
When activating an agent, if it has more than one version, you’re prompted to select the version you want to activate.
-
Open a terminal (macOS, Linux) or command prompt (Windows) and change to your DX project directory. Or use the integrated terminal in VS Code.
-
Run the
agent activatecommand to activate an agent in your org. Specify the--target-orgflag if you haven’t set the org as your default. For example:The command displays the agents that are currently inactive. Use the arrow keys to select the agent you want to activate, then press Return. If there are multiple versions of the agent, you’re prompted for the version you want to activate.
If you know the version and API name of your agent, you can use the
--versionand--api-nameflags to immediately activate it without being prompted.
Run the agent deactivate command in a similar way to deactivate active agents.
You can open an agent directly in your org’s Agentforce Builder UI from VS Code or with a CLI command.
-
In VS Code, open your Salesforce DX project.
-
In Explorer, navigate to your agent’s
.agentfile or the metadata file in theaiAuthoringBundledirectory of your DX project’s package directory. -
Right-click the file and select AFDX: Open Authoring Bundle in Default Org.
If the agent has more than one version, you’re prompted to select the version you want to open.
-
Open a terminal (macOS, Linux) or command prompt (Windows) and change to your DX project directory. Or use the integrated terminal in VS Code.
-
Run the
org open agentcommand to open an agent in your org’s Agentforce Builder UI. Specify--target-orgif you haven’t set the org as your default.-
To open an agent by its API name:
-
To open an agent by its authoring bundle API name, use the
--authoring-bundleflag.To open a specific version, use the
--versionflag and a version number, such as--version 2.
-
By default, the org opens in your default browser. Use --browser to specify chrome, edge, or firefox. To open in incognito mode, add --private. To display the navigation URL without launching a browser, add --url-only.