Get and Set the Dashboard State
This use case implements one Aura component to illustrate the getState and setState methods in a basic working example. This component contains two wave:waveDashboard components, two buttons, and a text box to display the dashboard state for reference. The buttons trigger the calls to getState and setState methods, which are implemented in the Aura controller code.
Create a simple custom Aura Component with the name GetSetStateExample. For more information on how to create Aura components, see the Lightning Aura Components Developer Guide.
The dashboardDevName attribute is the fully qualified developer name of the dashboard that you want to use. In production, this value is determined at runtime by discovering the CRM Analytics dashboard developer name. In this example, it’s hard-coded to focus on the state methods. For testing, enter a CRM Analytics dashboard developer name from your test org to replace the dashboardDevName default value. Use a dashboard with at least one filter or selection widget so the dashboard state can change with user interaction.
The lightning:textarea displays the dashboard state as received by the getState call. This state is the same state that’s passed into the setState method. This text enables you to inspect the state so that you can experiment and learn as you interact with the dashboard_1 component.
The two wave:waveDashboard components are identical, except for the aura:id. The first dashboard, which is used to get the state, has an aura:id of dashboard_1. The second dashboard, which is used to set the state, has an aura:id of dashboard_2.
Create a controller for your custom component with the name GetSetStateExampleController. The controller code implements the state methods. When the buttons are clicked, each click executes the controller methods. In this example, console.warn calls are used to display what the methods are doing in a debugger.
The dashboard state is represented as a JSON object. This example uses the JSON object methods to parse the state into and out of the method payloads and to stringify the JSON for display.
The getState function finds dashboard_1 and calls the getState method of that dashboard. In the callback function, the dashboard state is stored in the component dashboardState attribute for display in the text area and for use by the setState function.
The setState function gets the dashboard state from the dashboardState attribute, parses it back from a string into JSON, and sets it as the config parameter. It finds dashboard_2 and calls the setState method of the dashboard with the config parameter.
-
Create an App Page via the Lightning App Builder with the name
Dashboard State Test. For detailed steps on creating your page, see Create an App Home Page with the Lightning App Builder in Salesforce Help. -
Verify that your
GetSetStateExamplecomponent is in the Components menu, under the Custom heading. -
Drag the
GetSetStateExamplecomponent onto the page, and save your work. -
Activate your page for visibility in Lightning Experience. For activation details, see Activate Your Lightning App Page in Salesforce Help.
-
Load your new
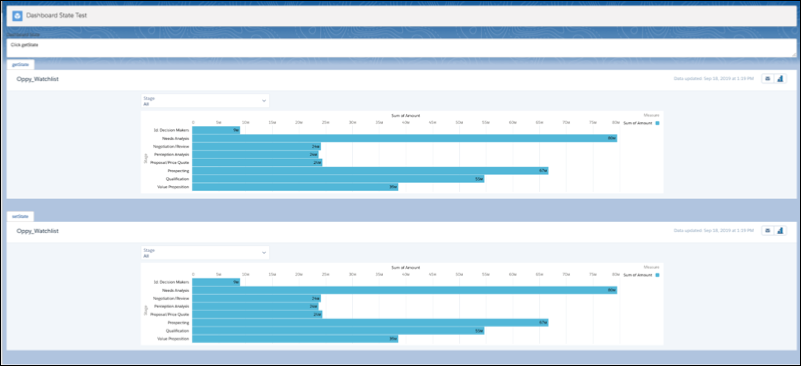
Dashboard State Testpage. On the initial load, both dashboards appear identical.

-
Click getState. Notice that the first dashboard component’s state JSON loads in the Dashboard State text area.
-
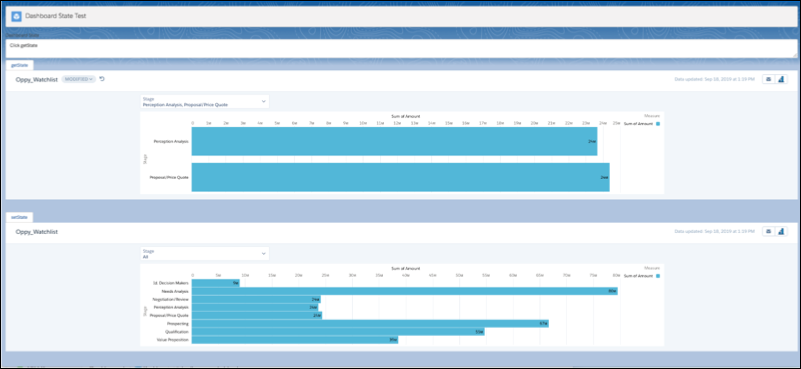
Change the state of the first dashboard by making a selection or updating the filter. Now the first dashboard looks different than the second dashboard.

-
To retrieve the updated dashboard state, click getState again.
-
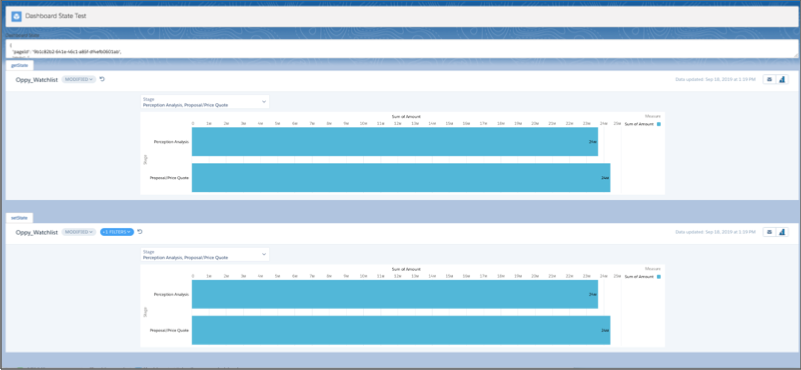
To pass the state of the first dashboard to the second dashboard, click setState. The second dashboard updates, and the dashboards are identical again.

For debugging or to see what the controller functions are doing, open the browser console. Each button click generates warning messages that are logged to the console.