Add a Custom Component to Your Store
Add a component to the canvas of your B2B or D2C store created with an LWR template. Optionally edit its properties.
Before placing a custom component, assign a custom theme layout to the page in Experience Builder.
-
In the Visual Studio Code editor, open the Command Palette by pressing Ctrl+Shift+P (Windows) or Cmd+Shift+P (macOS).
-
Enter
SFDX. -
Select SFDX: Open Default Org.
Your store opens in a separate browser.
-
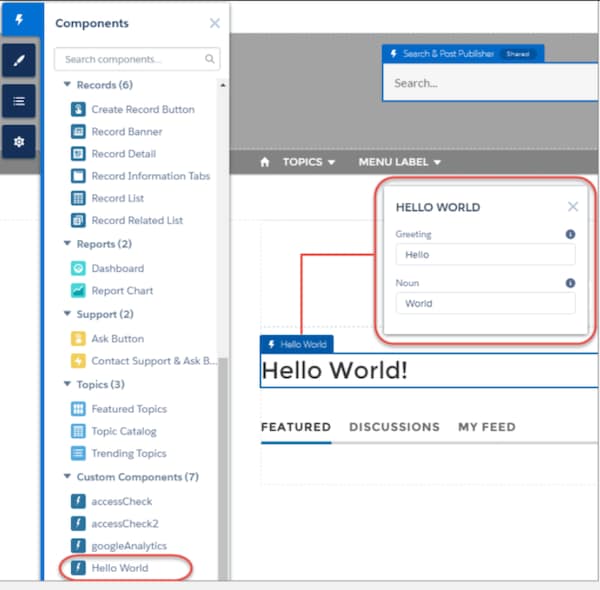
In the left Navigation panel, click Components.
The custom component displays under Components | Custom Components.
-
From the Custom area of the Lightning Components list, drag your Lightning web component to the page canvas.
-
To edit the component properties, select the component on the page canvas, and enter changes in the component property editor.
To include properties that are editable when the component is selected in Experience Builder, open the .js-meta.xml file and add
{lightningCommunity__Default}in targets and then define the properties intargetConfigs.