Checkout Component Hierarchy
The checkout page for a B2B or B2C store created with an LWR template contains a recommended hierarchy of nested checkout components. These components rely on a checkout data provider that loads and saves all of the necessary data for checkout.
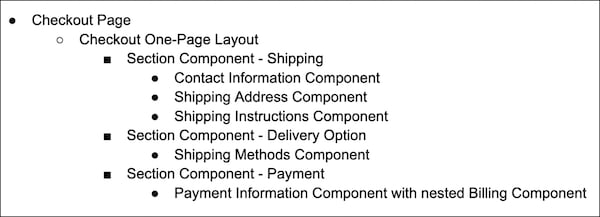
The checkout component hierarchy consists of three levels. At the top of the component hierarchy is a layout component. The layout component contains multiple section components, and it organizes the customer experience into a one-page workflow or an accordion workflow. The Layout: One Page component shows all sections at once, and the customer can complete them in any order. The Layout: Accordion layout expands one section at a time, and the customer must complete them in a specific order.
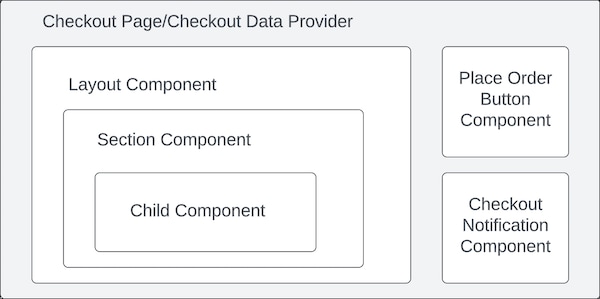
Section components group related child components. For example, a Shipping section can contain a Shipping Address component and a Shipping Instructions component. You can add, remove, reorder, or rename section components as needed.
Child components show and accept the customer details that are required to complete checkout. These components apply the mixin extend useCheckoutComponent(LightningElement) and implement certain checkout methods, depending on the desired behavior, to be managed by the page, layout, and section components.
Some components on the Checkout Page, such as the Place Order Button component and Checkout Notification component, are placed directly on the page and aren’t part of this hierarchy.
When you create a new store in Experience Builder, we provide a preconfigured Checkout Page by default that follows this setup.
You can add custom components anywhere in the workflow and expect the same or different behavior as the default components, depending on the implementation.