Lightning Aura Components Developer Guide
 j
jIntegrate Your Custom Apps into the Chatter Publisher
Use the lightning:availableForChatterExtensionComposer and lightning:availableForChatterExtensionRenderer interfaces with the lightning:sendChatterExtensionPayload event to integrate your custom apps into the Chatter publisher and carry your apps’ payload into a Chatter feed.
Example of a Custom App Integrated into a Chatter Publisher
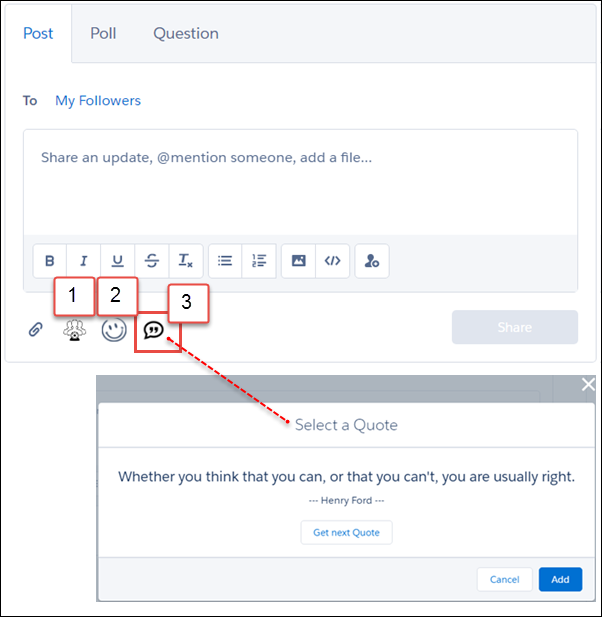
This example shows a Chatter publisher with three custom app integrations. There are icons for a video meeting app (1), an emoji app (2), and an app for selecting a daily quotation (3).
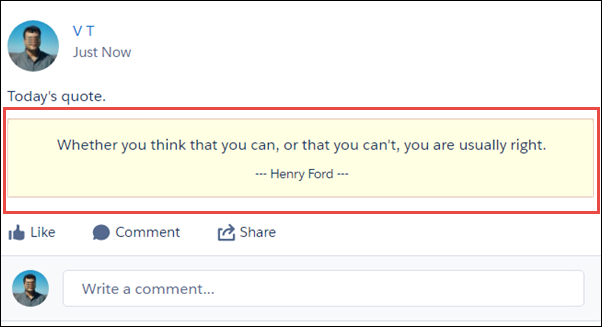
Example of a Custom App Payload in a Chatter Feed Post
This example shows the custom app’s payload included in a Chatter feed.
The next sections describe how we integrated the custom quotation app with the Chatter publisher.
1. Set Up the Composer Component
For the composer component, we created component, controller, helper, and style files.
Here’s the component markup in quotesCompose.cmp. In this file, we implement the lightning:availableForChatterExtensionComposer interface.
1<aura:component implements="lightning:availableForChatterExtensionComposer">
2    <aura:handler name="init" value="{!this}" action="{!c.init}"/>
3
4    <div class="container">
5    	<span class="quote" aura:id="quote"></span>
6        <span class="author" aura:id="author"></span>
7        <lightning:button label="Get next Quote" onclick="{!c.getQuote}"/>
8    </div>
9
10</aura:component>
Use your controller and helper to initialize the composer component and to get the quote from a source. When you get the quote, fire the event sendChatterExtensionPayload. Firing the event enables the Add button so the platform can associate the app’s payload with the feed item. You can also add a title and description as metadata for the payload. The title and description are shown in a non-Lightning context, like Salesforce Classic.
1getQuote: function(cmp, event, helper) {
2    // get quote from the source
3    var compEvent = cmp.getEvent("sendChatterExtensionPayload");
4    compEvent.setParams({
5        "payload" : "<payload object>",
6        "extensionTitle" : "<title to use when extension is rendered>",
7        "extensionDescription" : "<description to use when extension is rendered>"
8    });
9    compEvent.fire();
10}
Add a CSS resource to your component bundle to style your composition component.
2. Set Up the Renderer Component
For the renderer component, we created component, controller, and style files.
Here’s the component markup in quotesRender.cmp. In this file, we implement the lightning:availableForChatterExtensionRenderer interface, which provides the payload as an attribute in the component.
1<aura:component implements="lightning:availableForChatterExtensionRenderer">
2    <aura:attribute name="_quote" type="String"/>
3    <aura:attribute name="_author" type="String"/>
4    <aura:handler name="init" value="{!this}" action="{!c.init}"/>
5
6    <div class="container">
7    	<span class="quote" aura:id="quote">{!v._quote}</span>
8        <span class="author" aura:id="author">--- {!v._author} ---</span>
9    </div>
10</aura:component>
You have a couple of ways of dealing with the payload. You can use the payload directly in the component {!v.payload}. You can use your controller to parse the payload provided by the lightning:availableForChatterExtensionRenderer interface and set its attributes yourself. Add a CSS resource to your renderer bundle to style your renderer component.
3. Set Up a New ChatterExtension Entity
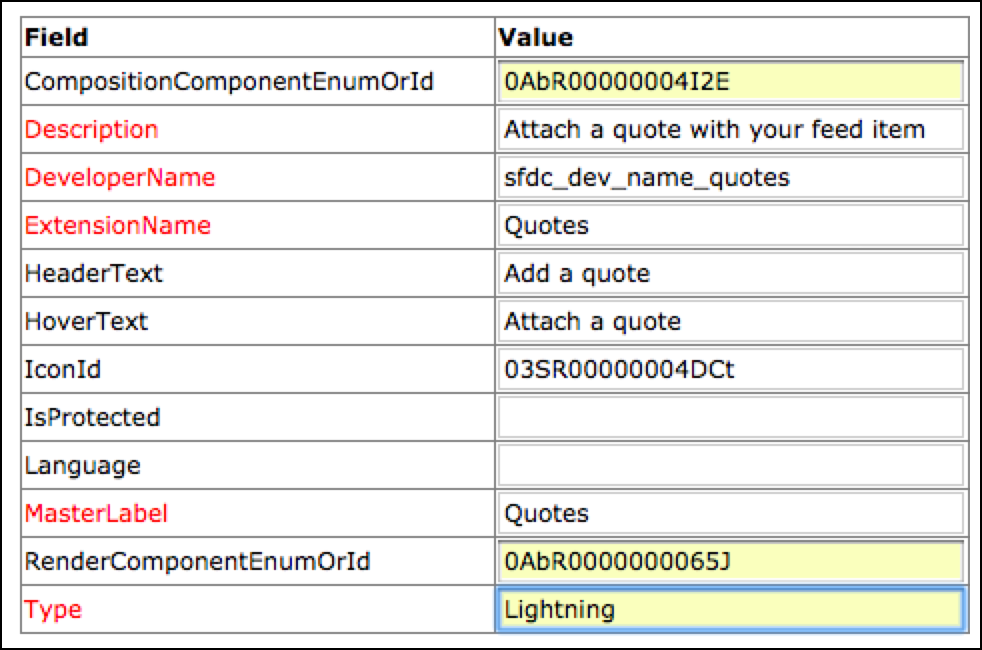
After you create these components, open Postman or any tool that can make SOAP and REST API calls. Make sure that you’re using at least API version 41.0. Log in to your org, and create a ChatterExtension entity using the Salesforce SOAP API.
Provide values for ChatterExtension fields (see ChatterExtension for values and descriptions).
Get the IconId for the file asset. Go to Postman, or your preferred tool, and make a new POST request for creating a file asset with a fileId from your org. The filepath is /services/data/v41.0/connect/files/<fileid>/asset. Replace the version number with the current version.
4. Package Your App and Upload It to AppExchange
The Second-Generation Managed Packaging Developer Guide provides useful information about packaging your apps and publishing them on AppExchange.
5. Select the Apps to Embed in the Chatter Publisher
An admin page is available in each Experience Builder site for selecting and arranging the apps to show in the Chatter publisher. Select up to five apps, and arrange them in the order you like. The order you set here controls the order the app icons appear in the publisher.
In your site, go to Experience Workspaces and open the Administration page. Click Rich Publisher Apps to open the page.
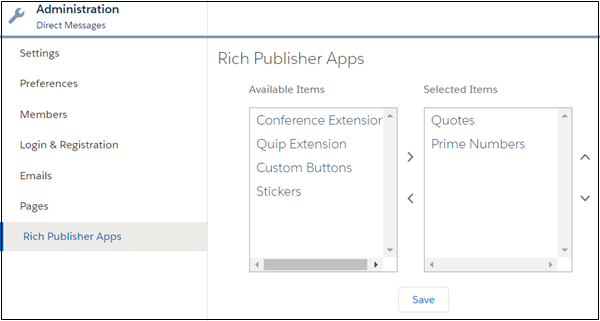
After you move apps to the Selected Items column and click Save, the selected apps appear in the Chatter Publisher.