Mobile and Offline Developer Guide
 j
jAndroid Emulator Setup
During development it’s convenient to test your code in a virtual device. Use Android
Studio to create a device emulator, and install the virtual device build of your mobile app into
it.
Configure Minimum Required Android Emulator Settings
Ensure your virtual device meets the minimum device and Android API version requirements
to run your mobile app.
Review the minimum requirements for your mobile app.
-
Download and install the latest version of Android Studio.
If you already have Android Studio installed, there’s no need to reinstall it.
- Launch Android Studio.
-
Click More Actions or
 in the top left, depending on your
version of Android Studio, and then select Virtual Device Manager from
the dropdown.
in the top left, depending on your
version of Android Studio, and then select Virtual Device Manager from
the dropdown.
-
Click the
 in the Actions column of the device you’d like to
edit.
Or, if you want to create an emulator, click Create Device and follow the prompts.
in the Actions column of the device you’d like to
edit.
Or, if you want to create an emulator, click Create Device and follow the prompts. -
Click Change in the line that displays the version number.
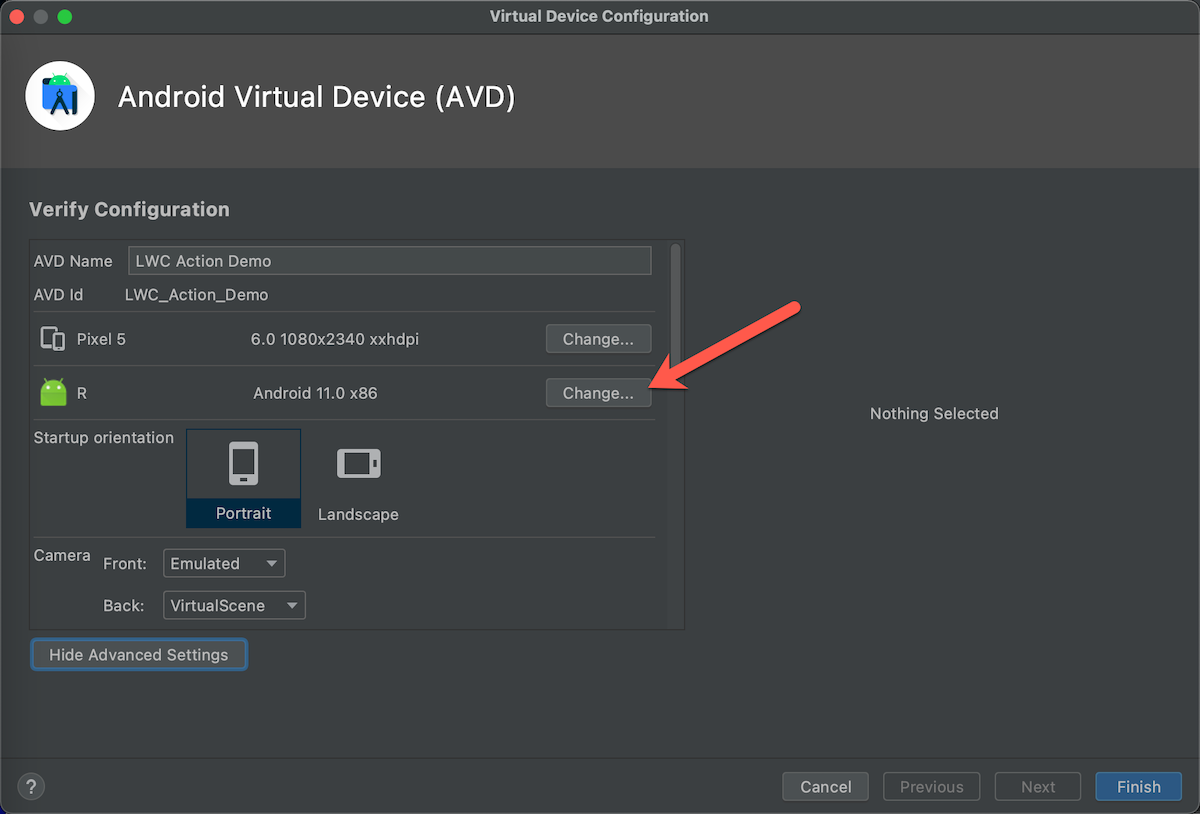
- In the pop-up window, select API 30 version or later.
- Click OK.
-
Scroll down in the window to the Memory and Storage section.
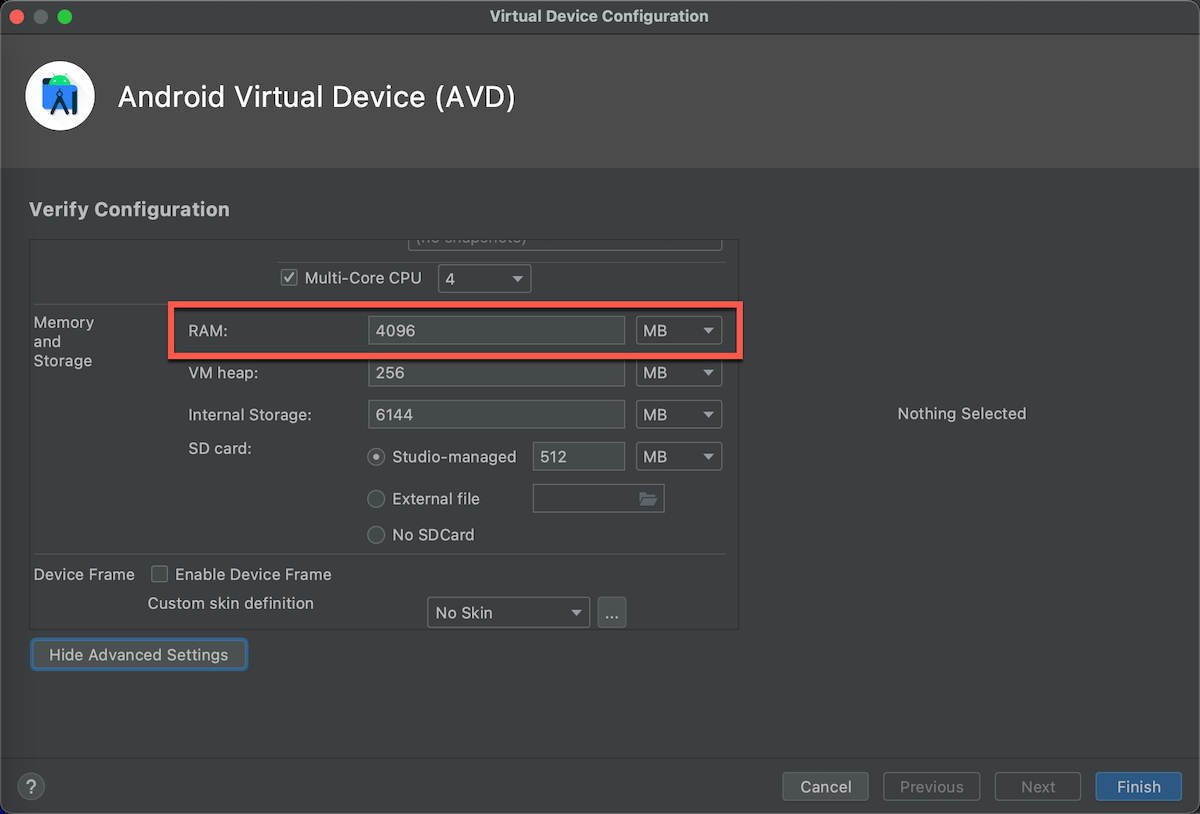
-
Click in the RAM field and enter 4096.
If you can’t change the RAM value, use a newer device for the emulator.
- Click Finish.
-
Click
 in the Actions column of
the device to launch the Android Emulator.
in the Actions column of
the device to launch the Android Emulator.
After the device emulator launches you can close Android Studio, but keep the Android
Emulator app window open to install the Field Service app in the next section.
Install the Field Service App for Android
To run the Field Service mobile app in an Android emulator, download and install a
virtual device build of the app. After it’s installed, open the app and log into your development
org.
- Download the latest Android virtual device build of the Salesforce Field Service mobile app APK file.
- Drag the downloaded .apk file into the Android Emulator window.
- Click a blank space on the Android Emulator’s screen and drag up to view the installed apps.
- Click the newly installed Field Service app.
- Click I Agree to accept the Order Form Supplement agreement.
-
Click the vertical dots button on the top right and select Change
Server.
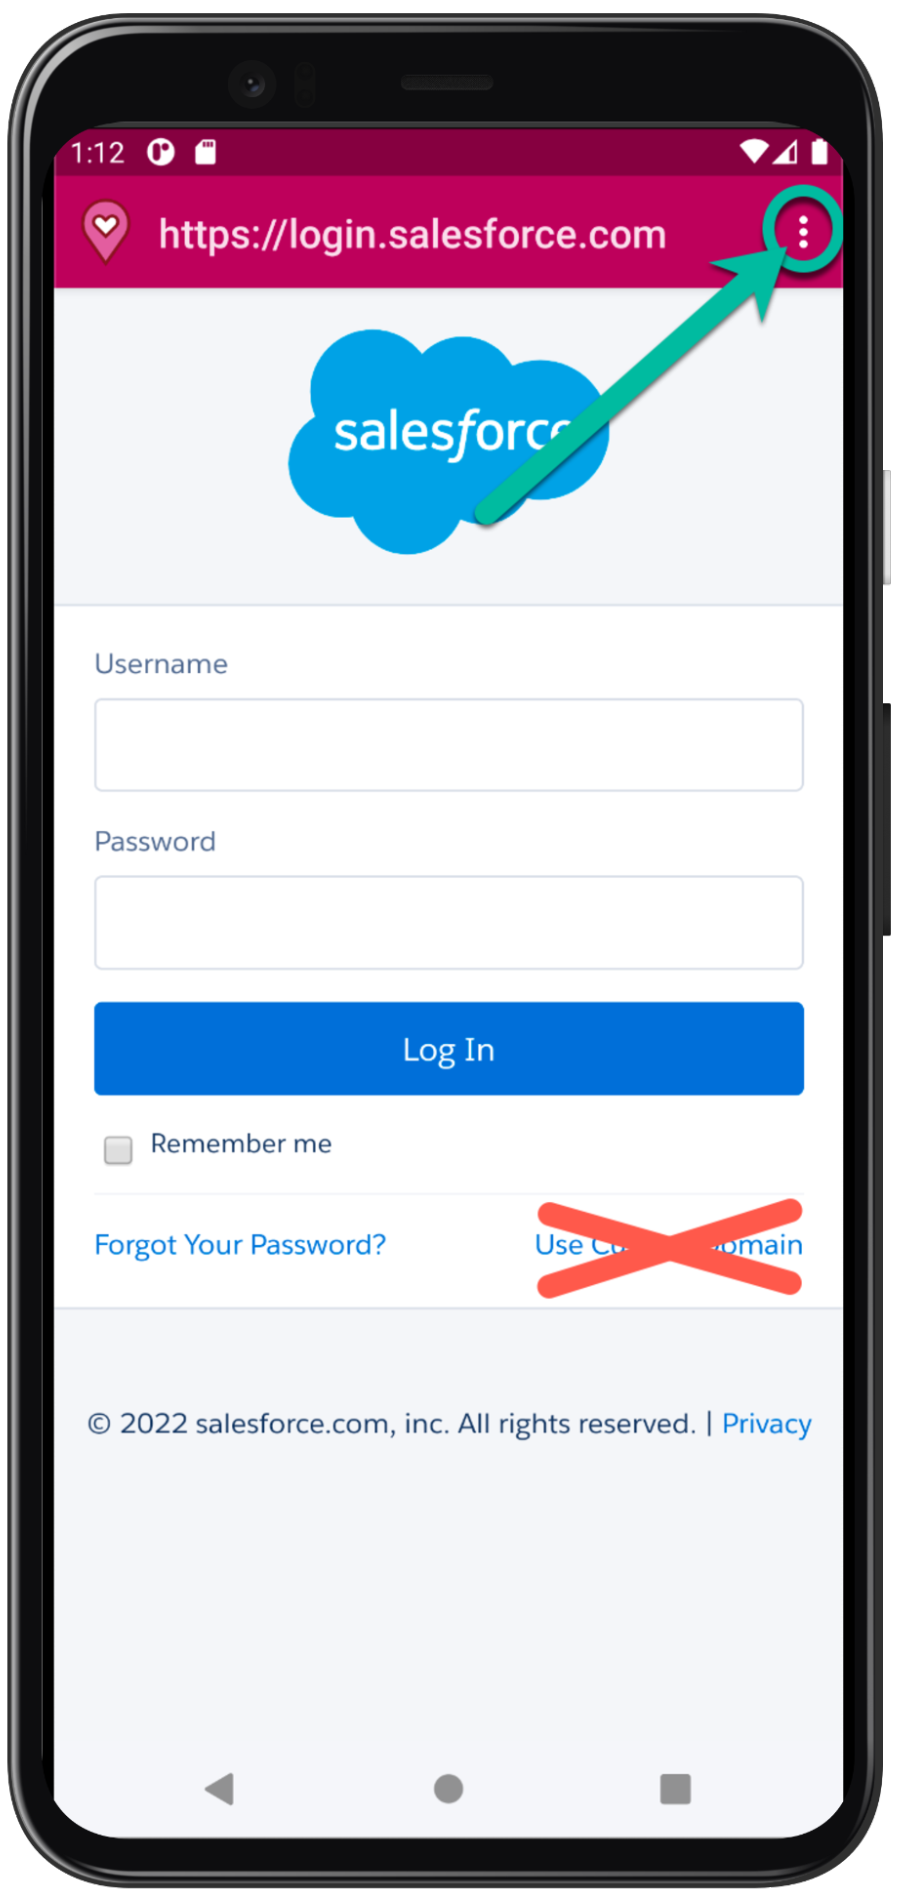
-
Select a connection.
- Click the arrow in the top left to go back to the login screen.
- Enter your username and password for your org.
- Click Log In.
- Click Allow to allow the app to access your Salesforce information.
-
Click through the various permissions screens and allow them the appropriate access.
When finished, you arrive at the app’s home screen.