Mobile and Offline Developer Guide
 j
jCreate a Self-Service Kiosk Application
Imagine a convention hall where convention attendees scan their badge for entry. The convention organizers have set up an entry point with a row of tablets, and on each tablet screen is a check-in application, displaying both a scanner view and instructions prompting attendees to scan their badge. Attendees can easily hold their badge up to the scanner view, after which they receive a confirmation message (indicating that they may enter) or a warning message (indicating that there is an issue with their badge, and that they should head over to the information booth to get help).
At the same conference, presenters at each booth in the convention hall need a way to collect leads and stay connected with conference attendees who express interest in their product or service. Each booth is outfitted with a tablet with a scanner view, similar to what the attendees encountered when entering the conference. These scanners, however, scan an attendee’s badge for the purpose of collecting their information and sharing it with the booth presenter, so that after the conference the two parties can stay connected, finalize purchase discussions, and more.
To implement these self-service scanning stations, conference organizers and booth presenters used BarcodeScanner in their applications to seamlessly integrate their check-in and lead collection processes with Salesforce. Once scanned, the check-in application processes the barcode to find the associated registration record and verify that the person scanning the barcode is a registered conference attendee. Along the same lines, the booth scanner scans barcodes, extracts embedded attendee data, and uses it to create leads in Salesforce.
Whether you want to update an existing LWC component to use the self-service features of BarcodeScanner, or you’re creating a brand-new component, you only need to keep a few things in mind to get started.
What You'll Need
As with all mobile capabilities, the user interface and other implementation details for creating a self-service “kiosk” application are up to you, the LWC developer, to create and maintain. However, there are common elements that any implementation will have.
Continuous Scanning Lifecycle
To create a scanner that continuously scans and processes barcode data without manual user intervention, use the resumeCapture() function in your programming logic to create a continuous scanning lifecycle.
For more information about resumeCapture() and how the scanning lifecycle works under the hood, see Scan Multiple Barcodes.
Front-Facing Camera
BarcodeScanner functionality to use the front-facing camera allows for a better user experience when creating a kiosk application. It allows the screen of your kiosk setup to function as a sort of mirror, which helps your users more easily position their scannable code (whether the code is on a badge, card, or something else) within the scanner view. To use the front-facing camera in your component, set the value of the cameraFacing property on the BarcodeScannerOptions object to FRONT.
For more information on this property and other details of configuring BarcodeScanner, see BarcodeScanner Data Types.
Custom Scanner UI
Finally, you’ll want to add your own custom UI to BarcodeScanner to replace the standard, minimal UI. To do this, first build your user interface as custom, static HTML page. Then provide the HTML for your custom UI as a string for the value of the backgroundViewHTML property of the BarcodeScannerOptions object.
For more information on customizing the UI, see Customize the BarcodeScanner User Interface.
Putting It All Together
With all of these pieces in place, you’ll have an LWC that can serve as a kiosk for continuously scanning barcodes (and processing the data in whatever way your component allows for) without the need to interact with the physical device.
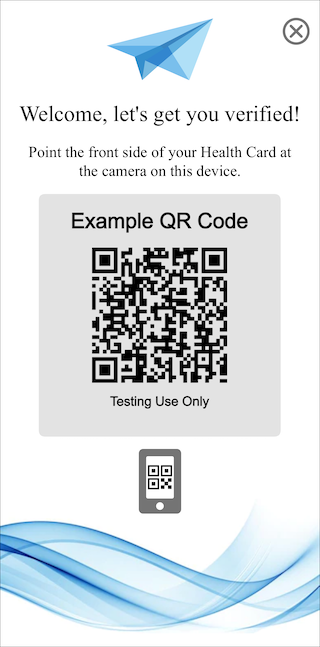
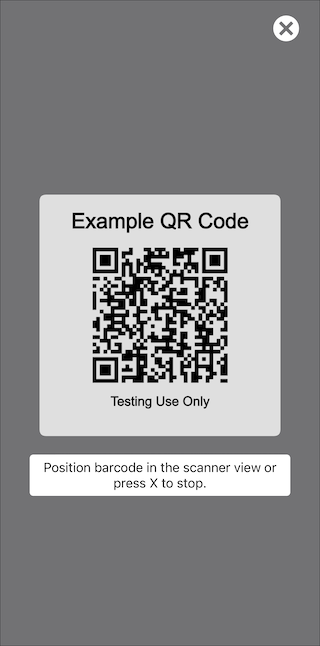
Here are examples of both the standard BarcodeScanner UI and a custom UI appropriate for a Kiosk Mode implementation.
Standard UI
Custom UI