ISVforce Guide
 j
jAdd Pricing Plans to Your AgentExchange Checkout Listing
To offer a subscription to your solution with AgentExchange Checkout, create a pricing
plan in the AgentExchange Partner Console. Then sync the plan to Stripe. A pricing plan sets the
solution’s cost, currency, and billing frequency.
| User Permissions Needed | |
|---|---|
| To create or update AgentExchange listings: | Manage Listings |
Before you create pricing plans, you must already have a Stripe account, and the account must be connected to the AgentExchange Partner Console. Learn how in Connect a Stripe Account to Your AgentExchange Listing.
You can create multiple pricing plans for your listing. For example, you can create one plan that uses monthly billing and another plan that uses annual billing.
- Go to the Partner Console.
- Click Listings.
- Create a listing, or edit an existing one. If you’re creating a listing, complete all the required fields on the Fill in the Basics step.
- Click Set Pricing.
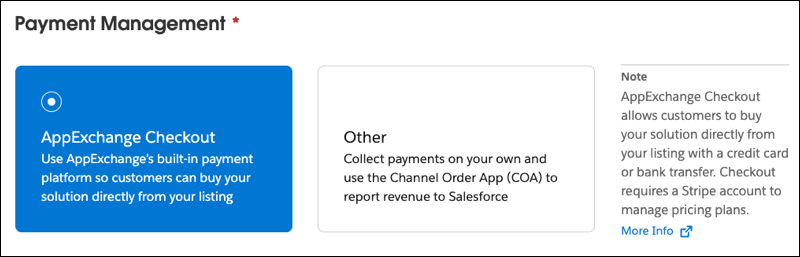
- For pricing model, select Paid.
-
For payment management, select AgentExchange Checkout.
-
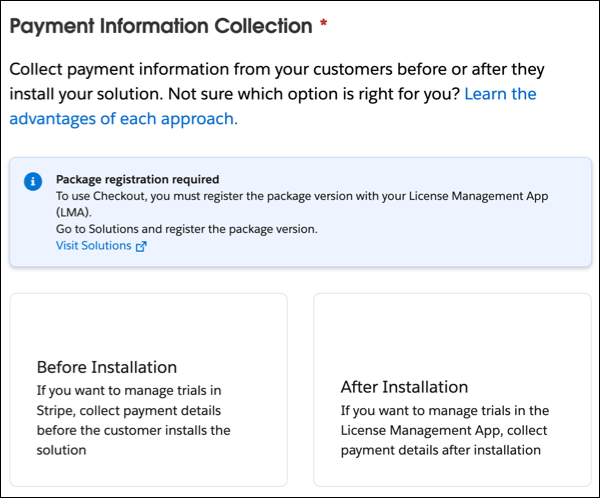
Select when to collect payment information from your customers, before or after they
install your solution.
- Select a country if one isn’t previously selected.
- Provide any required tax information.
- Click Add Pricing Plan.
-
Fill in the required details.
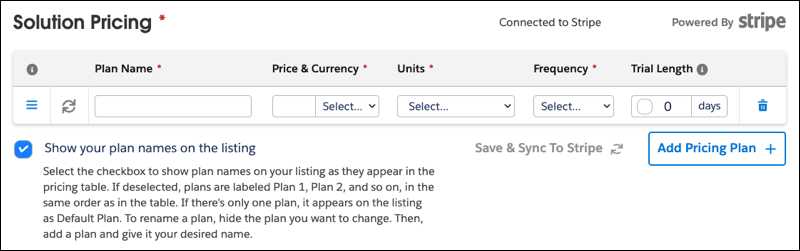
Pricing Plan Details Plan Name Give your plan a descriptive name. We recommend including the billing frequency, such as Annual, in the name. Price Enter the cost for this plan. Currency Select the currency that customers can use to pay for your solution. Select US dollars (USD) so customers can pay with US bank accounts. Select euros (EUR) so customers can pay with European bank accounts. Units Select whether to apply the price per user or per company (org-wide). AgentExchange Checkout doesn't support custom pricing units. Frequency Select a monthly, yearly, or one-time billing frequency. Trial Length Optionally, offer customers a trial of your solution for a specific time period, such as 30 days. - Choose to show the plan names on your listing as they appear in the solution pricing table, or as Plan 1, Plan 2, and so on. If there’s only one plan, it appears on your listing as Default Plan.
- Click Save & Sync to Stripe.
-
Click Save & Sync.
All unsaved changes that you made to this listing are saved, and your pricing plans are synced to the connected Stripe account. Synced pricing plans are immediately available on published listings.