Visualforce Developer Guide
 j
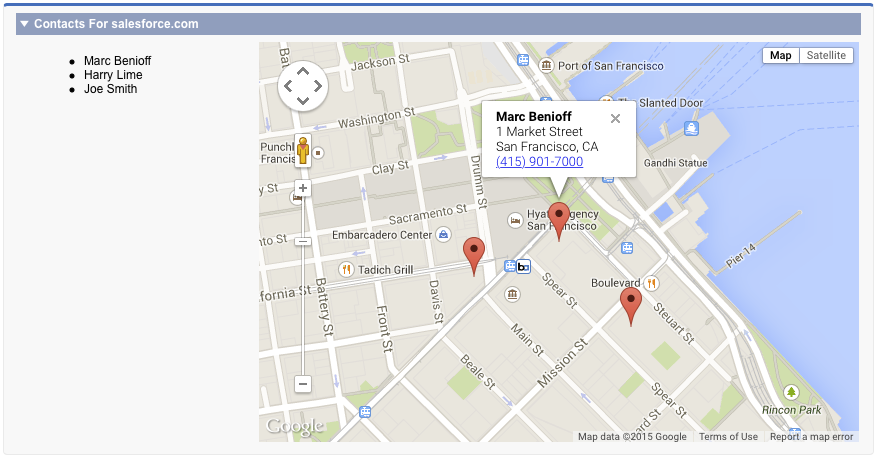
jAdding Info Windows to Markers
The map marker title attribute lets you display a small amount of information when a user hovers over the marker. To display more information or have more control over how it’s formatted, use an info window instead of or in addition to the title attribute.
For example, you can display complete details for a contact’s address, formatted for optimal display. You can add a clickable telephone link or even display a profile photo for objects that have one.
To add an info window to a map marker, add an <apex:mapInfoWindow> component as a child component of the associated <apex:mapMarker>. The body of the <apex:mapInfoWindow> component is displayed in the info window when users click or tap the marker, and can be Visualforce markup, HTML and CSS, or plain text.
1<apex:page standardController="Account">
2
3  <!-- This page must be accessed with an Account Id in the URL. For example:
4       https://MyDomainName--c.vf.force.com/apex/AccountContactsCustomMarker?id=001D000000JRBet -->
5
6  <apex:pageBlock >
7    <apex:pageBlockSection title="Contacts For {! Account.Name }">
8
9      <apex:dataList value="{! Account.Contacts }" var="contact">
10        <apex:outputText value="{! contact.Name }" />
11      </apex:dataList>
12
13      <apex:map width="600px" height="400px" mapType="roadmap"
14  center="{!Account.BillingStreet},{!Account.BillingCity},{!Account.BillingState}">
15
16      <!-- Add markers for account contacts -->
17      <apex:repeat value="{! Account.Contacts }" var="ct">
18        <apex:mapMarker title="{! ct.Name }"
19          position="{! ct.MailingStreet },{! ct.MailingCity },{! ct.MailingState }">
20
21          <!-- Add info window with contact details -->
22          <apex:mapInfoWindow >
23            <apex:outputPanel layout="block" style="font-weight: bold;">
24              <apex:outputText>{! ct.Name }</apex:outputText>
25            </apex:outputPanel>
26
27            <apex:outputPanel layout="block">
28              <apex:outputText>{! ct.MailingStreet }</apex:outputText>
29            </apex:outputPanel>
30
31            <apex:outputPanel layout="block">
32              <apex:outputText>{! ct.MailingCity }, {! ct.MailingState }</apex:outputText>
33            </apex:outputPanel>
34
35            <apex:outputPanel layout="block">
36              <apex:outputLink value="{! 'tel://' + ct.Phone }">
37                  <apex:outputText>{! ct.Phone }</apex:outputText>
38              </apex:outputLink>
39            </apex:outputPanel>
40          </apex:mapInfoWindow>
41
42        </apex:mapMarker>
43      </apex:repeat>
44
45      </apex:map>
46
47    </apex:pageBlockSection>
48  </apex:pageBlock>
49
50</apex:page>