Visualforce Developer Guide
 j
jUsing Custom Marker Icons
The Visualforce map marker icon
is functional but plain. To differentiate markers and add detail or style to your maps, use
custom map marker icons.
To customize a marker’s icon, set the icon attribute to an absolute or fully qualified URL to the
graphic to use. You can reference any image on the Web, for example, if your graphics are
distributed in a CDN. You can also use graphics stored in a static resource. If you use images
from a static resource, use the URLFOR() function to obtain the image URL. For
example:
1<apex:mapMarker title="{! Account.Name }"
2    position="{!Account.BillingStreet},{!Account.BillingCity},{!Account.BillingState}"
3    icon="{! URLFOR($Resource.MapMarkers, 'moderntower.png') }" />
Use a common graphics format, such as PNG, GIF, or JPEG. The preferred marker size is 32 × 32 pixels. Other sizes are scaled, which doesn’t always produce ideal results.
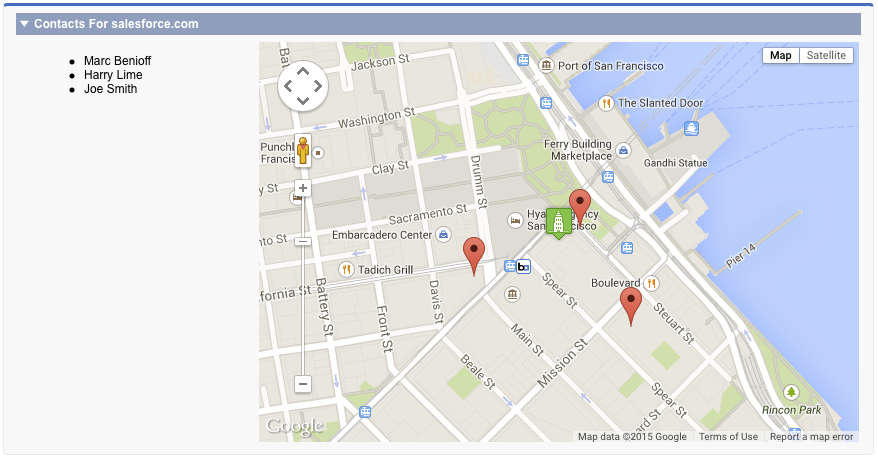
This complete page illustrates using a custom marker to indicate an account’s location, and
standard markers for the account’s
contacts.
1<apex:page standardController="Account">
2
3  <!-- This page must be accessed with an Account Id in the URL. For example:
4       https://MyDomainName--c.vf.force.com/apex/AccountContacts?id=001D000000JRBet -->
5
6  <apex:pageBlock >
7    <apex:pageBlockSection title="Contacts For {! Account.Name }">
8
9      <apex:dataList value="{! Account.Contacts }" var="contact">
10        <apex:outputText value="{! contact.Name }" />
11      </apex:dataList>
12
13      <apex:map width="600px" height="400px" mapType="roadmap"
14  center="{!Account.BillingStreet},{!Account.BillingCity},{!Account.BillingState}">
15
16      <!-- Add a CUSTOM map marker for the account itself -->
17      <apex:mapMarker title="{! Account.Name }"
18  position="{!Account.BillingStreet},{!Account.BillingCity},{!Account.BillingState}"
19       icon="{! URLFOR($Resource.MapMarkers, 'moderntower.png') }"/>
20
21      <!-- Add STANDARD markers for the account's contacts -->
22      <apex:repeat value="{! Account.Contacts }" var="ct">
23        <apex:mapMarker title="{! ct.Name }"
24          position="{! ct.MailingStreet },{! ct.MailingCity },{! ct.MailingState }">
25        </apex:mapMarker>
26      </apex:repeat>
27
28      </apex:map>
29
30    </apex:pageBlockSection>
31  </apex:pageBlock>
32
33</apex:page>
This code produces the following map.
To use different icons for markers added inside an iteration like <apex:repeat>, use an expression related to the iteration variable to define the URL. One simple way is to use icons named for a lookup field on a record. Another approach is to provide the icon name in a custom formula field.
Here’s the previous <apex:repeat> block with a
variation that assumes the contact object has a custom field named “ContactType__c” and that
each contact type has a correspondingly named
icon.
1<!-- Add CUSTOM markers for the account's contacts -->
2    <apex:repeat value="{! Account.Contacts }" var="ct">
3        <apex:mapMarker title="{! ct.Name }"
4          position="{! ct.MailingStreet },{! ct.MailingCity },{! ct.MailingState }"
5          icon="{! URLFOR($Resource.MapMarkers, ct.ContactType__c + '.png') }">
6        </apex:mapMarker>
7    </apex:repeat>