Third-Party Applications
You can integrate third-party applications such as product reviews, geotracking, Facebook, and Google Pay with Salesforce B2C Commerce.
Only existing customers can access some of the links on this page. Visit Salesforce Commerce Cloud GitHub Repositories and Access for information about how to get access to the Commerce Cloud repositories.
You can integrate a third-party product review application into Salesforce B2C Commerce. The Storefront Reference Architecture (SFRA) includes a product decorator function that you can modify to meet your requirements.
The rating function is located in the following SFRA file:
The object property decorator function (value) generates a random rating based on the product ID. Replace the following code with a call to get the rating:
Salesforce B2C Commerce supports geotracking through the IP address customer lookup feature.
You can use the dw.util.Geolocation class and dw.system.Request.getGeolocation() method to populate the pdict.CurrentRequest.httpRemoteAddress, then take action based on the associated country.
If the dw.system.Request.getGeolocation() method can't return a geolocation, it returns null. If the IP address can't be found in the database, for example, the method returns null.
The geolocation feature is turned on by default, but Commerce Cloud Support can disable the feature per customer request.
If the IP address is associated with a country you support with one of your sites, redirect to that site. If the IP address is associated with a country you don’t support with one of your sites, you can direct to a "site selector" page. The site selector page lets the visitor select a specific site by region. If you let a visitor explicitly select a site, consider also offering the option of saving a cookie to remember the selection for subsequent sessions.
On subsequent visits, if a cookie on the browser's computer indicates that the customer has previously selected a preferred site, your app can redirect to that site regardless of the IP address. If you provide cookie-based site preference, it's important to let the visitor change that preference. Present a link to the site selector page in the global user interface of the site. Geotracking can be used to delegate users from specific countries to country-specific landing pages.
Alternatively, check our LINK partners for pre-built integrations with geotracking functionality.
Apple Pay on the Web can help convert mobile shoppers into mobile buyers. Apple Pay decreases friction in an ecommerce transaction, especially on iPhones, iPads, and Macs. Salesforce B2C Commerce supports Apple Pay on the Web Version 1.
Merchants can incorporate the ability to pay using Apple Pay on their storefront. Merchants can determine whether to show the Apple Pay button on their Product Detail Pages, Cart, and mini-Cart. The Apple Pay on the Web feature is enabled by default.
When Apple Pay is enabled on a merchant's storefront, the customer can click the Apple Pay button. Customers then use their iPhones to complete payment, just as they would in the store.
Integrating Apple Pay on a site involves:
- merchant use of B2C Commerce functionality
- engagement with Apple
- use of a participating payment service provider (PSP)
For B2C Commerce merchants, the process of enabling Apple Pay depends on how their PSP enables Apple Pay on the Web. There are two possibilities:
-
the PSP uses the B2C Commerce API to implement Apple Pay
In this case, the merchant configures Apple Pay on the Web in Business Manager.
-
the PSP supports Apple Pay on the Web via their LINK cartridge
In this case, the merchant installs and configures the updated LINK cartridge and provides some configuration information in Business Manager.
There are several entities involved in enabling and using Apple Pay on B2C Commerce merchant sites:
-
B2C Commerce merchant (merchant)
If the merchant already uses a supported PSP, they simply configure Apple Pay on the Web in Business Manager.
-
Payment Service Provider (PSP)
B2C Commerce provides the API interface and works directly with key PSPs to enable Apple Pay on the Web. Each PSP determines whether to support this capability and which integration method (standard API or updated cartridge) they wish to support.
-
B2C Commerce merchant's customer (shopper)
The shopper's experience depends on what device they’re using:
- iPhone or iPad experience: If the shopper has Apple Pay on their iPhone or iPad, they see the Apple Pay button on the pages where the Merchant has added it. The shopper can then begin the checkout and payment process. The shopper taps the Apple Pay button and confirms the order details (payment, shipping option, totals) in the Apple Pay payment screen. The shopper completes the purchase via Touch ID or passcode.
- Mac experience: To pay using Apple Pay, the shopper must be browsing the site on a 2012 or newer Mac desktop or laptop, running Safari. The shopper must have an iPhone or Apple Watch with Apple Pay setup. While browsing using Safari on their Mac, the shopper clicks the Apple Pay button and confirms the order details in the Apple Pay payment screen. The shopper then uses their iPhone or Apple Watch to complete the purchase via Touch ID or by clicking the side button on their Apple Watch.
When a shopper clicks the Apple Pay button on a Product Detail Page, the quantity is automatically set to one. To purchase more than one of an item, the shopper adds the items to the cart and follows the standard checkout process for any payment type.
The default order of the shipping methods on the Apple Pay payment sheet shows the currently selected shipping method in the basket first. The currently selected methods are followed by the remaining applicable methods in the same order.
To ensure that the transaction is secure, Apple verifies the domain association. The verification occurs one time, although reverification can occur again later. For every payment request, Apple verifies the server source of the request using TLS validation through the session validation key. Apple encrypts the payment data with the encryption key.
The merchant runs any verification they need on the billing address, just as they would for a non-apple Pay transaction. The billing address information can be provided with the payment object as non-encrypted and isn't required for the processing of Apple Pay transactions.
Process Flow
- Shopper visits the storefront using an Apple Pay on the Web enabled device.
- The storefront detects the device and other conditions necessary for Apple Pay and, if all conditions are met, shows the Apple Pay button.
- The shopper clicks the Apple Pay button.
- The storefront provides the necessary information to Apple Pay.
- The shopper checks out using Apple Pay.
- The storefront updates the basket with Apple Pay information.
- The shopper authorizes payment on their Apple Pay enabled device.
- Apple Pay provides the storefront with encrypted payment information.
- The storefront makes the authorization request to the PSP.
- The storefront stores the transaction ID that is in the authorization response from the PSP.
- The storefront notifies Apple Pay of successful authorization.
- The storefront shows the order confirmation.
- The order, including the PSP transaction ID, is exported to the OMS.
- The OMS sends post order updates to the shopper.
The merchant can use a PSP that has enabled Apple Pay for use on B2C Commerce sites using the Standard Payment API from B2C Commerce. Alternatively, the merchant can use a LINK cartridge to enable Apple Pay for storefronts.
The standardized B2C Commerce and PSP Apple Pay integration model creates a seamless enablement process for B2C Commerce merchants to enable Apple Pay. This approach requires minimal client code customizations or LINK cartridge updates. In Business Manager, the merchant identifies the PSP to use, and the API version, API URL, API username and password, and PSP merchant account ID.
If the site is using a LINK cartridge, to enable customers to pay using Apple, the merchant updates the LINK cartridge for payment.
No matter which method the merchant uses to implement Apple Pay for the Web, the merchant must:
-
have at least one storefront in a location where Apple Pay is supported
-
register for an Apple Merchant ID
Apple recommends that merchants who already have a Merchant ID use the same Merchant ID and certificate to support Apple Pay on the web. You enter the merchant ID into Business Manager.
-
generate an Apple certificate
The PSP gives the merchant a certificate request which they upload to the Apple developer portal to generate the certificate.
-
configure Apple Pay for the Web in Business Manager
- Log in to developer.apple.com.
- Create an Apple Merchant ID.
When you set up and configure services for your merchant ID, you don't specify the Merchant Domains or Apple Pay Merchant Identity (in the lower portion of the iOS Merchant ID Setting page). However, to register the correct domain name of your site with Apple, ensure that your site's alias file contains the alias mapping for you https URL in the settings section. For details about Apple Merchant IDs, browse to https://developer.apple.com/support/apple-pay-domain-verification/.
-
Obtain a CSR (certificate signing request) file from your PSP.
-
Use this CSR to generate a certificate through Apple.
For details, browse to https://developer.apple.com/support/apple-pay-domain-verification/.
-
Upload the certificate back to your PSP.
To enable Apple Pay for use on B2C Commerce sites using the Standard Payment API from B2C Commerce, the merchant must configure Apple Pay in Business Manager.
You must enable the Apple Pay on the Web feature in Business Manager. You can later delete the configuration. Configuration information is deleted only for the instance type currently selected in the dropdown and not others.
Ensure that host name aliases are configured properly, as detailed in Hostname Aliases.
You don't need to manually register your merchant domain on Apple's developer account portal. Registration is handled by the B2C Commerce. You can start testing on your sandbox instance (no need to use staging or development instance) using iOS 10 and macOS Sierra. Also ensure you use the Register Apple Sandbox button on your Apple Pay Business Manager screen.
-
Click App Launcher
 and then select Merchant Tools > Site Preferences > Apple Pay.
 -
Select the environment that you want to configure (Production, Staging, Development).
-
Check Apple Pay Enabled?.
-
Enter your Apple Pay Merchant ID that you created or that you already use for Apple Pay.
-
Enter your Apple Merchant Name, which appears on the payment sheet.
This value is the brand name you would like to appear on the payment sheet.
-
Enter the Country Code for the locale of your site.
The country code is a two letter ISO 3166 country code.
-
For Merchant Capabilities, check 3DS and leave other fields unchecked.
-
Select the types of payment you support.
The payment types are sent to Apple Pay on button click and accepted by the sheet as valid payment types. Shoppers can submit a payment only with a card in one of the accepted payment types. It's up to the PSP what types are supported.
-
Select the Supported Networks.
The networks are sent to Apple Pay on button click and accepted by the sheet as valid payment networks. Shoppers can submit a payment only with a card in one of the accepted payment networks (Discover, Visa, or other network). It’s up to the PSP what networks are supported.
-
Select the Required Shipping Address Fields that are required on the shipping forms.
-
For the Required Billing Address Fields select Name and Postal Address.
-
For Use Commerce Cloud Apple Pay Payment API? check Yes.
-
Check whether to place the Apple Pay button on the cart and mini-cart pages.
-
Select whether to enable automatic redirect of product detail pages to HTTPS.
Because pages where the Apple Pay button appears must be served via HTTPS, it might be necessary to redirect certain pages on your site. Only pages that don't contain "sc.html" in the URL can be redirected using HTTPS redirection. Because of this, enabling HTTPS redirection might not result in the Apple Pay button appearing on all the pages you expect it should.
-
Specify Payment Provider URL.
-
Specify Payment Provider Merchant ID.
-
The API Version is v1.
This version is the version of the B2C Commerce Apple Pay PSP API that is specified by Salesforce and implemented by PSPs. In addition, there’s the Apple Pay JS API provided by Apple in Safari. B2C Commerce supports only version 1, not the later versions that Apple has made available.
-
If you’re using Cybersource, leave Use Basic Authorization? unchecked. However, if you’re using World Pay or Adyen, check Use Basic Authorization?.
-
If you checked Use Basic Authorization, enter the username and password for the merchant issued by the payment provider.
-
Enter the identifier for the merchant issued by the payment provider.
-
If you’re using Cybersource, for Use JWS? Check Yes. If you’re using World Pay or Adyen don't check Yes.
-
If you checked Yes for Use JWS?, for JWS Private Key Alias enter the merchant’s .p12 Key Alias. The private key alias is created when a merchant uploads their .p12 key file to Business Manager Module, Private Keys and Certificates. This private key can be obtained by going to Cybersource Business Center -> Account Management -> Transaction Security Keys -> Security Keys for Simple Order API.
-
Click Submit.
After you click Submit, a domain name appears in the Registration section. If you don't have an alias registered, a domain similar to one of the following appears:
- staging-merchant.<domain>
- production-merchant.<domain> If you do have an alias registered, the domain is something like mystore.com.
-
Register with the Apple sandbox or the Apple production server.
You need just one merchant ID to register with both servers. If your domain is registered with the Apple sandbox, the only device that can make payments on that domain is a device that is signed in to an iCloud Sandbox Tester Account; if your domain is registered with the Apple production server, any regular iCloud account can pay on that site. If you configure HTTPS, the HTTPS host name is used instead of the instance domain name. If you have multiple domain names for your site, you can register them; contact Commerce Cloud Support for details.
Apple lets multiple domains be registered for the same Apple merchant ID. To register multiple domains, set the HTTPS URL, register it with Apple Pay, and repeat for any number of domains. When registration is complete, you can remove the HTTPS URL from the Aliases screen
You can use several different methods to inject the Apple Pay button into the storefront.
The Apple Pay button can be either:
-
automatically injected in the storefront via configuration
When the shopper's browser supports Apple Pay and there’s a place in the page for a button to be injected, Salesforce B2C Commerce determines if it's appropriate to inject the button. If so, iB2C Commerce inserts the Apple Pay button on the page.
-
injected manually by a storefront developer
B2C Commerce supports customization of the storefront presentation of the controls to initiate payment via Apple Pay. This customization includes not only where the button appears, but also how the button should look, and if a product is to be added to the basket before checkout commences.
The Apple Pay button is injected when:
- The browser supports Apple Pay payment
- The page contains configured places to show an Apple Pay button
- The customer basket and additional information from the B2C Commerce server indicate that Apple Pay payment is supported The Apple Pay button should never be unavailable. The web page should prompt the user to provide the additional information if the user taps the button without completing their input selection. That prompt should guide the user to the part of the form that requires completion. For details, you should review the Apple Human Interface Guidelines and success stories to design your UI and UX for Apple Pay on the web.
A new tag ( <isapplepay> ) is added to ISML to inject an Apple Pay control in the HTML page supports optional attributes to:
- add the product to the basket
- specify the look of the button, among possible choices
- specify the ID of the element
The <isapplepay> tag must have a closing tag.
If there are already items in the shopper's basket and they click the Apple Pay button for an individual product, the items currently in the basket are stored temporarily during the purchase of the individual item; the original items are then restored to the basket.
There are two places where a button can be injected via configuration:
- Cart
- Mini Cart
Each is represented by a CSS selector plus additional information about how to inject. The CSS selectors are based on SiteGenesis DOM and CSS class names, but can work on sites other than SiteGenesis.
If a site is configured to inject, one of these selectors finds a match, and the SYSTEMApplePay-GetRequest pipeline responds with a valid JSON for an ApplePaySession payment request, the button is injected. These buttons check out the current basket (as opposed to buttons to buy a single specific product) so the basket must not be empty to inject the button.
For Cart, the Apple Pay button is injected after “button[name=dwfrm_cart_checkoutCart]” and its margin and width are copied for Apple Pay UI guidelines reasons. The CSS classes “dw-apple-pay-button” and “dw-apple-pay-cart” are put on the injected button, and (if necessary) a CSS class corresponding to the configured button style.
For MiniCart Commerce Cloud appends to “.mini-cart-totals”. Margin, width, or any other attributes aren’t copied. Commerce Cloud puts “dw-apple-pay-button” and “dw-apple-pay-mini-cart” plus configured style CSS classes. Not all sites support automatic injection, and sites that do support automatic injection might find they don’t like the way the button is automatically injected. In that case, a customer developer should choose where to inject by using <isapplepay></isapplepay> in their templates.
The process of injecting the Apple Pay button is as follows:

If the merchant enables Apple Pay through a LINK cartridge, the merchant must meet minimum requirements.
The merchant must:
-
have a supported iOS device
-
create an Apple Developer account
-
become a member of the iOS Developer program
-
be running Xcode 6.1 or later
In Xcode, enable Apple Pay under Capabilities in your Project Settings and enable both Apple Merchant IDs.
-
update the LINK cartridge
B2C Commerce currently supports only version 1 of the Apple Pay JS API that is provided by Apple in Safari.
B2C Commerce provides the constant METHOD_DW_APPLE_PAY to the new Apple Pay system Payment Method.
B2C Commerce provides hooks for payment authorization:
- dw.extensions.applepay.getRequest
- dw.extensions.applepay.prepareBasket
- dw.extensions.applepay.shippingContactSelected
- dw.extensions.applepay.shippingMethodSelected
- dw.extensions.applepay.paymentAuthorized.createOrder
- dw.extensions.applepay.paymentAuthorized.authorizeOrderPayment
- dw.extensions.applepay.paymentAuthorized.placeOrder
- dw.extensions.applepay.paymentAuthorized.failOrder
- dw.extensions.applepay.cancel
- dw.extensions.paymentapi.beforeAuthorization (If not implemented, custom data will not be included in the request or handled in the response as before.)
- dw.extensions.paymentapi.afterAuthorization (If not implemented, custom data will not be included in the request or handled in the response as before.)
Several Apple Pay hooks can optionally trigger a client-side DOM event after executing. Supported hooks are:
- applepay.prepareBasket
- applepay.shippingContactSelected
- applepay.shippingMethodSelected
- applepay.paymentMethodSelected
- applepay.cancel
The dw.extensions.applepay.shippingMethodSelected can return a status of INVALID_SHIPPING_ADDRESS. The dw.extension.applepay.paymentAuthorized hook can also return a status of INVALID_SHIPPING_ADDRESS if the street address field is invalid; however, if the name, email, or phone number is invalid, dw.extension.applepay.paymentAuthorized returns INVALID_SHIPPING_CONTACT.
The cartridge that contains the hook must be in the site cartridge path (not the Business Manager cartridge path).
The API class dw.extensions.applepay.ApplePayHookResult indicates error reasons.
The <isapplepay> ISML tag injects a default black Apple Pay button into the HTML page.
You can use the following CSS class names on pages where Apple Pay for the Web is enabled:
- dw-apple-pay-button
- dw-apple-pay-mini-cart
- dw-apple-pay-cart
- dw-apple-pay-logo-white
- dw-apple-pay-border
You use the Apple Pay Sandbox to test integration and payment sheet configuration. For more details, see Apple Pay Sandbox Testing (at https://developer.apple.com/support/apple-pay-sandbox/).
Salesforce B2C Commerce provides the API interface and works directly with key PSPs to enable Apple Pay. Each PSP determines whether to support this capability.
Apple Pay PSP API does not support split instrument payments or gift certificates. Payment Authorization is always for the full amount of an order.
The PSP sets up an endpoint that can accept the request from B2C Commerce. The B2C Commerce server makes a call to the PSP to enable them to authorize the payment. The PSP puts the request into a format that they can accept, if necessary. The PSP returns the response in the correct format to the B2C Commerce server.
Alternatively, PSPs can update their LINK cartridge.
Each PSP determines which integration method (standard API or updated cartridge) they wish to support.
To handle Apple Pay payments, the merchant sends a request to the PSP. The PSP handles the request, and returns a response and an HTTPS status.
In the request for authorization from the PSP, the following is passed. For Apple Pay, the merchant should request only the fields that are required to process the transaction.
The addition of properties to the available properties doesn't require you to update your implementation of Apple Pay on the Web. However, if there are changes to any existing properties you must update your Apple Pay on the Web implementation.
| Property | Type | Required | Notes | Description | B2C Commerce Mapping | Apple Mapping |
|---|---|---|---|---|---|---|
| _v | string enumeration | required | Only "1" currently supported | B2C Commerce request document version number | ||
| merchant_account_id | string | required | 256 characters maximum | PSP merchant account identifier | configuration data | |
| session_id | string | required | 256 characters maximum | B2C Commerce unique shopper session ID | session.sessionID | |
| order_no | string | required | 256 characters maximum | B2C Commerce storefront order number | order.orderNo | |
| payment.payment_id | hex encoded string | required | 28 characters maximum | B2C Commerce unique payment ID | paymentTransaction.UUID | |
| payment.type | string enumeration | required | The type of payment to authorize | "ApplePay" for Apple Pay transactions | ||
| payment.amount | number | required | between 1 and 999999999999 | Amount to auth in cents or equivalent minor unit | paymentTransaction.amount.value * 10 ^ currency.defaultFractionDigits | PaymentRequest.total.amount |
| payment.currency | string | required | 3 characters | paymentTransaction.amount.currency | PaymentRequest.currencyCode | |
| payment.token | base64 encoded string | required | Apple Pay payment token | not stored on B2C Commerce | ApplePayPaymentAuthorizedEvent.payment.token | |
| client.ip_address | string | 40 characters maximum | IP address of shopper browser | request.httpRemoteAddress | ||
| client.user_agent | string | 2000 characters maximum | User agent of shopper browser | request.httpUserAgent | ||
| client.accept_header | string | 2000 characters maximum | Accept header of shopper browser | request.httpHeaders.accept | ||
| customer_info.customer_no | string | 256 characters maximum | B2C Commerce shopper customer number | order.customerNo | ||
| customer_info.email | string | 256 characters maximum | B2C Commerce shopper email address | order.customerEmail | ApplePayPaymentAuthorizedEvent.payment.billingContact.emailAddress | |
| customer_info.customer_name | string | 256 characters maximum | B2C Commerce shopper name | order.customerName | ApplePayPaymentAuthorizedEvent.payment..billingContact.givenName + " " + ApplePayPaymentAuthorizedEvent.payment.billingContact.familyName | |
| shipping_address.first_name | string | 256 characters maximum | Apple Pay provided shipping contact name | order.defaultShipment.shippingAddress.firstName | ApplePayPaymentAuthorizedEvent.payment.shippingContact.givenName | |
| shipping_address.last_name | string | 256 characters maximum | Apple Pay provided shipping contact name | order.defaultShipment.shippingAddress.lastName | ApplePayPaymentAuthorizedEvent.payment.shippingContact.familyName | |
| shipping_address.address1 | string | 256 characters maximum | Apple Pay provided shipping contact street address | order.defaultShipment.shippingAddress.address1 | ApplePayPaymentAuthorizedEvent.payment.shippingContact.addressLines[0] | |
| shipping_address.city | string | 256 characters maximum | Apple Pay provided shipping contact city | order.defaultShipment.shippingAddress.city | ApplePayPaymentAuthorizedEvent.payment.shippingContact.locality | |
| shipping_address.state_code | string | 256 characters maximum | Apple Pay provided shipping contact state | order.defaultShipment.shippingAddress.stateCode | ApplePayPaymentAuthorizedEvent.payment.shippingContact.administrativeArea | |
| shipping_address.postal_code | string | 256 characters maximum | Apple Pay provided shipping contact postal code | order.defaultShipment.shippingAddress.postalCode | ApplePayPaymentAuthorizedEvent.payment.shippingContact.postalCode | |
| shipping_address.country_code | string | 256 characters maximum | Apple Pay provided shipping contact country | order.defaultShipment.shippingAddress.countryCode | ApplePayPaymentAuthorizedEvent.payment.shippingContact.countryCode | |
| billing_address.first_name | string | 256 characters maximum | Apple Pay provided billing contact name | order.billingAddress.firstName | ApplePayPaymentAuthorizedEvent.payment.billingContact.givenName | |
| billing_address.last_name | string | 256 characters maximum | Apple Pay provided billing contact name | order.billing Address.lastName | ApplePayPaymentAuthorizedEventt.payment.billingContact.familyName | |
| billing_address.address1 | string | 256 characters maximum | Apple Pay provided billing contact street address | order.billing Address.address1 | ApplePayPaymentAuthorizedEvent.payment.billingContact.addressLines[0] | |
| billing_address.city | string | 256 characters maximum | Apple Pay provided billing contact city | order.billing Address.city | ApplePayPaymentAuthorizedEvent.payment.billingContact.locality | |
| billing_address.state_code | string | 256 characters maximum | Apple Pay provided billing contact state | order.billing Address.stateCode | ApplePayPaymentAuthorizedEvent.payment.billingContact.administrativeArea | |
| billing_address.postal_code | string | 256 characters maximum | Apple Pay provided billing contact postal code | order.billing Address.postalCode | ApplePayPaymentAuthorizedEvent.payment.billingContact.postalCode | |
| billing_address.country_code | string | 256 characters maximum | Apple Pay provided billing contact country | order.billing Address.countryCode | ApplePayPaymentAuthorizedEvent.payment.billingContact.country |
A sample request is as follows:
The response is as follows:
| Property | Description | B2C Commerce Mapping | Notes |
|---|---|---|---|
| _v | B2C Commerce response document version number | ||
| transaction_id | PSP unique transaction identifier | paymentTransaction.transactionID | |
| status | Enum of possible logical statuses | order.paymentStatus | Possible values are:
|
| custom | Contains custom data. | ||
| reason_code | Enum of possible reasons for status | Logged on the B2C Commerce side For "refused" or "error" status | |
| message | Optional detail message | Logged on the B2C Commerce side |
A sample response for authorization appears as follows:
A sample response for refusal appears as follows:
A sample response for an error appears as follows:
A sample response that includes customization appears as follows:
The HTTPS statuses include:
| Status | Description | Notes | Example Cases |
| 200 OK | Request handled normally | Possible statuses are:
Omit message property | Successful authorization Over credit limit Insufficient funds Fraud suspected |
| 3xx Redirects | B2C Commerce will follow redirects | PSP should avoid in practice | PSP operations need |
| 400 Bad Request | Request could not be handled | Error status only | Malformed document Missing required property, including merchant account identifier Invalid property value |
| 401 Unauthorized | Request was not authorized | Unauthorized HTTP request, not unauthorized payment | Authorization: Basic header missing Authorization: Basic header not authorized |
| 403 Forbidden | Credentials are not permitted access | Need correct PSP credentials | Authorization: Basic header authorized but not permitted use of this API Merchant account identifier not permitted use of this API |
| 404 Not Found | Incorrect URL | B2C Commerce bug or configuration error | |
| 405 Method Not Allowed | Incorrect HTTP method used | Should always be POST | B2C Commerce bug |
| 500 Internal Server Error | Unknown error on PSP side | B2C Commerce will retry at least once | PSP bug |
| Code | Status | Notes | Apple |
|---|---|---|---|
| parse | error | 400 Bad Request responses | |
| invalid | error | 400 Bad Request responsesInclude message property if possible | |
| billing_address | refused | Invalid billing postal address | ApplePaySession.STATUS_INVALID_ID_BILLING_POSTAL_ADDRESS |
| shipping_address | refused | Invalid shipping postal address | ApplePaySession.STATUS_INVALID_SHIPPING_POSTAL_ADDRESS |
| shipping_contact | refused | Invalid shipping contact | ApplePaySession.STATUS_INVALID_SHIPPING_CONTACT |
| pin_required | refused | PIN required | ApplePaySession.STATUS_PIN_REQUIRED |
| pin_incorrect | refused | PIN incorrect | ApplePaySession.STATUS_PIN_INCORRECT |
| pin_lockout | refused | PIN lockout | ApplePaySession.STATUS_PIN_LOCKOUT |
| declined | refused | All other declined transactions | ApplePaySession.STATUS_FAILURE |
| fraud | refused | All fraud related refusals | ApplePaySession.STATUS_FAILURE |
| canceled | refused | All canceled transactions | ApplePaySession.STATUS_FAILURE |
B2C Commerce provides Apple Pay with information about the customer and basket: line items, shipping methods, and stored contact information. When the shopper authorizes payment, Apple Pay provides B2C Commerce with a token containing the encrypted payment information.
B2C Commerce creates an order from the basket, and provides the encrypted payment information to the storefront payment service provider in an authorization request. B2C Commerce updates the order with the transaction information in the authorization response.
B2C Commerce provides Apple Pay with the outcome of the authorization, and if successful, shows the storefront order confirmation page.
To authorize Apple Pay payment:
- The shopper clicks or taps the Buy with Apple Pay button.
- B2C Commerce creates the payment request.
- B2C Commerce creates a merchant session, requested from the B2C Commerce Web Server to Apple.
- The session is returned to B2C Commerce and is forwarded with the payment request.
- The app shows the Apple Pay sheet.
- The shopper uses their Touch ID or passcode.
- Payment data is generated.
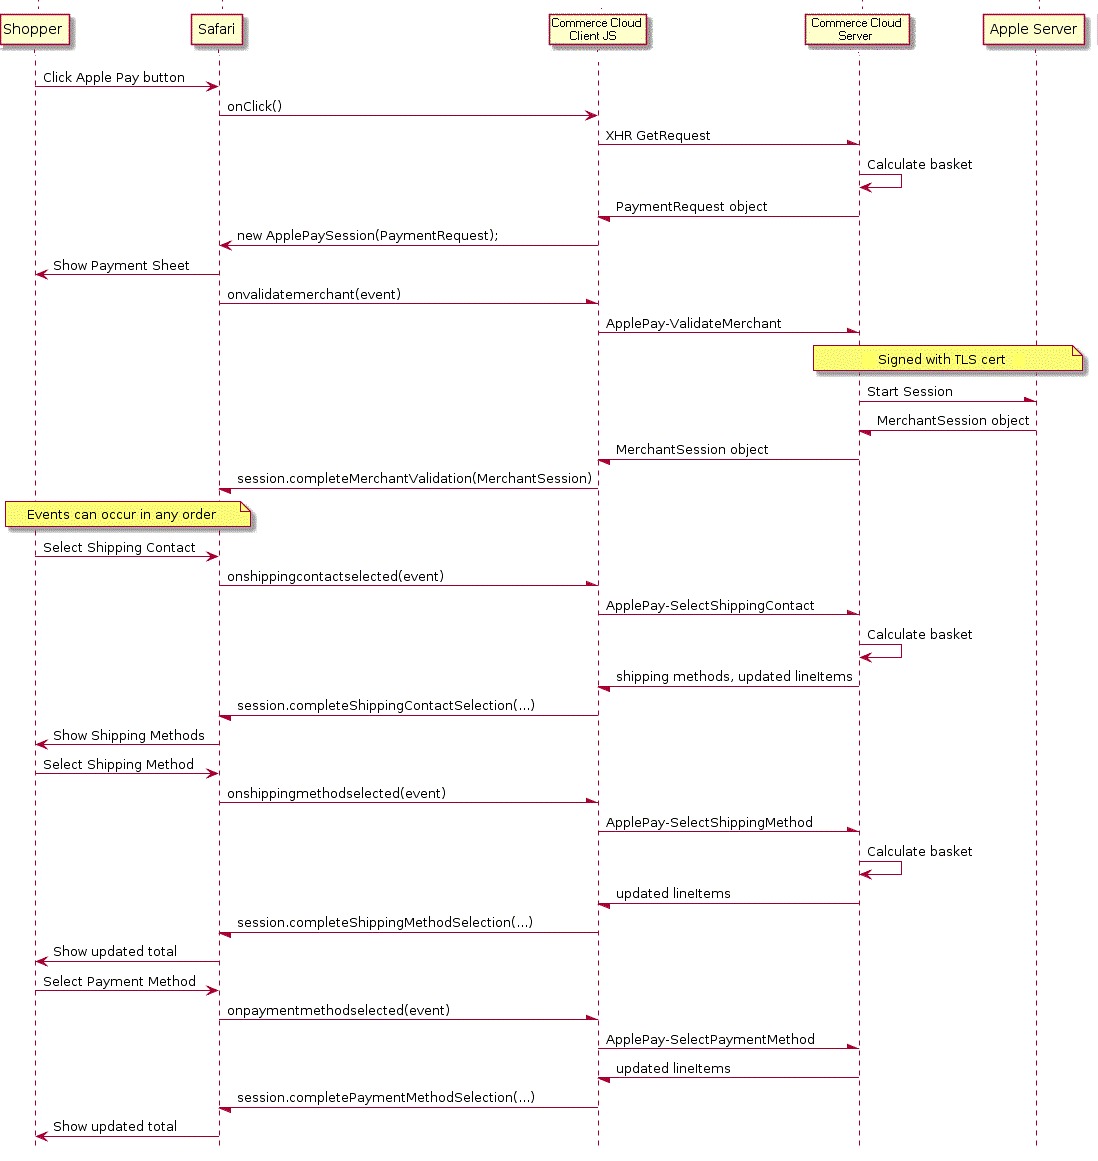
The Apple Pay payment processing authorization process looks as follows:

The following is an example of merchant validation:
- A valid merchant DOM event is dispatched to the session.
- The event has a validationURL property.
- Validation is performed.
- Call completeMerchantValidation.
The following is an example of authorizing payment:
Payments made using Apple Pay are processed in the usual manner through a merchant's PSP.
Use of Apple Pay doesn’t change fulfillment or customer service, and the like. The merchant continues to own the relationship with the customer, including all aspects of fulfillment and customer service.
Use of Apple Pay doesn’t change how returns are handled. The merchant’s business handles questions about orders or returns. The PSPs provide all transaction information needed for returns as for all other transactions.
As long as the merchant continues to use the same PSP, no changes are required to the order management system or the payment settlement process.
Existing B2C Commerce storefront capabilities or integrations are used for shipping and tax calculations. If the merchant uses B2C Commerce tax tables, for example, these tables work “out of the box” after enabling Apple Pay.
Chrome and other major browsers are retiring support for third-party cookies, which negates the effectiveness of the current pixel-based tracking needed for the Facebook Dynamic Ads feature. To address this change, Salesforce now provides server-side activity tracking for Facebook.
The Commerce Cloud server-side activity tracking for Facebook is only applicable to instances that use B2C Commerce to inject the Facebook pixel. Commerce Cloud Activity Tracking for Facebook isn’t adaptable to third-party tracking solutions that implement custom events to Facebook. Because custom events implemented by a third-party tracking solutions aren’t know to B2C Commerce, using the b2c commerce server side tracking isn’t a like for like replacement to the third party tracking.
When enabled in Business Manager, server-side activity tracking for Facebook completes the following process.
- Collects shopper viewPage, viewProduct, addToCart, and Finish checkout events using the existing Commerce Cloud Einstein tracking mechanism.
- Transforms the events to the Facebook format.
- In real time, sends the events to the Facebook Conversions API.
To enable the server-side activity tracking and use the Facebook Conversion API with your B2C Commerce instance, you must:
- Integrate your instance of B2C Commerce with a Facebook Business Manager account
- Enable Commerce Cloud Einstein tracking in your B2C Commerce instance
- Set up server-side tracking for Facebook in Business Manager
Set Up Server-Side Activity Tracking for Facebook
If you inject the Facebook pixel using B2C Commerce, you can set up server-side tracking for Facebook.
The Commerce Cloud server-side activity tracking for Facebook is only applicable to instances that use B2C Commerce to inject the Facebook pixel. Commerce Cloud Activity Tracking for Facebook isn’t adaptable to third-party tracking solutions that implement custom events to Facebook. Because custom events implemented by a third-party tracking solutions aren’t known to B2C Commerce, using the b2c commerce server side tracking isn’t a like for like replacement to the third-party tracking.
When server-side activity tracking for Facebook is enabled in Business Manager, B2C Commerce uses the existing Commerce Cloud Einstein tracking that collects shopper activities. Commerce Cloud Einstein data is converted to the Facebook format and sent server-side to Facebook.
Before you can enable server-side activity tracking, you must:
- Create a Facebook Business Manager Account
- Enable Commerce Cloud Einstein tracking
- Integrate your B2C Commerce instance with Facebook
-
In Business Manager, click App Launcher
 and then select Merchant Tools > Site > Site Preferences > Facebook.
The Facebook option is available only after you integrate your B2C Commerce instance with Facebook.
-
Under Local Configuration, select Enable Server-side Activity Tracking using Conversions API.
-
In Facebook Business Manager, navigate to Events manager, select the desired pixel, and click the Settings tab.
-
Under Conversions API, select Generate access token, and copy the token.
-
In Business Manager, navigate to Merchant Tools > Site > Site Preferences > Facebook, and paste the token in the Pixel Conversions API Token field.
-
Click Submit.
After configuring, data pushed to Facebook is available through your Facebook Business Manager account.
Salesforce B2C Commerce's integration of Facebook Dynamic Ads allows merchants to quickly and easily get started using the Facebook Dynamic Ads product.
The B2C Commerce integration to Facebook Dynamic Ads lets you embed the Facebook Tracking Pixel into your site, and generates a daily product catalog feed, which is exported to Facebook. Merchants can then create ads for products, which appear on Facebook. (When you place ads, you place them in Facebook not Business Manager.)
The Facebook Pixel integration to support Dynamic Ads now automatically tracks:
- PageView
- ViewContent
- AddToCart
- Purchase
To take advantage of tracking these events, Facebook must be enabled for your site and Facebook Pixel injection must also be enabled.
To enable Facebook integration, contact your Commerce Cloud Customer Support representative.
To complete integration:
-
Commerce Cloud Business Manager: (done by a user with Admin access to Facebook Business Manager)
-
Enable Facebook integration – pixel injection for the specified environment (production)
You can have only one instance of the Facebook pixel on your site. If you previously integrated the pixel, but want to use the Commerce Cloud integration, you must back out the current pixel code. Alternatively, if you want to continue with your existing pixel you can opt to export only the product catalog to Facebook. Disable Automatically inject Facebook Pixel code in site when you configure the feed in Business Manager.
-
Complete the Facebook Business Account settings – You must have access to this information (Facebook Business Account ID, Page ID, Pixel ID. Get this information from the Facebook Business Manager setup.)
-
Complete the setup of the Product Feed Configuration, including identifying which products are in the feed
You configure Facebook on each instance independently, or use site import or export to copy configuration data from instance to instance. You can export and import configuration data of the Facebook integration through site import or export. You can customize the feed by performing any necessary post processing using B2C Commerce hooks
-
-
Facebook Business Manager Activity:
-
Create a Facebook Business account and accept the Terms and Conditions.
Create the Facebook Business Account, the Facebook Page, the Facebook Ad Account, and the Facebook Pixel.
-
Create retargeting campaigns in Facebook Business Manager.
-
Buy Ads for this campaign
-
To integrate with Facebook, create a Facebook Business Manager account and a Facebook page.
-
Create the Facebook Business Manager account by browsing to https://business.facebook.com and clicking Create Account.
-
Create a Facebook page.
If you’ve already integrated with Facebook, you might have multiple Facebook "page" objects for which you would like to have one shared Facebook product catalog. However, because a product catalog is owned by a single Facebook page, you have to choose which page to integrate with B2C Commerce.
-
Ensure the daily product feeds to Facebook contain the merchant’s product catalog and match what is expected by Facebook.
-
Create a catalog in Facebook.
B2C Commerce enables you to write catalog feed files in a Facebook supported format. You can customize feed exports by using hooks, which you implement in a custom cartridge you create. Typically, products feeds reach Facebook Business Manager within 24 hours.
Configure at least one product feed to enable Facebook integration; the Run Now button doesn’t appear until you create a feed.
B2C Commerce injects the Facebook Pixel only if the site is online. If the site is offline or password protected, the Facebook Pixel isn’t injected.
-
Click App Launcher
 and then select Merchant Tools > site > Site Preferences > Facebook.
 -
Check Enable Integration.
-
Enter your site information. Ensure that products that are enabled, online, have both pricing and a Product Image View Type specified to be able to create a product feed.
| Option | Description |
| Facebook Business ID | ID of the Facebook business account, listed as "Business Manager ID" in Facebook Business Manager on the Business Info tab. You can create a Facebook Business Manager account at business.facebook.com. You select the Business ID from a list. |
| Facebook Page ID | The ID of the merchant's Facebook page. Provide an existing Facebook page to create a Facebook product catalog in Business Manager. Facebook limitation is one Page ID per Facebook product catalog. Facebook supports multiple product catalogs per page, but only one page per product catalog. You select the Page ID from a list. |
| Facebook Pixel ID | ID of the Facebook Pixel to inject in pages for the site. You create the Pixel ID in Facebook Ads Manager on the Facebook Pixel tab at business.facebook.com. Listed when you click View Pixel Code in Facebook Ads Manager on the Facebook Pixel tab. Facebook limitation is one Pixel ID per Facebook Ads account. You select the Facebook Pixel from the list. |
| Automatically inject Facebook Pixel Code in Site | If you already instrumented your storefront to use a Facebook Pixel, previous to implementing Commerce Cloud Facebook Dynamic Ads integration, and only want to export the product catalog without Commerce Cloud injecting Facebook Pixel code in your storefront then uncheck this option. |
| Enable Site Products for Feed by default | If all products for the site are enabled for Facebook feed, export by default. When unchecked, you explicitly configure which products are enabled for the site. When checked, you can configure which products are disabled for the site. When checked, products which are disabled explicitly at site level are ignored in the Facebook feed. This flag doesn't override the site specific value for Facebook Enabled: attribute on product. |
| Product Image View Type | Both DIS and external images are supported, as long as the product image model is used. Legacy thumbnail or alternative image sources like custom attributes are supported, but require custom code. If you don't enter a view type, or you enter a view type for which products don't have images of that type, those products are without images in the feed. Facebook skips products in the feed that are missing images. You can create custom code by writing a hook that sets the desired image for some or all products. Make sure that the type matches the types in the catalog. |
| Color Variation Attribute ID | Both local and shared variation attributes are supported through this configuration; use of two or more variation attributes requires custom code. |
| Size Variation Attribute ID | Both local and shared variation attributes are supported through this configuration; use of two or more variation attributes requires custom code. |
| Material Variation Attribute ID | Both local and shared variation attributes are supported through this configuration; use of two or more variation attributes requires custom code. |
| Pattern Variation Attribute ID | Both local and shared variation attributes are supported through this configuration; use of two or more variation attributes requires custom code. |
| Notification Email Address | Email address to send status of catalog feed. |
| Notification Status | Select the job statuses for which to receive feed job notifications. The choices are error, exception, and success, similar to the notification choices for custom jobs. |
| Start Time | Time of day, in site time zone, to run the Facebook catalog feed export. To run a feed immediately, click Run Now. This feature is intended for testing changes to catalog data and custom hook implementations as part of feed development; the button isn't available on Production instances. |
| Feed ID | A name assigned to the feed. It can be anything, and does not affect the set up in Facebook in any way. Does _not_ appear after B2C Commerce creates the feed, but is assigned by the user. |
| Facebook Product Catalog ID | Appears after B2C Commerce creates the catalog. Is pulled by B2C Commerce through API calls when creating the feed. |
| Facebook Product Feed ID | Appears after B2C Commerce creates the product feed. Is pulled by B2C Commerce through API calls when creating the feed. |
| Country Code | Two-digit country code where the products in the Facebook product feed for the Facebook product catalog can be sold. There’s only one Facebook page per site. |
| Product Link Redirect Action | Select whether shoppers who click Facebook Dynamic Ads view the product page or add the product to the cart by default. URL parameters added when creating the ad in Facebook are now preserved in the redirect URL. As previously, you can provide custom links in the Facebook feed to override the default behavior. |
| Channel Type | Select either Facebook Ads or Instagram Commerce. |
-
Click Submit.
-
To run a feed immediately, click Run Now.
When you run a feed, Business Manager shows the status of the product feed, including the number of products in the Facebook catalog, and any errors or warnings raised by Facebook for the products in the feed. The errors and warnings include the cause of the problem and how to fix them. Typically, any product with an error isn’t exported. Files with warnings are often exported, but still need attention.
-
To download the most recent export log file, click Download Log File.
-
To configure a feed:
-
Click + next to the existing feed tabs.
-
Enter the
Feed ID. -
Select the Channel Type, which specifies whether the feed is for use in Facebook or Instagram.
-
Enter the
Facebook Product Feed ID. -
Select the Country Code.
-
Select the Product Redirect Action, which specifies whether to add the product to the cart or show the Product Detail Page when the customer clicks the product link.
-
Click Submit.
-
You can specify whether to include products on a site when you configure the Facebook product feed.
Before you configure your Facebook feed, make sure your products are eligible. Products that meet the following criteria are eligible for Facebook feed.
- Product isn’t:
- A base product
- A product bundle
- A product set
- An option product
- Base product or variation isn’t disabled at the site level
- Product is accessible from the storefront
To include or exclude a product from the product feed:
- Click App Launcher
 and then select Merchant Tools > site > Products and Catalogs > Products.
 - Search for and select the product.
- To change the default for this product, click All Site Values.
- Specify the default value for this product for all sites.
- To change the default for this product on an individual site, unselect Use Default and select the value to use for that site.
- Click Apply.
The following fields can be included in the product feed for any item for sale on Facebook. The values in the Commerce Cloud Value column represent what is copied into your feed by default without custom code.
Salesforce B2C Commerce doesn't upload an empty Facebook catalog feed export file. The Facebook export logs indicate when the catalog feed export job resulted in an empty file. An empty file can occur when no products are enabled for Facebook. Data from the catalog feed that is known to be invalid, for example, products missing a title, description, or images, are now included in the feed export file. The Facebook Business Manager product shows what data is missing from which products in the feed. The B2C Commerce export logs for the Facebook feed contain warnings about products missing data required by Facebook.
To consistently import products, Facebook requires the quote (") characters in feed content, such as product names and descriptions, be doubled ("") and surrounded by single quotes. B2C Commerce automatically makes these changes for Facebook catalog feed exports.
| Facebook Column | Commerce Cloud Value | Description | Required |
| id | Product.getSKU() | Unique identifier for this item Not customizable. | Yes |
| availability | FacebookProduct.AVAILABILITY_PREORDER FacebookProduct.AVAILABILITY_IN_STOCK FacebookProduct.AVAILABILITY_IN_STOCK | Whether the item is in stock. Acceptable values are: in stock, out of stock, preorder, available for order, and discontinued. | Yes |
| condition | FacebookProduct.CONDITION_NEW | Accepted values are new, refurbished, or used. | Yes |
| description | Product.getShortDescription() | Falls back to base product value for variation product with null value. Line breaks, tab characters, and HTML tags are removed. | Yes |
| image_link | Product.getImageModel().getImages(viewType).get(0) null | viewType is the configured product_image_view_type in the Facebook configuration. If there’s no image_link, the product is excluded from the catalog feed. | Yes |
| additional_image_link | Product.getImageModel().getImages(viewType) null | viewType is the configured product_image_view_type in the Facebook configuration. | No |
| link | Absolute URL to \_\_SYSTEM\_\_Facebook-ProductRedirect pipeline with parameter pid=Product.getSKU() | Customer can customize the r parameter value, not the rest of the URL. Because an r parameter isn't provided by default, the redirect is to Cart-Show. | Yes |
| title | Product.getName() | Falls back to base product value for variation product with null value. | Yes |
| price | Product.getPriceModel().getPrice().getValue() null | The cost of the item and currency. Specify currency as the ISO 4217 currency code, for example, 9.99 USD. If the price is null, the product is excluded from the catalog feed. | Yes |
| gtin | Product.getUPC() | The Global Trade Item Number (GTINs) can include UPC, EAN, JAN, and ISBN. gtin, mpn, or brand is required. | Yes |
| mpn | Product.getManufacturerSKU() | The number which uniquely identifies the product to its manufacturer. gtin, mpn, or brand is required. | Yes |
| brand | Product.getBrand() | The name of the brand. gtin, mpn, or brand is required. | Yes |
| color | Product.getVariationModel().getVariationValue(product, variationAttribute).getDisplayValue() null | variationAttribute is the attribute with ID color_variation_attribute_id in the Facebook configuration. If color is null, the value is blank in the feed. | No |
| size | Product.getVariationModel().getVariationValue(product, variationAttribute).getDisplayValue() null | variationAttribute is the attribute with ID size_variation_attribute_id in the Facebook configuration. If size is null, the value is blank in the feed. | No |
| expiration_date | Product.getValidTo() | Expiration date of the product in the catalog. | No |
| gender | null | Acceptable values are male, female, and unisex. | No |
| item_group_id | Product.getMasterProduct().getSKU() null | If this item is a variation product, all items in a group should share an item_group_id. If null, the value is blank in the feed. | No |
| google_product_category | null | Predefined values from Google's product taxonomy. For example, Apparel & Accessories > Clothing > Dresses. If null, the value is blank in feed. | No |
| material | Product.getVariationModel().getVariationValue(product, variationAttribute).getDisplayValue() null | The material or fabric that a product is made out of. If null, the value is blank in the feed. | No |
| pattern | Product.getVariationModel().getVariationValue(product, variationAttribute).getDisplayValue() null | The pattern or graphic print featured on a product. If null, the value is blank in the feed. | No |
| product_type | Category path from child of root to product category: Mens>Clothing>Shorts If product is assigned to root category, its name alone is used: Apparel | No | |
| sale_price | null | ||
| sale_price_effective_date | null | ||
| shipping | null | ||
| shipping_weight | null | ||
| shipping_size | null | ||
| custom_label_0 | null | ||
| custom_label_1 | null | ||
| custom_label_2 | null | ||
| custom_label_3 | null | ||
| custom_label_4 | null |
dw.extensions.facebook.FacebookProductdefines a data structure that contains the Facebook representation of a B2C Commerce product. The product is passed to a hook you can use to customize the default transformation of a product in the B2C Commerce schema to the Facebook catalog feed export schema.
In addition, a customization hook, com.demandware.plugin.facebook.FacebookFeedHooks, is included for optional implementation in customer custom cartridges. This interface defines the hooks that can be implemented to customize the data included in Facebook feed exports.
|Name|Signature|Description| |dw.extensions.facebook.feed.transformProduct|dw.system.Status transformProduct( dw.catalog.Product product, dw.extensions.facebook.FacebookProduct facebookProduct )|Called after default transformation of given Commerce Cloud product to Facebook product as part of the catalog feed export.|
The feed export generates a Facebook tab-delimited file. You can implement the hooks described previously to customize the default transformation from Product system attributes.
The cartridge that contains the hook must be in the site cartridge path (not the Business Manager cartridge path).
Example
Following is an example of how to define a hook to map product attributes to Facebook product feed attributes:
-
In a custom cartridge, include a file package.json at the root (sibling to the "cartridge" folder containing "scripts", "templates", and the like, with this content:
If a custom cartridge registers other custom hook implementations, the JSON file already exists.
-
In that custom cartridge, include a file hooks.json in "cartridge/scripts" with this content:
If a custom cartridge already registers other custom hook implementations, instead of performing this step, add the object with "name" and "script" to the existing array of registered hooks, for example:
-
In that custom cartridge, include a file facebook.js in the cartridges/scripts folder with this content:
You can put whatever code you want in the exports.transformProduct function. The code in the example is just to show how it works.
The parameters to the hook function are specified in the FacebookFeedHooks Script API documentation:
- The first parameter is a standard dw.catalog.Product API object to be mapped
- The second parameter is a dw.extensions.facebook.FacebookProduct API object
- The FacebookProduct is an object representation of a row in the feed.
- The Script API documentation for FacebookProduct specifies what attributes it contains, thus what we support to be included in a Facebook product feed.
- There are constants available in FacebookProduct for the values that Facebook supports for columns with enumerated values, such as condition ("new", "refurbished", and "used").
- The FacebookProduct passed to this function already has values set based on a default mapping B2C Commerce performs. A developer can set values in a FacebookProduct to override the B2C Commerce default mapping, or supply a value for a field that Commerce Cloud doesn't map by default, such as shipping weight or custom label 0-4. Consult Facebook documentation for what the fields mean, and the constraints placed on them by Facebook.
- The hook function is only called for products that are enabled for Facebook in Business Manager. If the Enabled checkbox is checked in the Facebook cofiguration page in Business Manager, all products in the storefront catalog are included in the feed except products that are explicitly excluded using the site-specific system attribute named "FacebookEnabled". If unchecked, products to include in the feed must be explicitly included using the "FacebookEnabled" attribute.
- The Facebook feed export job automatically skips rows that don't have the values required per Facebook documentation. If a row is skipped for this reason, its SKU is logged in the export job log. These logs are in the Impex logs area like other export logs. You don't have to use the script name "facebook.js" to contain the hook. However, if you already have hooks in your custom cartridge that are all implemented in an existing script file, you could add this Facebook code in that script file and not create a new one.
An out of the box feature is available for Facebook and Instagram shopping integration. To activate the feature, contact Salesforce Support.
Use the Facebook and Instagram module to improve product discoverability, retarget existing shoppers, acquire new shoppers, and direct shoppers to your storefront for checkout. The module is built from a set of Business Manager cartridges and is included in the Social Channels Extension. With this integration, you can:
- Launch the Meta Business Extension (MBE) tool from Business Manager.
- Publish and sync an entire site catalog or a specific category of products into Facebook and Instagram, and apply catalog refreshes as frequently as every 15 minutes with no additional steps needed.
- Publish the full category tree into Facebook and Instagram.
- Synchronize promotions with Facebook and Instagram, so that Instagram shoppers can make use of the same promotions set up for your storefront.
- Synchronize shipping profiles, so shoppers can place orders on Instagram using their shipping information from your storefront.
- Synchronize orders and order statuses between Meta and Salesforce, so that the shopper can view and get accurate order updates from Meta.
This integration does not support sites that use the Gross Tax Policy.
Only existing customers can access some of the links on this page. Visit Salesforce Commerce Cloud GitHub Repositories and Access for information about how to get access to the Commerce Cloud repositories.
Before you integrate with Facebook and Instagram:
- Contact B2C Commerce Support to enable the Facebook feature toggle.
- Ensure you have met the SFCC Prerequisites.
- Create a Meta Developer Account.
- Optional: Create a Meta Business Account.
- This step is optional because you can add your developer account to a pre-existing business account before starting the onboarding process.
- Make sure you have:
- A Salesforce Commerce Cloud site catalog
- A Salesforce Commerce Cloud business user account
-
Clone the Instagram repository, which requires access to the Salesforce CommerceCloud repositories on GitHub. If you don’t have a GitHub account, see Salesforce Commerce Cloud GitHub Repositories and Access.
-
Sign in to Salesforce CommerceCloud GitHub.
-
Search for the Social Channels Integrations repository, and click Clone.
-
Install Dependencies and Create dw.json. If you installed B2C Commerce using b2c-tools, this step has already been completed. See Install Social Integrations using b2c-tools.
-
From the root of the
social_channel_integrationsrepo, manually upload the following Facebook and Instagram cartridges using the instructions in Uploading SFCC Cartridges. If you installed B2C Commerce using b2c-tools, this step has already been completed. See Install Social Integrations using b2c-tools.int_social_base: This cartridge contains code shared by all the social channels. Apply this cartridge to both the storefront and Business Manager cartridge paths.bm_socialchannels: This cartridge contains the Business Manager controllers/UI logic for a new Business Manager extension that integrates with Facebook and Instagram.int_instagram: This cartridge contains the logic to integrate with Facebook and Instagram. It contains the service definitions, logic to handle the customer object that stores the Facebook and Instagram details, and the jobs which sync the B2C Commerce product categories, order, etc with Facebook and Instagram.int_social_checkout: This cartridge contains the logic to synchronize orders and order statuses between Facebook/Instagram and Salesforce.bc_library: This library contains all shared code for various demandware community projects. Ported from demandware-library.bm_socialfeeds: The custom feeds Business Manager module allows merchants to easily create catalog feeds according to their needs. The framework uses a powerful generic export model which ensures reasonable performance while more feeds are added. The extension comes with a BM UI which is easily usable and does not require any technical background.int_socialfeeds: The custom feeds module allows merchants to easily create catalog feeds according to their needs. The framework uses a powerful generic export model which ensures reasonable performance while more and more feeds are added.In order to upload cartridges via npm scripts, you must replicate the dw.json in the
social_channels,social_checkout, andsocial_feedsdirectories. The npm scripts attempt to create a symlink, but you might need to manually create this symlink for your operating system.
-
Update the Facebook and Instagram cartridge paths:
If you installed via b2c-tools, this step has already been completed. See Install Social Integrations using b2c-tools.
- Update your Business Manager cartridge path:
- Log in to Business Manager.
- Click App Launcher
 and then select Administration > Sites > Manage Sites.
 - Within Business Manager Site, select the Manage the Business Manager site link.
- Select the Settings tab.
- In the Cartridges field, add paths for the following cartridges, for example:
int_socialfeeds:bm_socialfeeds:bc_library:bm_socialchannels:int_social_base.int_socialfeedsbm_socialfeedsbc_librarybm_socialchannelsint_social_baseint_instagramint_social_checkout
- Update your Site cartridge path:
- Log in to Business Manager.
- Click App Launcher
 and then select Administration > Sites > Manage Sites.
 - Select the site that you want to use, for example: site
RefArch. - Select the Settings tab.
- In the Cartridges field, add the following new cartridges so that they precede
app_storefront_base. For example:int_instagram:int_socialfeeds:int_social_checkout:bc_library:int_social_base:app_storefront_base.int_socialfeedsbm_socialfeedsbc_librarybm_socialchannelsint_social_baseint_instagramint_social_checkout
- Determine if you are using Salesforce OMS, and add the final required cartridge according to your environment:
int_order_somfor Salesforce OMS users. The final path should look like:int_order_som:int_instagram:int_socialfeeds:int_social_checkout:bc_library:int_social_base:app_storefront_base.int_order_no_omsfor non Salesforce OMS users. The final path should look like:int_order_no_oms:int_instagram:int_socialfeeds:int_social_checkout:bc_library:int_social_base:app_storefront_base.- For details, see OMS documentation.
- Update your Business Manager cartridge path:
Meta requires the access token from the Account Manager (AM) client credentials to access feed files from Web-based Distributed Authoring and Versioning (WebDAV).
- Create an Account Manager API Client ID for this integration using the instructions in Create an API Client.
- Ensure that you have the following required environments on the Salesforce Commerce API role:
abcd.001.dx.commercecloud.salesforce.comabcd.002.dx.commercecloud.salesforce.comabcd.003.dx.commercecloud.salesforce.comabcd.004.dx.commercecloud.salesforce.com(SANDBOXES).ccdx.abcd.demandware.net
- Add the following scopes:
sfcc.catalogs.rwsfcc.orders.rwsfcc.promotionssfcc.promotions.rw
If you installed B2C Commerce via b2c-tools, this step has already been completed. See Install Social Integrations using b2c-tools.
-
To import Facebook and Instagram common data, perform the steps in Import and Update Configuration Data -> Import Common Data.
-
To import Facebook and Instagram global data:
- Zip the data/instagram/instagram_global folder by running
npm run data:instagram:global:zipfrom the root of the repo, or manually zipping up the folder. Pay attention todata/instagram/instagram_global/sites/{SiteID}, this should be your current site ID. - Log in to Business Manager.
- Click App Launcher
 and then select Administration > Site Development > Site Import & Export.
 - Select Browse.
- Select the
instagram_global.zipfile from the root of the repo. - Select Upload.
- Select
instagram_global.zip. - Select Import.
- Select OK.
- Zip the data/instagram/instagram_global folder by running
If you installed B2C Commerce via b2c-tools, this step has already been completed. See Install Social Integrations using b2c-tools.
- Log in to Business Manager.
- Click App Launcher
 and then select Administration > Organization > Roles & Permissions.
 - Select the role of your Business Manager user(s).
- Select the Business Manager Modules tab.
- Select the specified Sites under Sites, for example: RefArch and RefArchGlobal.
- Select Apply.
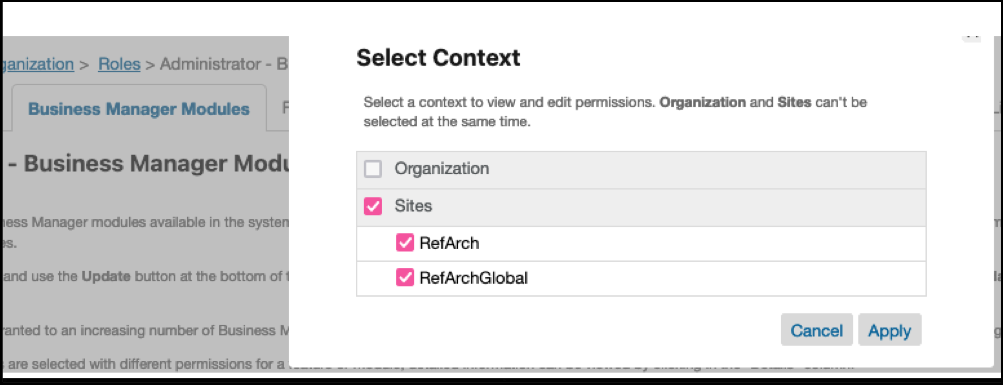
- For Custom Objects, select the write checkbox for
Custom Object Editor.
- For Social Channels, select the write checkbox for
Facebook and Instagram.
- Select Update.
- In the Business Manager Modules tab, switch the context to Organization.
- Select Apply.
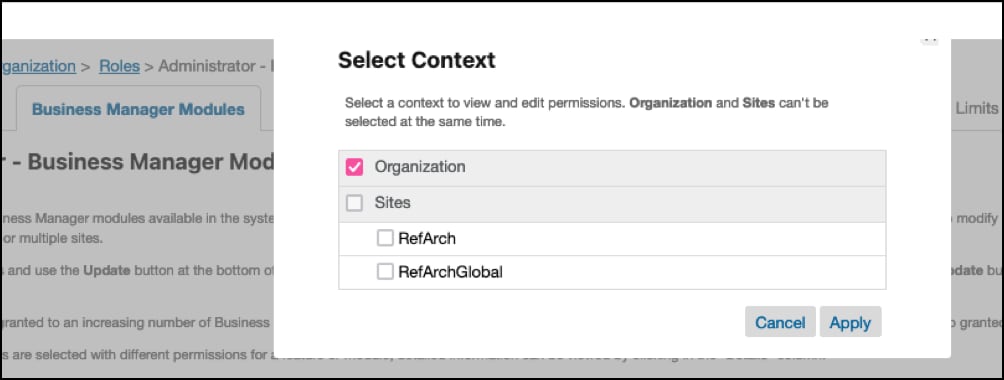
- For Operations, select the write checkbox for
Jobs. - For Operations, select the write checkbox for
Job History.
- For Social Product Feeds, select the write checkbox for Social Product Feeds Definition.

- Select Update.
- Select the WebDAV Permissions tab.
- Scroll to the Impex section.
- Select the Manage custom folders link.
- In the text box, enter:
src/feeds/export.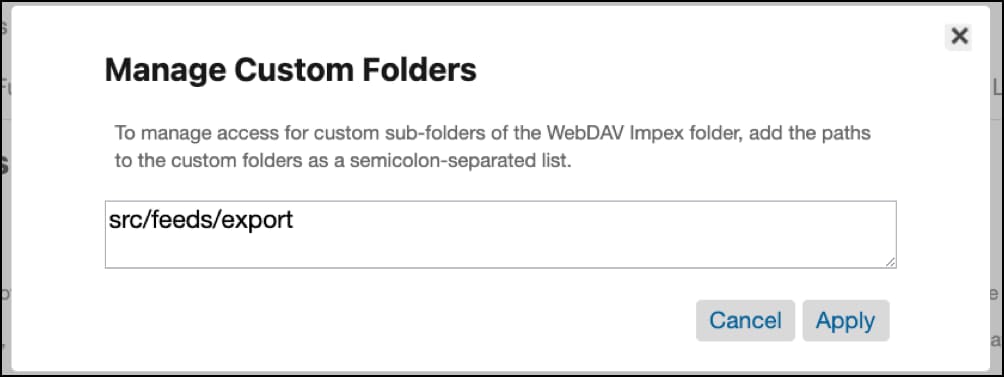
- Select Apply.
- For Impex, select the write checkbox for
/impex/src/feeds/export/*.
- Select Update.
If you installed via b2c-tools, this step has already been completed. See Install Social Integrations using b2c-tools.
Follow the steps in Configure WebDAV Permissions.
Use the same client ID from the previous step to add the following configuration to your sandbox OCAPI settings. Meta uses this permission information to trigger the product feed jobs when needed.
- Log in to Business Manager.
- Click App Launcher
 and then select Administration > Site Development > Open Commerce API Settings.
 - Select
Datain theSelect Typefield, and let the context asGlobal (organization-wide).
- Paste and merge the following configuration information for your
clientID:For more information, refer to Instagram Shopping with Commerce Cloud.
Enable SCAPI Hook execution in Salesforce Commerce Cloud Business Manager so that you can create a basket or place an order through OCAPI endpoints when the access token is generated through SCAPI TSOB:
- Click App Launcher
 and then select Administration > Global Preferences > Feature Switches.
 - Check the
Enable Salesforce Commerce API Hook Executionbox.
- Select Apply.
Before continuing, verify that you have completed the required modifications to your environment:
- The custom cartridges provided must be available inside your active code version.
- The Cartridge Path for Business Manager must be updated to include the required cartridges:
int_socialfeeds:bm_socialfeeds:bc_library:bm_socialchannels:int_social_base
- The Cartridge Path for your current Site must be updated to include the required cartridges:
- for Salesforce OMS users:
int_order_som:int_instagram:int_socialfeeds:int_social_checkout:bc_library:int_social_base:app_storefront_base - for non Salesforce OMS users:
int_order_no_oms:int_instagram:int_socialfeeds:int_social_checkout:bc_library:int_social_base:app_storefront_base
- for Salesforce OMS users:
- The metadata system-objecttype-extensions file from data/common folder must be imported (
Basket,Order,ProductLineItemandShippingLineItemextensions). - The metadata custom-objecttype-definitions file from data/common folder must be imported (
SalesChannelFeedConfigandSocialChannelsdefinitions). - The metadata system-objecttype-extensions file from data/instagram/instagram_global folder must be imported (
BasketandOrderextensions likeOpt-Inattributes). - Permissions on Administration > Organization > Roles & Permissions > Business Manager Modules (organization context) to view the feed definition module in the required profiles must be configured.
- Permissions on Administration > Organization > Roles & Permissions > Business Manager Modules (site context) to view the onboarding module in the required profiles must be configured.
- Permissions on Administration > Organization > Roles & Permissions > WebDAV Permissions to WebDAV folders for the required profiles must be configured.
- Permissions on Administration > Organization > WebDAV Client Permissions to the integration Client ID access to WebDAV folders must be configured.
- Permissions on Administration > Site Development > Open Commerce API Settings to the integration Client ID for jobs must be configured.
- The
Enable Salesforce Commerce API Hook Executionon Administration > Global Preferences > Feature Switches must be checked to allow hook executions on basket and order requests. - The payment method
META_SOCIAL_PAYmust be imported to your current site . - The custom object SalesChannelFeedConfig
instagram-feedor a similar one must be imported and updated to configure a feed template for your current site. - The jobs on Administration > Operations > Jobs, including
Instagram-ExportCategories,Instagram-ExportFullFeeds,Instagram-ExportOrders,Instagram-ExportPartialFeeds,Instagram-ExportPromotionsandInstagram-ExportShippingProfiles, must be imported and configured for your current site scope and preferences if you are using multisites, desired schedule, and so on. - The services on Administration > Operations > Services, including
facebook.graphandsom.order.detailsif you are using Salesforce OMS, must be imported.
- Log in to Business Manager.
- In Business Manager, click App Launcher
 and then select Merchant Tools > Social Channels > Facebook and Instagram.
 - Select the Accept Terms button.
- Fill out the form. If you need help, refer to the Salesforce B2C Commerce Details or select the small help icon for a field to learn about the required values.
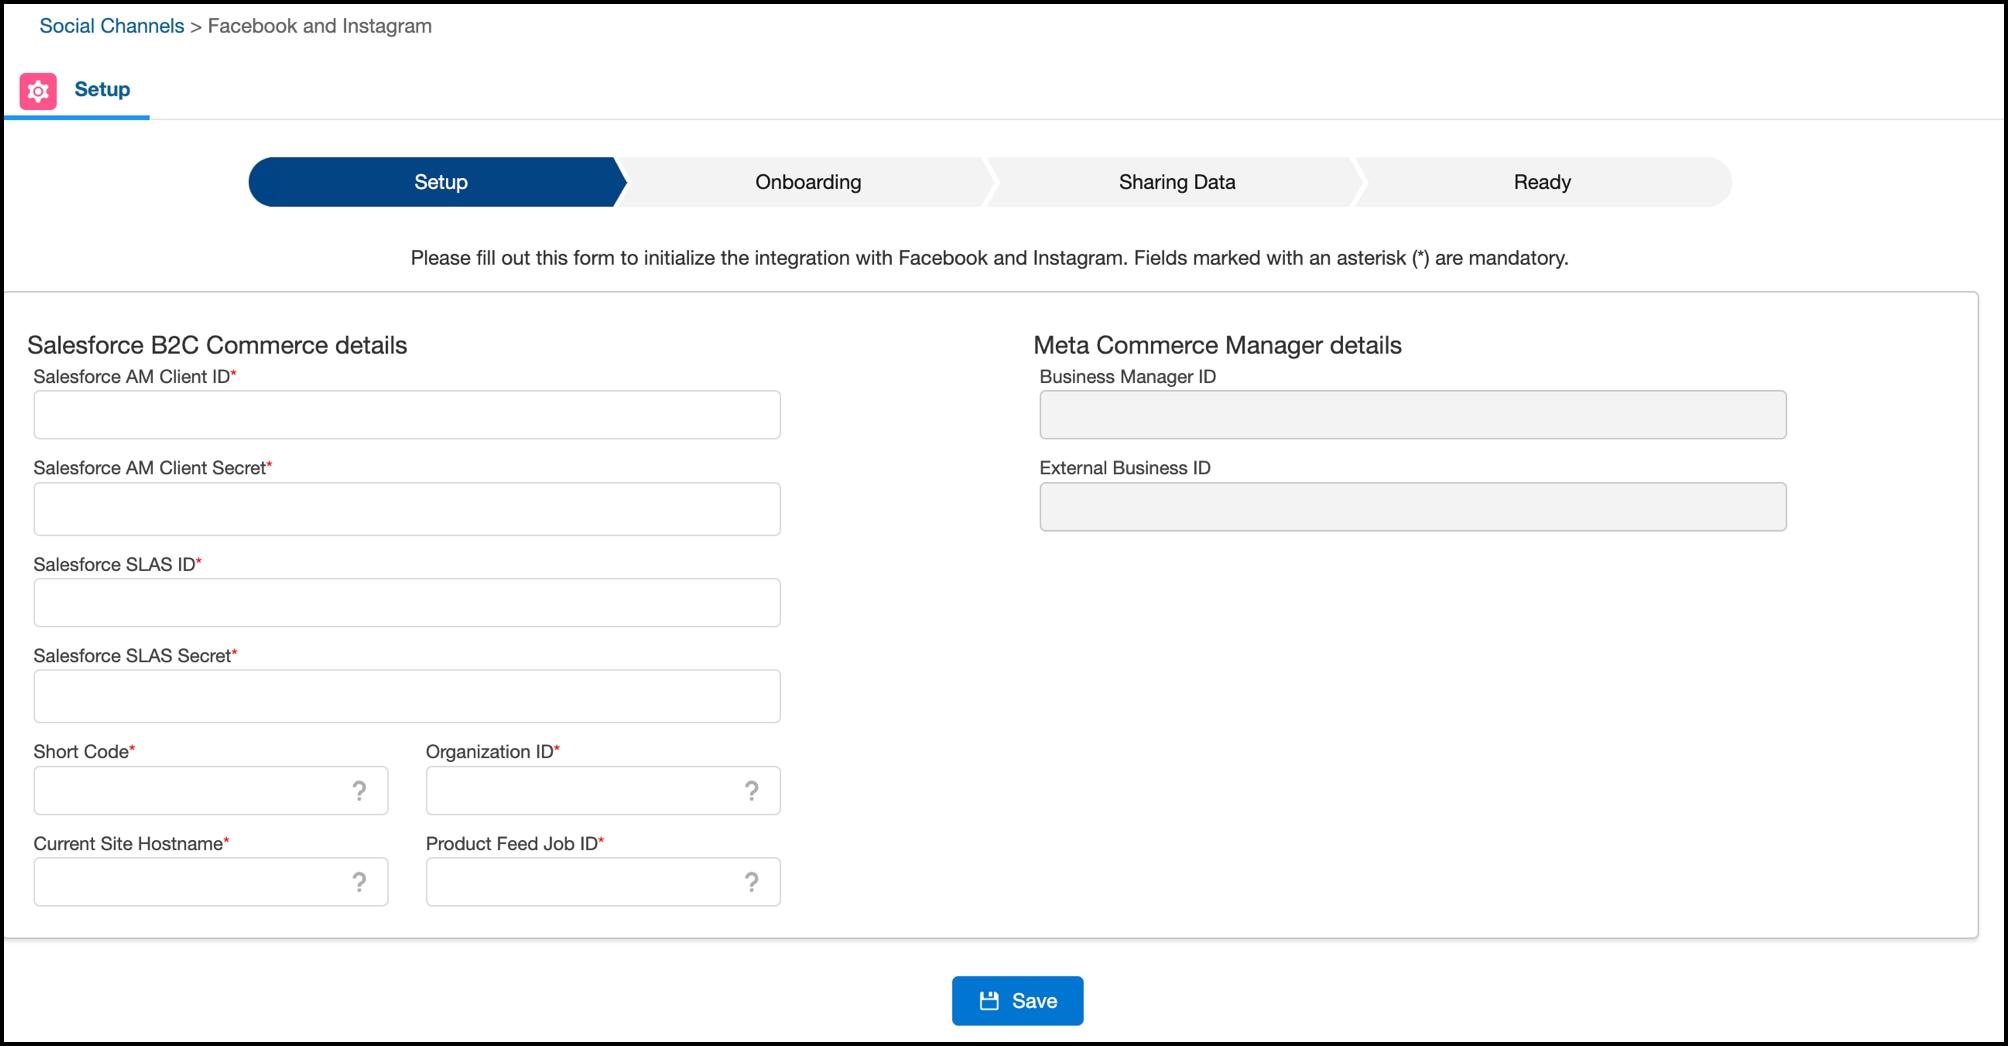
- Select Save.
- If all required fields are defined and valid, the Onboarding tab is displayed.
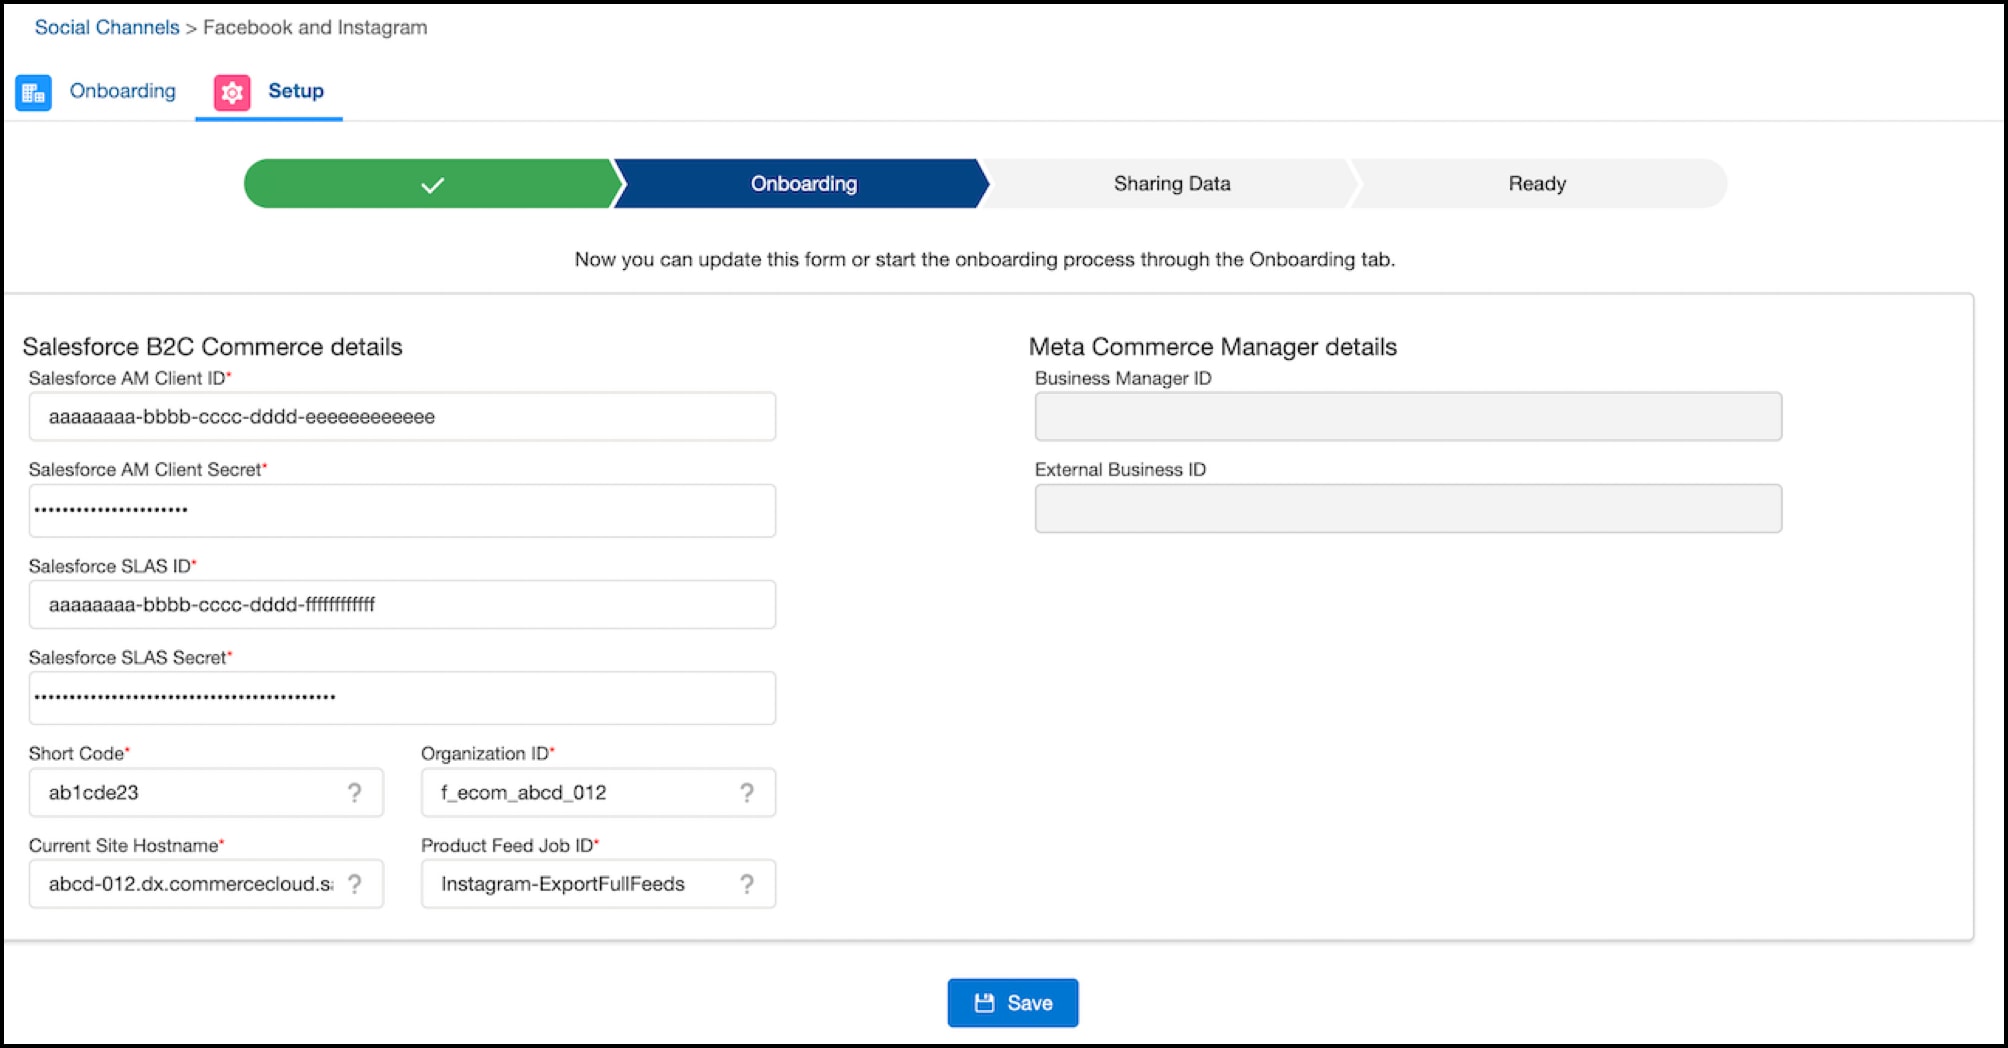
- Select Get Started.
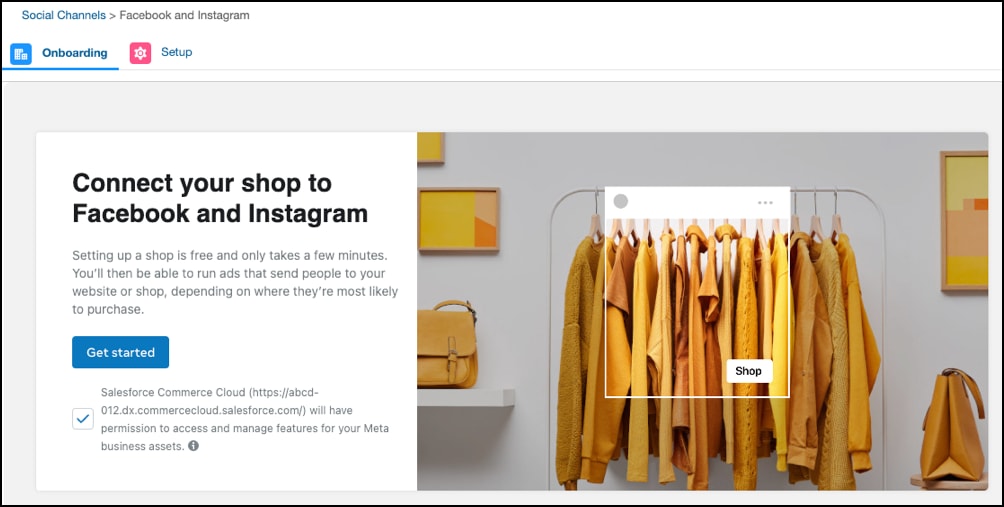
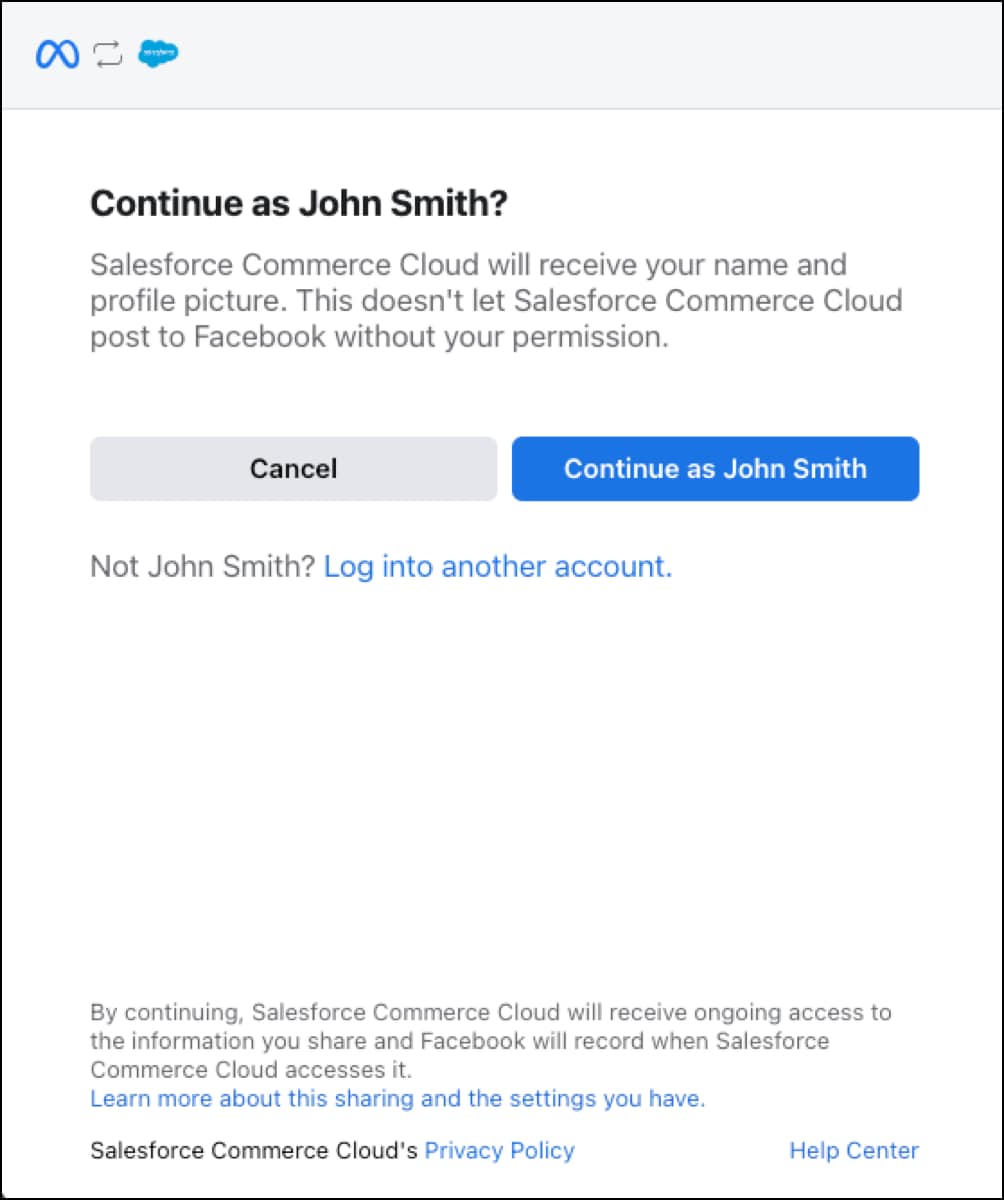
- Log in with your Facebook account (this should be part of a Meta Business Account).
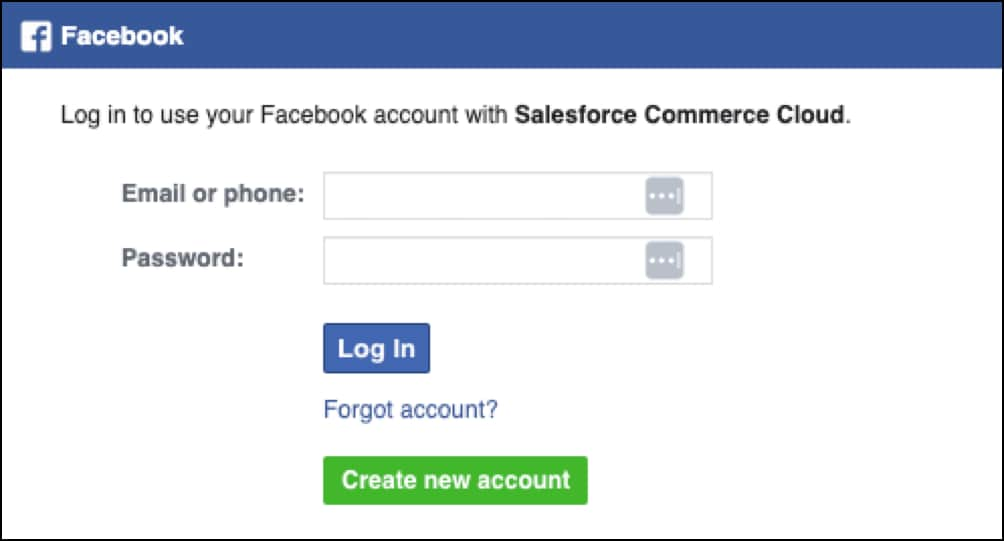
- Select Continue as [Your Name].
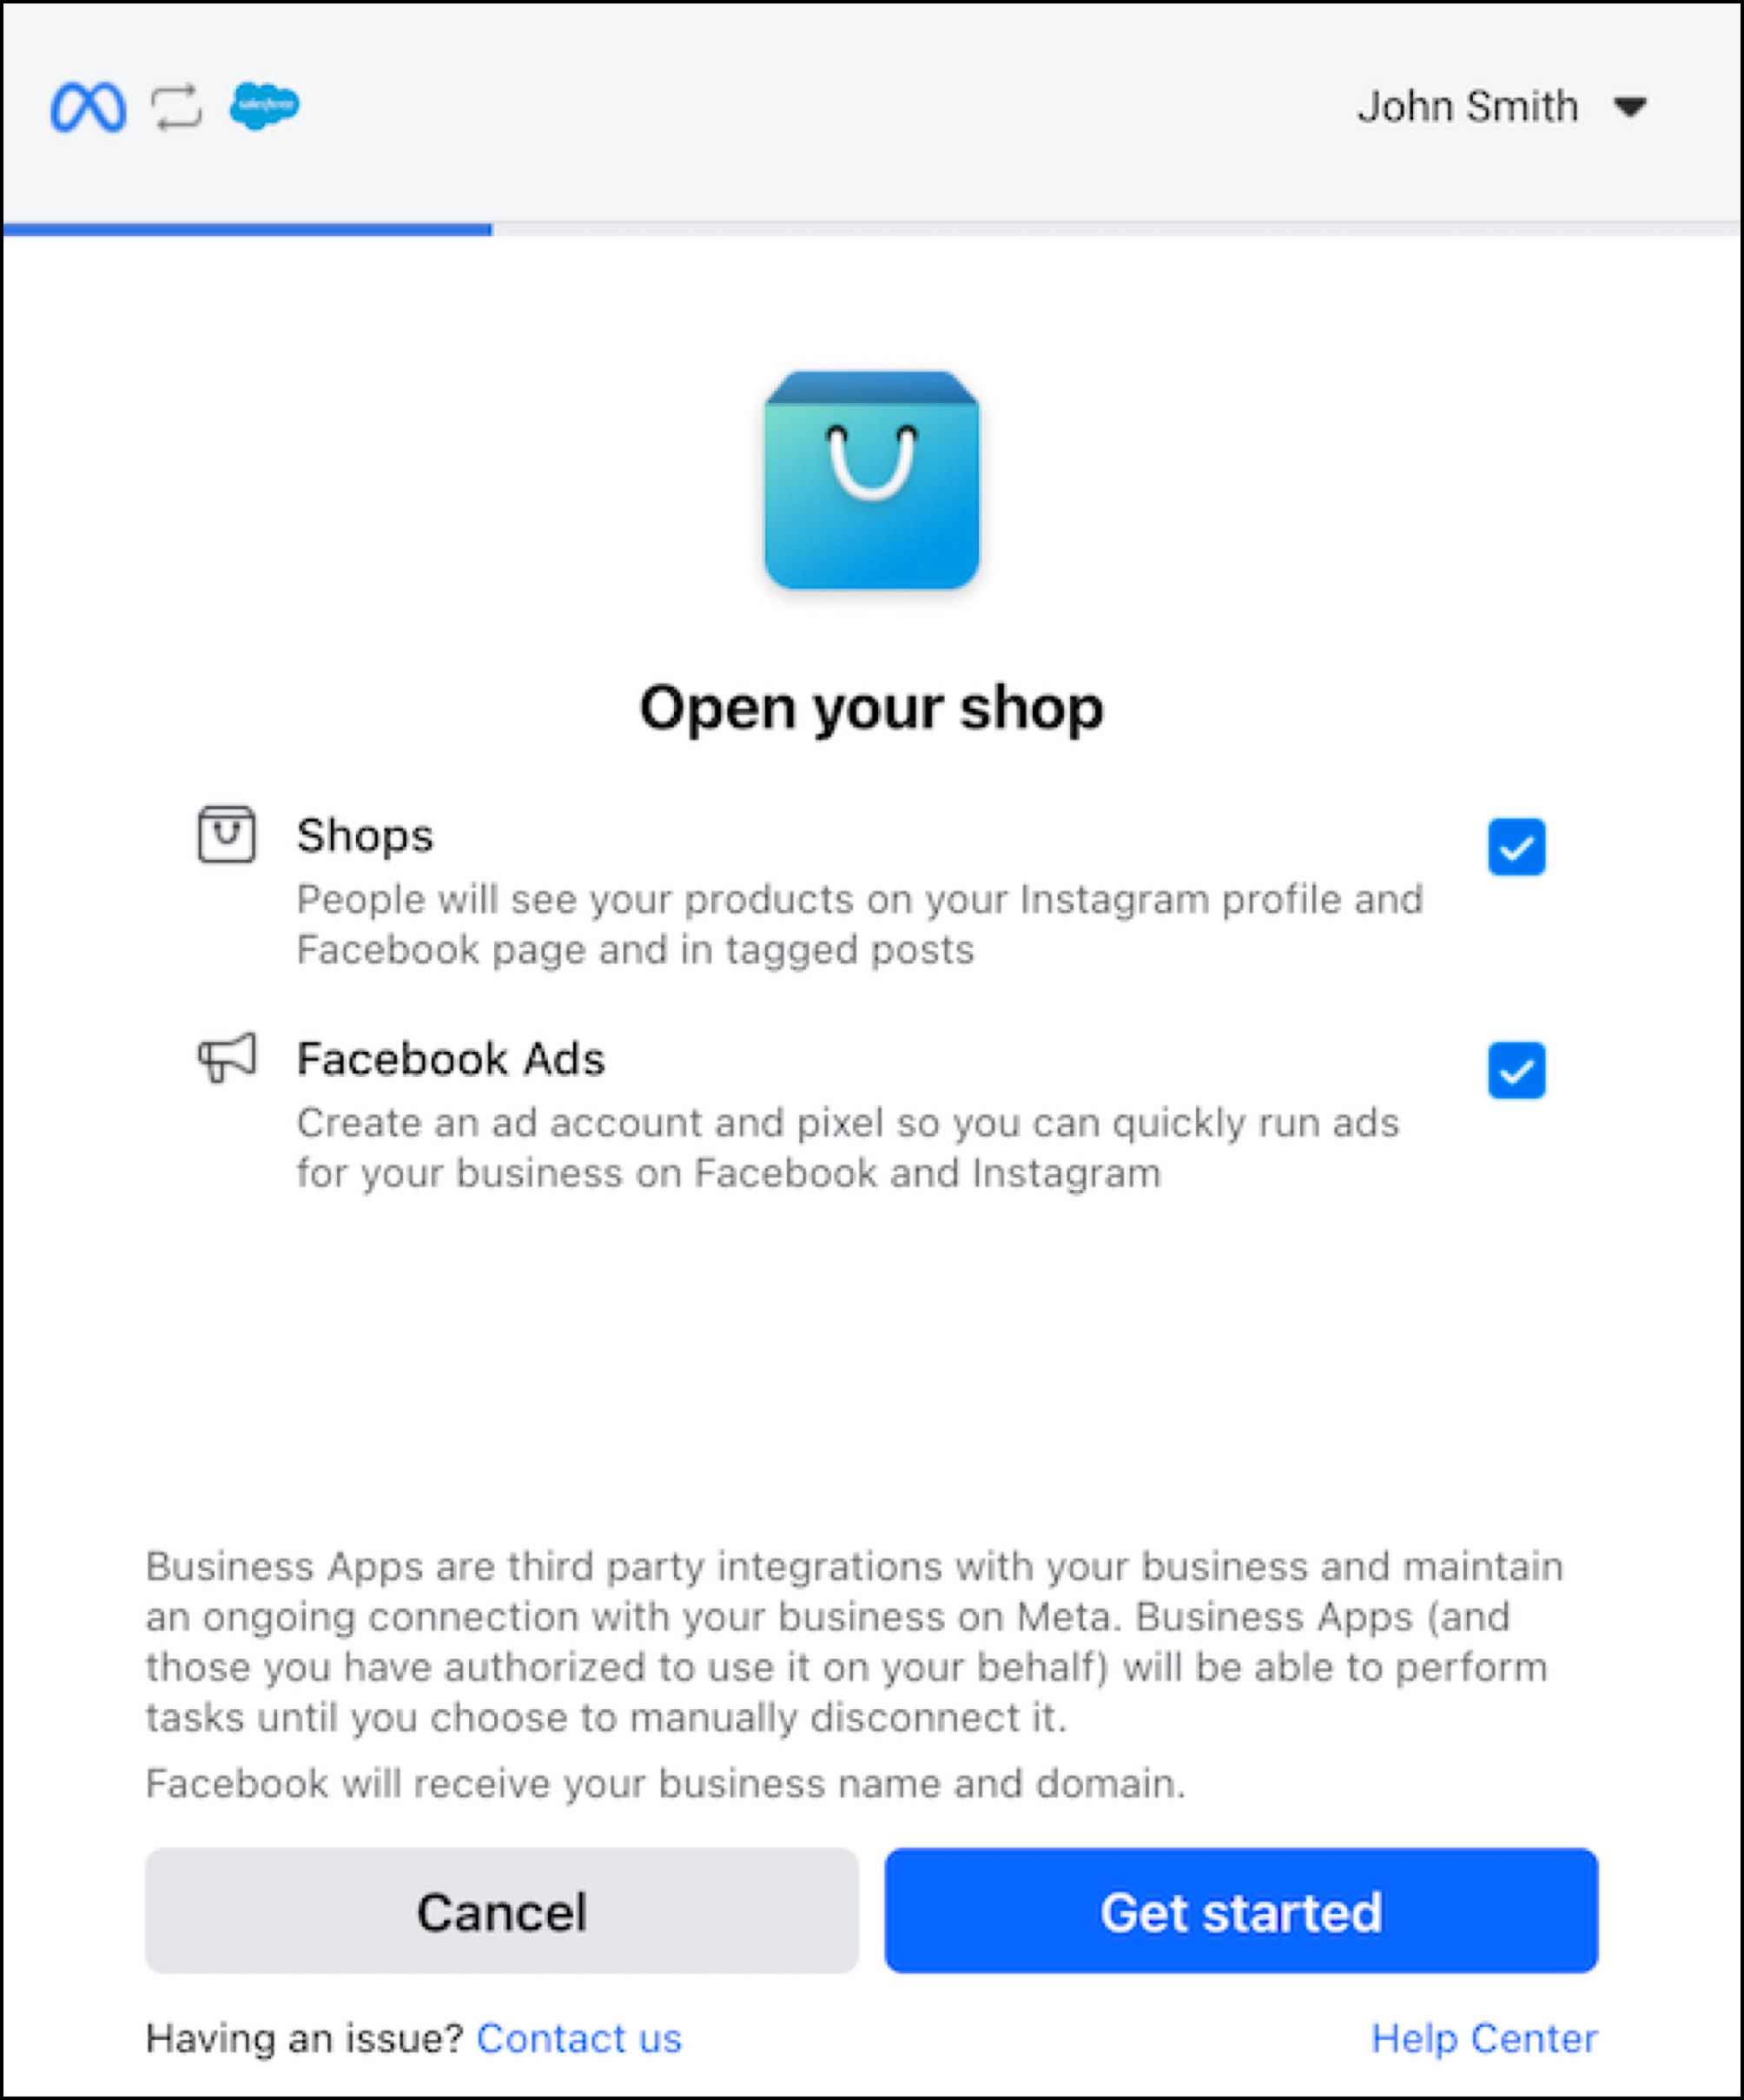
- Select the following options from your Meta Business account:
- Check Shops to configure the integration related to your shop.
- Check Facebook Ads to configure the integration related to your ad account.
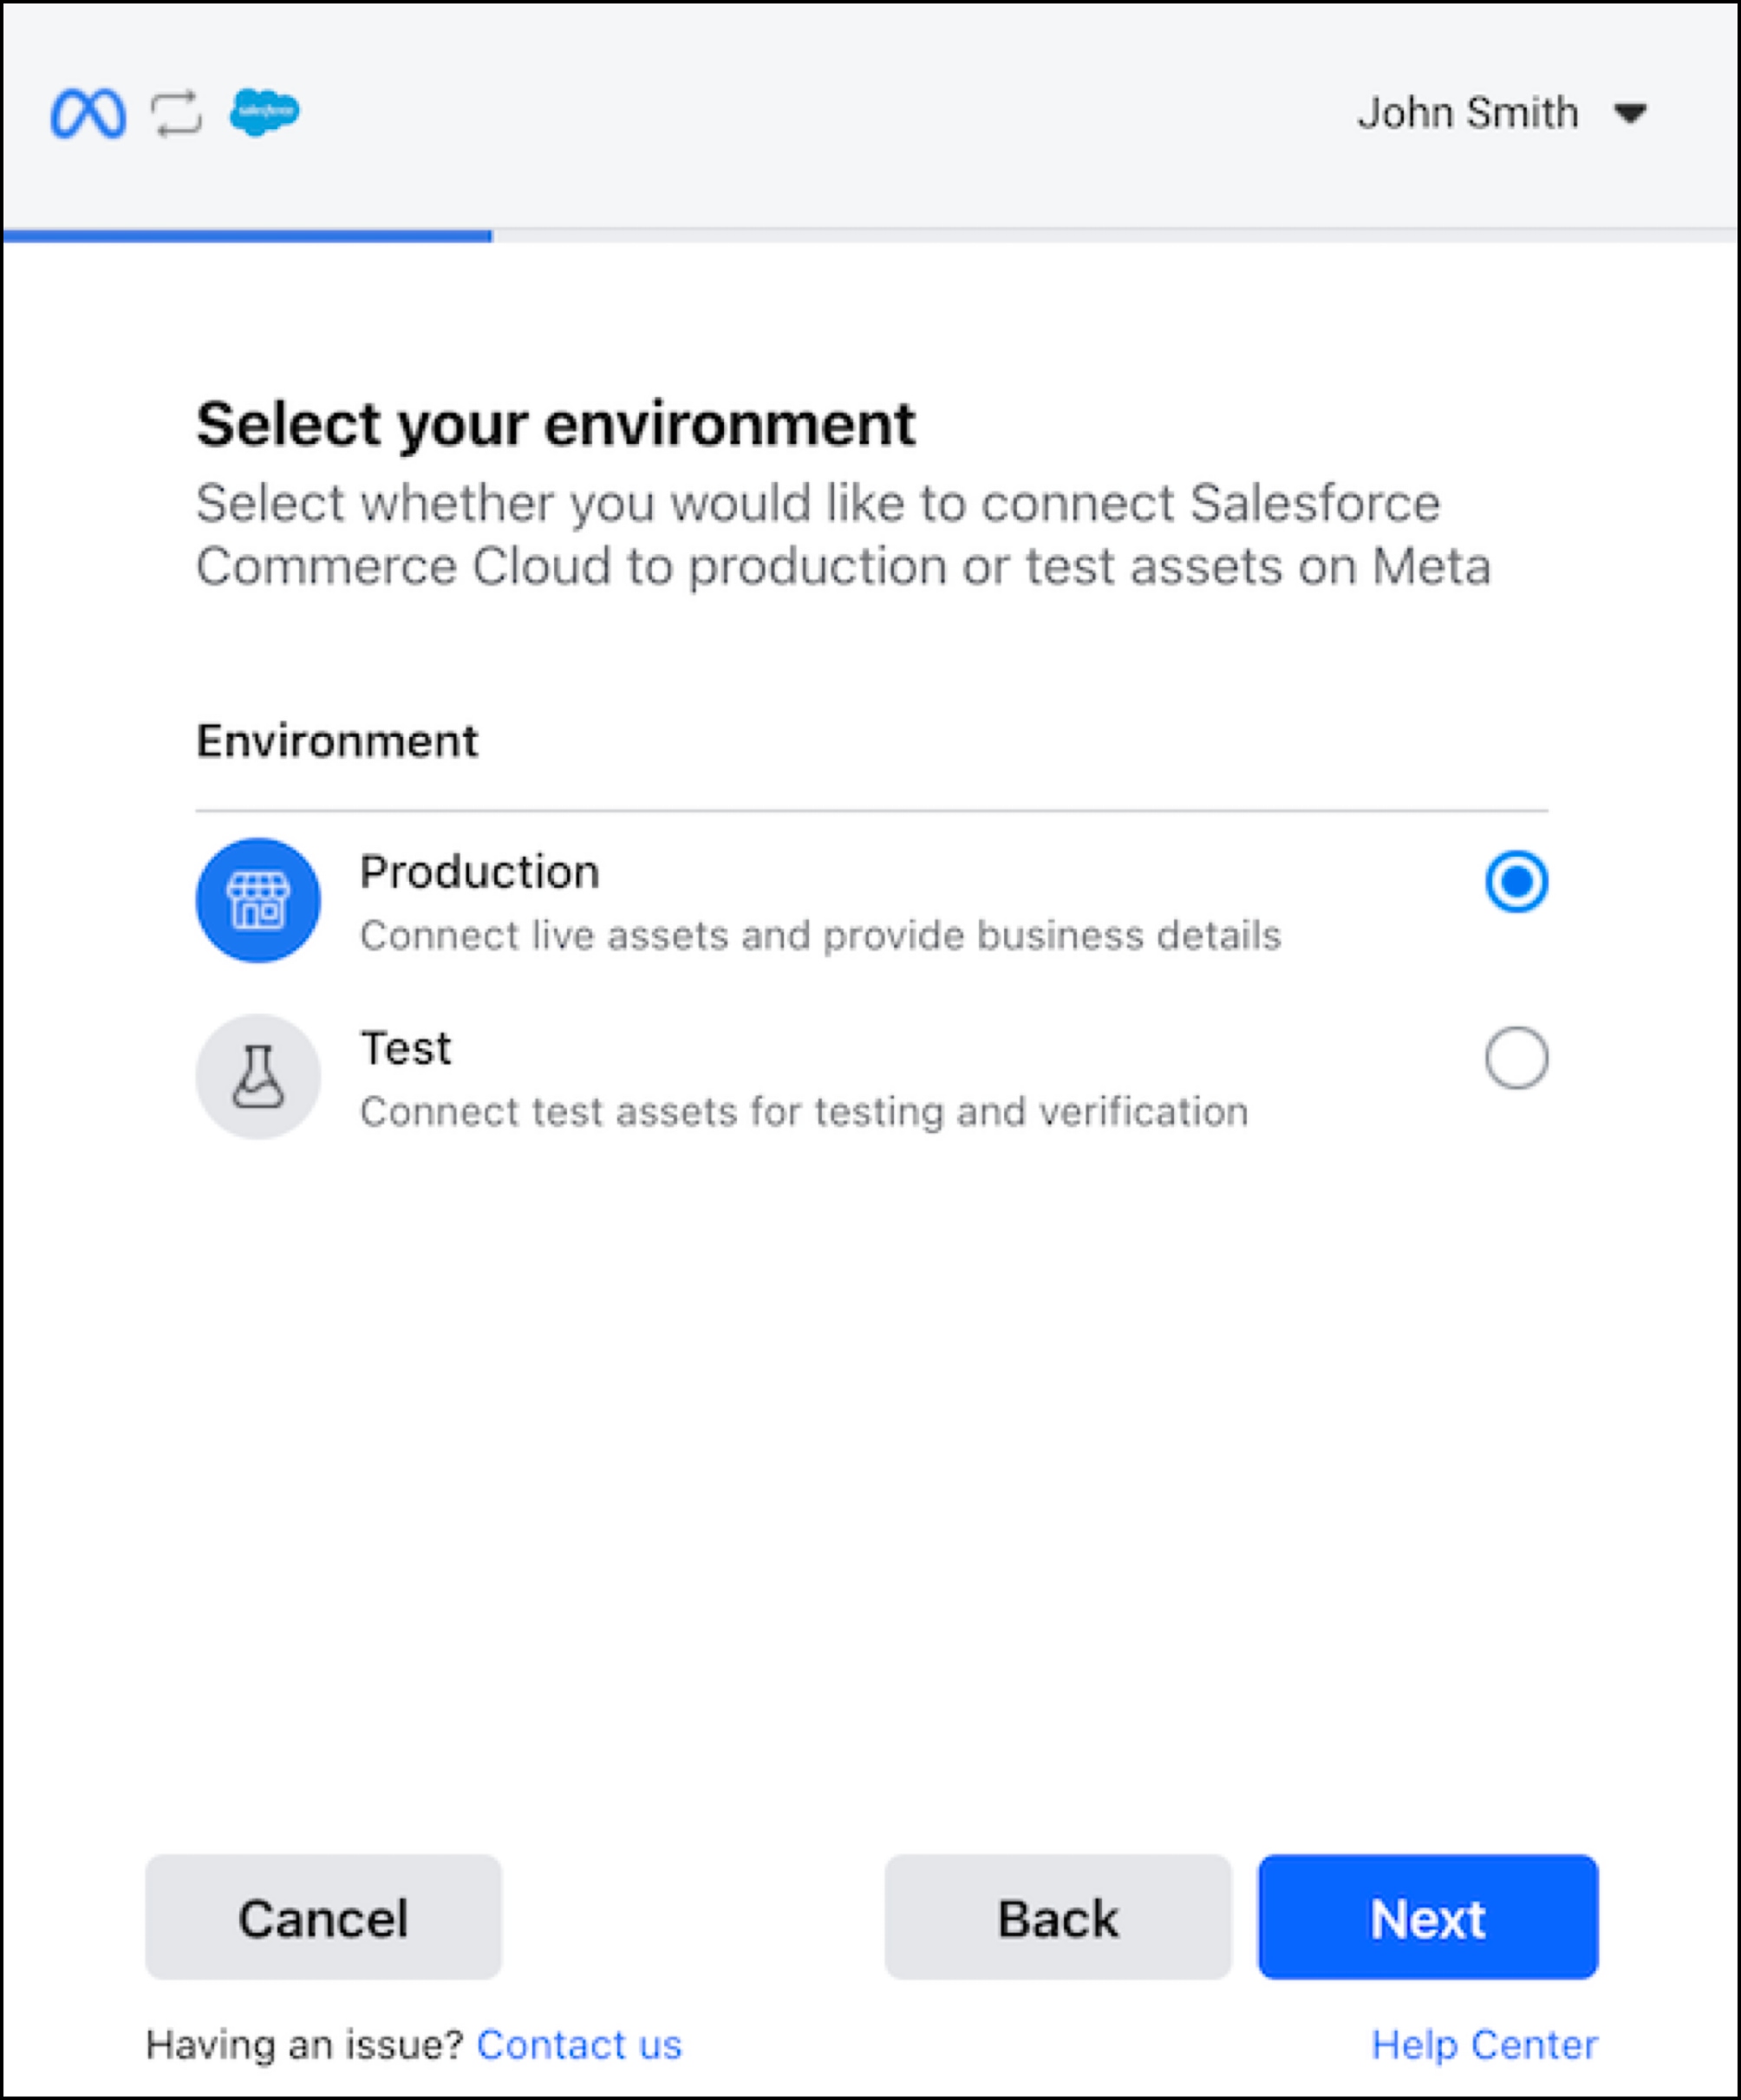
- Select the environment for this integration:
- Choose Production to be connected to your live assets.
- Choose Test to validate this integration with test assets.
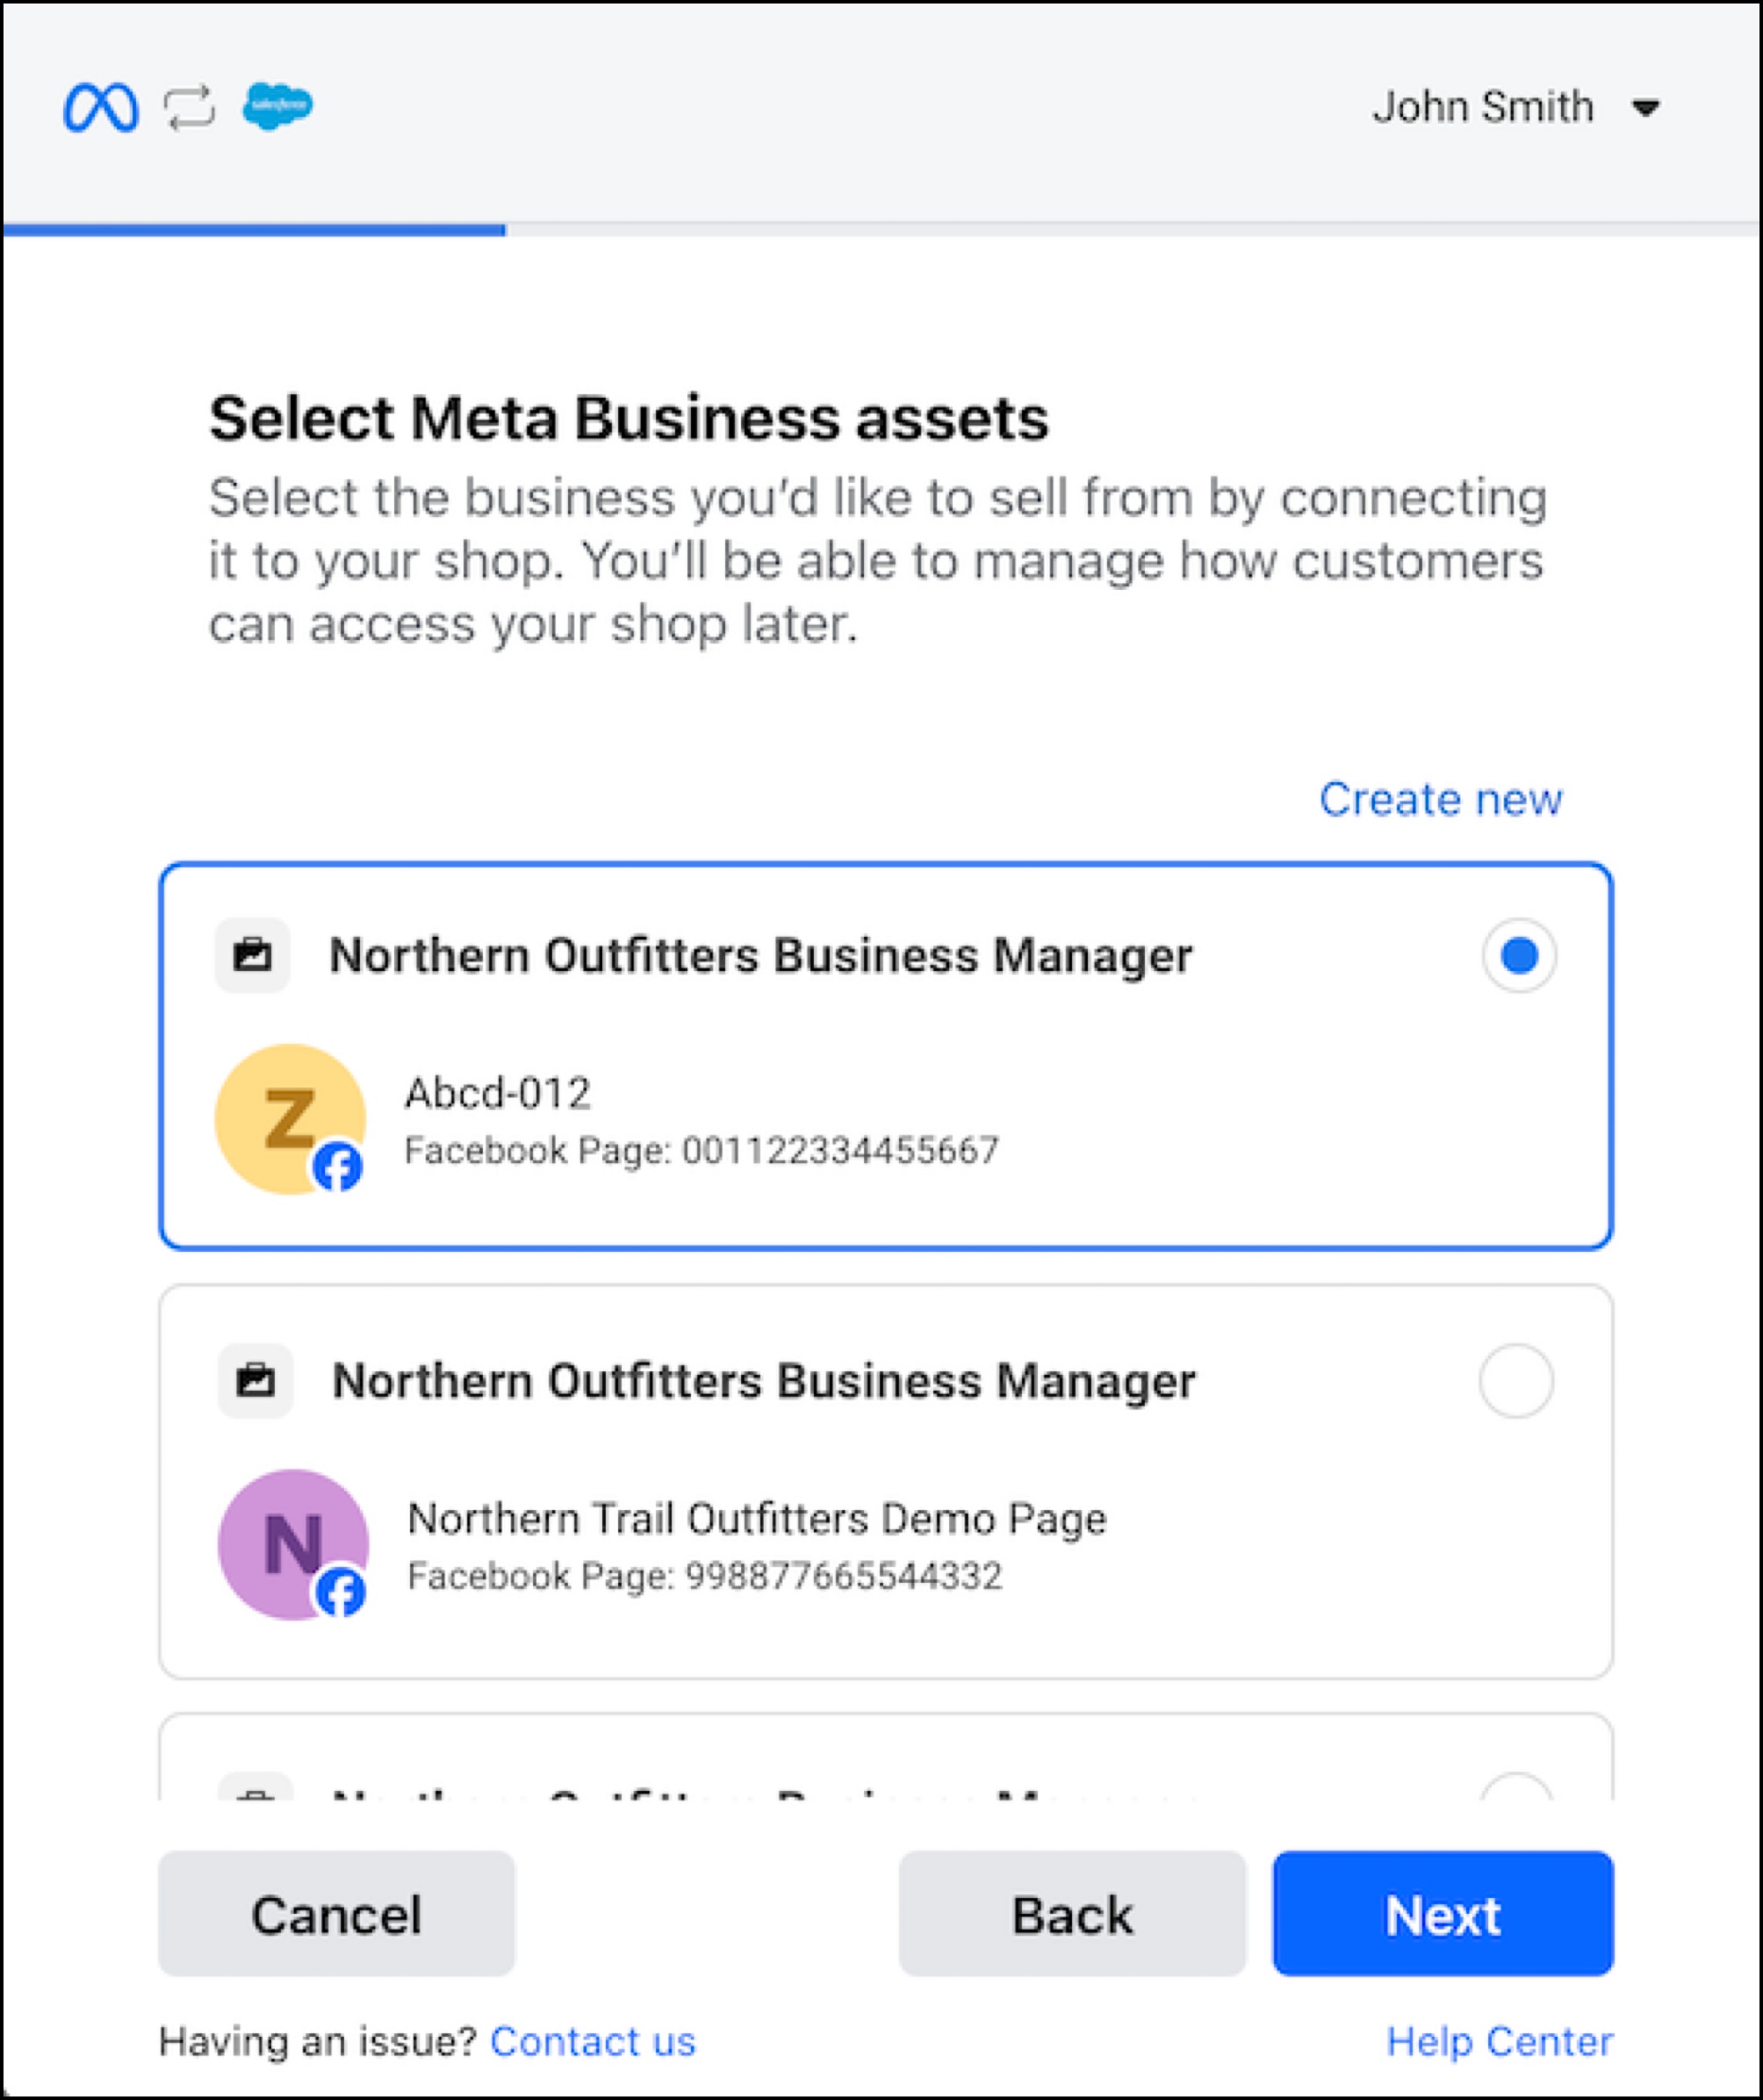
- Select a business Page from your Meta Business Account:
- Connect to an existing Page by selecting any entry you want to use.
- Create a new Page by selecting Create New.
- Choose an ad account if you checked this option on the first step. Otherwise, skip this step.
- Connect to an existing ad account by selecting any entry you want to use.
- Create a new ad account by selecting Create New.
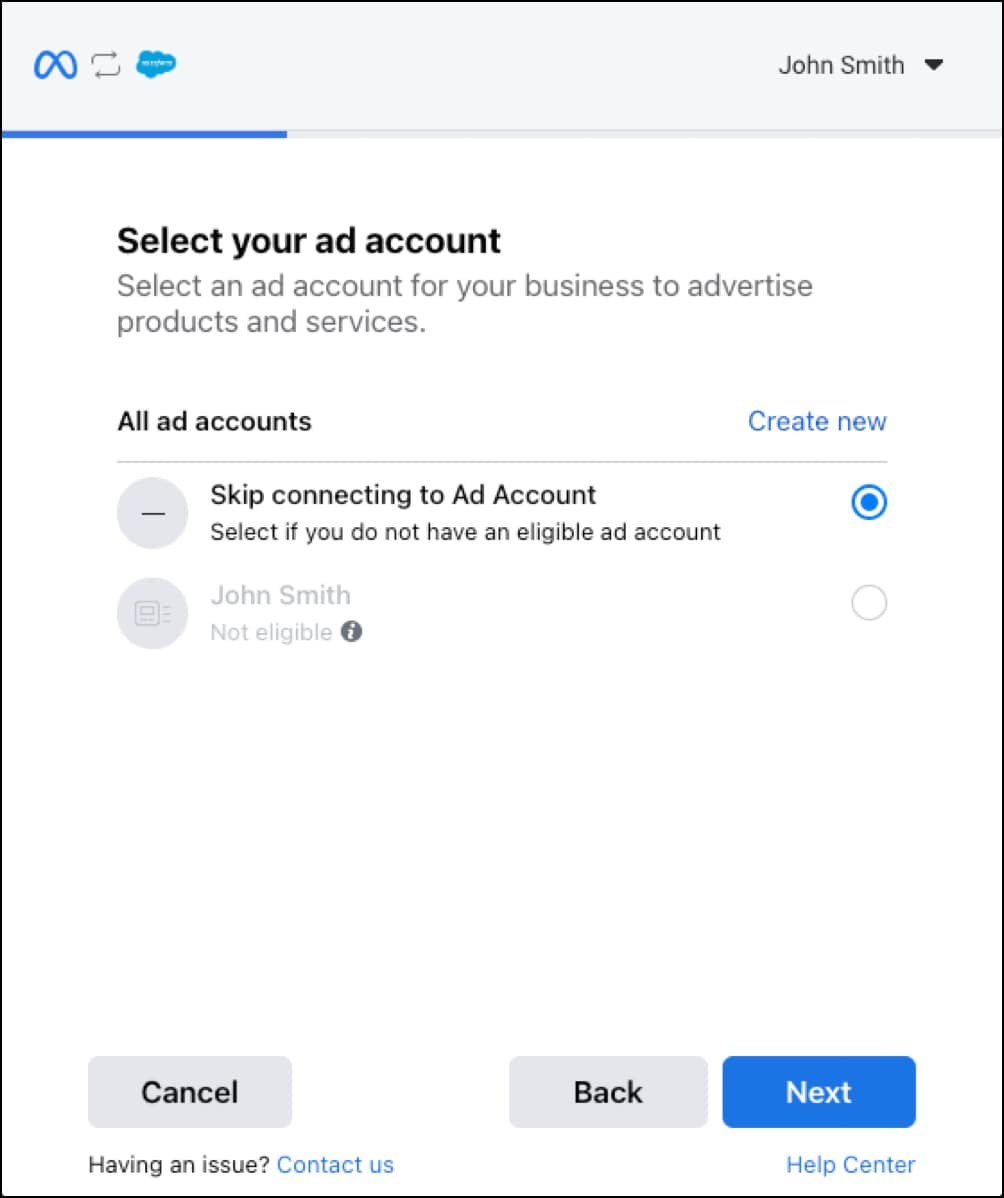
- Fill in required Shop details.
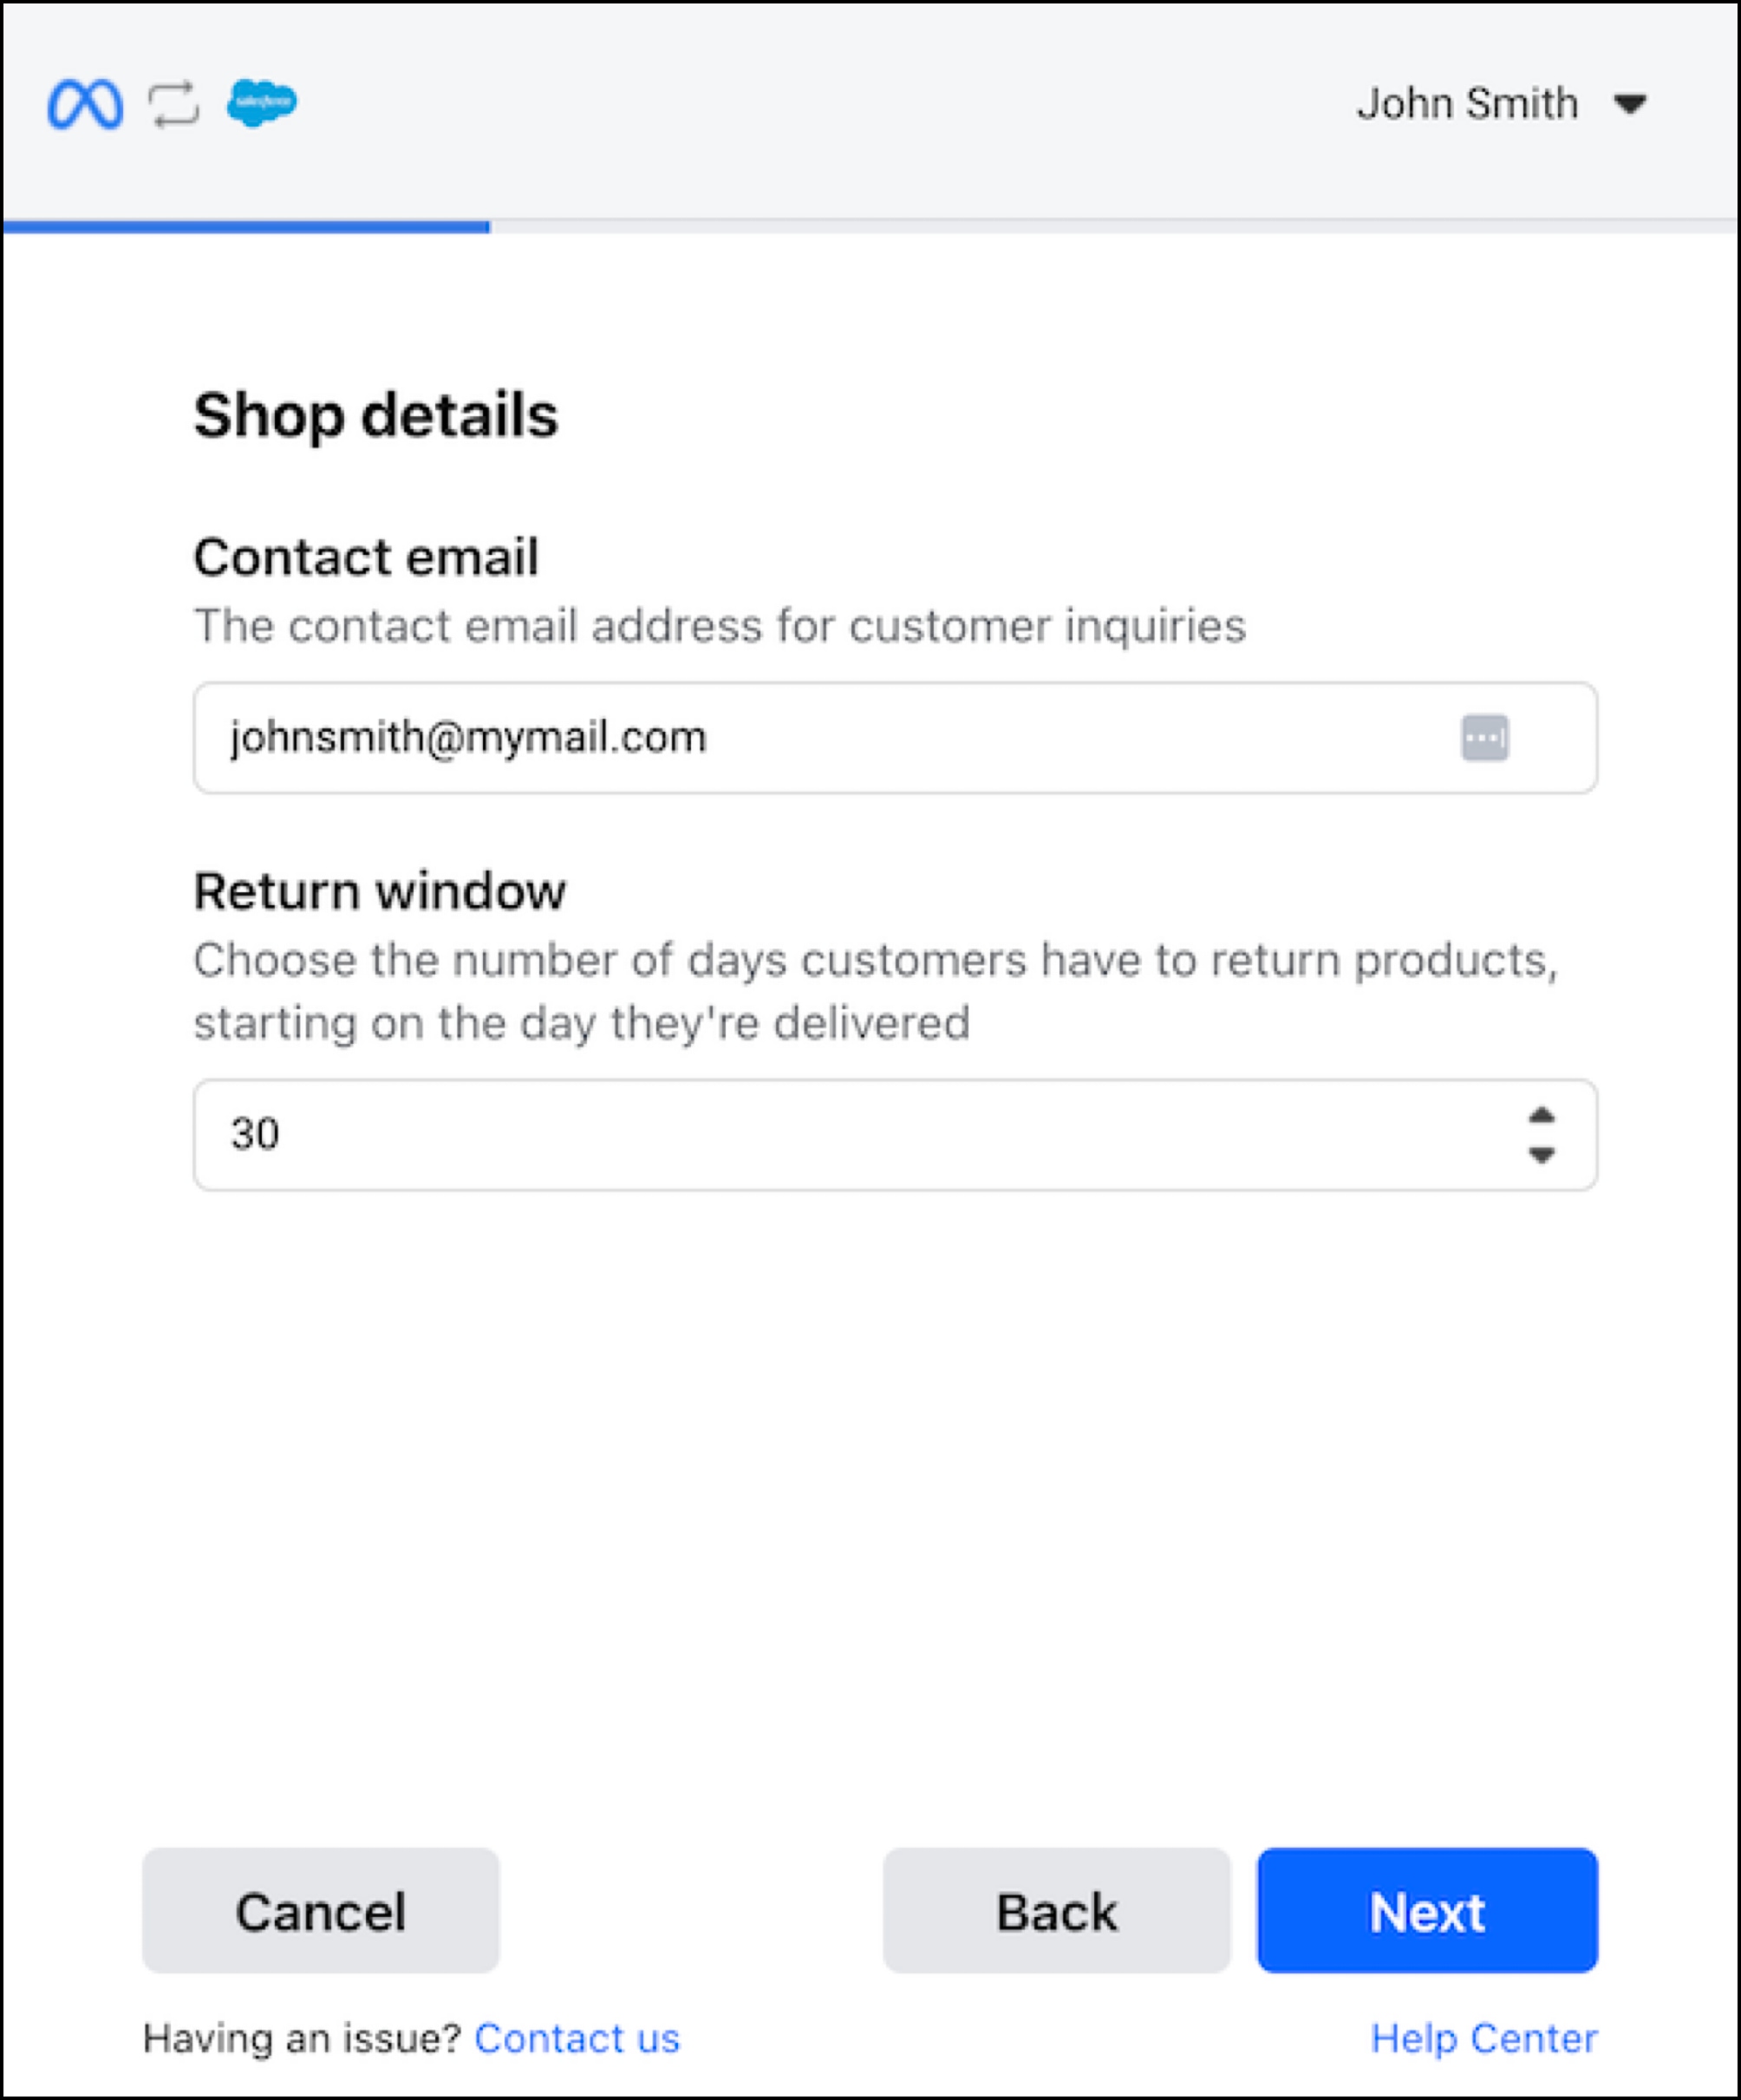
- Confirm the commerce account being used and select Next.
- Check all required permissions for the Commerce Cloud application.
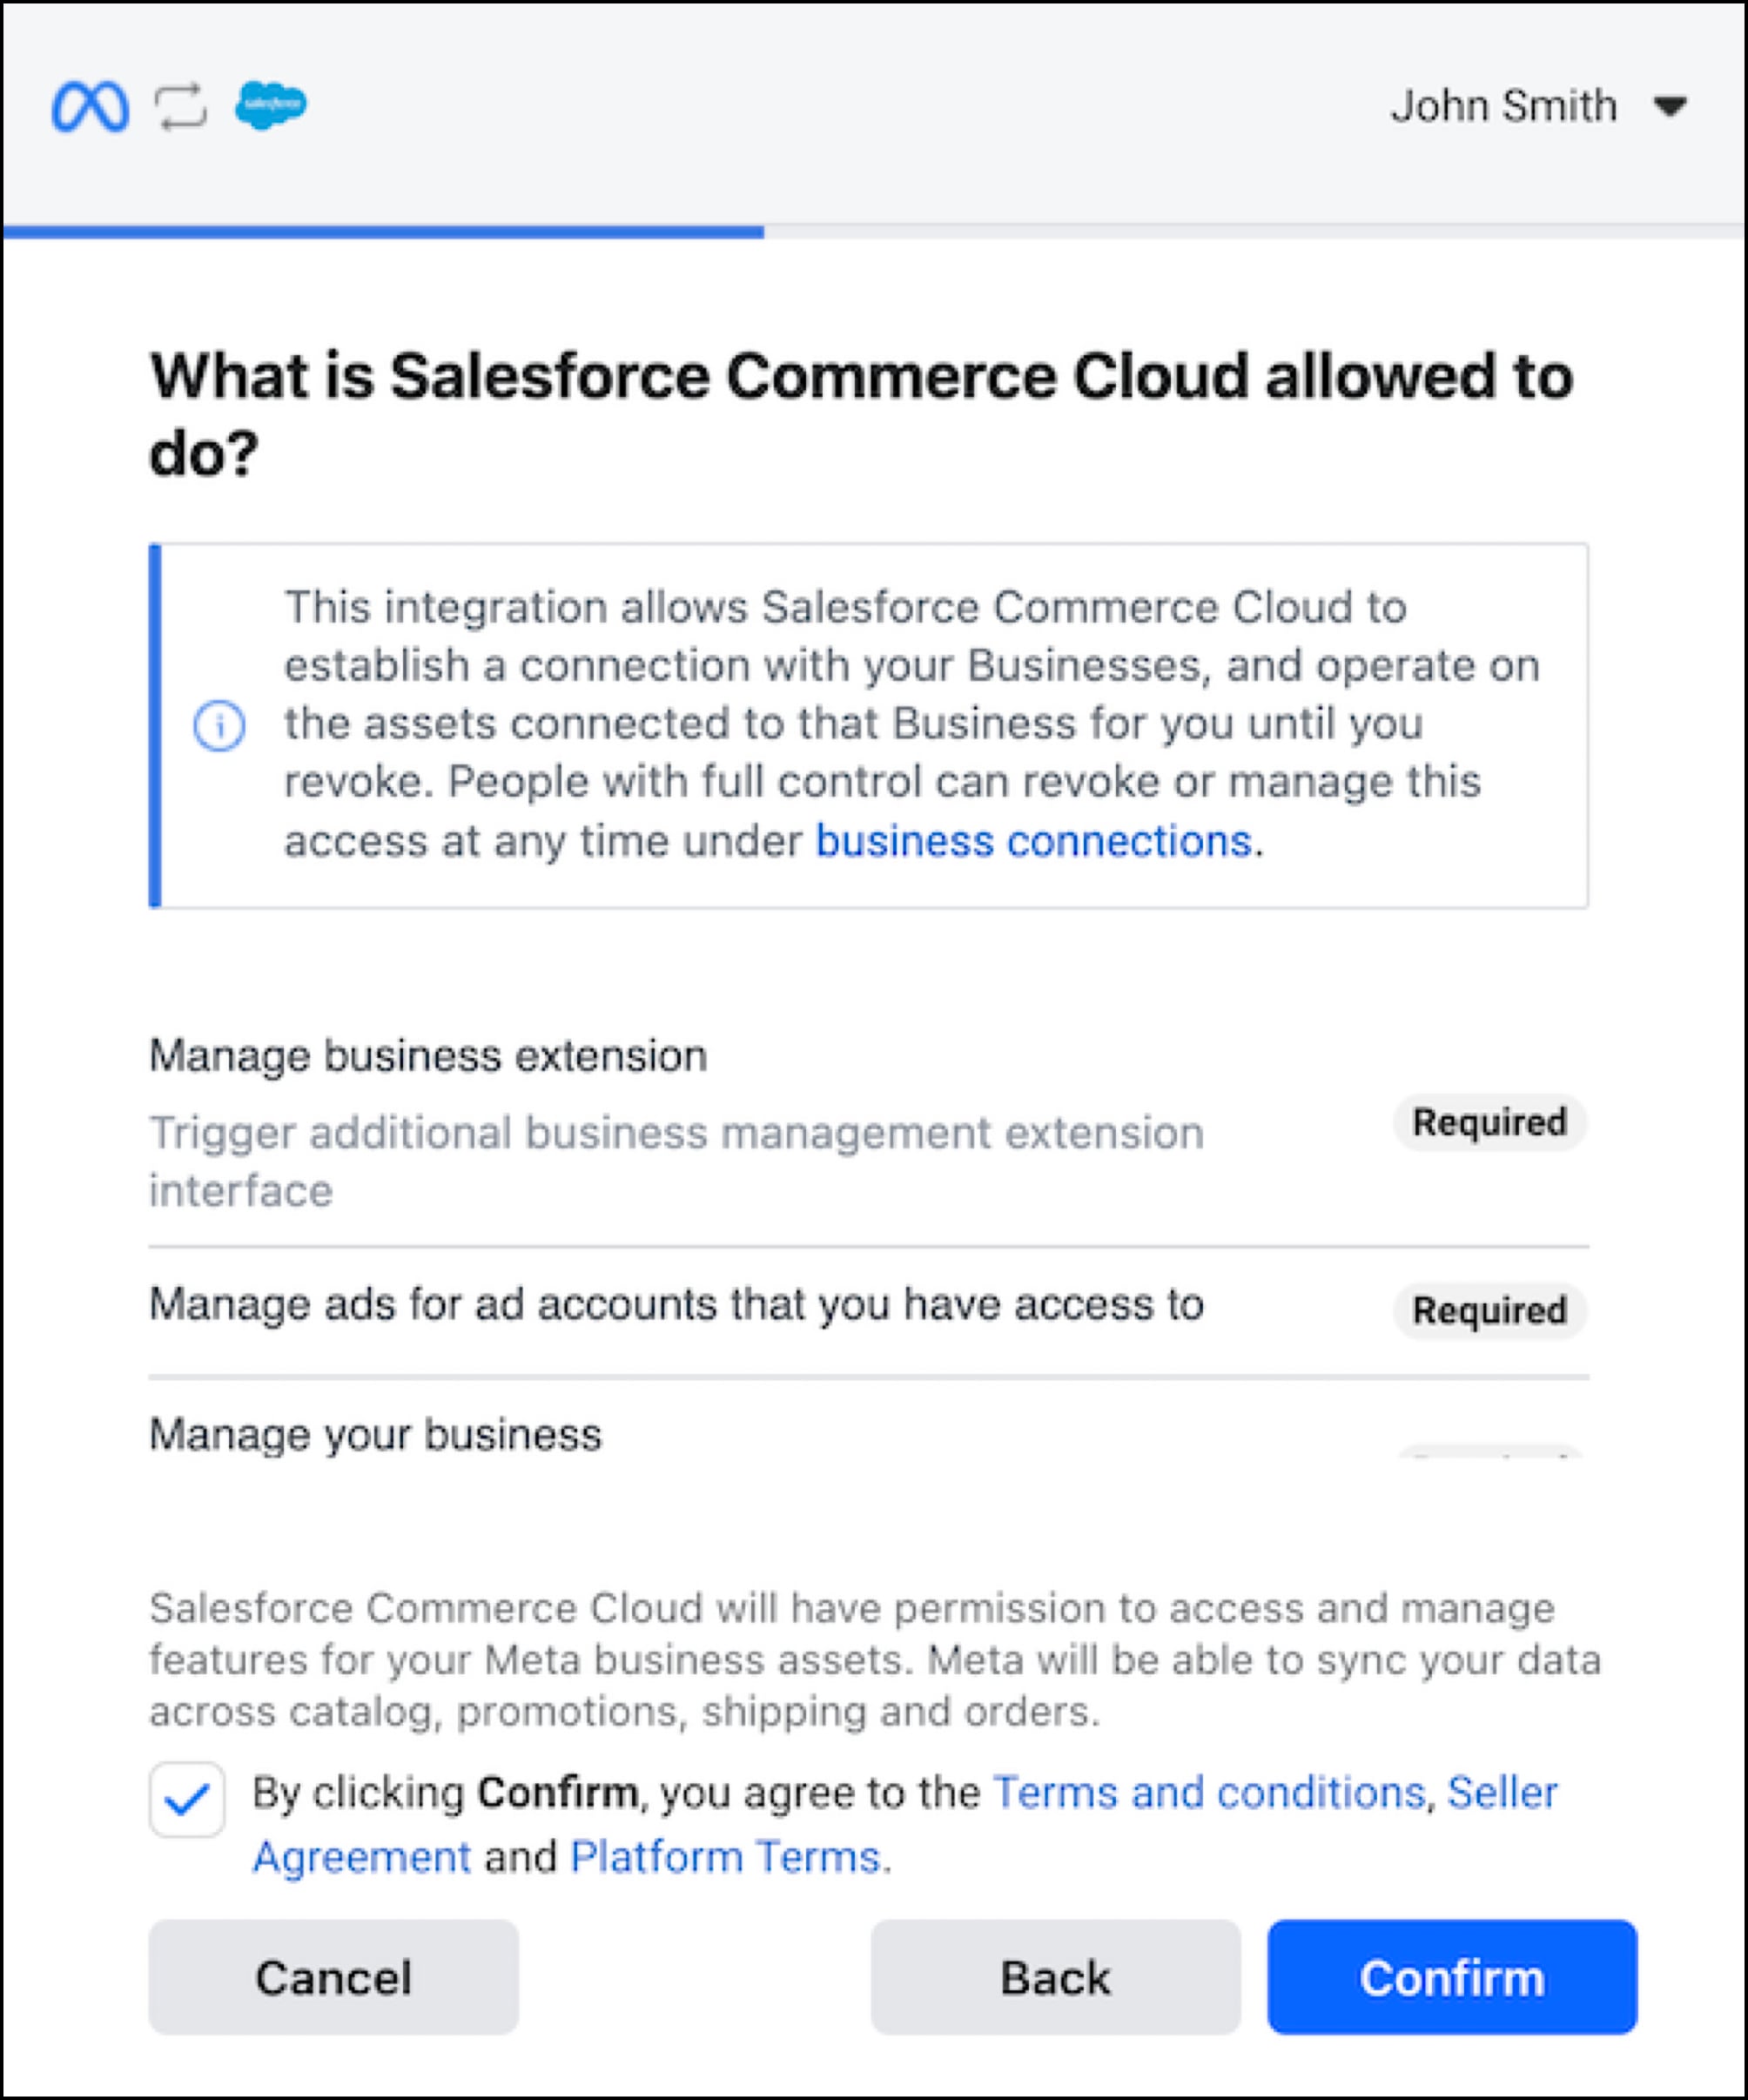
- Select Confirm to perform the linking.
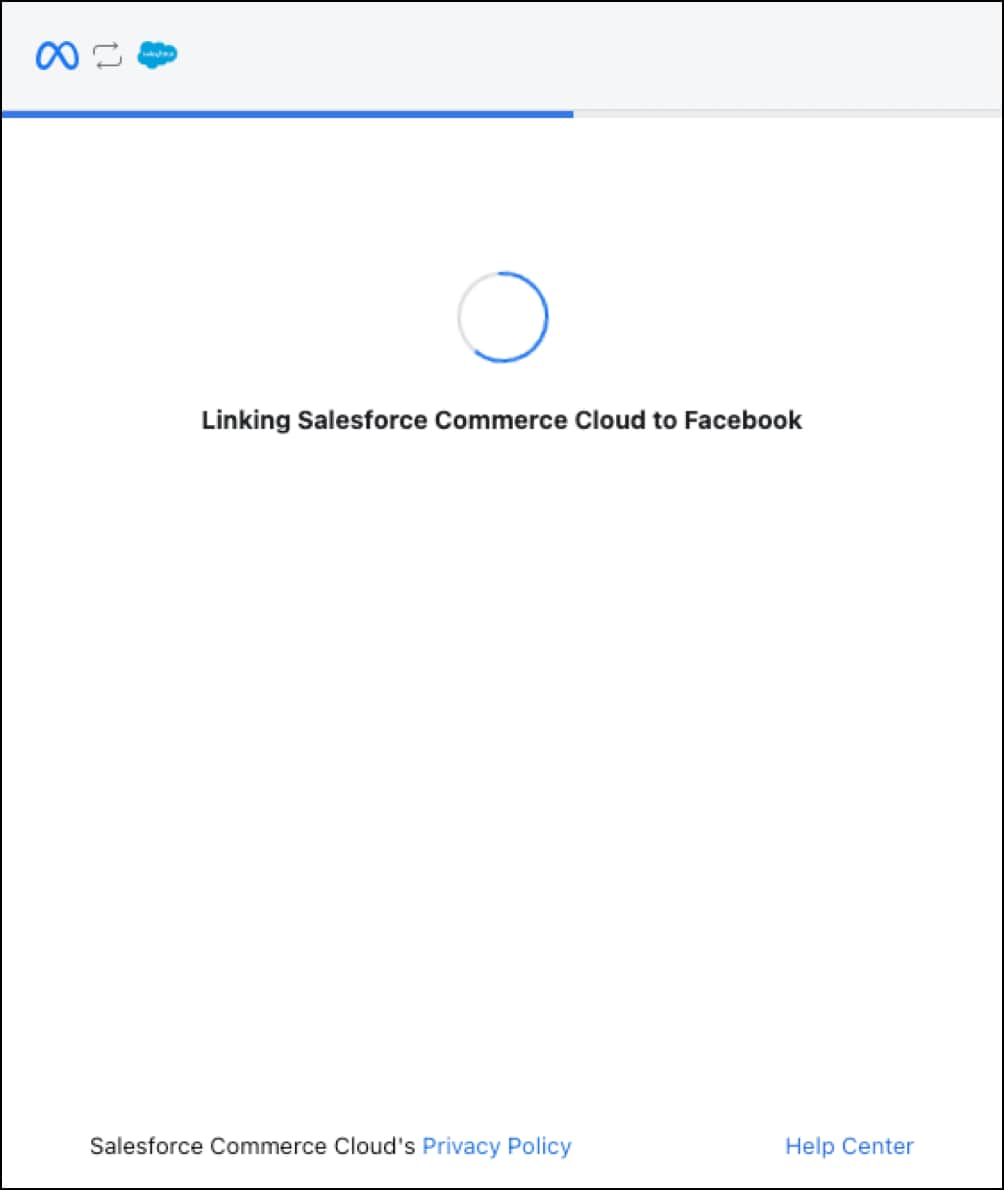
- Set any additional desired information, or skip this step. Wait for the onboarding to complete before closing or refreshing the page.
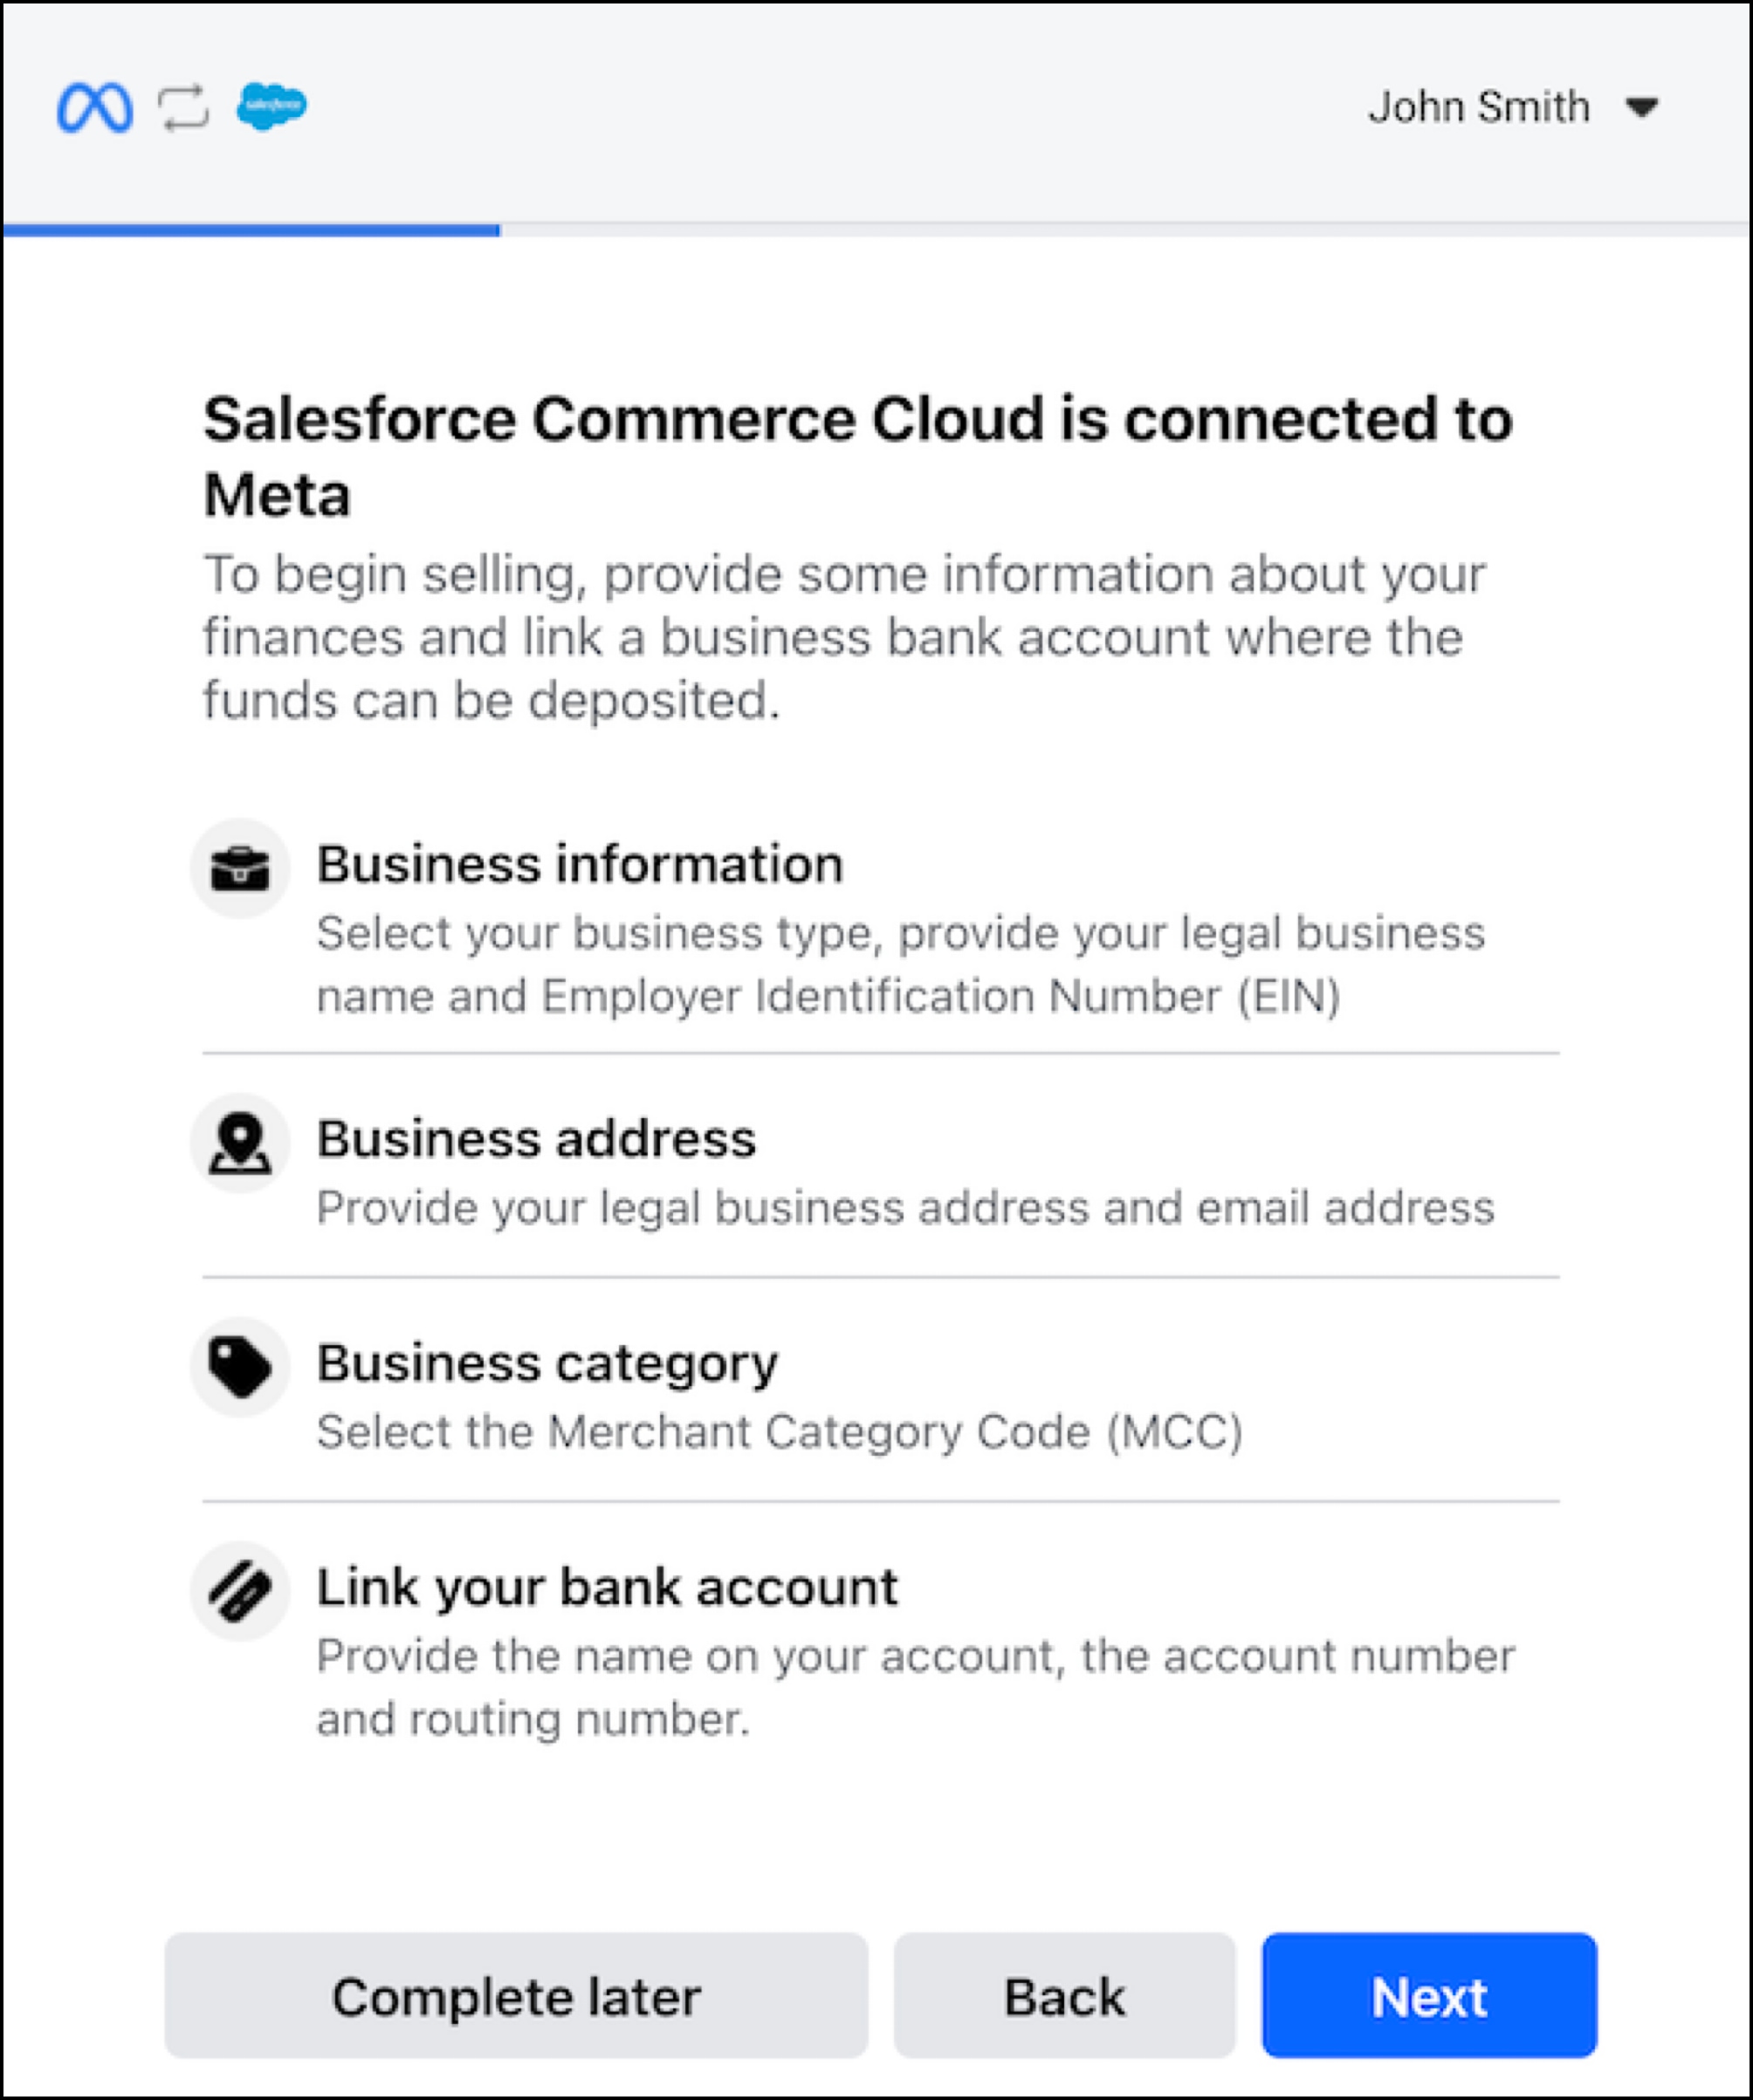
- After completing the onboarding process, B2C Commerce Cloud automatically attempts to share additional post onboarding data with Meta. If this fails, resend this information by selecting Share Data. If the automated process was executed successfully, Share Data not visible.
- When everything completes, check the connected Meta application details on Business Manager. This information is used to process all features available in this integration.
Business Manager IDExternal Business ID
- The new Meta tab contains information you need to manage your connection.
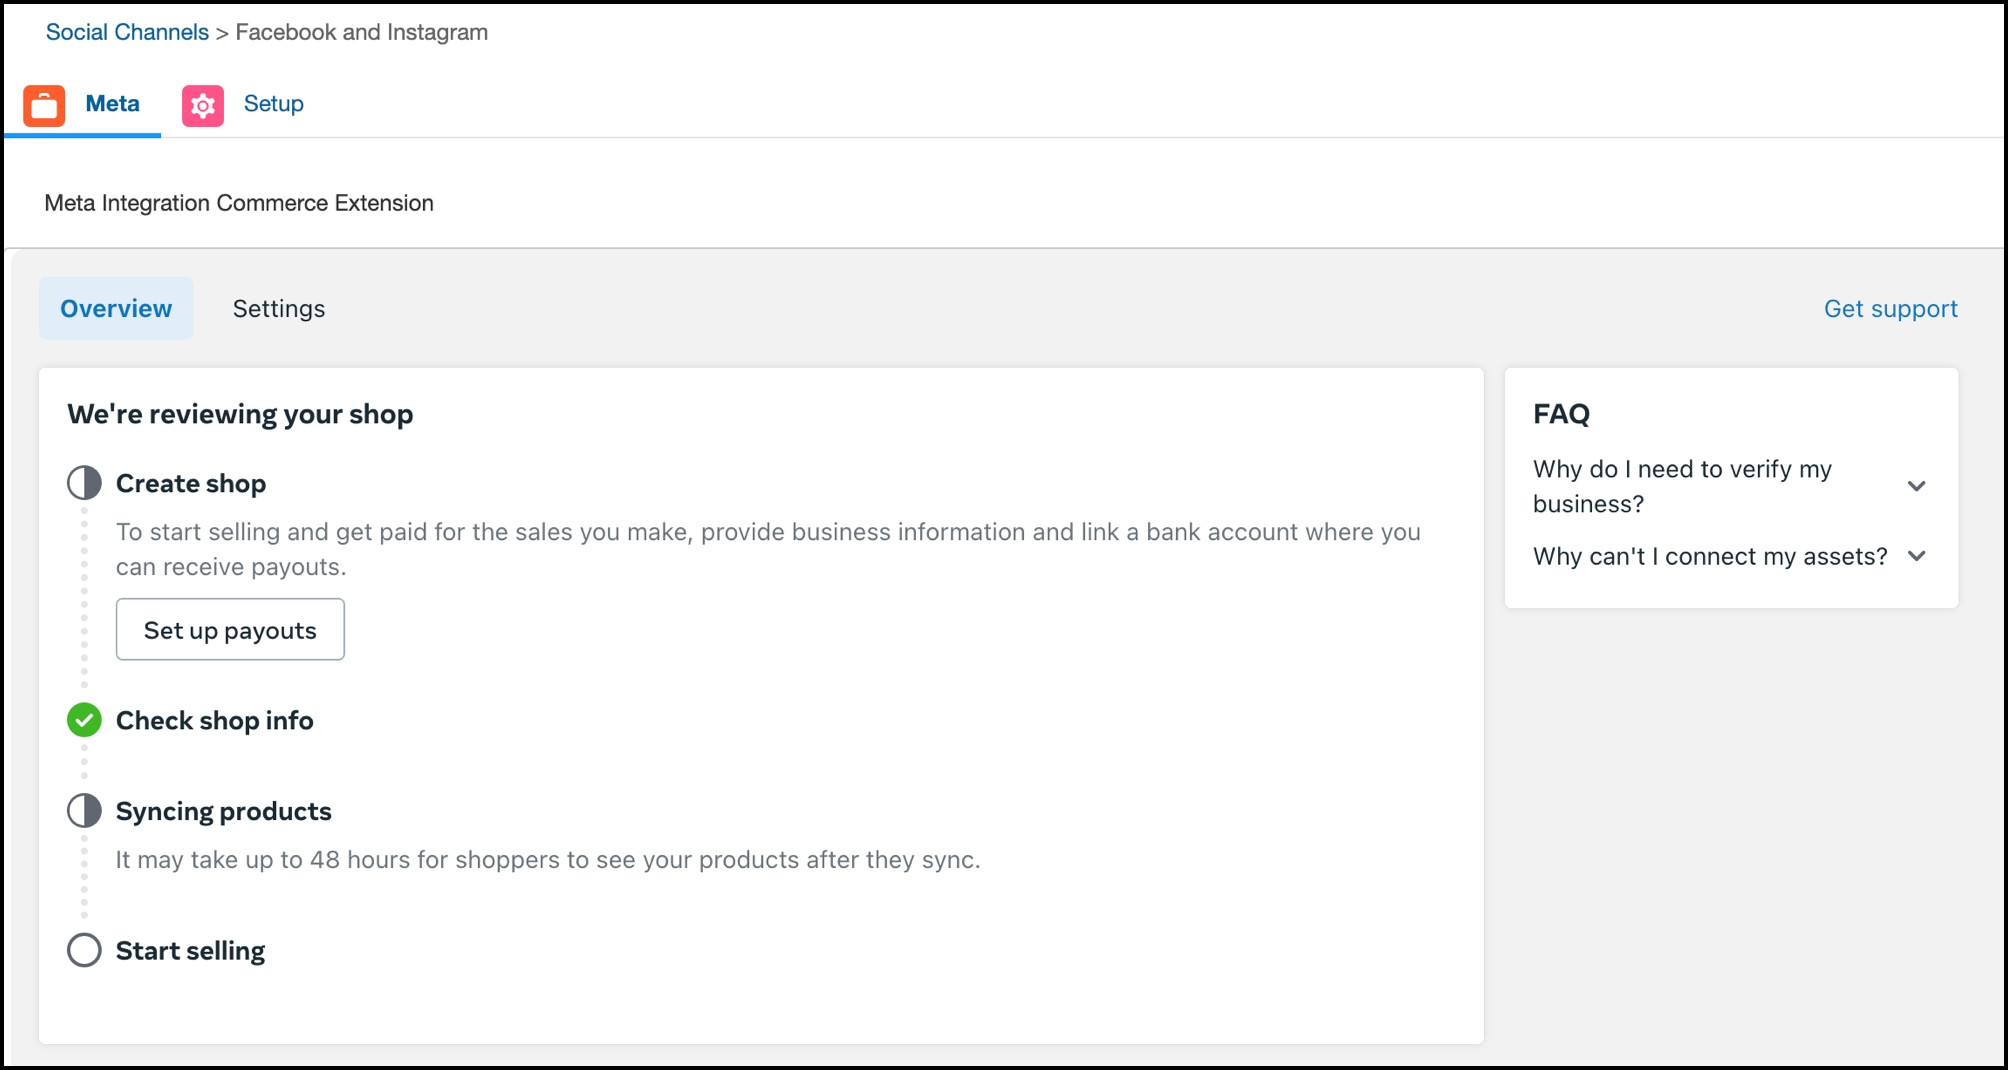
| Field Name | Details |
|---|---|
| Salesforce AM Client ID | The Account Manager API Client ID, used for operations like accessing WebDAV folders to read feed files (categories, products, etc) |
| Salesforce AM Client Secret | The Account Manager API Client Secret |
| Salesforce SLAS ID | The SLAS Credential ID, used for operations like syncing Orders from Meta to Salesforce Commerce Cloud |
| Salesforce SLAS Secret | The SLAS Credential Secret |
| Short Code | The environment short code, which you can get by selecting the help icon or accessing Administration > Site Development > Salesforce Commerce API Settings. |
| Organization ID | The environment organization ID, which you can get by selecting the help icon or accessing Administration > Site Development > Salesforce Commerce API Settings. |
| Current Site Hostname | The hostname used by the current Site to access the environment APIs, for example: dev.mysite.com. This is important information, especially if this integration is running in a development or production instance. If you have a custom hostname registered, check the correct value in Merchant Tools > SEO > Aliases. |
| Product Feed Job ID | The job ID used by the current Site to export full product feeds, for example: Instagram-ExportFullFeeds). This is used to trigger this job immediately after onboarding. If you have more than one storefront site, check the correct job ID (according to the defined job step scope) in Administration > Operations > Jobs |
Enable product catalog synchronization by reviewing catalog feed configuration and enabling the B2C Commerce job that sends the products to Facebook and Instagram. Other jobs perform synchronization for promotions, shipping profile information, and order status.
Catalog feed configurations are based on the custom feeds module, which allows you to easily create catalog feeds according to your needs. After you define the template, you can schedule the feed to run at desired intervals. It is recommended to run this job at the same frequency you anticipate changes to your catalog, or whenever you replicate to production.
- Log in to Business Manager.
- Click App Launcher
 and then select Administration > Social Product Feeds > Social Product Feeds Definition:
Field Description Template The default feed configuration is loaded into the instagram-feedrecord within the SalesChannelFeedConfig custom object. Initial configuration is based on the SFRA reference website. Review the header and field mapping according to the catalog setup for your storefront and update it as required. Product field mappings can be found in Social Product Feeds. Possible areas of interest:imageJsonData type="large": configure proper image view type that should be exportedprice type="usd-m-list-prices": configure the list pricebookFolder Name IMPEX/src/feeds/export/social/instagram/catalogsFile Name instagram-feed-{{site_id}}-{{timestamp}}-{{locale}}.txtCategory Specific Export The category to export. Enter rootto export all products or enter a specific category, for example:social-instagram. Ensure the category you select is marked as "online".Channel Type InstagramGoogle Shopping Category Category based on the kind of products that are sold on your site Available for Sites The site(s) for which products need to be exported. Make sure you run and configure a feed template once per site. Custom object IDs can be defined in the CustomObjectIdsjob parameter within the Product Full Feed job step in theInstagram-ExportFullFeedsscheduled job.
Review all job configurations, and then enable scheduling and execution according to your needs.
-
Export Categories Job
-
Log in to Business Manager.
-
Click App Launcher
 and then select Administration > Operations > Jobs.
 -
Select the Instagram-ExportCategories job.
-
Select the Job Steps tab and configure the following job steps:
-
Export Categories
-
The following table shows important attributes:
Step Parameter Description Is Disabled A flag to disable this step from the job execution flow (for test purposes) CatalogId The catalog ID for the catalog from which to extract the category tree. Use *for all catalogs.Locale A specific locale for extracting category attributes or ALLto generate one file for each localeFolderPath The folder in which to generate the feed. This path is relative to _IMPEX/_. -
Set values for the attributes as needed and then select Assign.
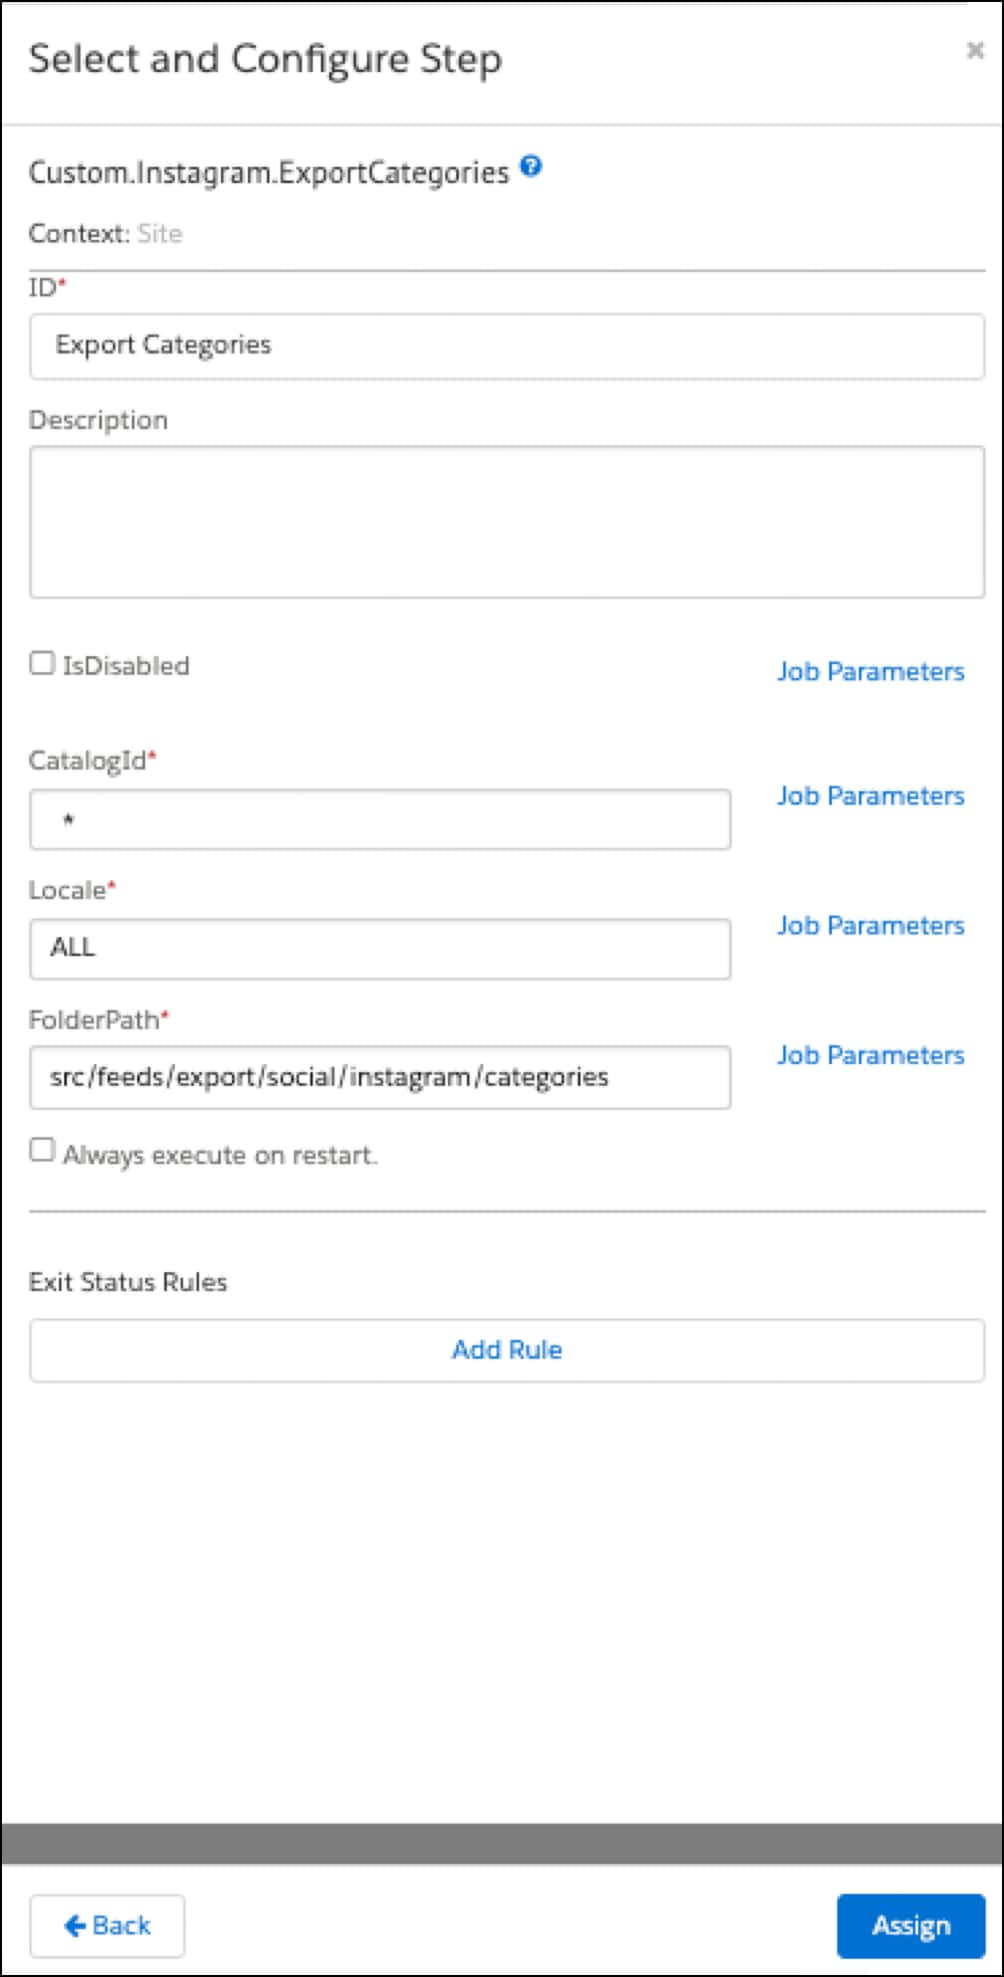
-
-
Notify Feed
-
Set FeedType to
PRODUCT_SETS. -
Set UpdateType to
CREATE. -
Set FileFolder to the folder location in which to generate the feeds. This path is relative to
_IMPEX/_. -
Select Assign.
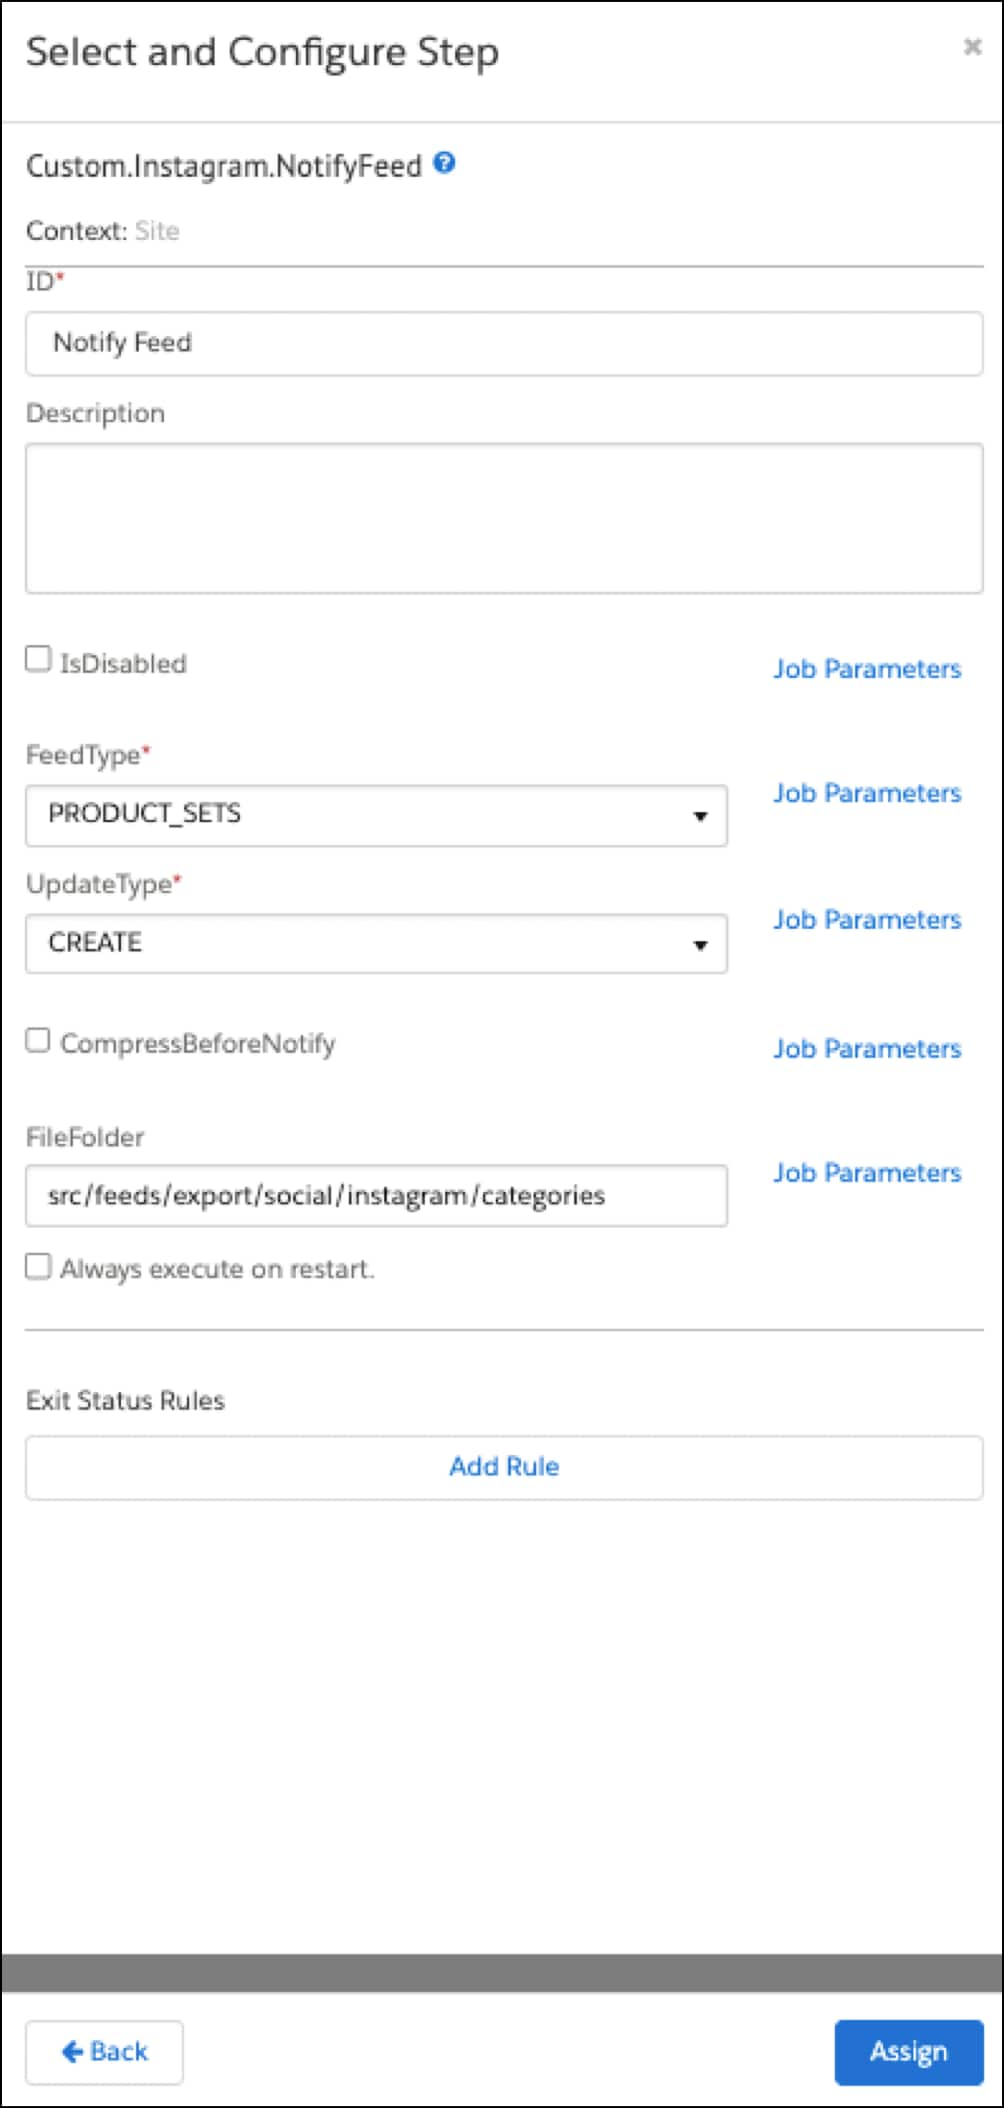
-
-
-
Select Run Now or select the Schedule and History tab to schedule the job.
-
-
Export Full Feeds Job
-
Log in to Business Manager.
-
Click App Launcher
 and then select Administration > Operations > Jobs.
 -
Select the Instagram-ExportFullFeeds job.
-
Select the Job Steps tab and configure the following job steps:
-
Product Feed
-
The following table shows important attributes:
Step Parameter Description Is Disabled A flag to disable this step from the job execution flow (for test purposes). ExportCatalogs A flag to enable exporting products from catalogs. Set this to activated unless you want to generate only a delete feed file. Locales Comma-separated locales to extract product attributes. An empty value specifies to only use the default site locale. GroupLocaleExport If checked, the product attributes are grouped by locales when generating the feeds. GenerateDeleteFeed If checked, a delete feed is also generated. It uses the last feed execution information contained in tracking files to generate the delete feed. A separate file is created for deleted products, which informs Facebook and Instagram about products that are deleted. - NOTE: If you manually create a delete file for Facebook and Instagram, specify line endings as line feed, LF(\n) instead of carriage returnCR(\r) orCRLF(\r\n).CustomObjectIds Comma-separated SalesChannelFeedConfigIDs that store instructions on how to generate each feed, for example:instagram-feed.Hostname If informed, this composes the URL path of images on the resulting feed. -
This job step requires a pre-built product index when you set a specific category (instead of
root) in your feed configuration object. -
Set values for the attributes as needed and then select Assign.
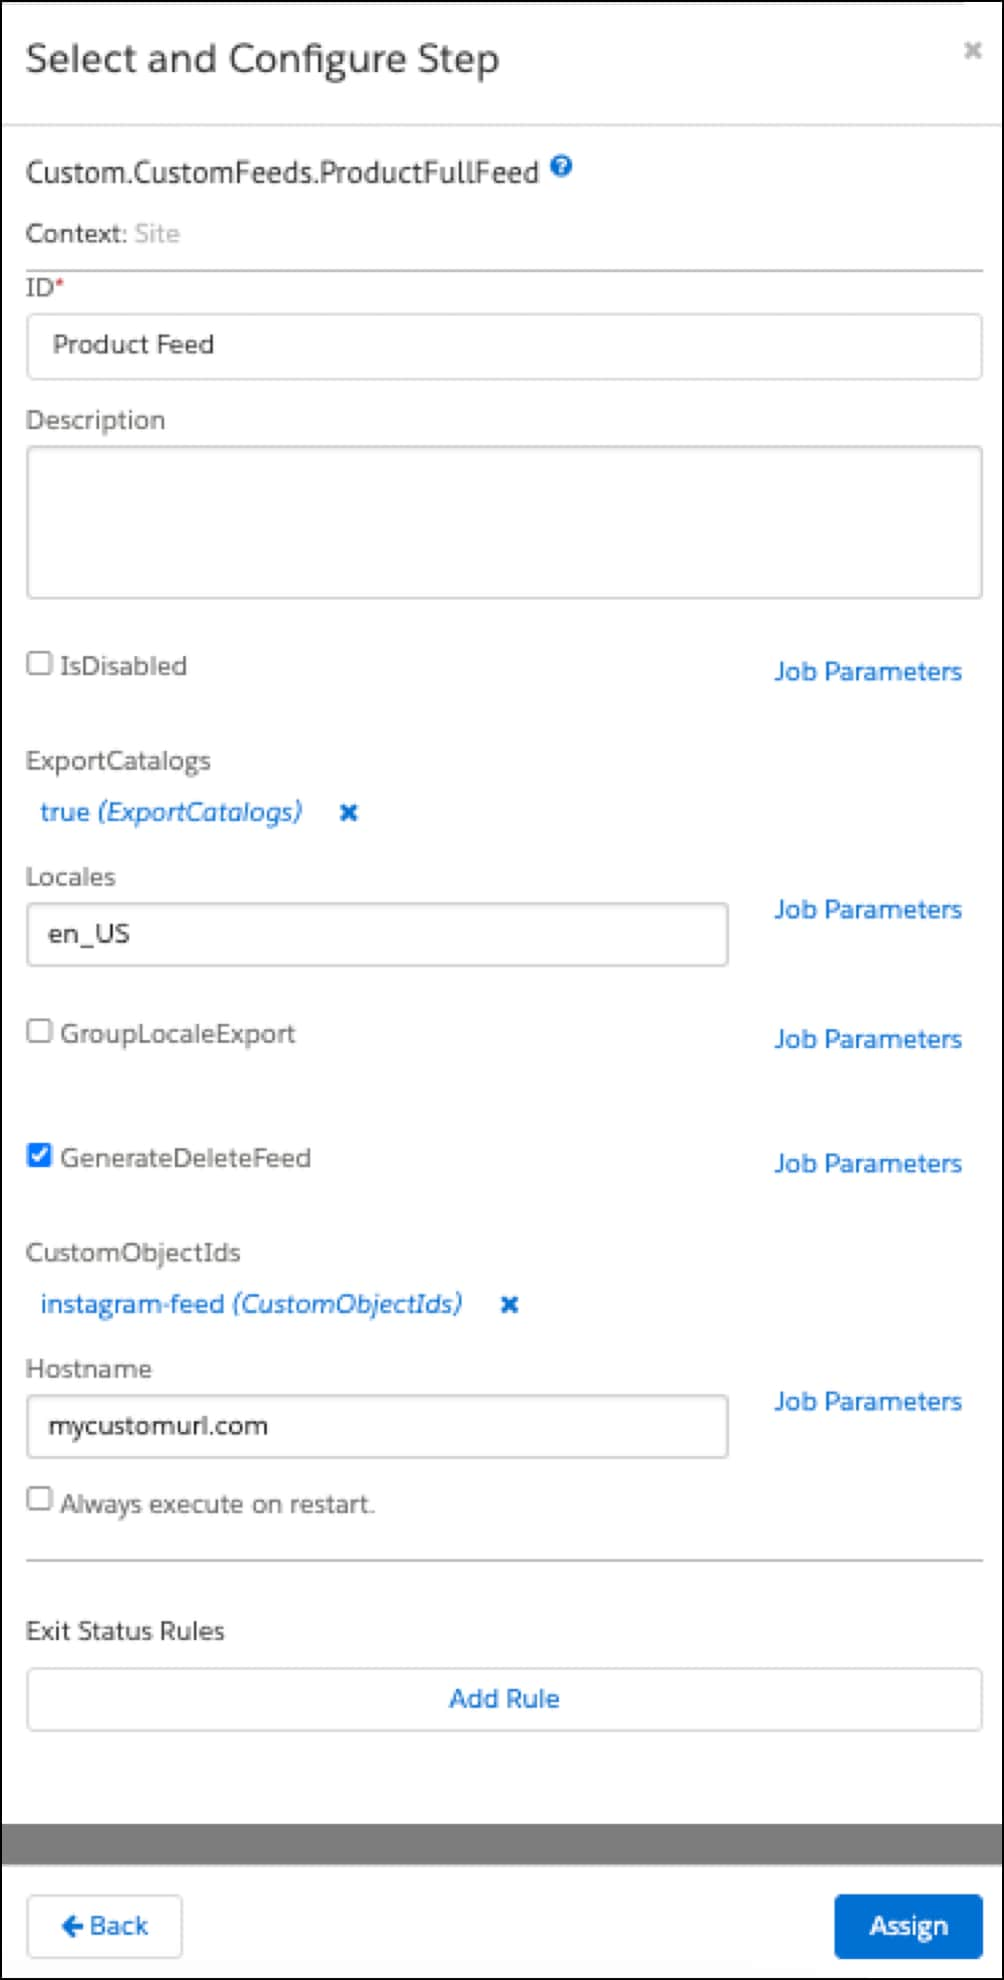
-
-
Notify Feed
-
Set FeedType to
PRODUCTS. -
Set UpdateType to
CREATE. -
Set FileFolder to the folder location in which to generate the feeds. This path is relative to
_IMPEX/_. -
Select Assign.
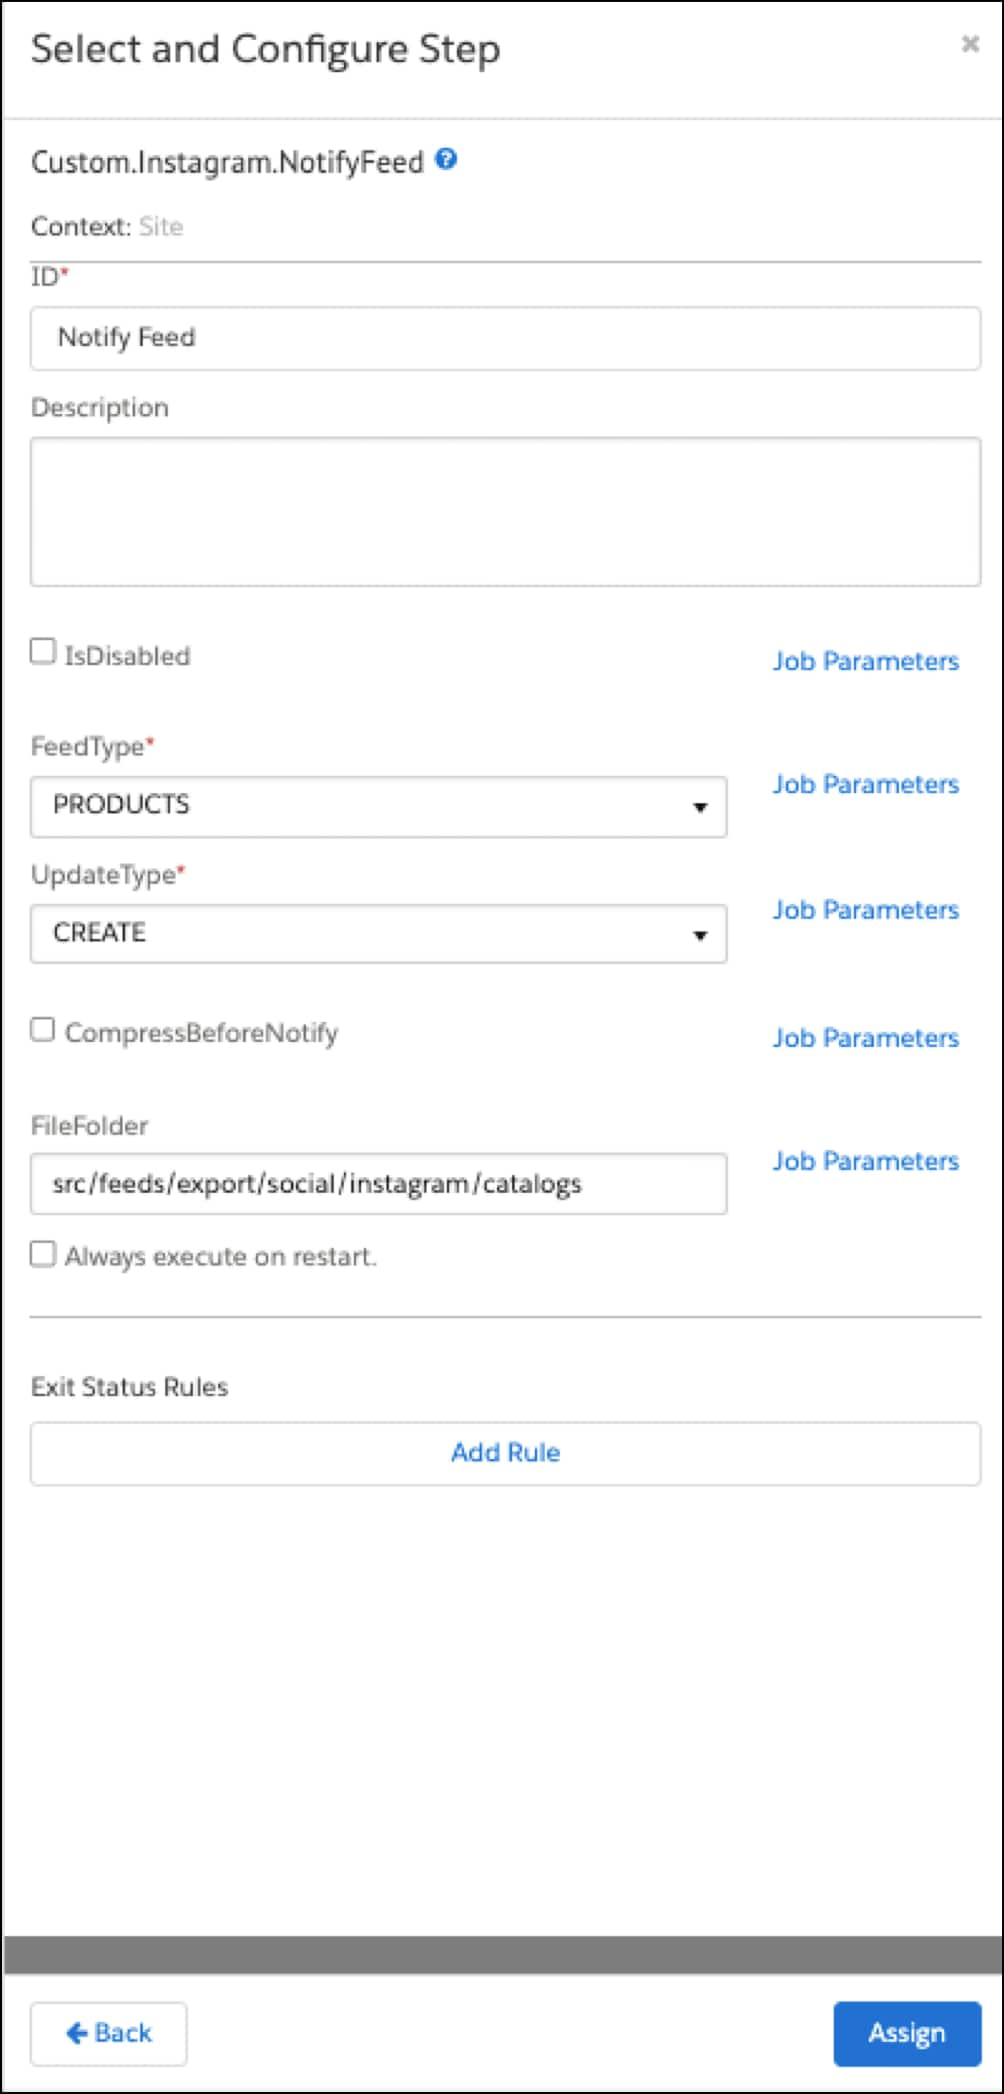
-
-
-
Select Run Now or select the Schedule and History tab to schedule the job.
-
-
Export Orders job
-
Log in to Business Manager.
-
Click App Launcher
 and then select Administration > Operations > Jobs.
 -
Select the Instagram-ExportOrders job.
-
Select the Job Steps tab and configure the following job steps:
-
Export Orders
-
The following table shows important attributes:
Step Parameter Description Is Disabled A flag to disable this step from the job execution flow (for test purposes) FileFolder The folder in which to generate the feed file. This path is relative to _IMPEX/_. -
Set values for the attributes as needed and then select Assign.
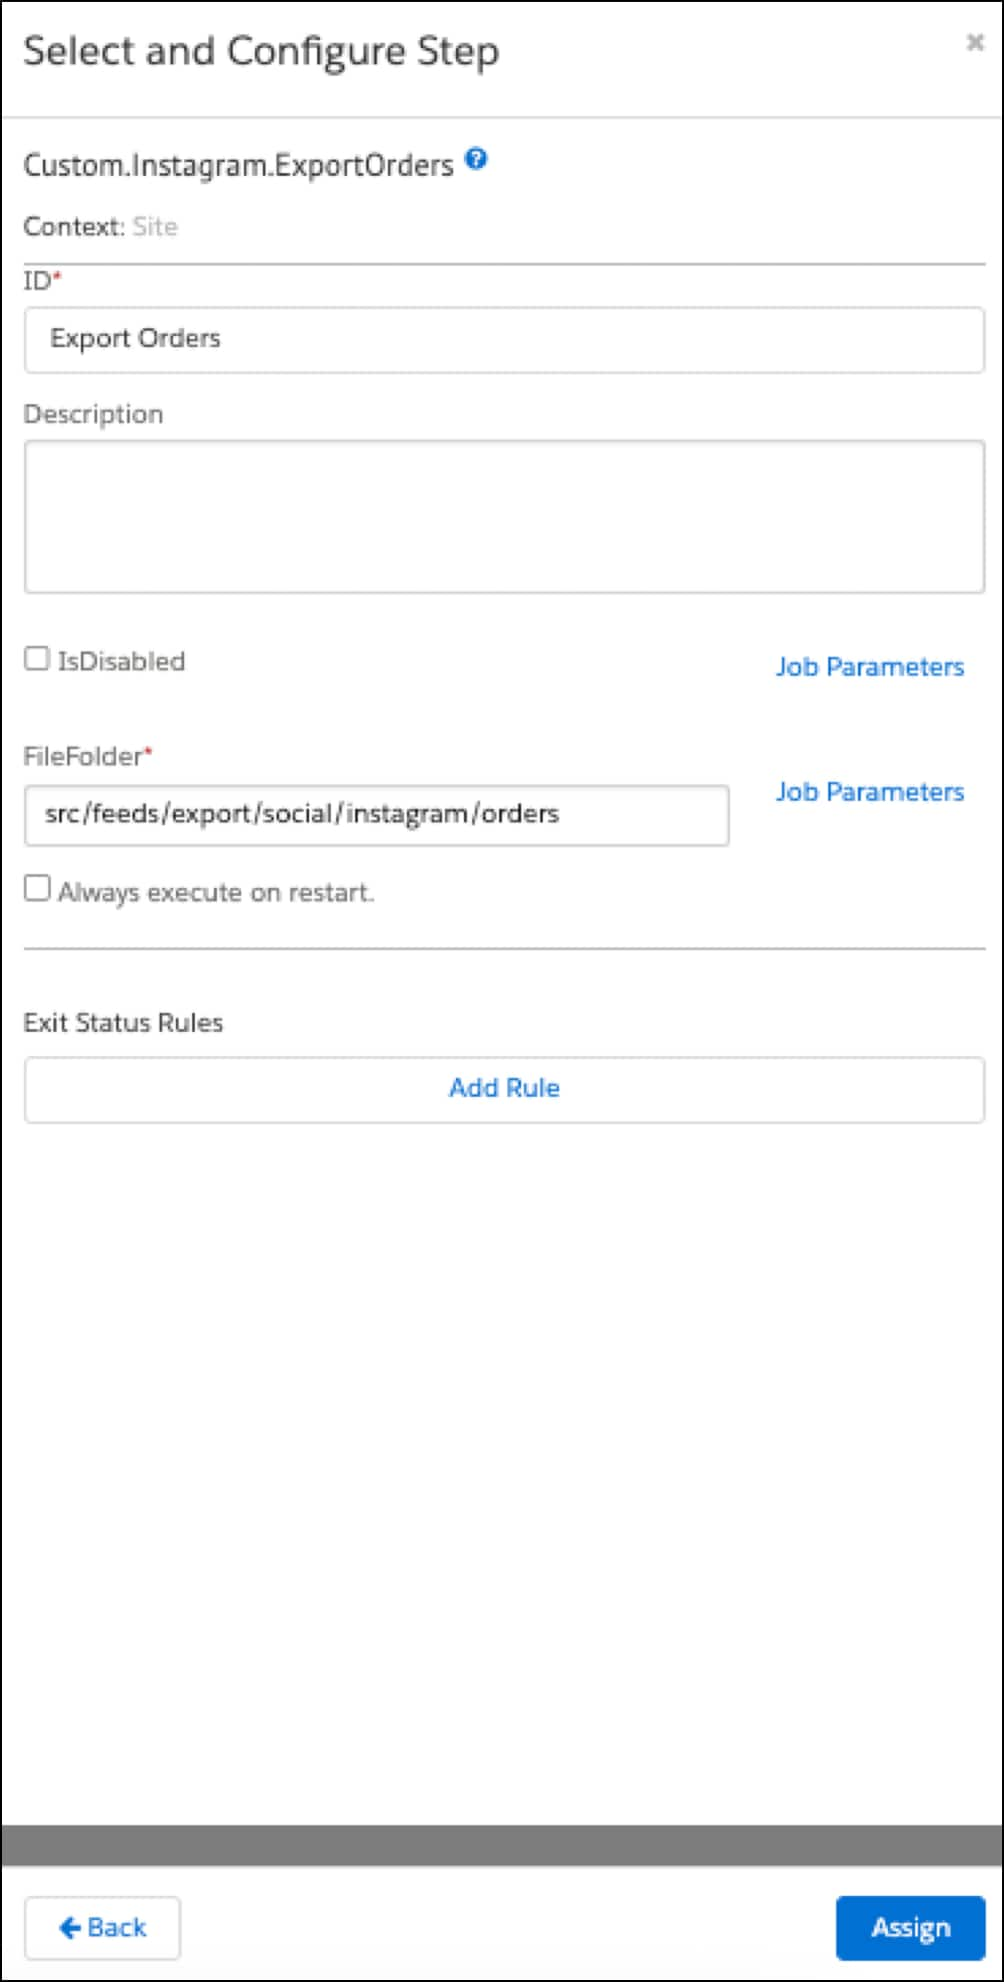
-
-
Notify Feed
-
Set FeedType to
ORDERS. -
Set UpdateType to
UPDATE. -
Set FileFolder to the folder location in which to generate the feeds. This path is relative to
_IMPEX/_. -
Select Assign.
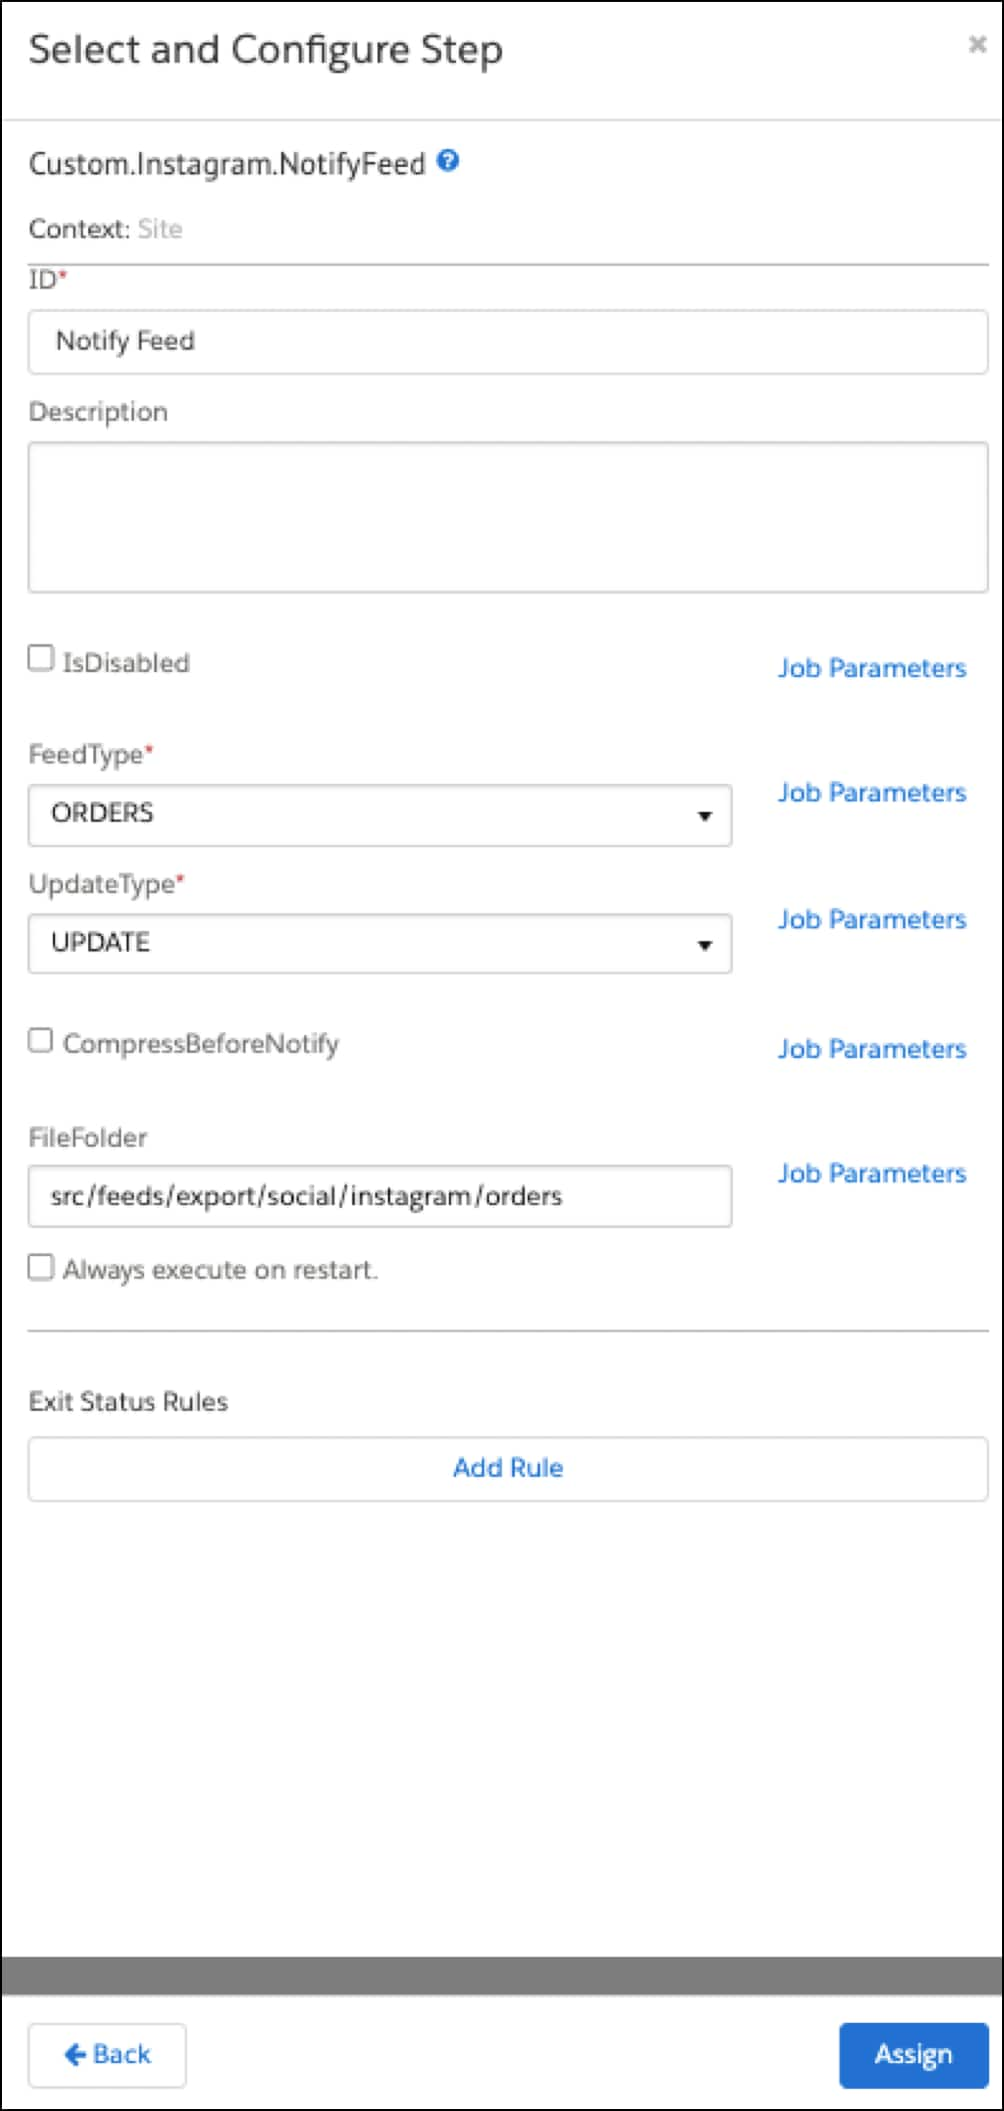
-
-
-
Select Run Now or select the Schedule and History tab to schedule the job.
-
-
Export Delta Feeds Job
-
Log in to Business Manager.
-
Click App Launcher
 and then select Administration > Operations > Jobs.
 -
Select the Instagram-ExportPartialFeeds job.
-
Select the Job Steps tab and configure the following job steps:
-
Product Feed
-
The following table shows important attributes:
Step Parameter Description Is Disabled A flag to disable this step from the job execution flow (for test purposes). ExportCatalogs A flag to enable exporting products from catalogs. Set this to activated unless you want to generate only a delete feed file. DeltaCatalogInDays Delta for a specified number of days. Valid values include 0.1through1.0.1= 2.4 hours;0.2= 4.8 hours;...;1= 24 hours. For example, set 0.1 to do delta updated products for the last 2.4 hours.Locales Comma-separated locales to extract product attributes. An empty value indicates to only use the default site locale. GroupLocaleExport If checked, the product attributes are grouped by locales when generating the feeds. GenerateDeleteFeed If checked, a delete feed is also generated. It uses the last feed execution information contained in tracking files to generate the delete feed. A separate file is created for deleted products, which lets Facebook and Instagram know about products that are deleted. NOTE: If you manually create a delete file for Facebook and Instagram, specify line endings as line feed, LF(\n) instead of carriage returnCR(\r) orCRLF(\r\n).CustomObjectIds Comma-separated SalesChannelFeedConfigIDs that store instructions on how to generate each feed, for example:instagram-feed.Hostname If informed, this is used to compose the URL path of images on the resulting feed. -
This job step requires a pre-built product index when you set a specific category (instead of
root) in your feed configuration object. -
Set values for the attributes as needed and then select Assign.
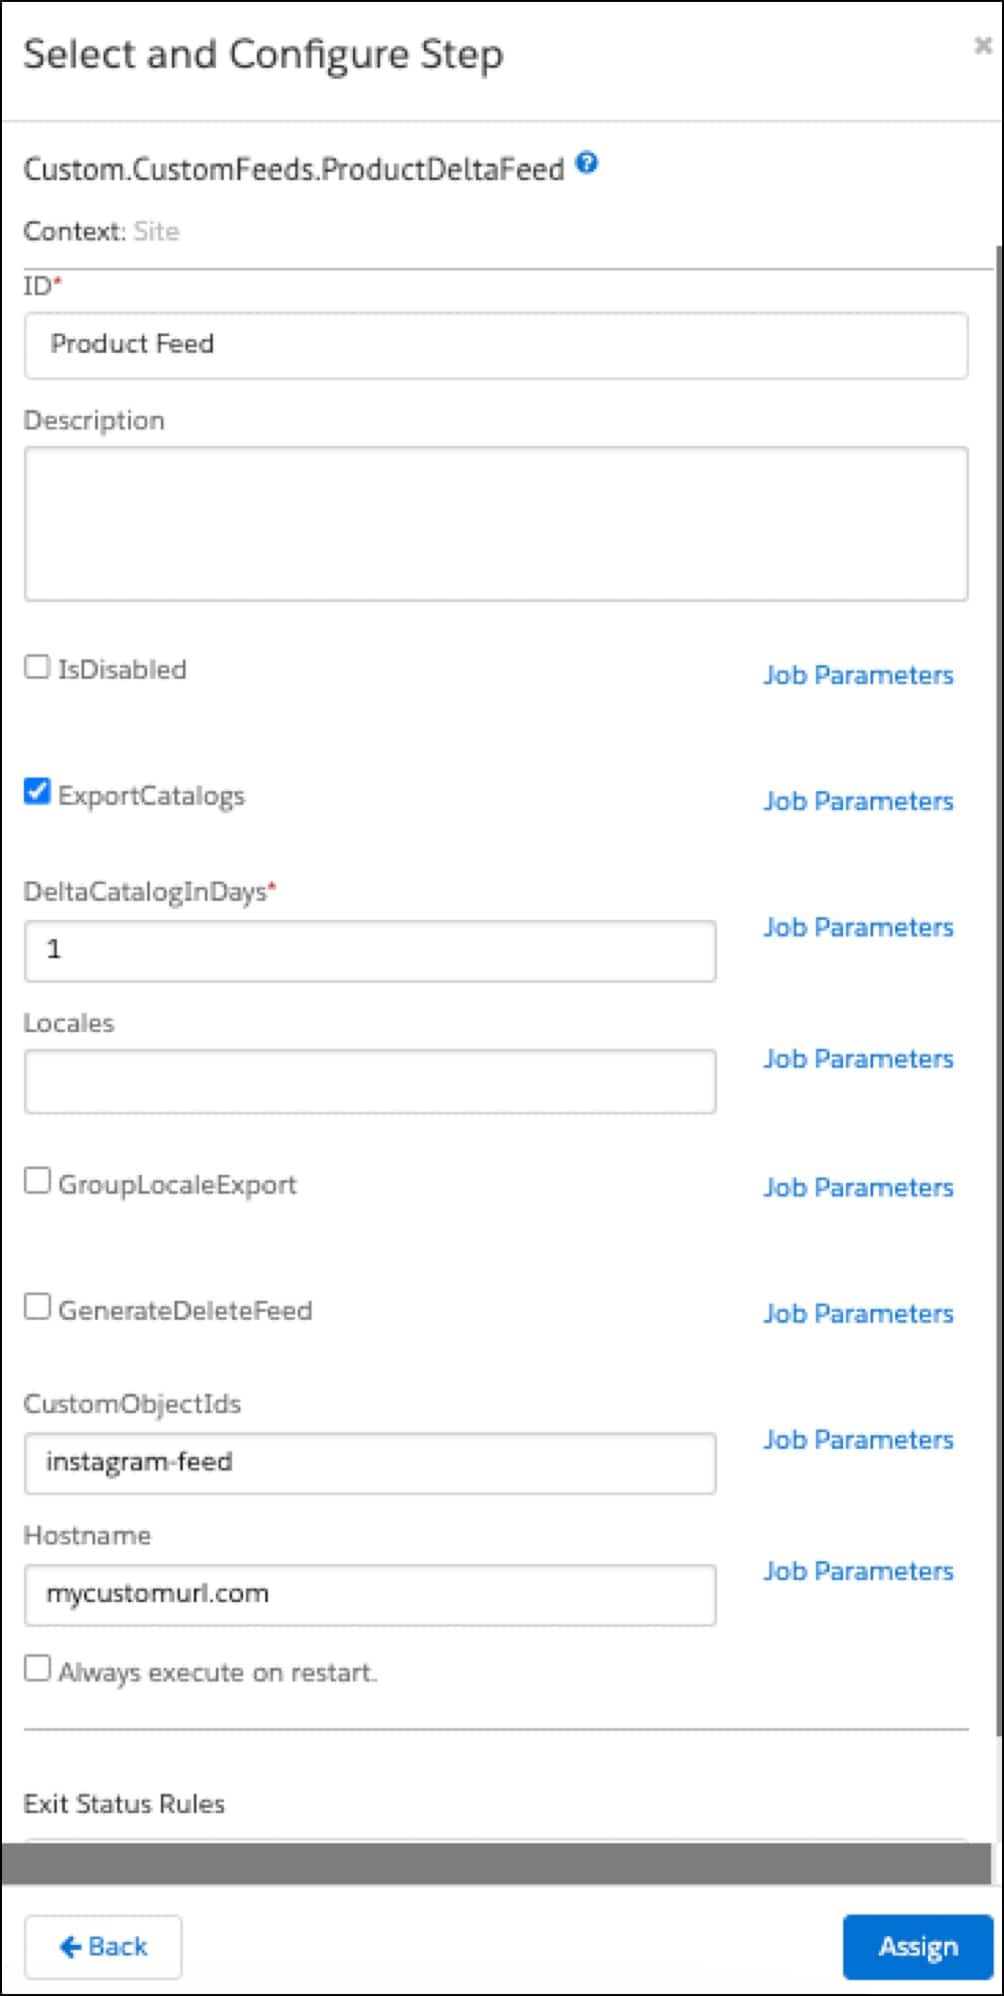
-
-
Notify Feed
-
Set FeedType to
PRODUCTS. -
Set UpdateType to
UPDATE. -
Set FileFolder to the folder location for the feeds. This path is relative to
_IMPEX/_. -
Select Assign.
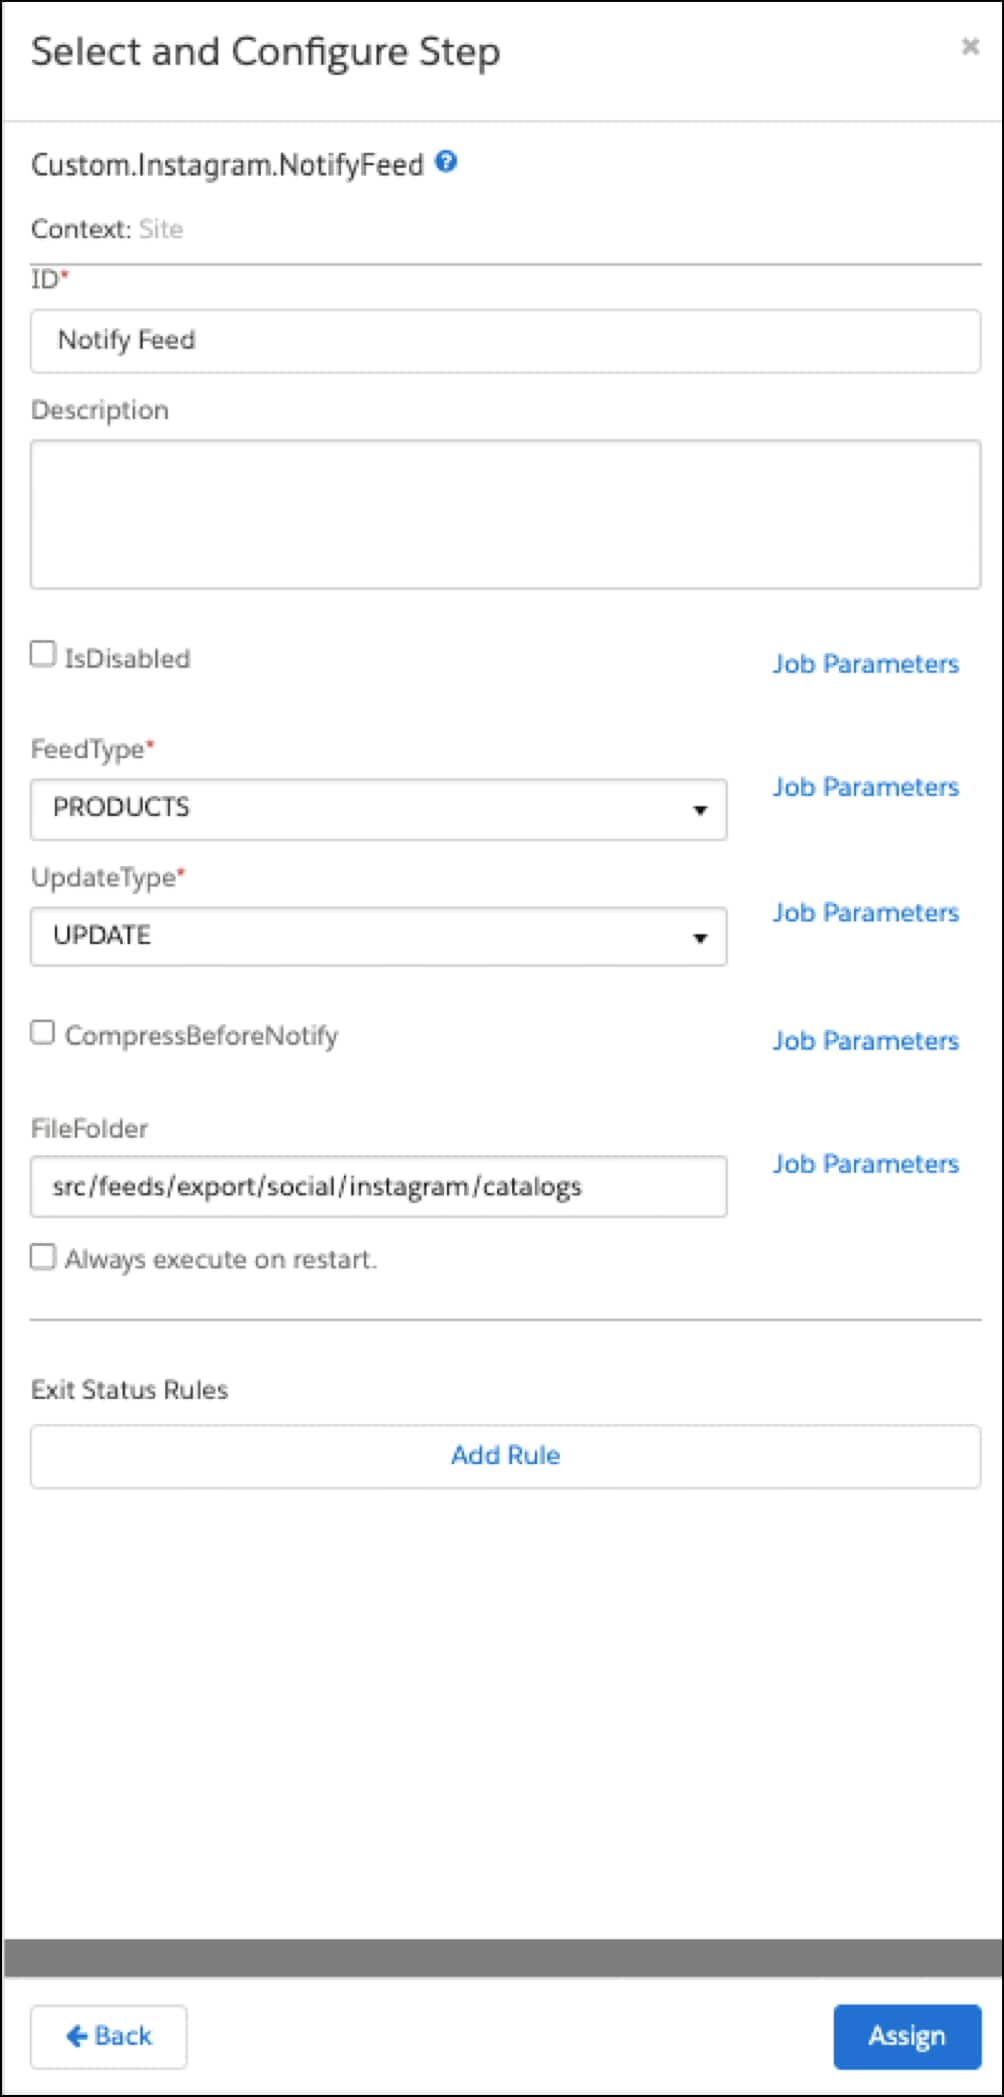
-
-
-
Select Run Now or select the Schedule and History tab to schedule the job.
-
-
Export Promotions Job
-
Log in to Business Manager.
-
Click App Launcher
 and then select Administration > Operations > Jobs.
 -
Select the Instagram-ExportPromotions job.
-
Select the Job Steps tab and configure the following job steps:
-
Export Promotions
-
The following table shows important attributes:
Step Parameter Description ExportFile Optional. If used, the generated file receives the same name. FileNamePrefix (recommended) A name prefix that can contain a path and is used to generate different files with a timestamp. This is the prefix for the file and folder where the feed is to be generated. This path is relative to _IMPEX/src/_.OverwriteExportFile If checked, the resulting file can overwrite an older file on the same directory. -
Select Assign.
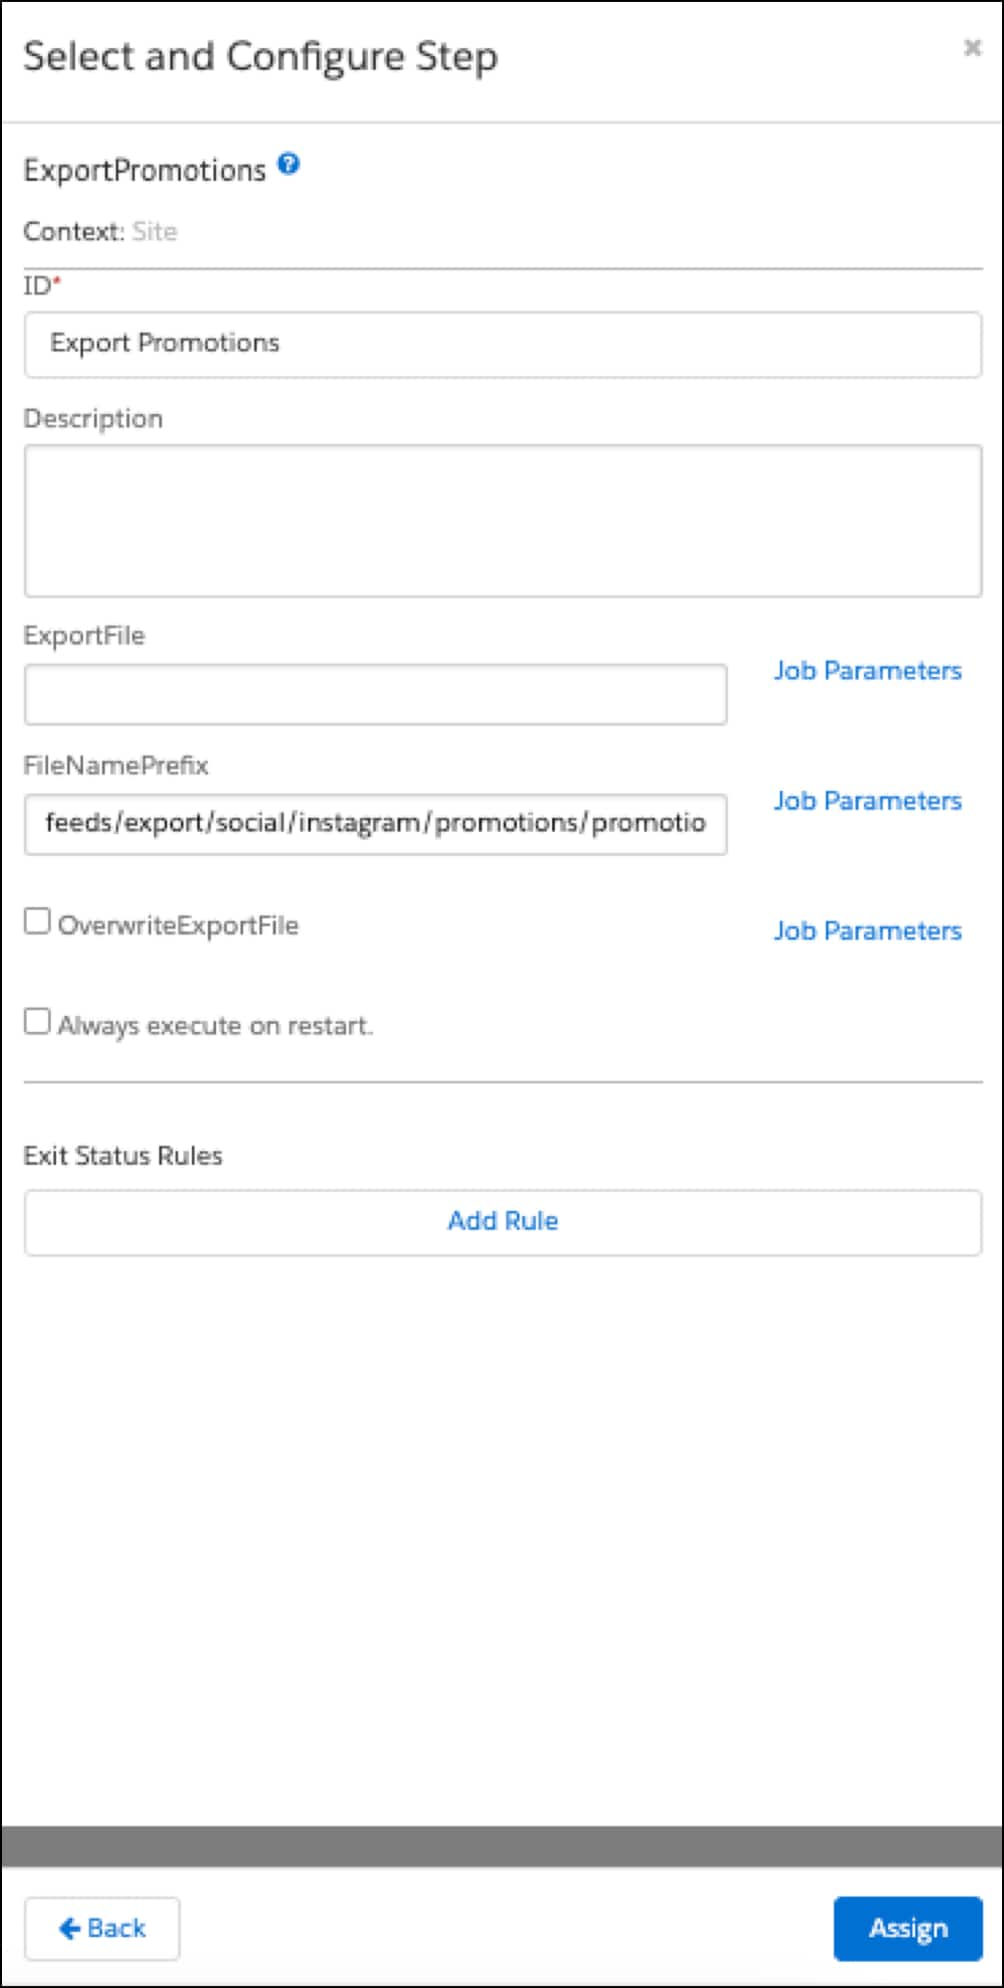
-
-
Notify Feed
-
Set FeedType to
PROMOTIONS. -
Set UpdateType to
CREATE. -
Set FileFolder to a folder location for the generated feeds. This path is relative to
_IMPEX/_. -
Set values for the attributes as needed and then select Assign.
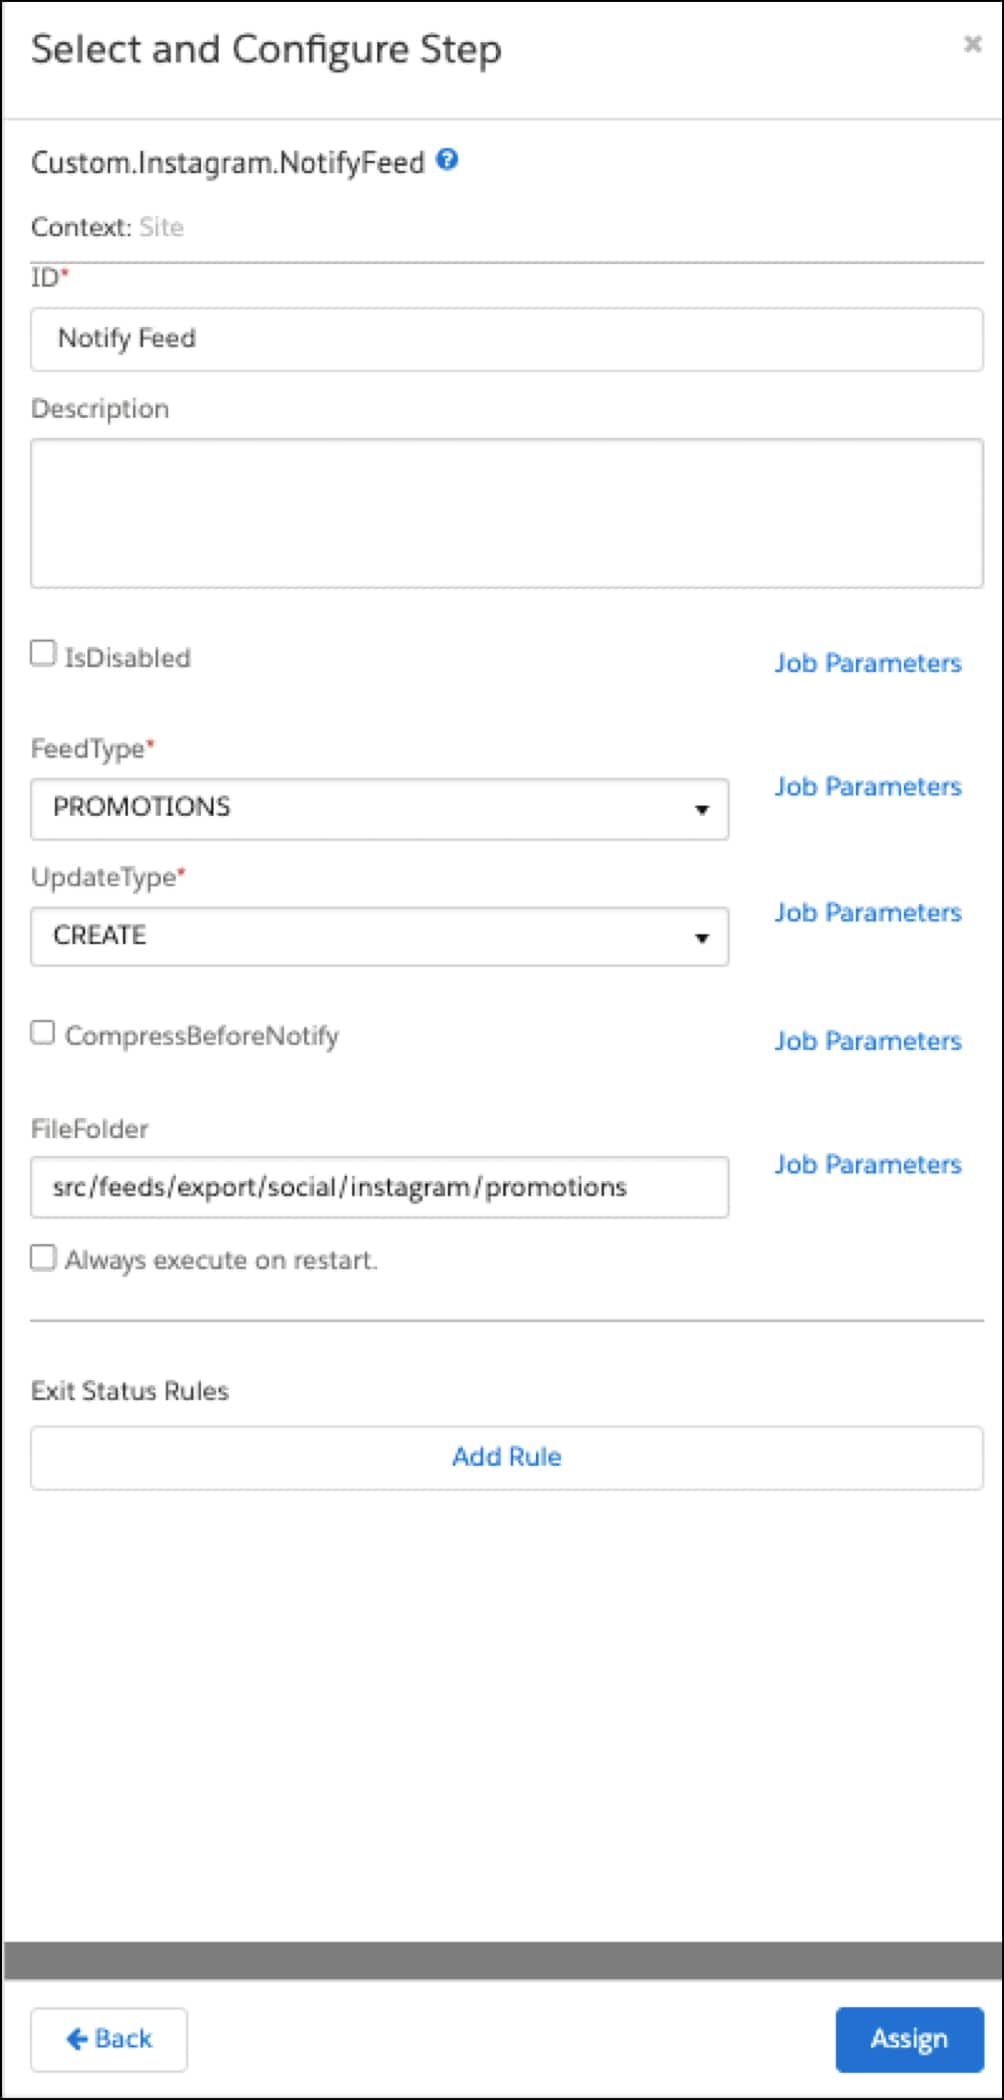
-
-
-
Select Run Now or select the Schedule and History tab to schedule the job.
-
-
Export Shipping Profiles Job
-
Log in to Business Manager.
-
Click App Launcher
 and then select Administration > Operations > Jobs.
 -
Select the Instagram-ExportShippingProfiles job.
-
Select the Job Steps tab and configure the following job steps:
-
Export Shipping Methods
-
The following table shows important attributes:
Step Parameter Description ExportFile Optional. If used, the generated file receives the same name. FileNamePrefix (recommended) A name prefix that can contain a path and be used to generate different files with a timestamp. This is the prefix for the file and folder where the feed is to be generated. This path is relative to _IMPEX/src/_.OverwriteExportFile If checked, the resulting file can overwrite an older file on the same directory. -
Set values for the attributes as needed and then select Assign.
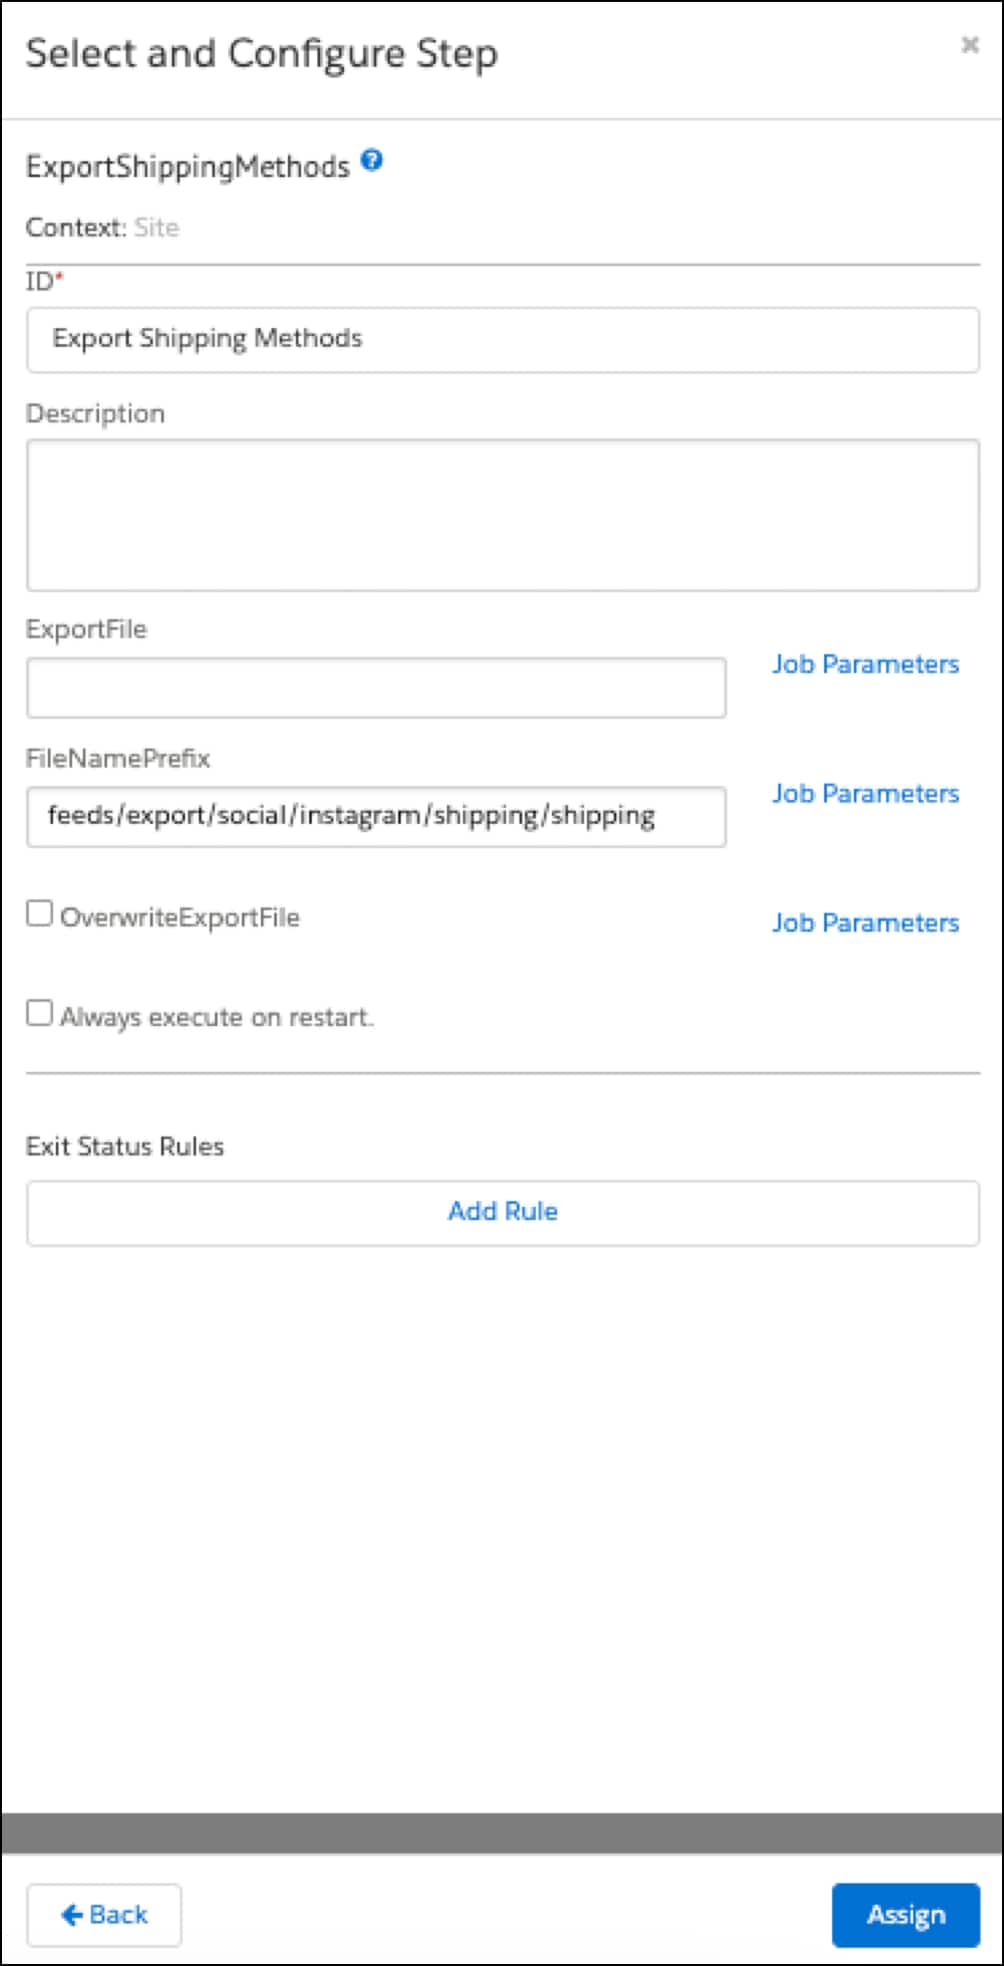
-
-
Notify Feed
-
Set FeedType to
SHIPPING_PROFILES. -
Set UpdateType to
CREATE. -
Set FileFolder to the folder location where the feeds are generated. This path is relative to
_IMPEX/_. -
Select Assign.
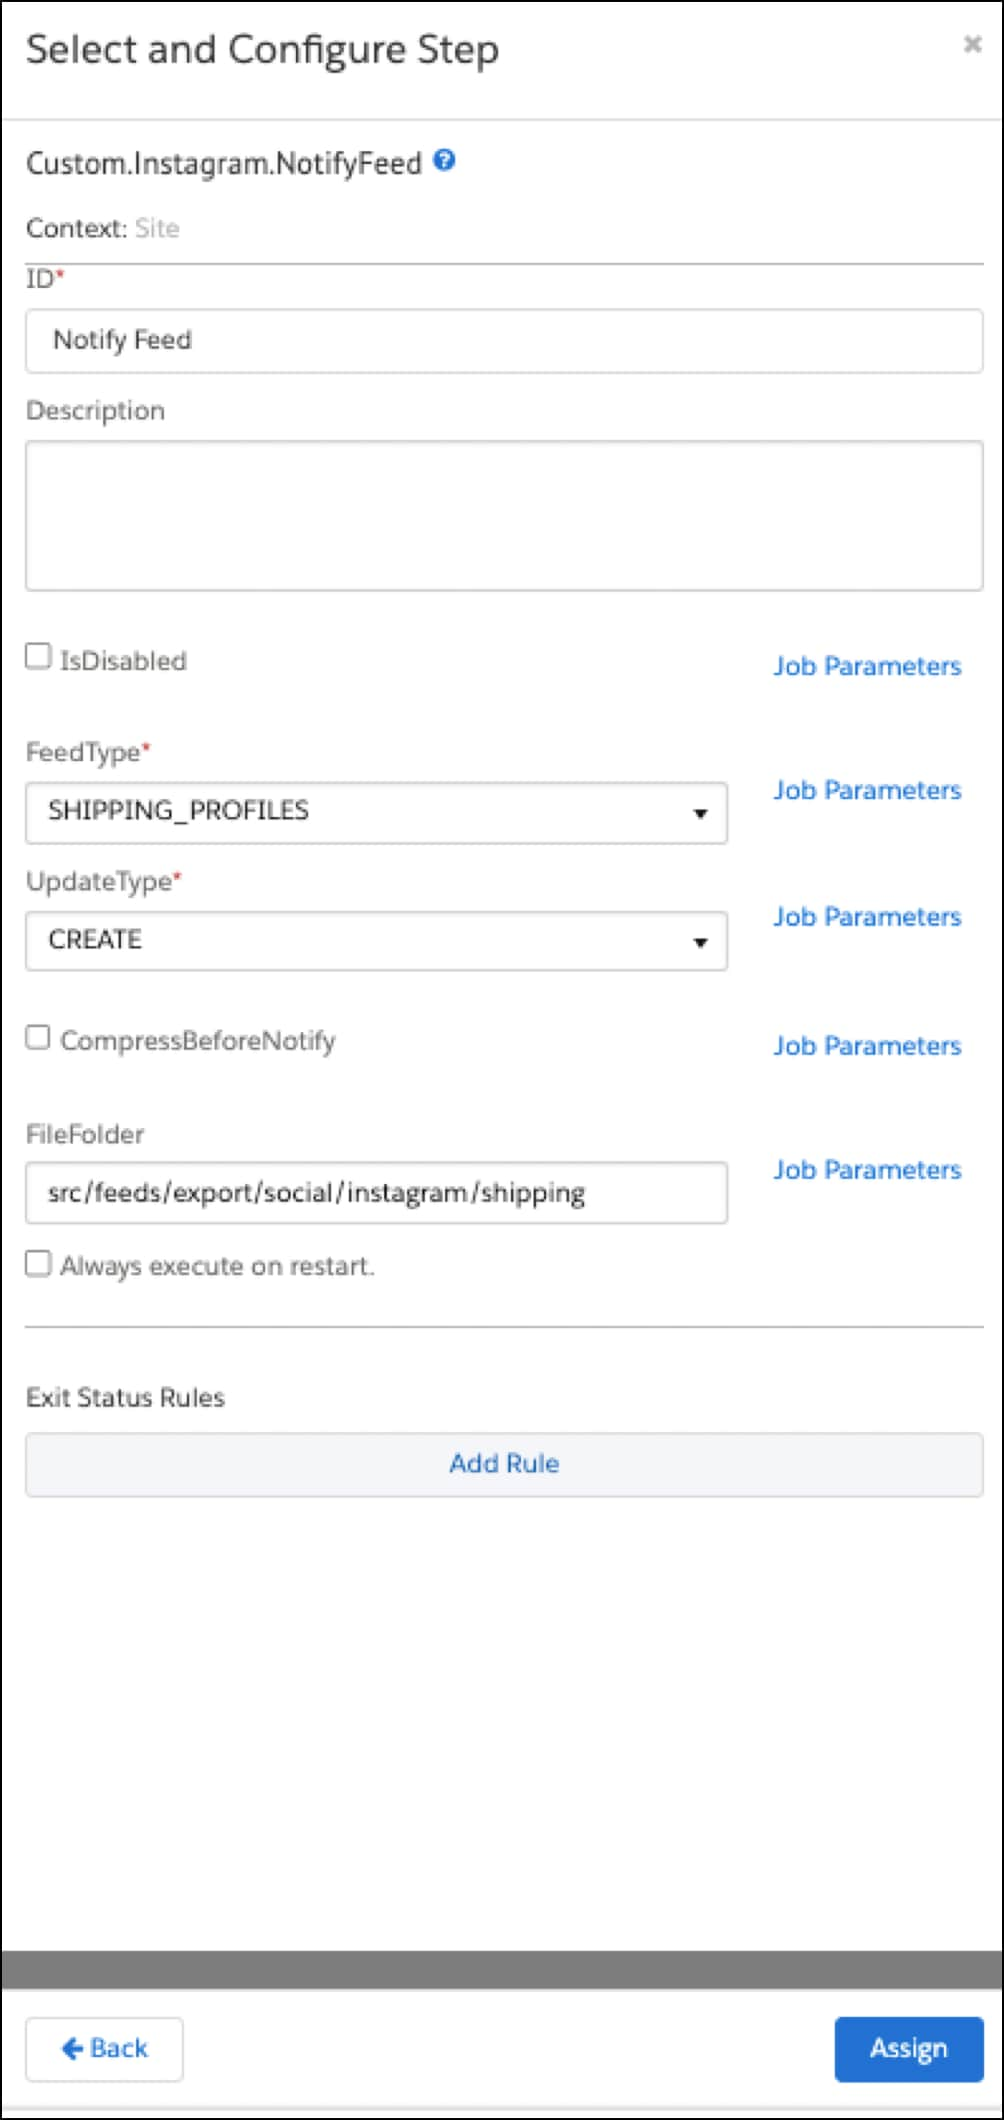
-
-
-
Select Run Now or select the Schedule and History tab to schedule the job.
-
When you configure jobs for more than one site, pay attention to the following job-specific information. Use the following screenshot as a guide when setting folder information for each job:
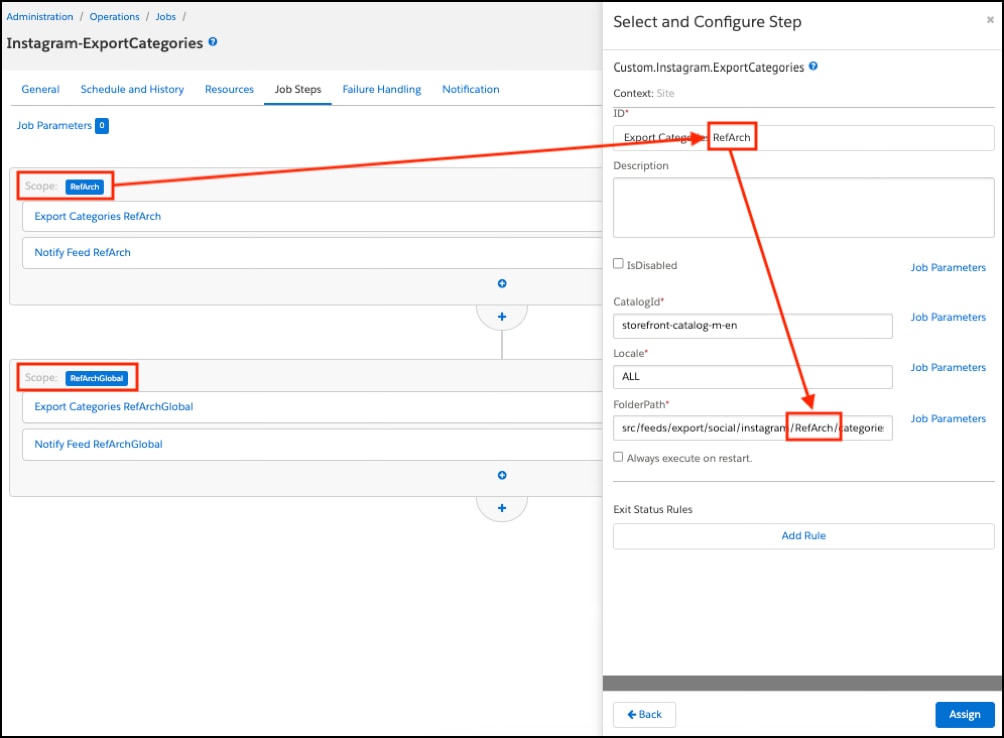
- Instagram-ExportCategories job:
- The Export Categories step generates the category tree feed and can create multiple files, depending on the selected locales.
- The Notify Feed step attempts to send all files generated in the previous steps (observing the correct folder) to each site within the scope of this step.
- For each site:
- Create a sequential flow with the required steps.
- Set a different folder for Export Categories and Notify Feed.
- Instagram-ExportFullFeeds job:
- The Product Feed step generates the catalog feed and can create multiple files, depending on the specified parameters.
- The Notify Feed step attempts to send all files generated in the previous steps (observing the correct folder) to each site within the scope of this step.
- For each site:
- Create a sequential flow with the required steps.
- Set a different
CustomObjectId(a feed configuration id that includes folder and site) for Product Feed and a different folder for Notify Feed.
- Instagram-ExportOrders job:
- The Export Orders step generates the order feed and creates just one file in the specified folder.
- The Notify Feed step attempts to send all files generated in the previous steps (observing the correct folder) to each site within the scope of this step.
- For each site:
- Create a sequential flow with the required steps.
- Set a different folder for Export Orders and Notify Feed.
- Instagram-ExportPartialFeeds job:
- The Product Feed step generates the catalog feed and can create multiple files, depending on the specified parameters.
- The Notify Feed step attempts to send all files generated in the previous steps (observing the correct folder) to each site within the scope of this step.
- For each site:
- Create a sequential flow with the required steps.
- Set a different CustomObjectId (a feed configuration id that includes folder and site) for Product Feed and a different folder for Notify Feed.
- Instagram-ExportPromotions job:
- The Export Promotions step generates the promotion feed and creates just one file in the specified folder.
- The Notify Feed step attempts to send all files generated in the previous steps (observing the correct folder) to each site within the scope of this step.
- For each site:
- Create a sequential flow for each site with the required steps.
- Set a different folder for Export Promotions and Notify Feed.
- Instagram-ExportShippingProfiles job:
- The Export Shipping Methods step generates the order feed and creates just one file in the specified folder.
- The Notify Feed step attempts to send all files generated in the previous steps (observing the correct folder) to each site within the scope of this step.
- For each site:
- Create a sequential flow with the required steps.
- Specify a different folder for Export Shipping Methods and Notify Feed.
Send shoppers from Facebook and Instagram to your B2C Commerce storefront by adding checkout URLs.
You can create permalinks only for SFRA and hybrid storefronts.
-
In your Meta Commerce Business product catalog, make sure that your product IDs (called content IDs in Meta) match your SKU IDs.
-
Enable permalinks.
- In Business Manager, from App Launcher
 , go to Administration > Global Preferences > Feature Switches.
 - Select Enable Permalinks Integration.
- In Business Manager, from App Launcher
-
Add a URL pipeline to route shoppers to checkout.
You can add a storefront link for simple and variant products, and each cart can include one coupon. You can’t create a link for a bundle, option, bonus, subscriptions, or gift card product. All transactions must be in US currency.
- Select Merchant Tools > Site > SEO > URL Rules.
- Go to the Pipeline URLs tab.
- For New Alias, enter a term to represent the pipeline in the URL. For example, to show the URL as hostnamealias/s/sitename/permalink-checkout instead of hostnamealias/s/sitename/Checkout-Start, enter permalink-checkout.
- For Resolves To, enter PermalinkCheckout-Begin.

- Click Apply.
For Meta transaction flow details, see Checkout Scenarios on Meta Flows.
- Log in to Business Manager.
- In Business Manager, click App Launcher
 and then select Merchant Tools > Social Channels > Facebook and Instagram.
 - If you are connected, the Disconnect button is displayed.
- Selecting the Disconnect button calls the disconnect process and clears your data in this environment.
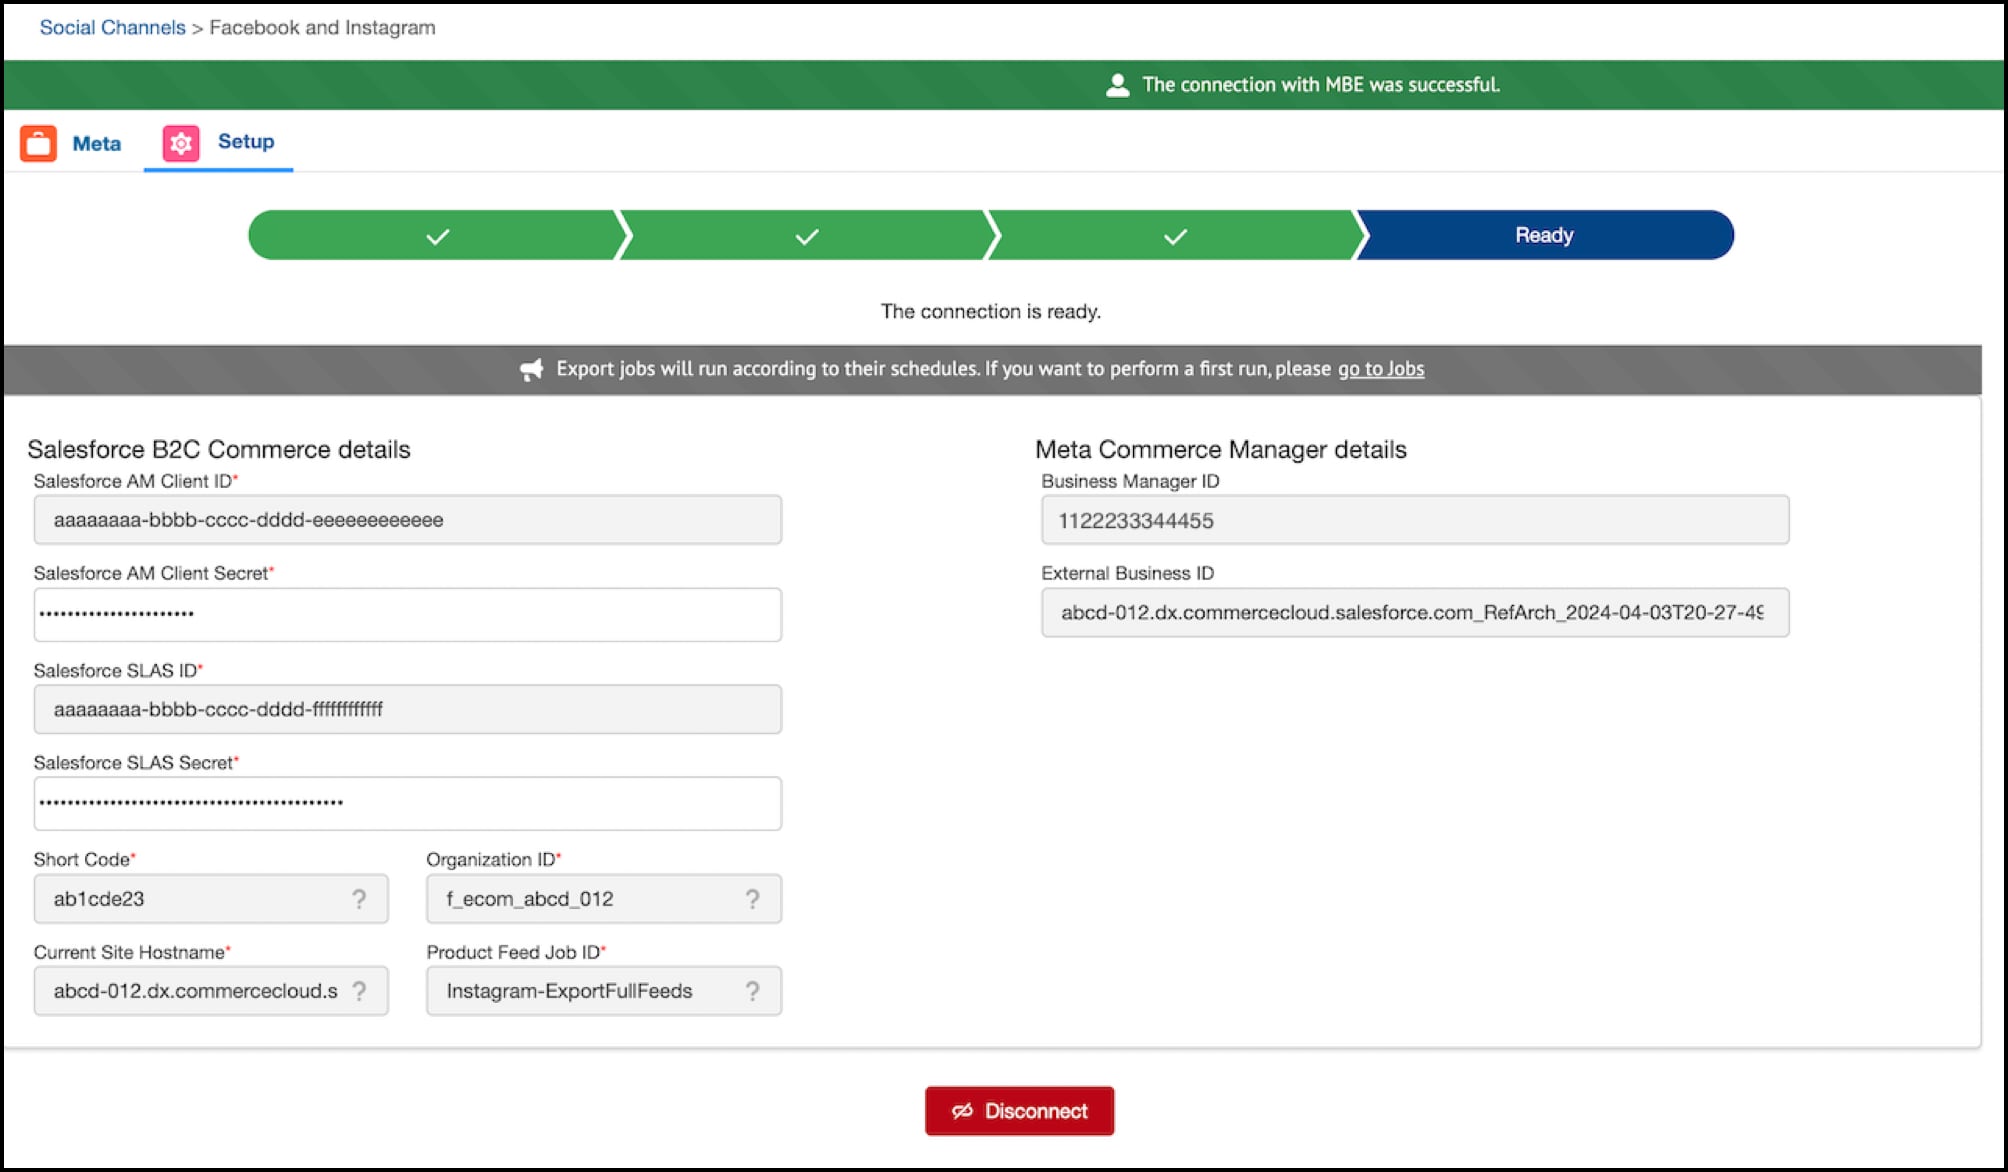
To enable centralization of product catalog synchronization and optimize audience engagement with TikTok users, integrate TikTok for Business with your SiteGenesis or Storefront-Reference-Architecture (SFRA) site.
TikTok for Business requires that you have a SiteGenesis or Storefront-Reference-Architecture (SFRA).
You also need:
- A Salesforce Commerce Cloud site catalog
- A Salesforce Commerce Cloud business user account
- A Salesforce Commerce API client setup within Account Manager
| A-E | F-K | L-Q | R-V |
|---|---|---|---|
| Argentina | Finland | Lebanon | Romania |
| Australia | France | Malaysia | Saudi Arabia |
| Austria | Greece | Mexico | Singapore |
| Bahrain | Germany | Morocco | South Africa |
| Belarus | Hungary | Netherlands | South Korea |
| Belgium | Indonesia | New Zealand | Spain |
| Brazil | Iraq | Norway | Sweden |
| Cambodia | Ireland | Oman | Switzerland |
| Canada | Israel | Pakistan | Taiwan |
| Chile | Italy | Peru | Thailand |
| Colombia | Japan | Philippines | Turkey |
| Czech | Jordan | Poland | United Arab Emirates |
| Denmark | Kazakhstan | Portugal | United Kingdom |
| Egypt | Kuwait | Qatar | United States |
| Vietnam |
TikTok for Business requires that you have a SiteGenesis or Storefront-Reference-Architecture (SFRA).
To clone the repository, you need access to the Salesforce CommerceCloud repositories on GitHub. If you don’t have a GitHub account, see Salesforce Commerce Cloud GitHub Repositories and Access.
-
Sign in to Salesforce CommerceCloud GitHub.
-
To copy the repository to your local system, search for the Social Channels Integrations repository, and click Clone.
To integrate with TikTok for Business, you need two cartridges:
bm_socialchannels: This cartridge contains the Business Manager controllers and UI logic for the Business Manager extension that a site administrator can use to integrate with different social channels like TikTok, and Snapchat.int_tiktok: This cartridge contains the logic to integrate with TikTok. It includes the service definitions, logic to handle the customer object that stores the TikTok details, and the job that syncs the B2C Commerce product catalog with TikTok.
-
Upload the cartridges to your sandbox and import the metadata. Follow the instructions in the README file from the social_channels folder.
Always install the cartridge in a staging instance, test the setup process with the staging Instance Id, orgId, and catalog. Then, replicate the code to production, change the instance Id, orgId in the setup process. Point staging and production instances to different catalogs, and pixels on TikTok. You can use the same business center account and TikTok Ad account.
-
Upload both
bm_socialchannelsandint_tiktokcartridges to your active code version. -
Add
bm_socialchannelscartridge to the Business Manager cartridge path.-
In Business Manager, click App Launcher
 and then select Administration > Sites > Manage Sites.
 -
On the Storefront Sites page, click Business Manager.
-
Add
int_socialchannelsto the cartridge path. -
Click Apply
-
-
Add
int_tiktokcartridge to the Business Manager cartridge path.-
In Business Manager, click App Launcher
 and then select Administration > Sites > Manage Sites.
 -
From the list of sites, select your site.
-
Click the Settingstab.
-
Add
int_tiktokto the cartridge path. -
Click Apply
The export catalog job directly calls the TikTok API.
-
-
Zip the contents of the data folder and import the zip file.
-
In Business Manager, click App Launcher
 and then select Administration > Site Development > Site Import & Export
 -
Click Choose File.
-
Select the zip file and click Import.
-
-
Give permission to the TikTok for Business Manager menu to the required users.
You integrate TikTok for Business with your B2C Commerce SiteGenesis or SFRA storefronts.
-
Log in to your business TikTok account using the Advertising on TikTok page.
-
On the same computer, log in to Business Manager. click App Launcher
 and then select Merchant Tools > Social Channels > TikTok for Business.
 -
Accept the data sharing agreements.
-
Complete Salesforce B2C Commerce and TikTok details form.
Salesforce B2C Commerce Details
-
Account Manager Client id–The commerce API client you set up in Account Manager.
-
Account manager Client Secret–The secret for the API client.
-
Tennent Id–The realm_instance. For example, zzie_047.
-
Org Id–Available in Business Manager. Select, Administration > Site Development > Salesforce Commerce API settings TikTok Details
-
Email–The email for the marketing team that uses the account.
-
Phone–The phone number for the marketing team that uses the account.
-
Country Code–The region where the website is set up.
-
WebSite URL–The URL for the site.
-
Industry Id–The industry for the site.
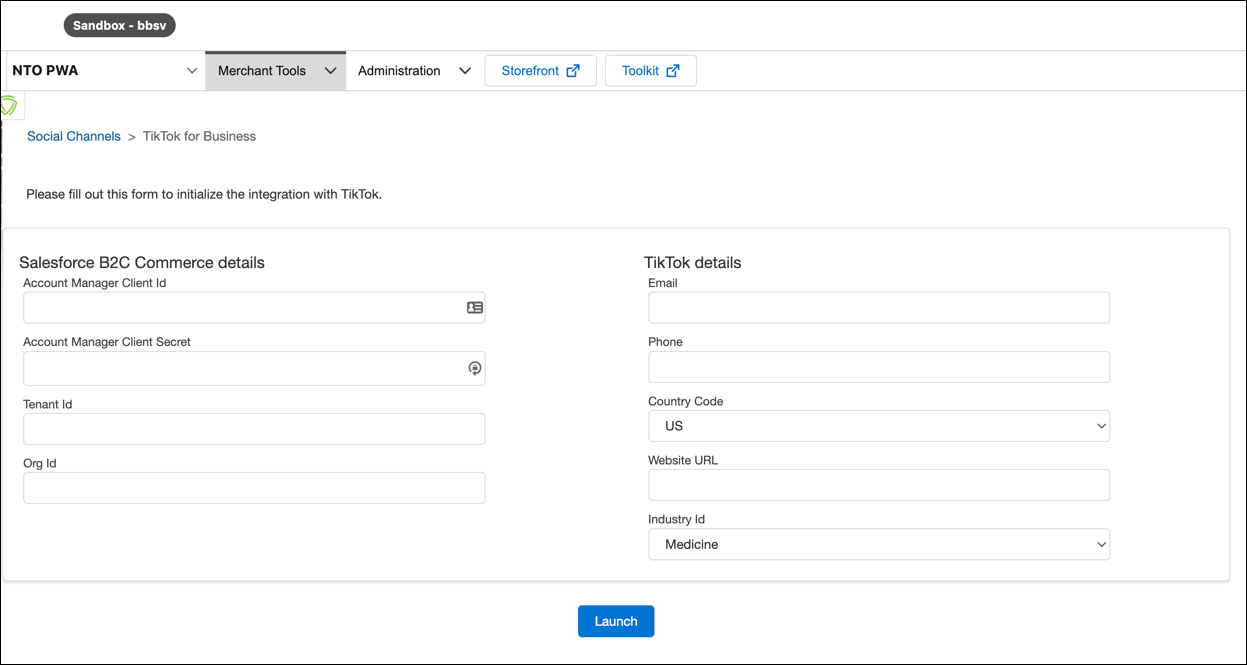
-
-
Click Launch.
You’re directed to the TikTok for Business site where you previously logged in.
-
In the TikTok for Business site, select an account.
-
Click Connect Account.
The TikTok for Business plugin and integration app is launched.

-
In the app, connect or create a business center.
You can only connect to existing business centers for which you have admin or owner access permission.
- To connect to an existing business center, click Connect.
- To create a Business Center, click Create New.
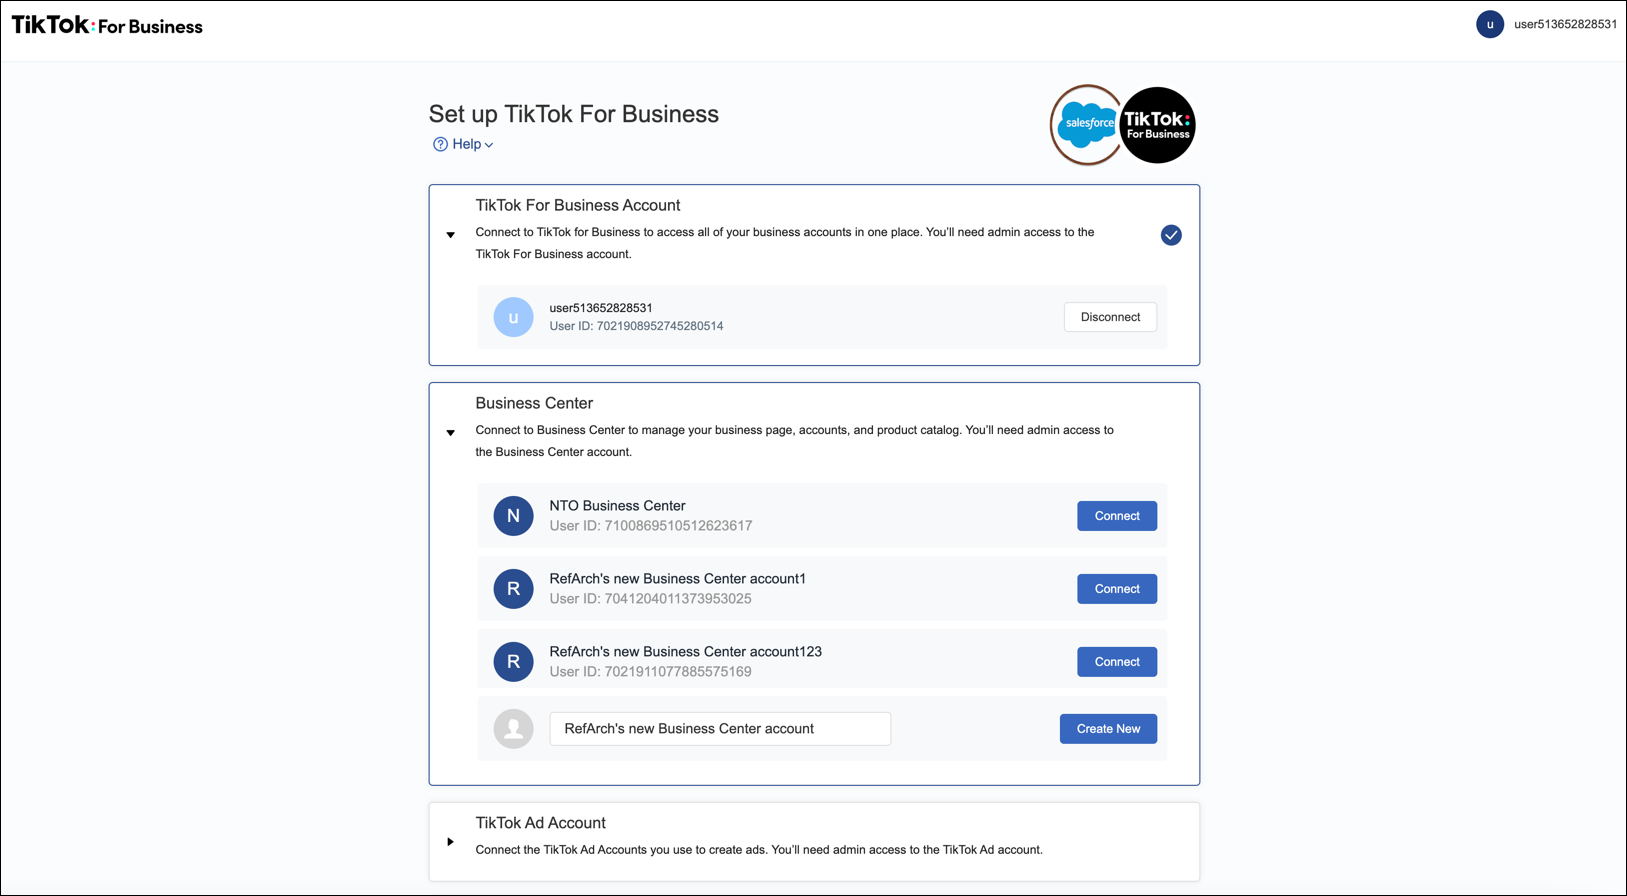
-
Connect or create an ad account
You can only connect to ad accounts for which you have admin or owner access permission.
- To connect to an existing ad account, click Connect.
- To create an ad account, click Create New.
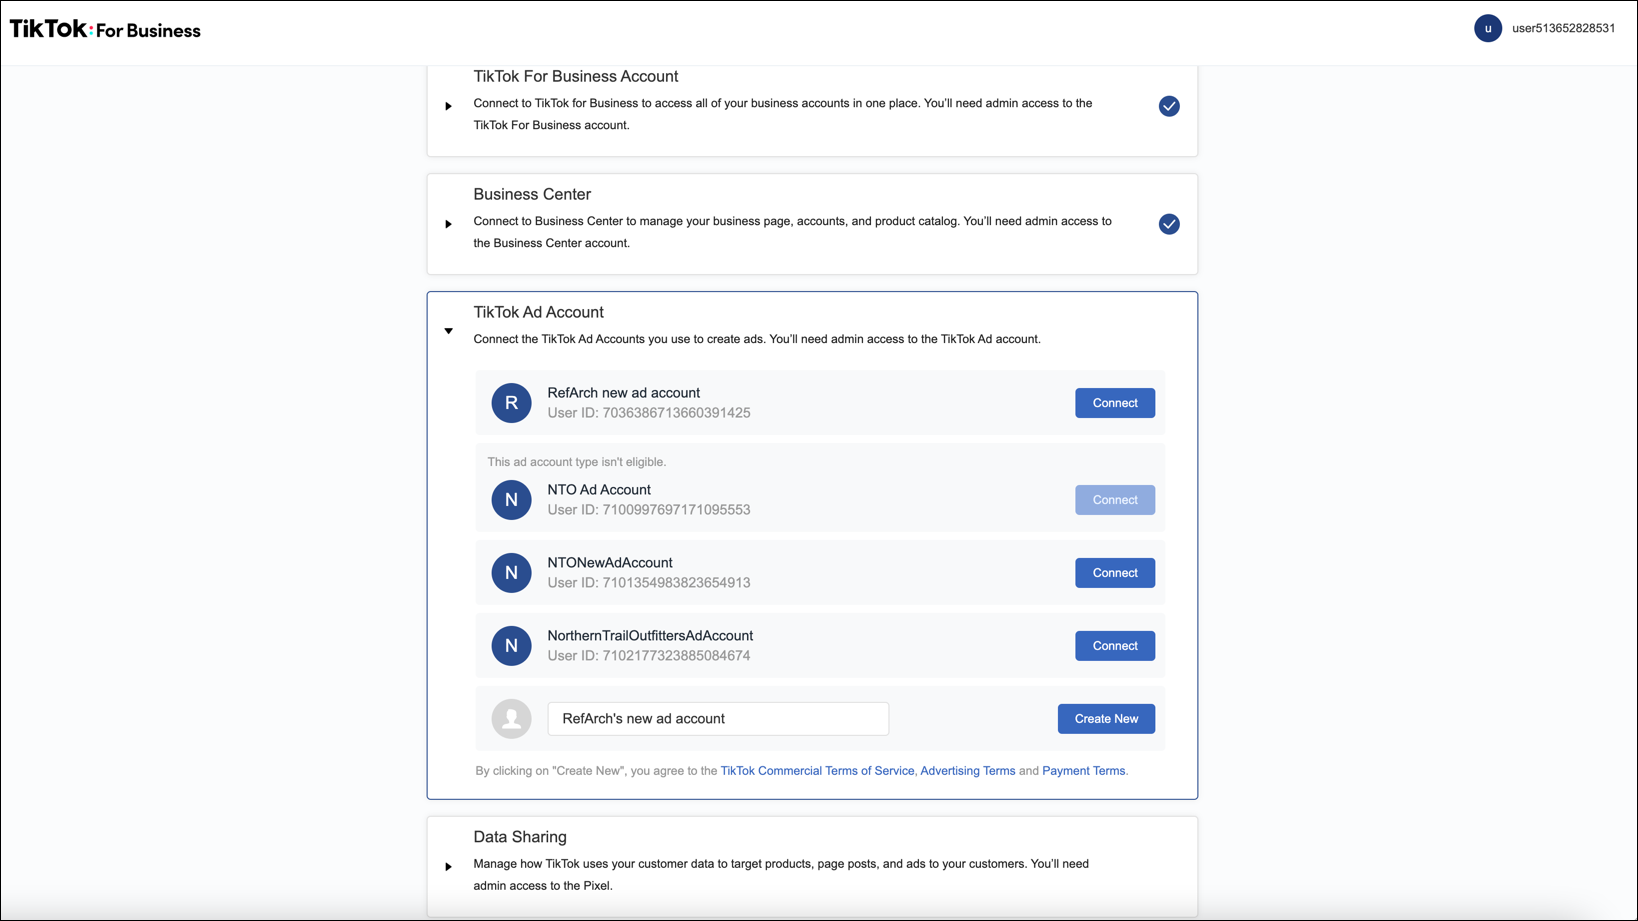
-
Connect or create a pixel.
You can only connect to a pixel for which you have admin or owner access permissions.
- To connect a pixel, click Connect.
- To create a pixel, click Create New. The pixel code isn't injected on your storefront. To enable event tracking, see Sync Shopper Activities and Monitor Web Events.
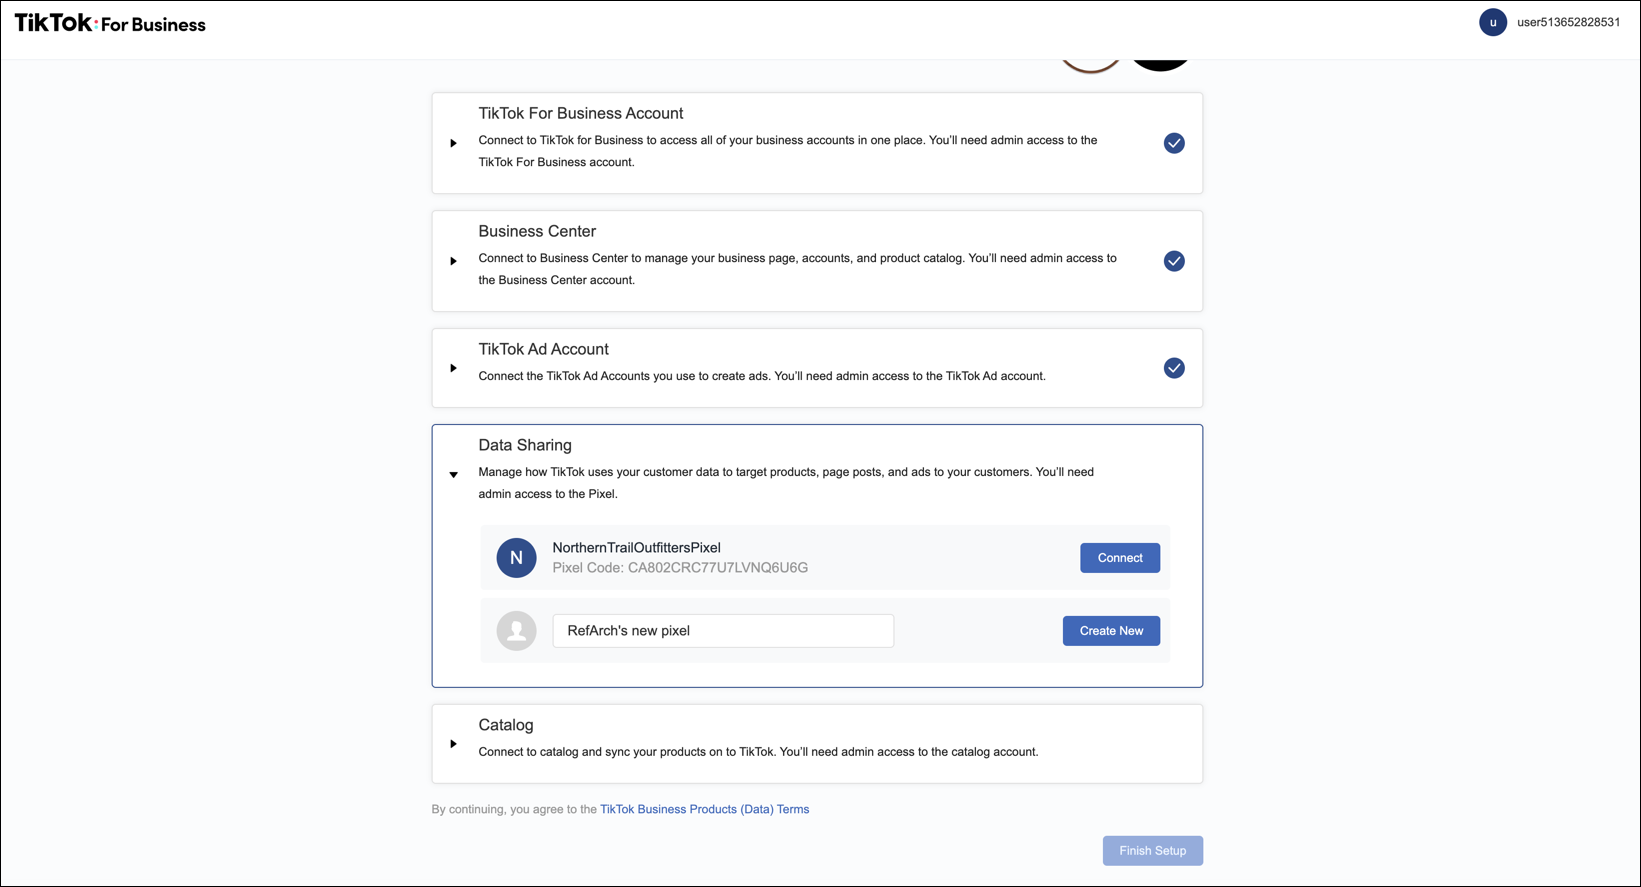
-
Connect or create a catalog.
- To connect an existing catalog, click Connect.
- To create a catalog, click Create New.
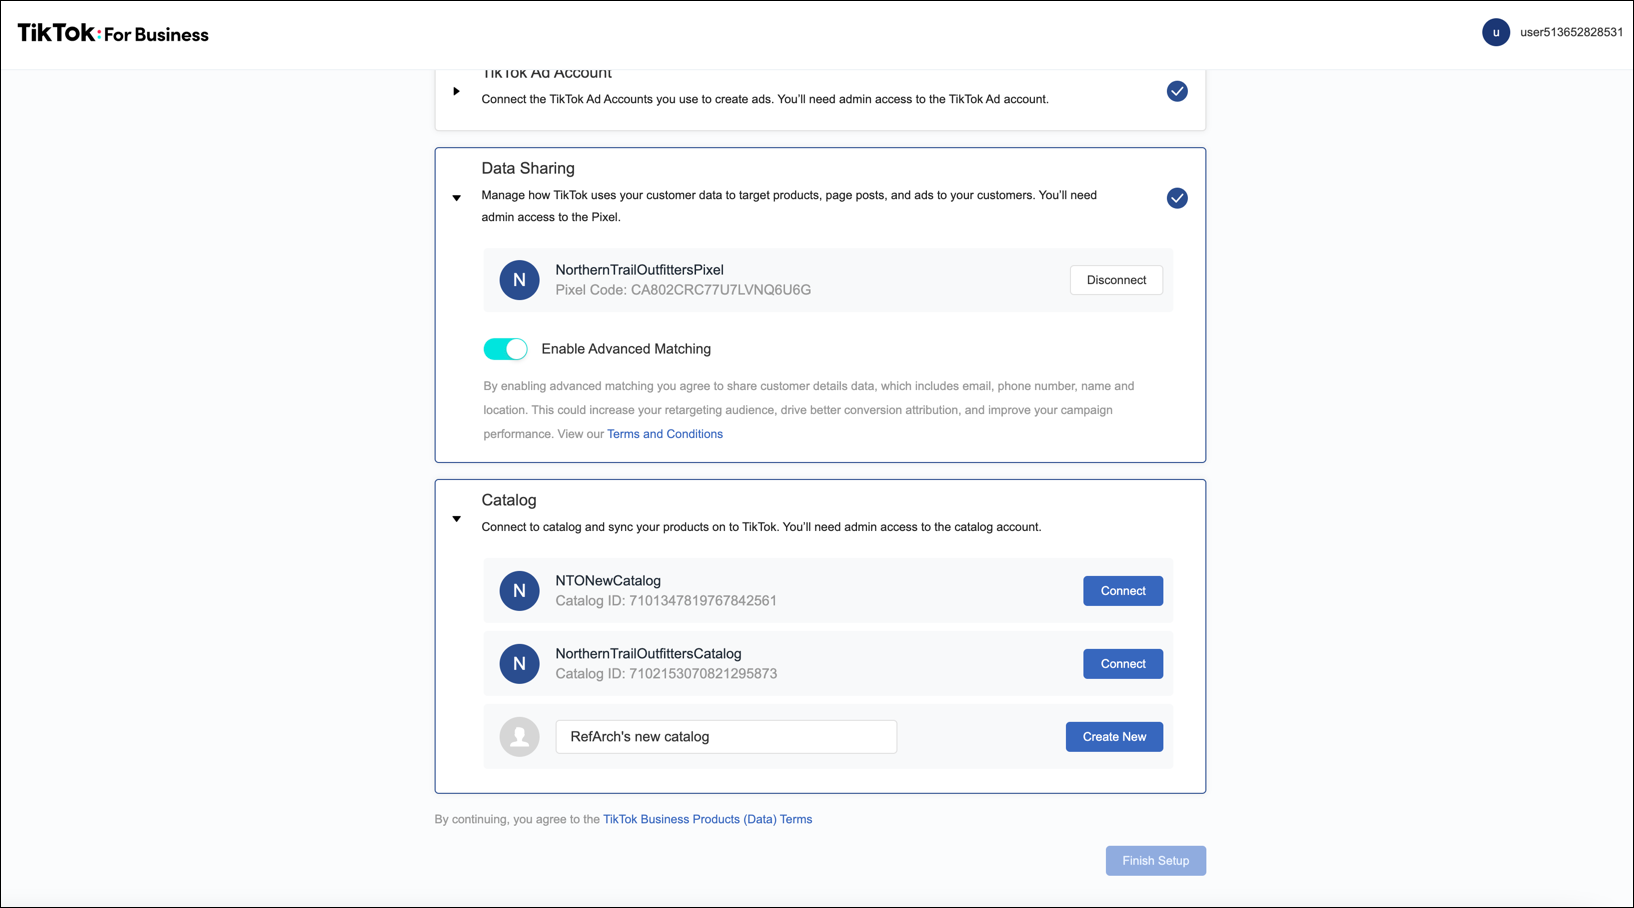
-
Click Finish Setup.
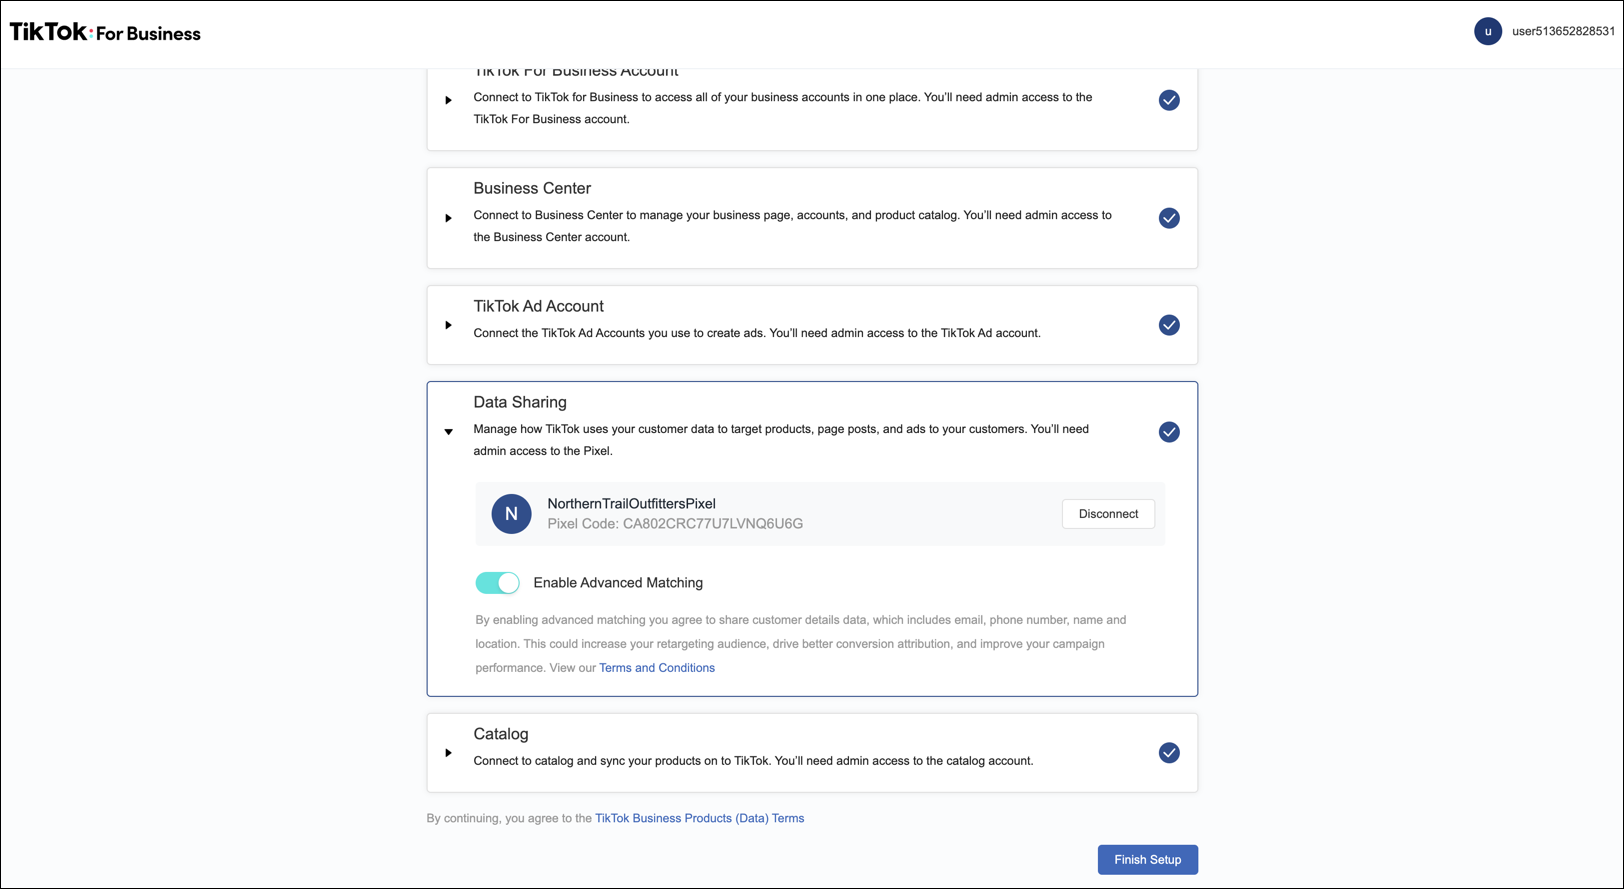
-
On the setup success screen, click Start Later.
You’re redirected to the Business Manager, TikTok for Business screen. The screen lists the TikTok application details created or connected during the setup.
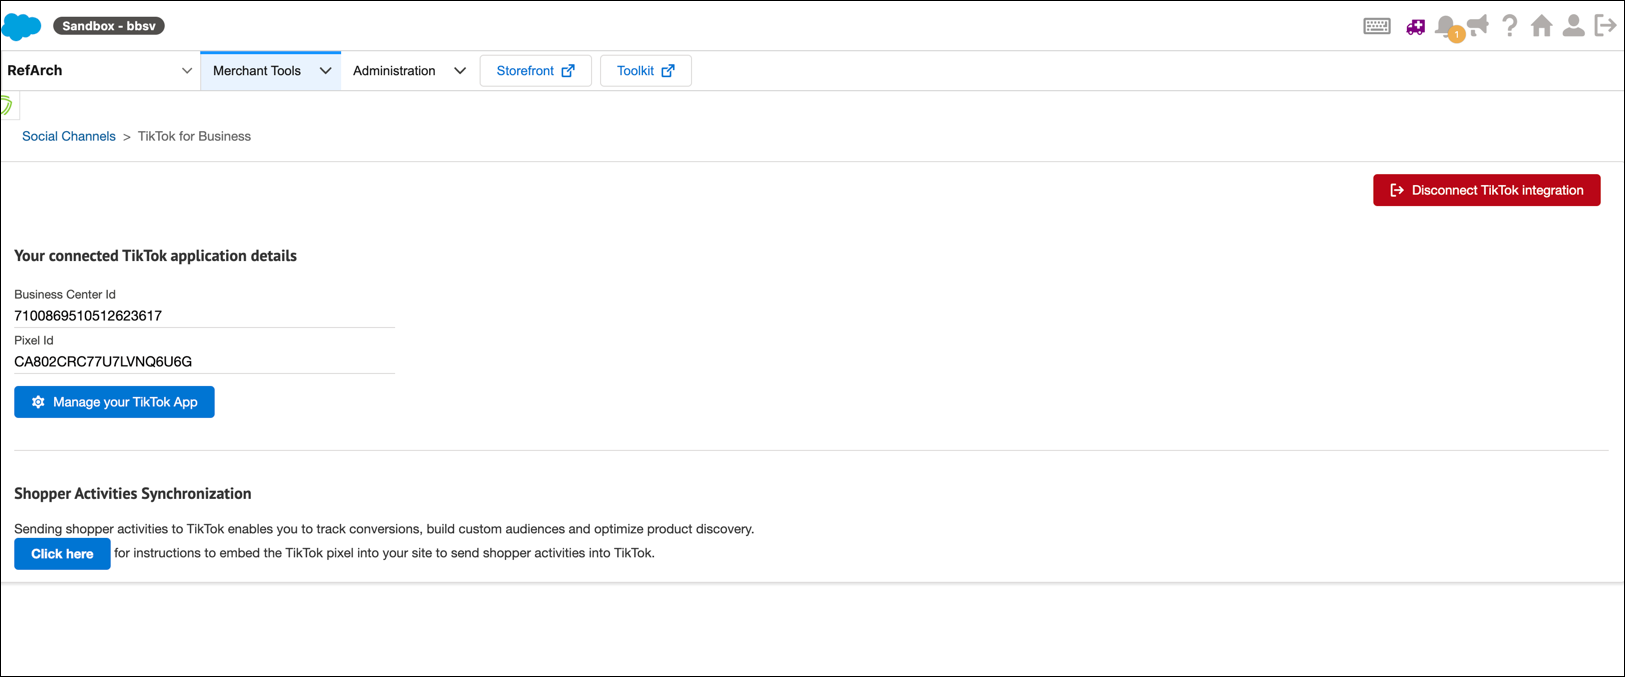
-
To launch, Click Manage your TikTok App.
The Plugin Overview page is displayed. From the Plugin Overview you can launch ad campaigns, and get quick links to your TikTok for Business assets. For example, ad account, catalog sync status, and other settings.
To synchronize your product catalog with TikTok for Business, you enable a B2C Commerce job to send products to TikTok. Complete this process after you integrate B2C Commerce and TikTok.
-
In Business Manager, click App Launcher
 and then select Administration > Operations > Jobs.
 -
In the Search field, enter “TikTok-ExportCatalog job.”

-
Select and open the TikTok-ExportCatalog job.
-
Select the Job Steps tab.
-
Set ProductImageView Type to the view type that is set in the catalog.
The value can be large or hi-res.
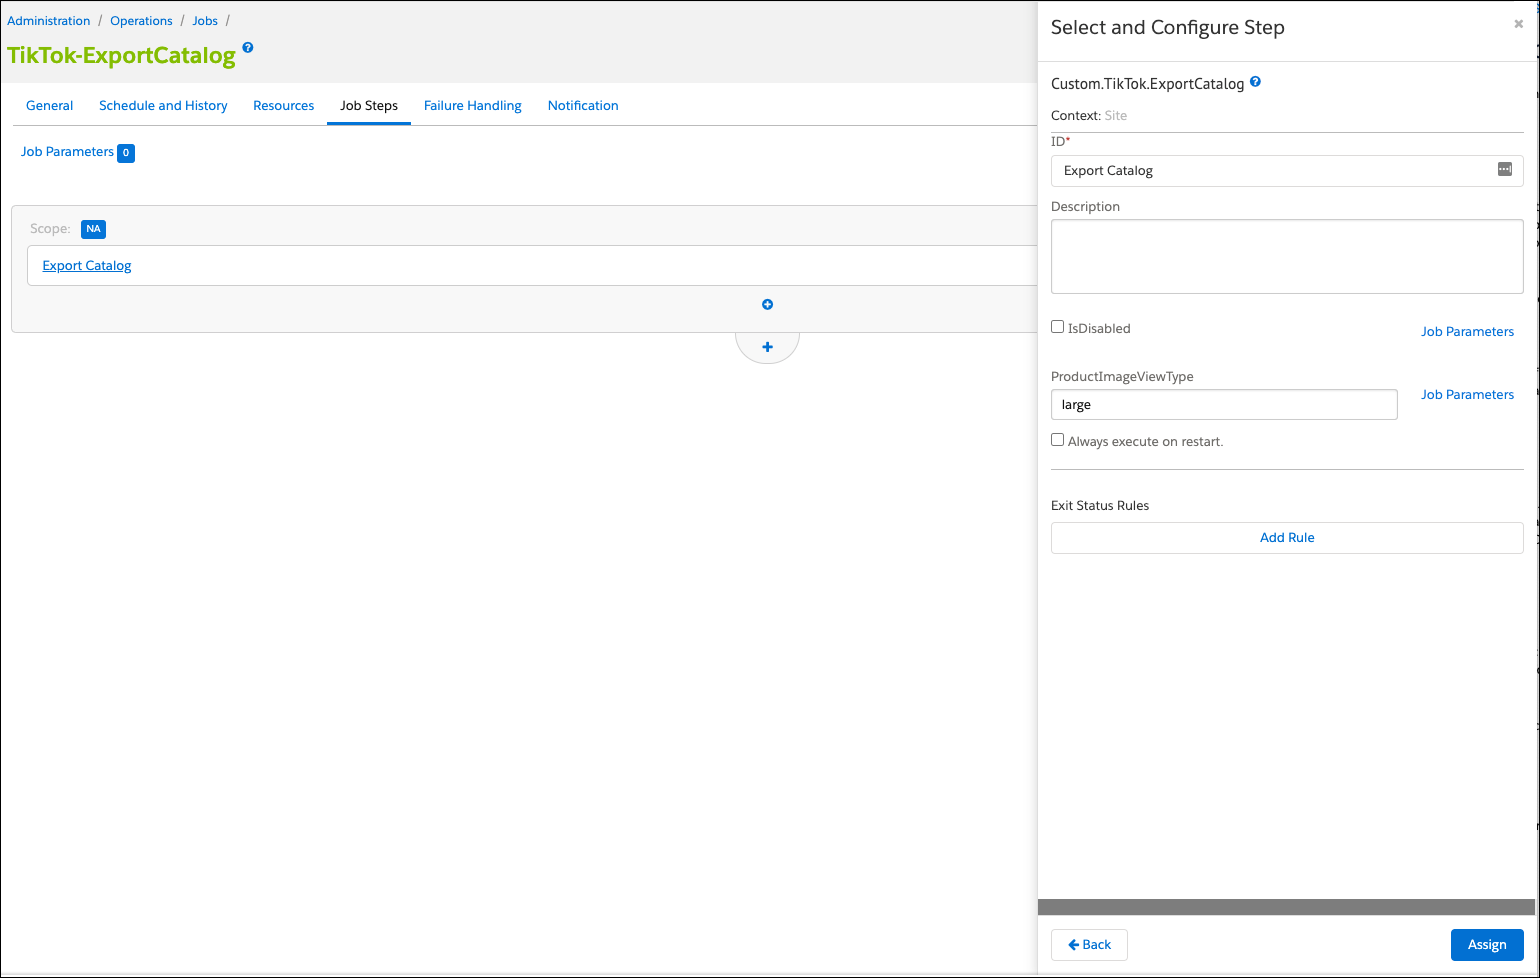
You can find the value listed in the main catalog image settings.
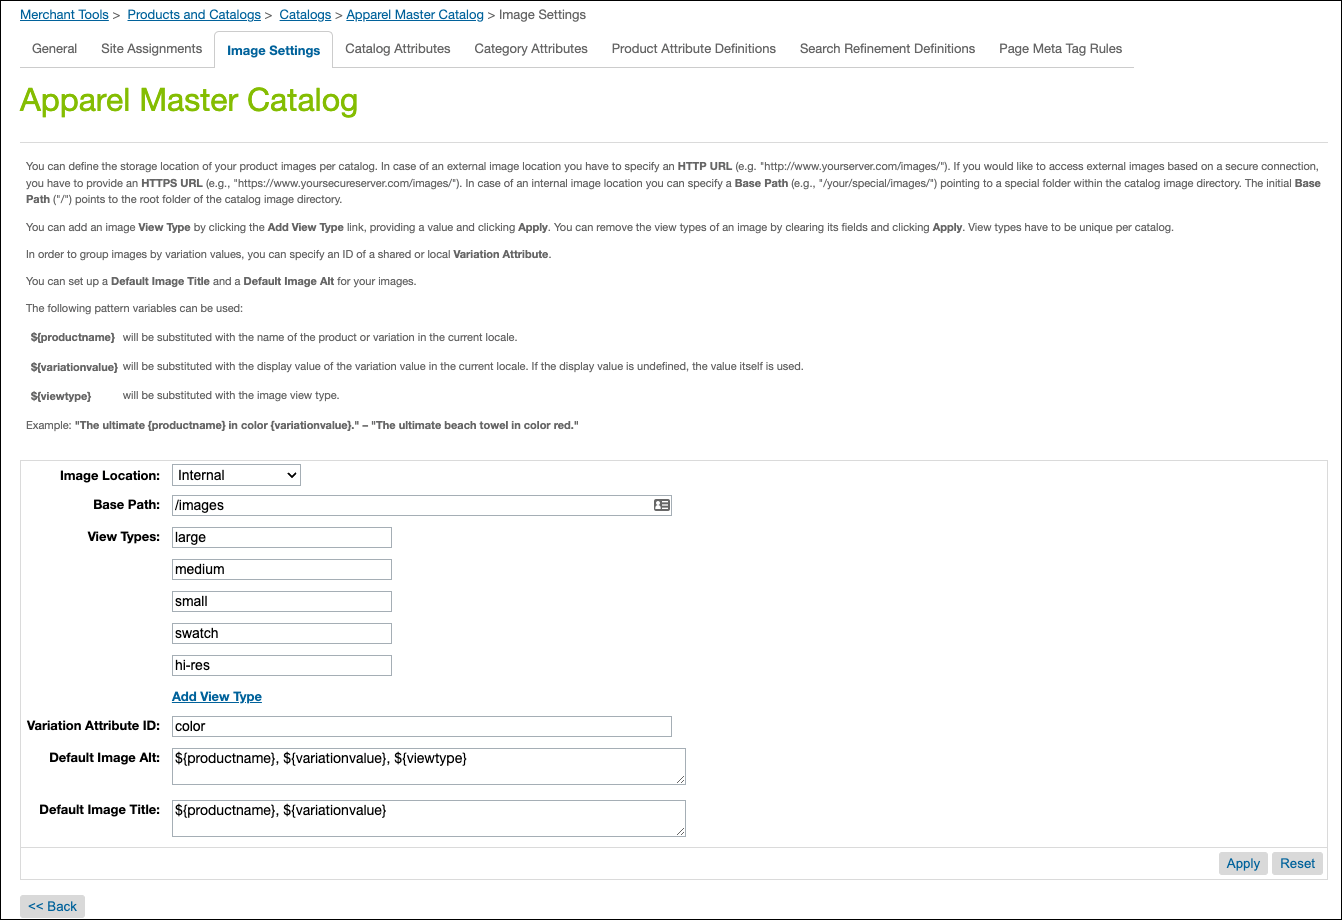
-
Click Assign.
-
Select the Schedule and History tab.
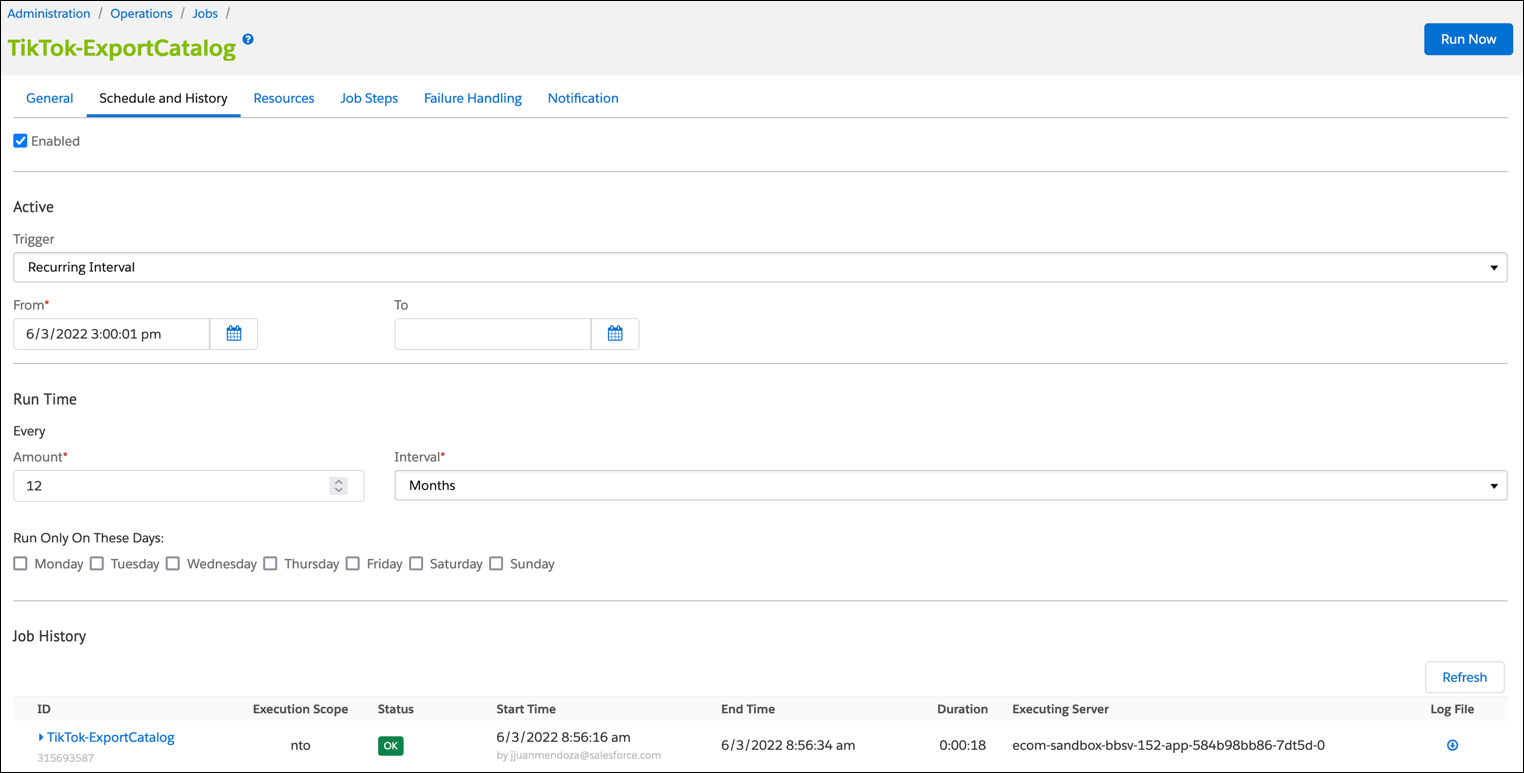
-
Start the job or set a schedule and frequency.
- To immediately start the job, click Run Now.
- To Schedule the job, complete the Active and Run Time settings and click Run Now.
You can monitor the details of your TikTok export catalog with Manage your TikTok App.
-
In Business Manager, click App Launcher
 and then select Merchant Tools > Social Channels > TikTok for Business.
 -
Click Manager your TikTok App.
The plugin and integration app is loaded.
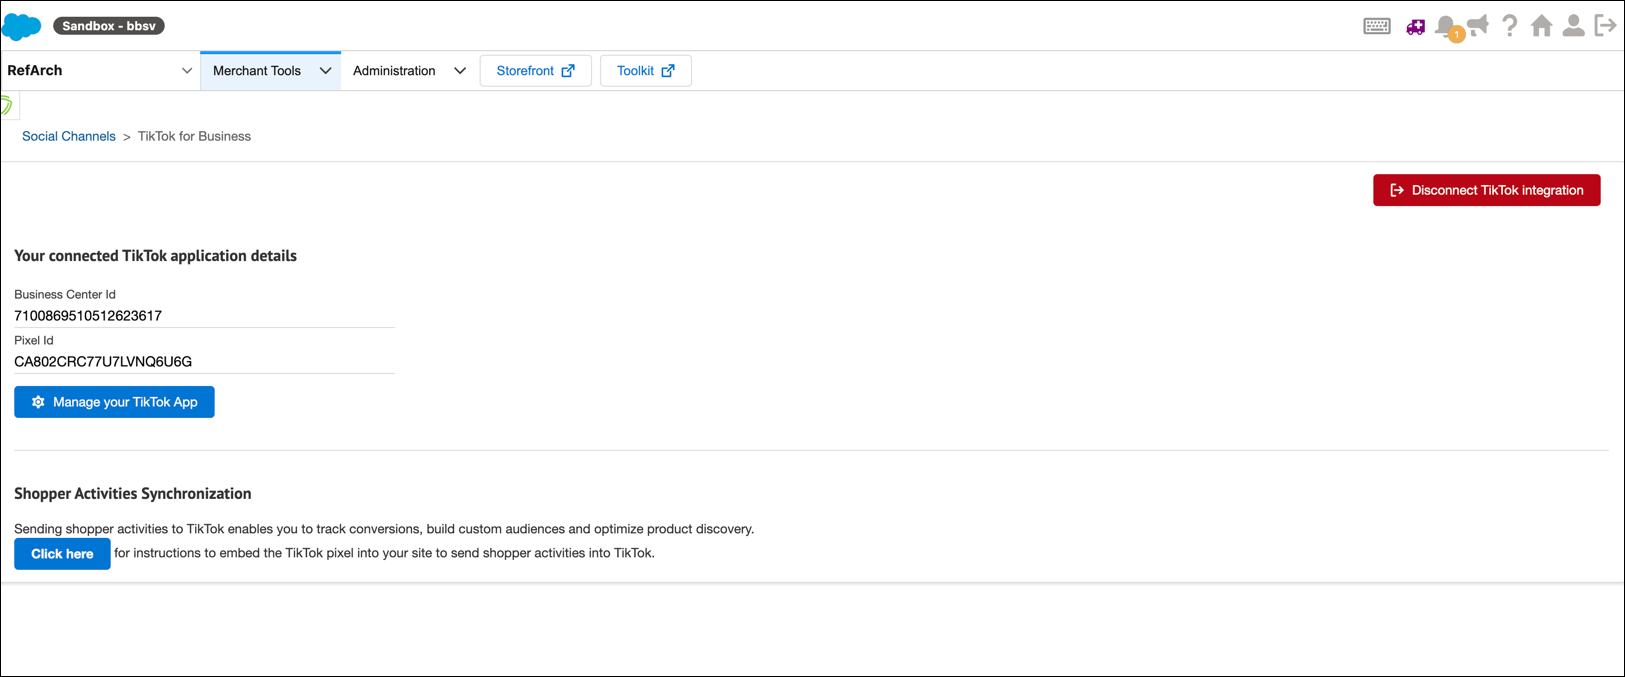
-
Click Manage your TikTok App.
The TikTok Catalog Manager opens.
-
Review the synced product details.
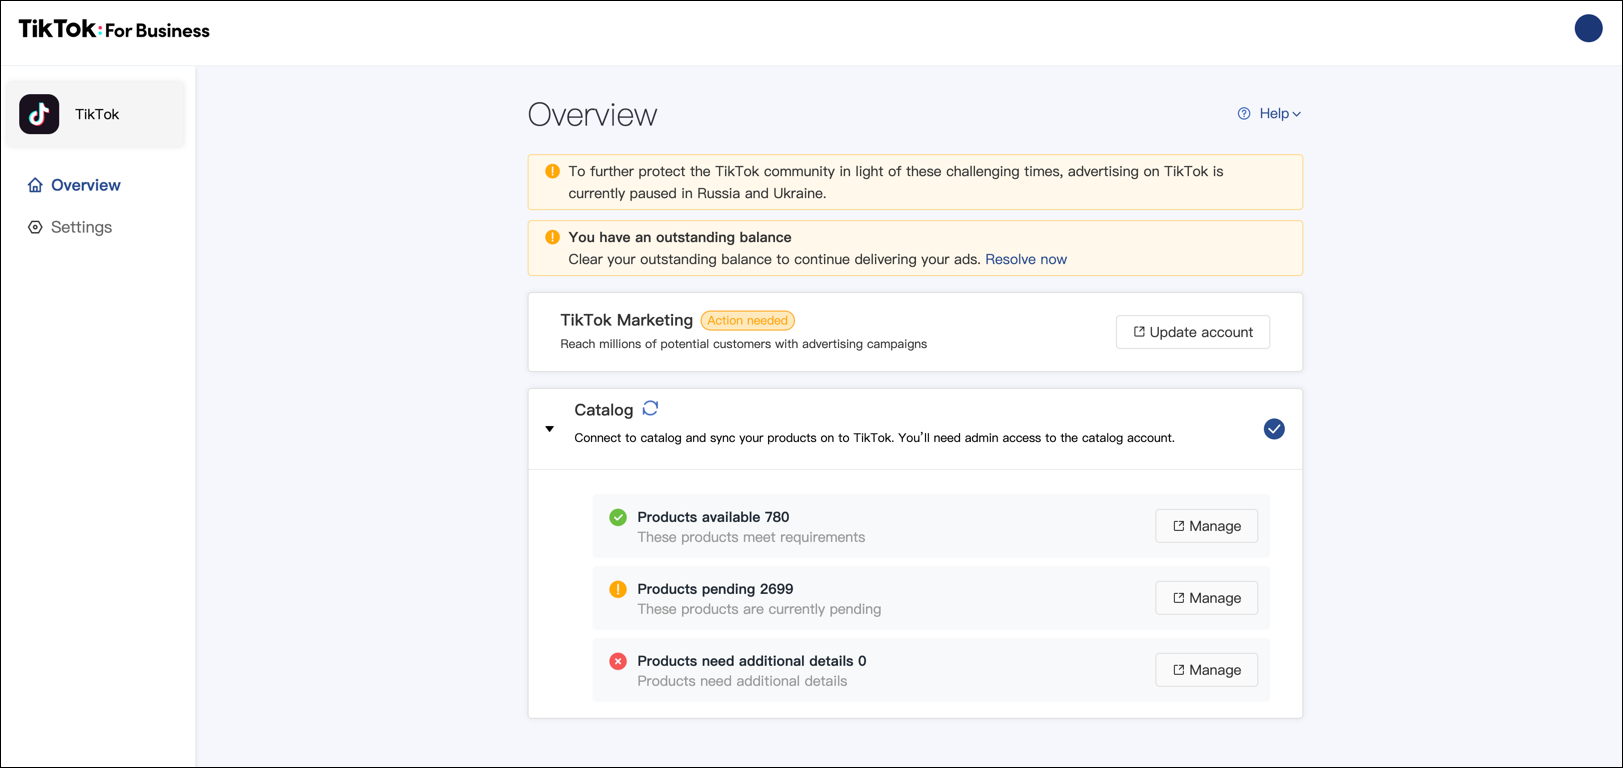
You can send shopper activities to TikTok, track conversions, and build custom audiences for optimized product discovery. Two options are available. Complete the TikTok for Business integration and sync your product catalog before you begin.
Events API Based tracking queues the events by storing them inside custom objects. Events call the TikTok batch API to push or send them to TikTik. The ViewContent event is the only real-time API call to TikTok.
-
To make sure you have the latest code changes for
int_tiktokcartridge, pull the latest code version from GitHub. -
Upload the code to your sandbox or instance. If you haven’t completed the TikTok for Business integration and synced your product catalog, complete those processes before you continue.
-
Import the metadata for the server-side event tracking. The files are in the data-pixel folder.
-
Add the
int_tiktok_pixelcartridge to your cartridge path. The cartridge tracks the following events:View Content(Product Show)AddToCart(add item to carat)InitiateCheckout(begin checkout)CompletePayment(place order)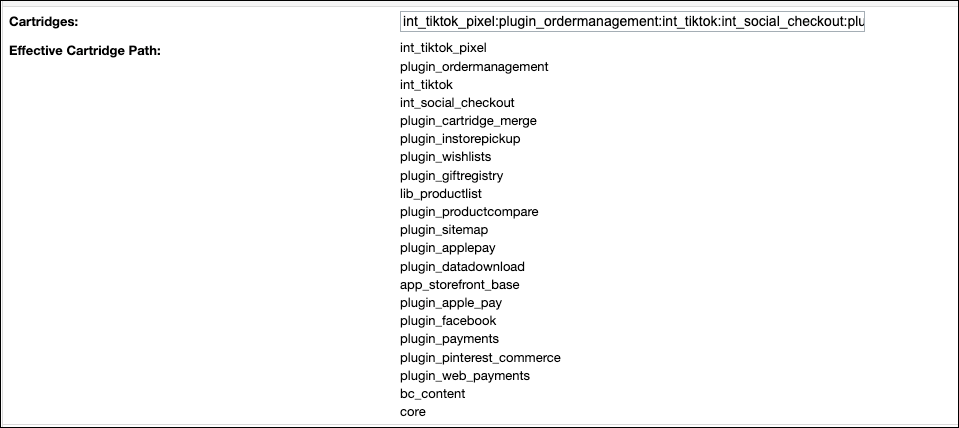
-
Enable or disable events tracked by the tiktok-settings custom object.
- In Business Manager, click App Launcher
 and then select Merchant Tools > Custom Objects > Custom Objects Editor.
 - From the Object Type dropdown, select SocialChannels.
- From the object list, select the tiktok-settings object.
- Click Edit Selected. The tiktok-settings reflect how the TikTok for Business app links to TikTok. The Tracking section lists the toggles that you can enable or disable.
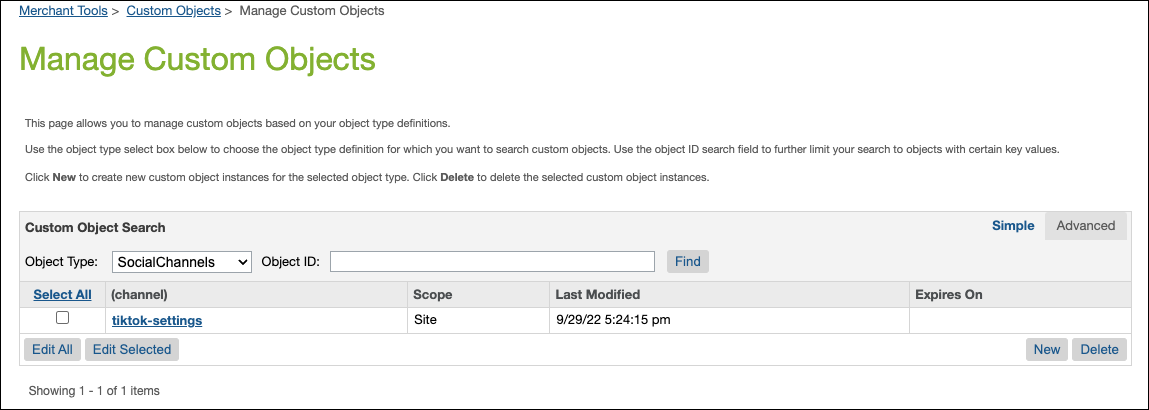
- In Business Manager, click App Launcher
-
(Optional) Set the View Content event tracking. The default setting is None and the event isn’t queued. Setting the option to either Real Time or Queue Events, isn’t recommended for high traffic sites or during a flash sale. If you set the Queue Event option, run or schedule the TikTok-WebEvents-Push job more frequently. The job pushes the events to TikTok and clears the custom objects.
When you deselect the Enable Events API Based Tracking all events are disabled.
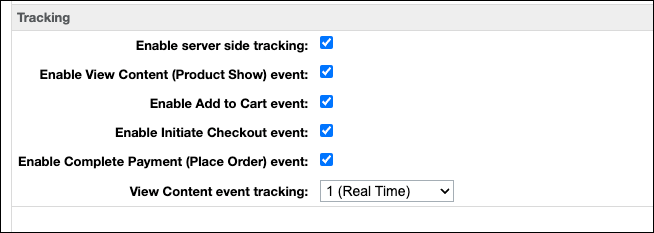

-
When the setup is complete, use the Test Event Function to verify your event setup.
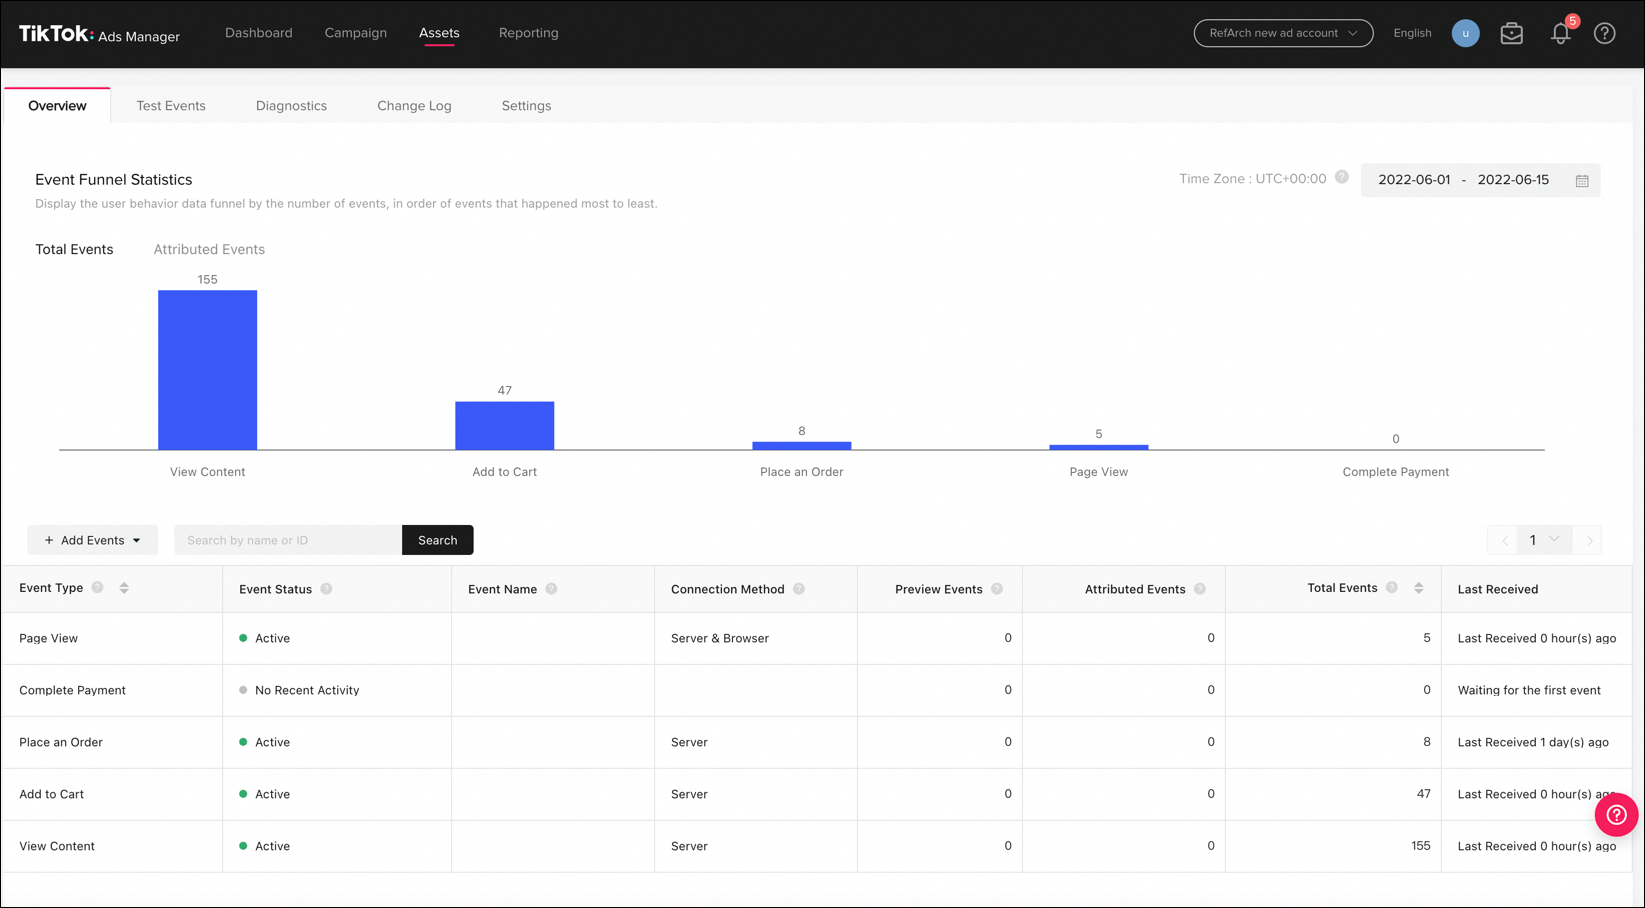
Embed the TikTok pixel into your site to send shopper activities into TikTok. For detailed steps, see TikTok documentation.
-
int_tiktokexposes a hookapp.template.htmlHead. You can use the hook to inject the TikTok pixel directly into an SFRA storefront that manually installs the pixel to a site. To enable the pixel, add the following code snippet inhtmlhead.isml.
After you inject the TikTok pixel base code across the storefront, you can add event codes to track and report on specific user actions. You use both TikTok pixel base code and event scripts to successfully track and report conversions.
Use the Google Channels integration to list your local store product availability on Google Surfaces. If you use Salesforce Omnichannel Inventory(OCI), you can list inventory directly from your OCI service. Inventory exposure on Google Surfaces improves product discoverability, and drives foot traffic to your local stores.
The Salesforce Commerce Cloud (SFCC) social feeds cartridge for Google Surfaces enables you to publish to Google Surfaces:
- An entire site catalog, or a category of products.
- Information from inventory lists that are imported into Commerce Cloud.
- Information from the Omnichannel Inventory(OCI) service.
- List of stores with mapping to inventory lists.
- Price books for products in each store.
Before you configure Google Channels integration with B2C Commerce, complete the following prerequisites.
- Ensure you have met the required SFCC Prerequisites.
- Create a Google Merchant Account.
See Install Dependencies and Create dw.json.
If you used b2c-tools to install the cartridge, this step is complete. Start with Install Social Integrations using b2c-tools.
Upload the following cartridges.
- bm_socialchannels: This cartridge contains the Business Manager controllers and UI logic to provide a newBusiness Manager extension that the site admin can use to integrate with Google.
- int_google: This cartridge contains the logic to integrate with Google.
- bc_library: This library contains all shared code for various B2C Commerce community projects. Ported from demandware-library
- bm_socialfeeds: The custom feeds Business Manager module allows merchants to easily create catalog feeds according to their needs. The framework uses a powerful generic export model. The model ensures reliable performance while more feeds are added. The extension integrates with a Business Manager for easy modifications.
- int_socialfeeds: The custom feeds module allows merchants to easily create catalog feeds according to their needs. The framework uses a powerful generic export model that ensures reliable performance while more and more feeds are added.
In order to upload cartridges via npm scripts, replicate the dw.json in thesocial_channels, social_checkout, and social_feeds directories. The npm scripts create a symlink. If the scripts fail, you can manually create the symlink for your operating system.
- From the root of the repo (
social_channel_integrations),run: npm run code:upload:googleto upload the bm_socialchannels,int_google, bc_library, bm_socialfeeds,andint_socialfeedscartridges to your instance. - (Optional) Manually upload the cartridge. See Uploading SFCC Cartridges.
If you used b2c-tools to install the cartridges, the cartridge paths are already updated.
-
In Business Manager, click App Launcher
 and then select Administration > Sites > Manage Sites.
 -
Select your site.
-
Click Settings.
-
In the Cartridges field, add the new cartridges. For example,
path:int_socialfeeds:bm_socialfeeds:bc_library:bm_socialchannelsint_socialfeedsbm_socialfeedsbc_librarybm_socialchannels
-
Update your Site cartridge path:
- In Business Manager, click App Launcher
 and then select Administration > Sites > Manage Sites.
 - Select your site.
- Click Settings.
- In the Cartridges field, add the following cartridges.
For example,
path: int_google:int_socialfeeds:bc_library:app_storefront_baseint_googleint_googleint_socialfeedsbc_library
- In Business Manager, click App Launcher
If you used b2c-tools to install the cartridges, the cartridge paths are already updated.
To import common data, see Import Common Data.
If you use b2c-tools to install the cartridges, the cartridge paths are already updated.
Otherwise, to import google data, use one of the following options.
-
(Optional) Import with npm scripts.
From the root of the repo (social_channel_integrations), run: npm run data:import:google
The data files are uploaded and imported into the sandbox specified in your dw.json file.
-
(Optional) Use Business Manager to zip, upload, and import data.
- Zip the data/google/google_global folder
- In Business Manager, click App Launcher
 and then select Administration > Site Development > Site Import & Export.
 - Click Browse and select the google_global.zip file. The file is at the root of the repo.
- Click Upload.
- Select google_global.zip
- Click Import.
- Click OK.
If you used b2c-tools to install the cartridges, the cartridge paths are already updated.
- In Business Manager, click App Launcher
 and then select Administration > Organization > Roles & Permissions.
 - Select the Business Manager user role to assign.
- Click Business Manager Modules.
- Select the Sites to which the assigned permissions apply.
- Click Apply.
- In the custom Objects > Custom Object Editor, assign the write permission.
- In the Social channel list, locate the Google Channel and assign the write permission.
- Click update.
- Select the Organization tab and Apply the permissions settings.
- In the Operations list, locate the Jobs and Jobs History listings and for each, assign the write permission.
- In the Social Product Feeds Definition list, locate the Social Product Feeds listing and assign the write permission.
- Click Update.
- Click the WebDAV permissions tab.
- Scroll to the Impex section and click Manage custom folders.
- Enter
src/feeds/export. - Apply your changes.
- In the Impex listings, locate
/impex/src/feeds/export/*and assign the write permission. - Update your changes.
If you use b2c-tools to install the cartridges, the cartridge paths are already updated.
To import common data, see Configure WebDAV Permissions.
-
From Business Manager, click App Launcher
 and then select Administration > Operations > Services.
 -
Click Services, and select google.merchant.create.
-
Update the following credentials:
- For sandboxed, Development, and Staging instances use
google-surfaces-api-preprod. - For Production instances use
google-surfaces-api-prod
- For sandboxed, Development, and Staging instances use
-
Apply your changes.
-
Click Back to List.
-
Click Services, and select google.merchant.get.
-
Update the following credentials:
- For sandboxed, Development, and Staging instances use
google-surfaces-api-preprod. - For Production instances use
google-surfaces-api-prod
- For sandboxed, Development, and Staging instances use
-
Apply your changes.
Catalog feed configurations are based on the custom feeds module. To use the module, define a template and schedule the feed to run at desired intervals. Sites with multiple locations require one feed file per locale. Prices for each locale are generated from the price book associated with the currency assigned to the locale. Salesforce recommends that you schedule the job to run in parallel with changes to your catalog, and when you replicate to production.
- In Business Manager, select Administration > Social Product Feeds > Product Feeds Definition.
- Configure each field to meet your custom feed requirements. The default template values already represent the attributes that Google is looking for in the product feed.
-
In Business Manager, click App Launcher
 and then select Administration > Operations > Jobs
 -
Click the Google-ExportFullFeeds job.
-
From the Jobs tab, select configure job steps.
-
Complete the ExportPriceBook form.
-
Enter the PriceBook IDs.
-
Enter the FileNamePrefix. For example,
feeds/export/social/google/pricebook/pricebook. -
Select OverwriteExportFile.
-
Assign your settings.
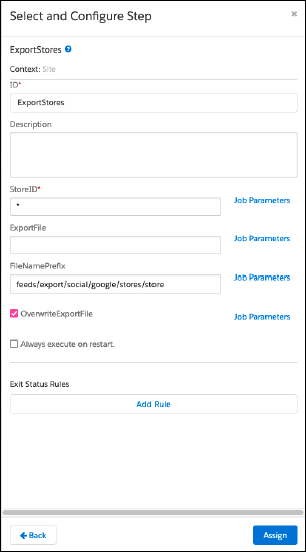
-
-
Complete the ExportInventoryLists form.
-
Enter the InventoryList IDs. If the full list doesn’t fit, create a duplicate job step and split the list.
-
Enter the FileNamePrefix. For example,
feeds/export/social/google/inventory/inventory. -
Select OverwriteExportFile.
-
Assign your settings.
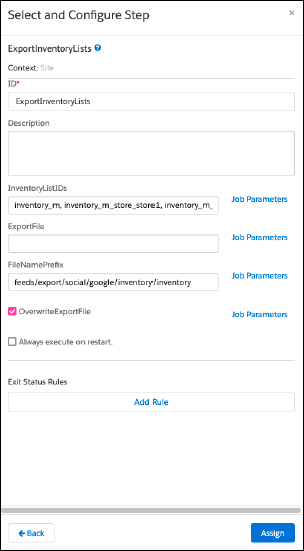
-
-
Complete the ExportStores form.
-
Enter the StoreID. Use the ID of the store to be exported or * to export all stores.
-
Enter the FileNamePrefix. For example,
feeds/export/social/google/inventory/inventory. -
Select OverwriteExportFile.
-
Assign your settings.

-
-
Complete the ExportProducts FullFeed form.
-
Select ExportCatalogs.
-
Select GenerateDeleteFeed. A separate file is created for deleted products.
-
Add the CustomObjectids. Use a comma to separate IDs
-
Configure the Hostname.
-
Assign your settings.
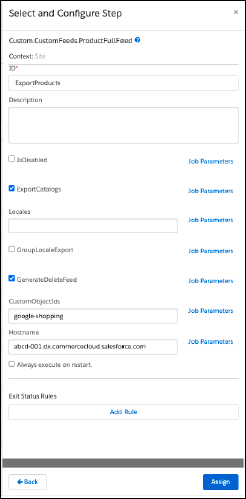
-
-
(Optional) From the Schedule and History tab, schedule the job to run.
-
(Optional) Click Run Now.
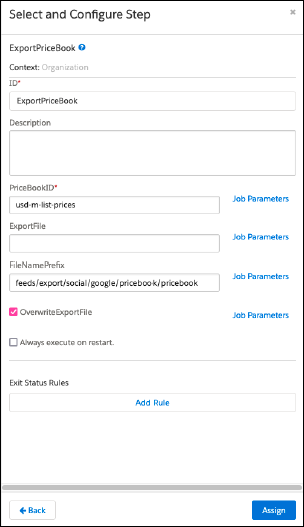
When you use Salesforce Omni Channel Inventory Integration for a store, the native inventory export doesn’t generate accurate inventory. To integrate Omnichannel Inventory, complete the steps in the Omnichannel Inventory Integration document.
When the integration steps are complete, remove the standard inventory export from the Google-ExportFullFeeds job.
- In Business Manager, click App Launcher
 and then select Administration > Operations > Jobs.
 - Click Google-ExportFullFeeds.
- Click Job Steps.
- Delete the ExportInventoryList step.
To export store-specific prices, you assign price books to stores, see Assign a Price Book or Promotion to a Specific Store.
After price book assignments are imported, you can use the Google-StorePricing Export job to export store price books to Google.
- In Business Manager, click App Launcher
 and then select Administration > Operations > Jobs.
 - Select Google-StorePricingExport.
- Configure the job steps.
- Click Job Steps.
- Enter the ExportFile. For example,
feeds/export/social/google/assignments/assignments. - Select OverwriteExportFile.
- Assign your settings.
- Configure GoogleLIA Store Pricing Export.
- Enter the folder path. For example,
feeds/export/social/google. - Select OverwriteExportFile.
- Assign your settings.
- Enter the folder path. For example,
-
In Business Manager, check that Google-ExportFullFeeds has completed one or more runs.
Check that the feed is available in the WebDAV folder,
webdav/Sites/Imped?src/feeds/export/social/google/. -
In Business Manager, click App Launcher
 and then select Merchant Tools > Social Channels > Google Channel.
 -
Accept the terms.
-
Complete the Initialization form fields.
- Name: Your business username.
- Email: Your business email.
- Country Calling Code: The business country calling code.
- Phone: A business phone number.
- Account manager Client ID: The client ID created in Account Manager.
- Account Manager Client Secret: Client ID password.
- Org ID: Salesforce Commerce API org ID. Find in Business Manager > Site Development > Salesforce Commerce API Settings.
- Google Merchant Center ID: User ID established with Google. Find in the Google Merchant Center.
-
Submit your changes.