Configure Client Authentication with Private Key JWT
OpenID Connect (OIDC) private_key_jwt client authentication is a secure method for the Salesforce Login API and Access Service (SLAS) to authenticate itself to a 3rd party identity provider (IDP). This method is a more secure alternative to using a shared secret and is a common choice in environments that require high-security authentication.
Instead of sending a shared secret, SLAS uses a JSON Web Token (JWT) that’s signed with its private key. The third-party IDP then verifies the signature of this JWT using a corresponding public key that SLAS has registered with the IDP. This process ensures strong authentication by leveraging asymmetric cryptography, which helps prevent shared secret risks and reduces the chances of leaks or breaches.
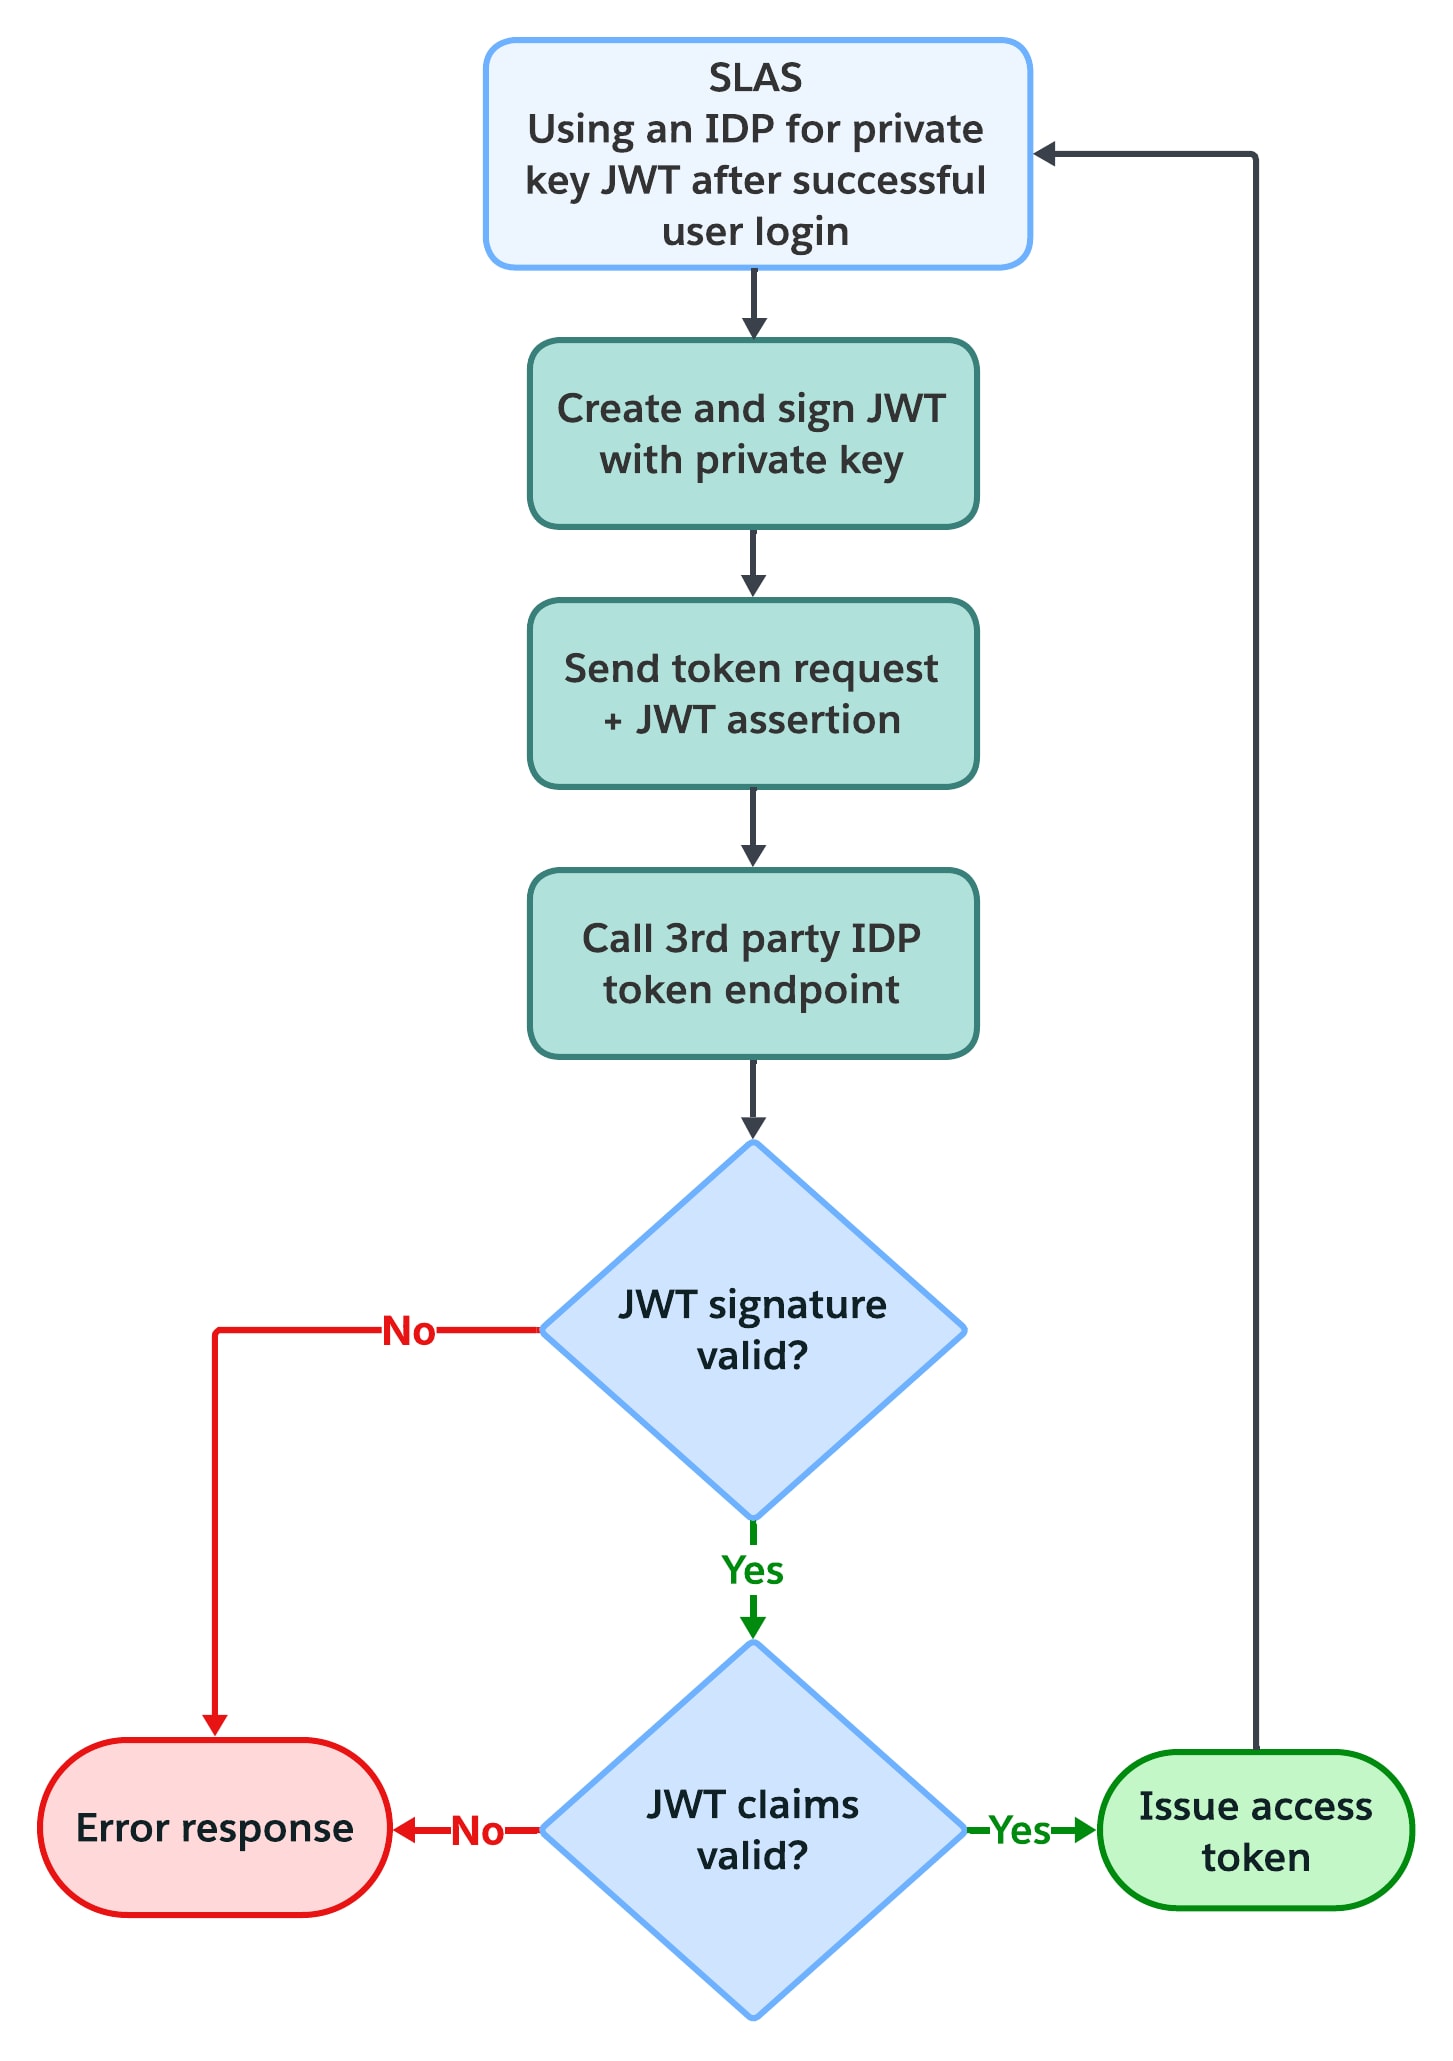
The JWT assertion crafted by SLAS includes several required claims:
iss(Issuer) andsub(Subject): Both contain the third-party IDP’sclient_id.aud(Audience): The token endpoint of the third-party IDP.exp(Expiration Time): The JWT’s expiration time.iat(Issued at Time): The timestamp when the JWT was created.jti(JWT Id): A unique identifier for the token to prevent replay attacks.
First, configure your client IDP for private_key_jwt authentication. For example, if you use Okta, follow these steps.
- Create an Okta application that uses Public Key / Private Key client authentication.
- Make sure that your Okta application public key configuration is set to save keys in Okta.
To configure private_key_jwt authentication, use the SLAS Admin UI to create a key pair and get a public key for the 3rd party IDP.
- Go to the IDPs tab.
- Select Add Idp.
- Add all applicable information.
- Enter your URLs and scopes. To autofill these fields, enter you 3rd party IDP’s OIDC Well-Known URL. For example, https://accounts.google.com/.well-known/openid-configuration. Then click Search and Populate URLs.
- Select a tenant from the dropdown menu.
- In the Idp name field, enter the name of your 3rd party IDP.
- In the Secret field, enter NA. A secret isn’t needed, but SLAS requires a placeholder value.
- In the Idp Client Id field, enter the client ID from your 3rd party IDP.
- In the Client Type field, select
client_private_jwtfrom the dropdown menu. - In the Key Algorithm field, select a key pair algorithm from the dropdown menu. If unspecified, the default value is
RS256. - In the Login Merge Claims field, enter space separated IDP supported userInfo claims.
- Click Add to save your configuration. SLAS now creates the public and private key pair using the selected key algorithm.
- Copy the resulting public key (Public Json Web Key) and register it in your 3rd party IDP for use in validating the JWT that is created and sent by SLAS in the /token request.
- On your authenticate call to SLAS, make sure that the hint query parameter matches the new IDP. See Authorize customer.
To rotate the JWT key pair for an IDP, use the SLAS Admin UI to switch the client type to client_secret and then back to client_private_jwt. This action rotates the key pair and creates a new public key.
- Go to the Idps tab.
- Click Edit for the IDP that you want to rotate keys for.
- In the Client Type field, select
client_secretfrom the dropdown menu. - Click Save.
- In the Client Type field, select
- Click Edit again for the same IDP.
- In the Client Type field, select
client_private_jwtfrom the dropdown menu. - In the Key Algorithm field, select a key pair algorithm from the dropdown menu. If unspecified, the default value is
RS256. - Click Save.
- In the Client Type field, select
- Copy the resulting public key (Public Json Web Key) and register it in your 3rd party IDP.