Create a Pricing Component that Displays Discount Percentage
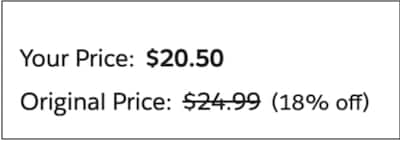
Enhance store pricing by displaying the percentage discount alongside a negotiated price. Create the app by adapting a productPricing component from the Commerce LWR library.
| Required Editions |
|---|
| Available in: Enterprise, Unlimited, and Developer Editions |
| Available in: B2B Commerce |
Before you begin this task set up your Commerce DX environment and clone the Commerce LWR repo. See xref to Get Reference Components from the LWR Library. In Visual Studio (VS) Code editor, cloning by default places each library component in force-app/main/default/lwc.
Customizing the productPricing component to display the discount percentage alongside the negotiated price requires changes to the reference lightning web component project files.
- In the javascript file, you add the discount calculation logic.
- In the javascript-metadata file you optionally specify targets to deploy the custom component and optionally enable component property editing in Experience Builder.
- In the HTML template you specify where to display the discount percentage.
-
Open your VS Code editor.
-
In the
lwc/productPricingfolder, double-clickproductPricing.js.The file is open in the Visual Studio Code editor.
-
To insert the discount percentage calculation logic, add the code in the snippet and highlighted in the screenshot.
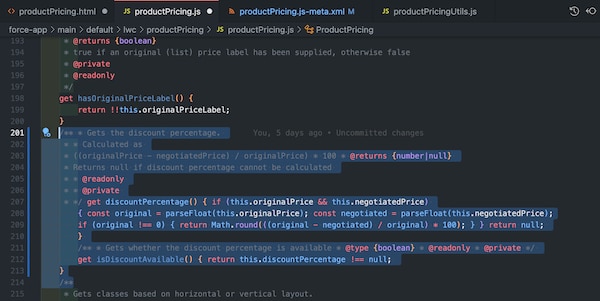
-
Save the file.
-
In the
productPricingfolder, double-clickproductPricing.js-meta.xml.The file is open in the Visual Studio Code editor.
-
If you deploy the
force-app/main/default/lwcwith this custom LWC, skip this step; thelwc/builderProductPricing.js-meta.xmlfile includes the Experience Builder target declarations.To make your LWC deployable in Experience Builder, set
isExposedtotrue, and define{lightningCommunity__Page},{lightningCommunity__Page_Layout}, or{lightningCommunity__Theme_Layout}intargets.The snippet specifies a pricing js.meta.xml for a component in Experience Builder and also enables component property editing.

-
Save the file.
-
In the Visual Studio Code explorer, double-click
productPricing.html.The
productPricing.htmltemplate is open in the Visual Studio Code editor. -
To display the discount percentage element alongside a negotiated price, add the
<span>highlighted in the snippet.
-
Save the file.
-
From the component project directory in Visual Studio Code, right-click the enhanced productPricing under
force-app/main/lwc, and select SFDX: Deploy Source to Org.View the status of your deployment on the Output tab of the integrated terminal, where SFDX displays a notice that includes an exit code, such as “SFDX: Deploy Source to Org … ended with exit code 0.” Exit code 0 means that the command ran successfully.
-
In the VS Code editor, open the Command Palette by pressing Ctrl+Shift+P (Windows) or Cmd+Shift+P (macOS).
-
Enter
SFDX. -
Select SFDX: Open Default Org.
Your store opens in a separate browser.
-
In the left Navigation panel, click Components.
The custom component displays under Components | Custom Components.
-
From the Custom area of the Lightning Components list, drag your Lightning web component to the page canvas.
-
To edit component properties, select the component on the page canvas, and enter changes in the component property editor.