Create External Credentials for the ADP Connector (Beta)
To ingest data from ADP to Data 360, set up an external credential for ADP.
Before you begin:
- Create the OAuth based authentication in Setup, before completing these steps.
-
From Setup, in the Quick Find box, enter
Named Credentials. Then select Named Credentials (1).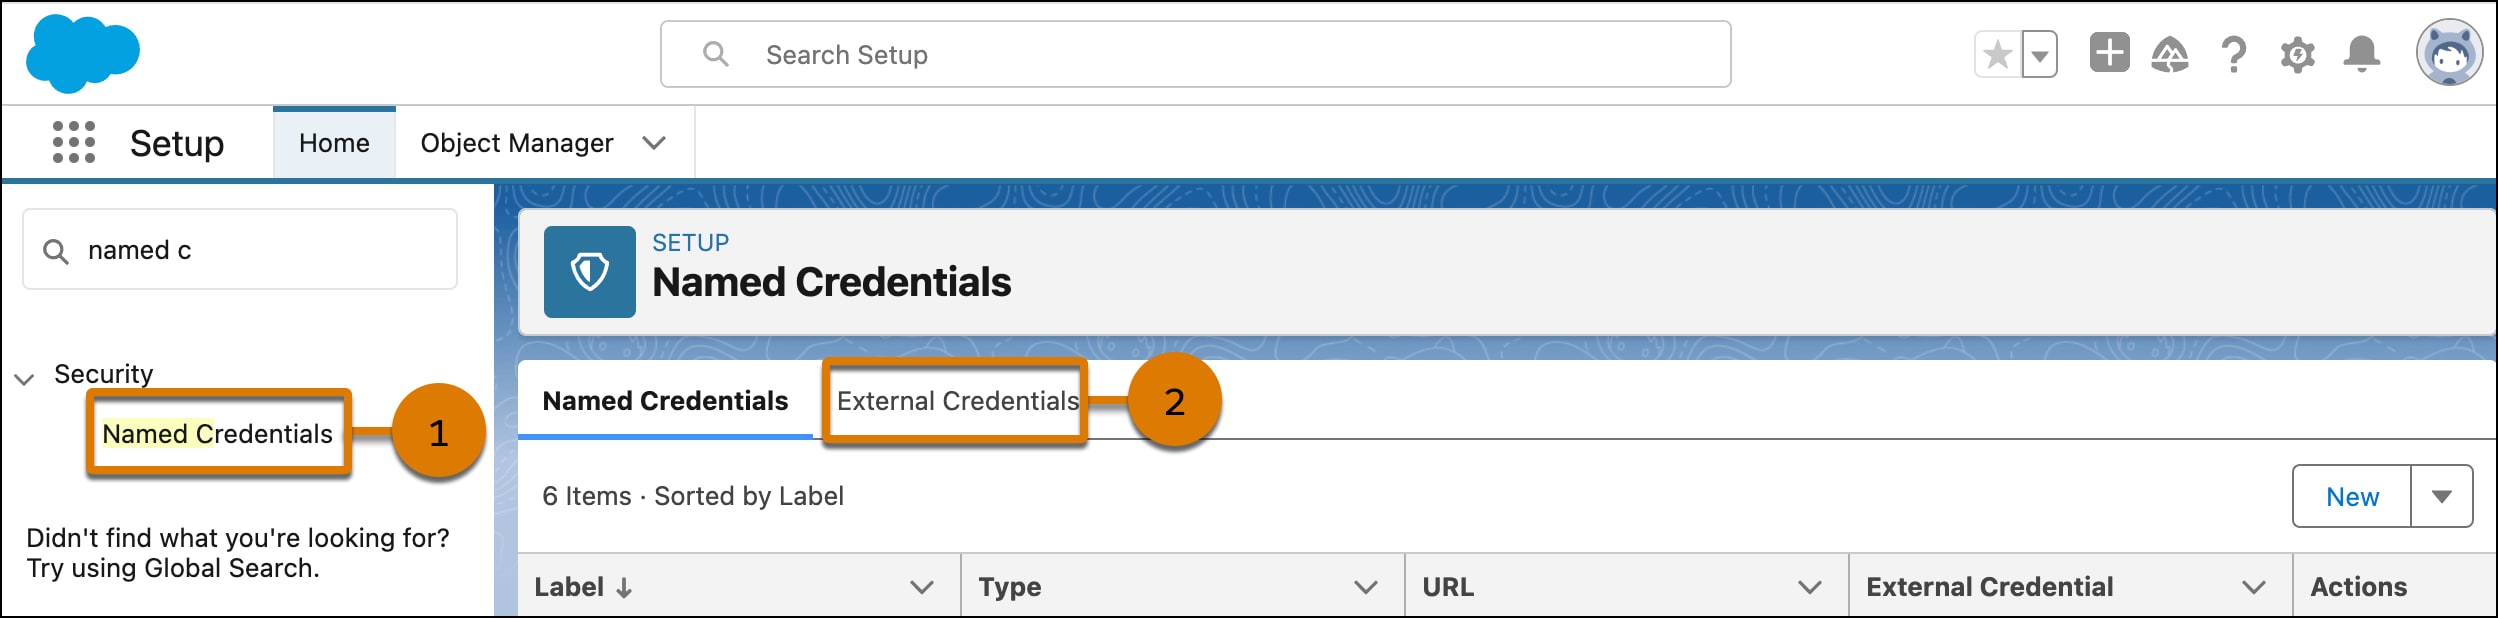
-
On the External Credentials tab (2), click New.
-
Enter a label and name for your external credential. The name can’t contain spaces. You can use underscores.
-
For Authentication Protocol, select OAuth 2.0.
-
For Authentication Flow Type, select Browser Flow.
-
For Authentication Provider, select the provider you created.
-
Click Save.
-
-
Add principal to external credentials
-
In the external credentials that you created, under Principals, click New.
-
Enter the parameter name. You can include spaces.
-
For Identity Type, select Named Principal.
-
Set the Sequence Number to
1. -
Click Save.
-
-
Authenticate your external credentials.
-
Under Principals, from the Actions dropdown menu, select Authenticate.
-
Follow the authentication flow and confirm access permissions.
-
To connect Data Cloud to ADP, click Allow.
After you authenticate, the status changes to Configured.
-
-
Define the named credential.
-
In the Named Credentials Tab, click New. Then enter a label and name. The name can’t contain spaces, but you can use underscores.
-
For the URL, enter
https://www.adp.com. -
For external credentials, select the credential that you created.
-
Click Save.
-
-
Enable external credentials access.
-
From Setup, in the Quick Find box, enter
Profiles. Then select it. -
Click System Administrator
-
On the Enable External Credential Principal Access tab, click Edit.
-
Add the external credentials principal that you created to the Enabled External Credentials Principals column.
-
Click Save.
-