Create External Credentials for the SAP Concur Connector
To ingest data from SAP Concur to Data 360, set up an external credential for SAP Concur.
Steps and links that are outside of Salesforce content aren’t regularly updated and may not be accurate.
-
Create and register a custom OAuth application in the SAP Concur admin console.
-
Your Authorization Endpoint URL resembles:
https://{region}.api.concursolutions.com/oauth2/v0/authorize
-
Your Token Endpoint URL resembles:
https://{region}.api.concursolutions.com/oauth2/v0/token
-
Note the required scopes and grants.
-
-
Create an OAuth-based authentication.
-
Verify the connection by pasting the value of Test-Only Initialization URL into your browser.
-
From Setup, in the Quick Find box, enter
Named Credentials. Then select Named Credentials (1).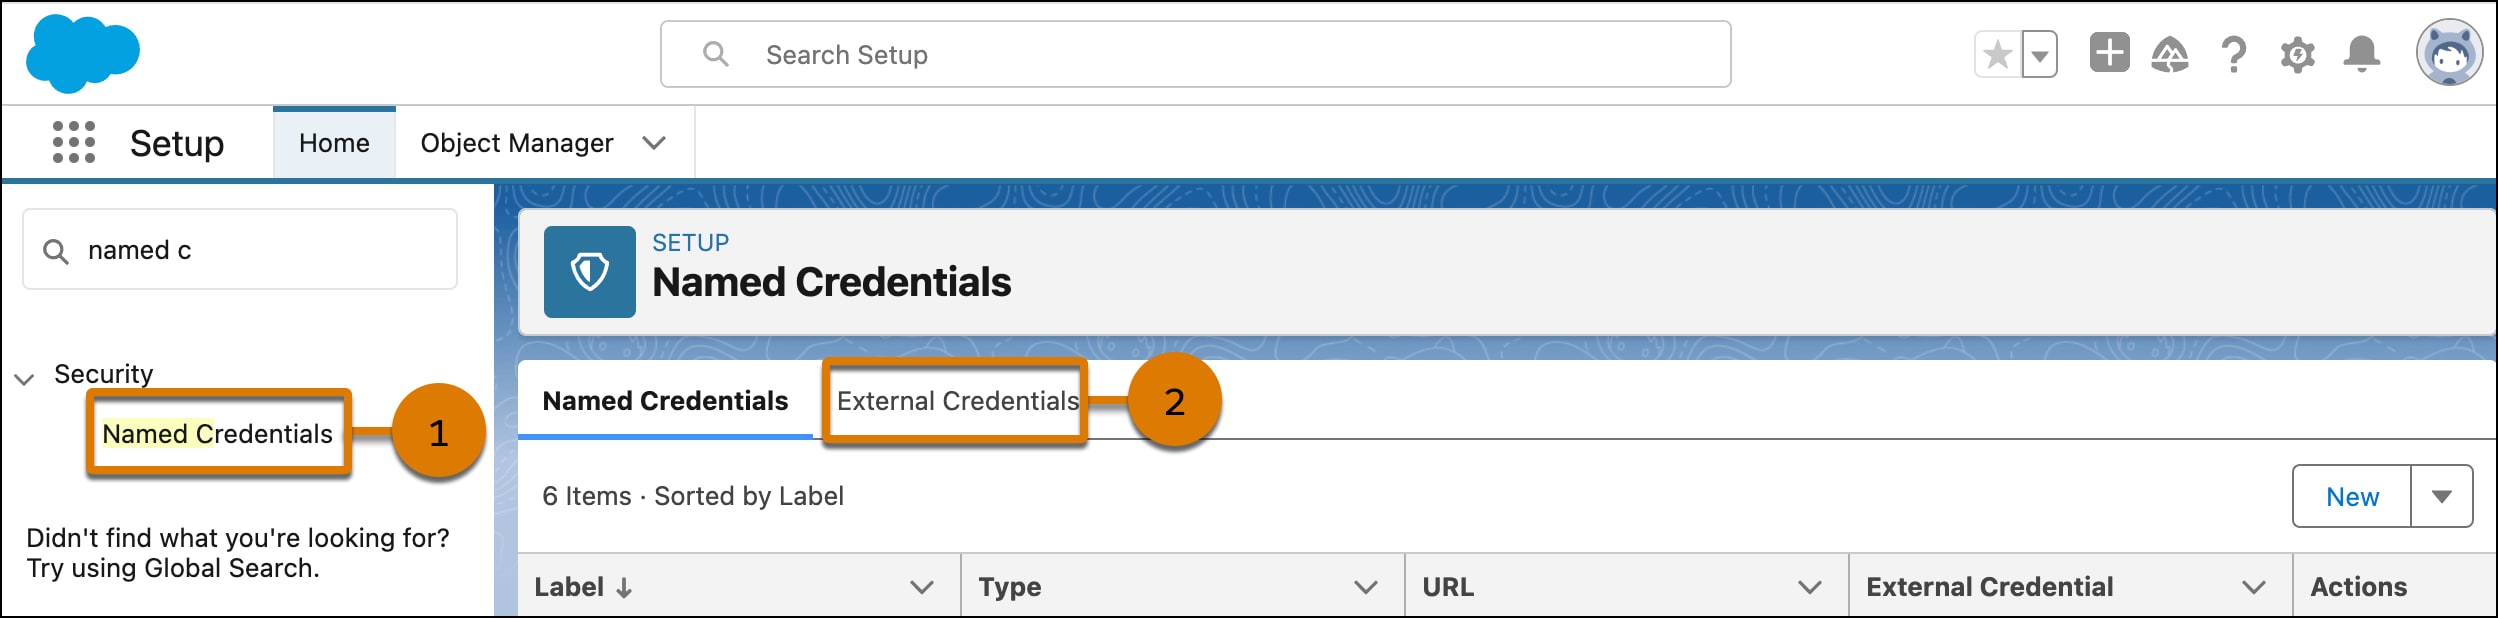
-
On the External Credentials tab (2), click New.
-
Enter a label and name for your external credential. The name can’t contain spaces. You can use underscores.
-
For Authentication Protocol, select OAuth 2.0.
-
For Authentication Flow Type, select Browser Flow.
-
For Authentication Provider, select the provider you created.
-
Click Save.
-
-
Add principal to external credentials.
-
In the external credentials that you created, under Principals, click New.
-
Enter the parameter name. You can include spaces.
-
For Identity Type, select Named Principal.
-
Set the Sequence Number to
1. -
Click Save.
-
-
Authenticate your external credentials.
-
Under Principals, from the Actions dropdown menu, select Authenticate.
-
Follow the authentication flow and confirm access permissions.
-
To connect Data Cloud to SAP Concur, click Allow.
After you authenticate, the status changes to Configured.
-
-
Define the named credential.
-
In the Named Credentials Tab, click New. Then enter a label and name. The name can’t contain spaces, but you can use underscores.
-
For the URL, enter
https://us2.concursolutions.com/. Theus2represents the region where your Concur instance is hosted. -
For external credentials, select the credential that you created.
-
Click Save.
-
-
Enable external credentials access.
-
From Setup, in the Quick Find box, enter
Profiles. Then select it. -
Click System Administrator.
-
On the Enable External Credential Principal Access tab, click Edit.
-
Add the external credentials principal that you created to the Enabled External Credentials Principals column.
-
Click Save.
-