Get Started with the Agent API
Bring the power of generative AI to your business with Agentforce. Build intelligent, trusted, and customizable AI agents and empower your users to get more done with Salesforce. Use the Agent API to communicate with AI agents directly from a REST API. Start sessions, send messages to the AI agent, receive messages, and end sessions using the API.
Agent API isn’t supported for agents of type “Agentforce (Default)”.
To access the Agent API, you must set up an external client app that supports the client credential flow. These instructions show you how to get your environment set up for use with the API and demonstrate how to make your first call to the API.

You must have Agentforce enabled with at least one agent activated. See Set Up Your Agent in Salesforce Help.
To use the Agent API, you must create an external client app (ECA). To learn how to create an ECA, see Create an External Client App in Salesforce Help.
These instructions help you create a basic app with the client credentials flow, although you can use any flow that provides a JWT-based access token.
-
From Setup, in the Quick Find box, enter
External Client App, and then select External Client Apps Manager. -
Select New External Client App.
-
Specify a name and contact email.
-
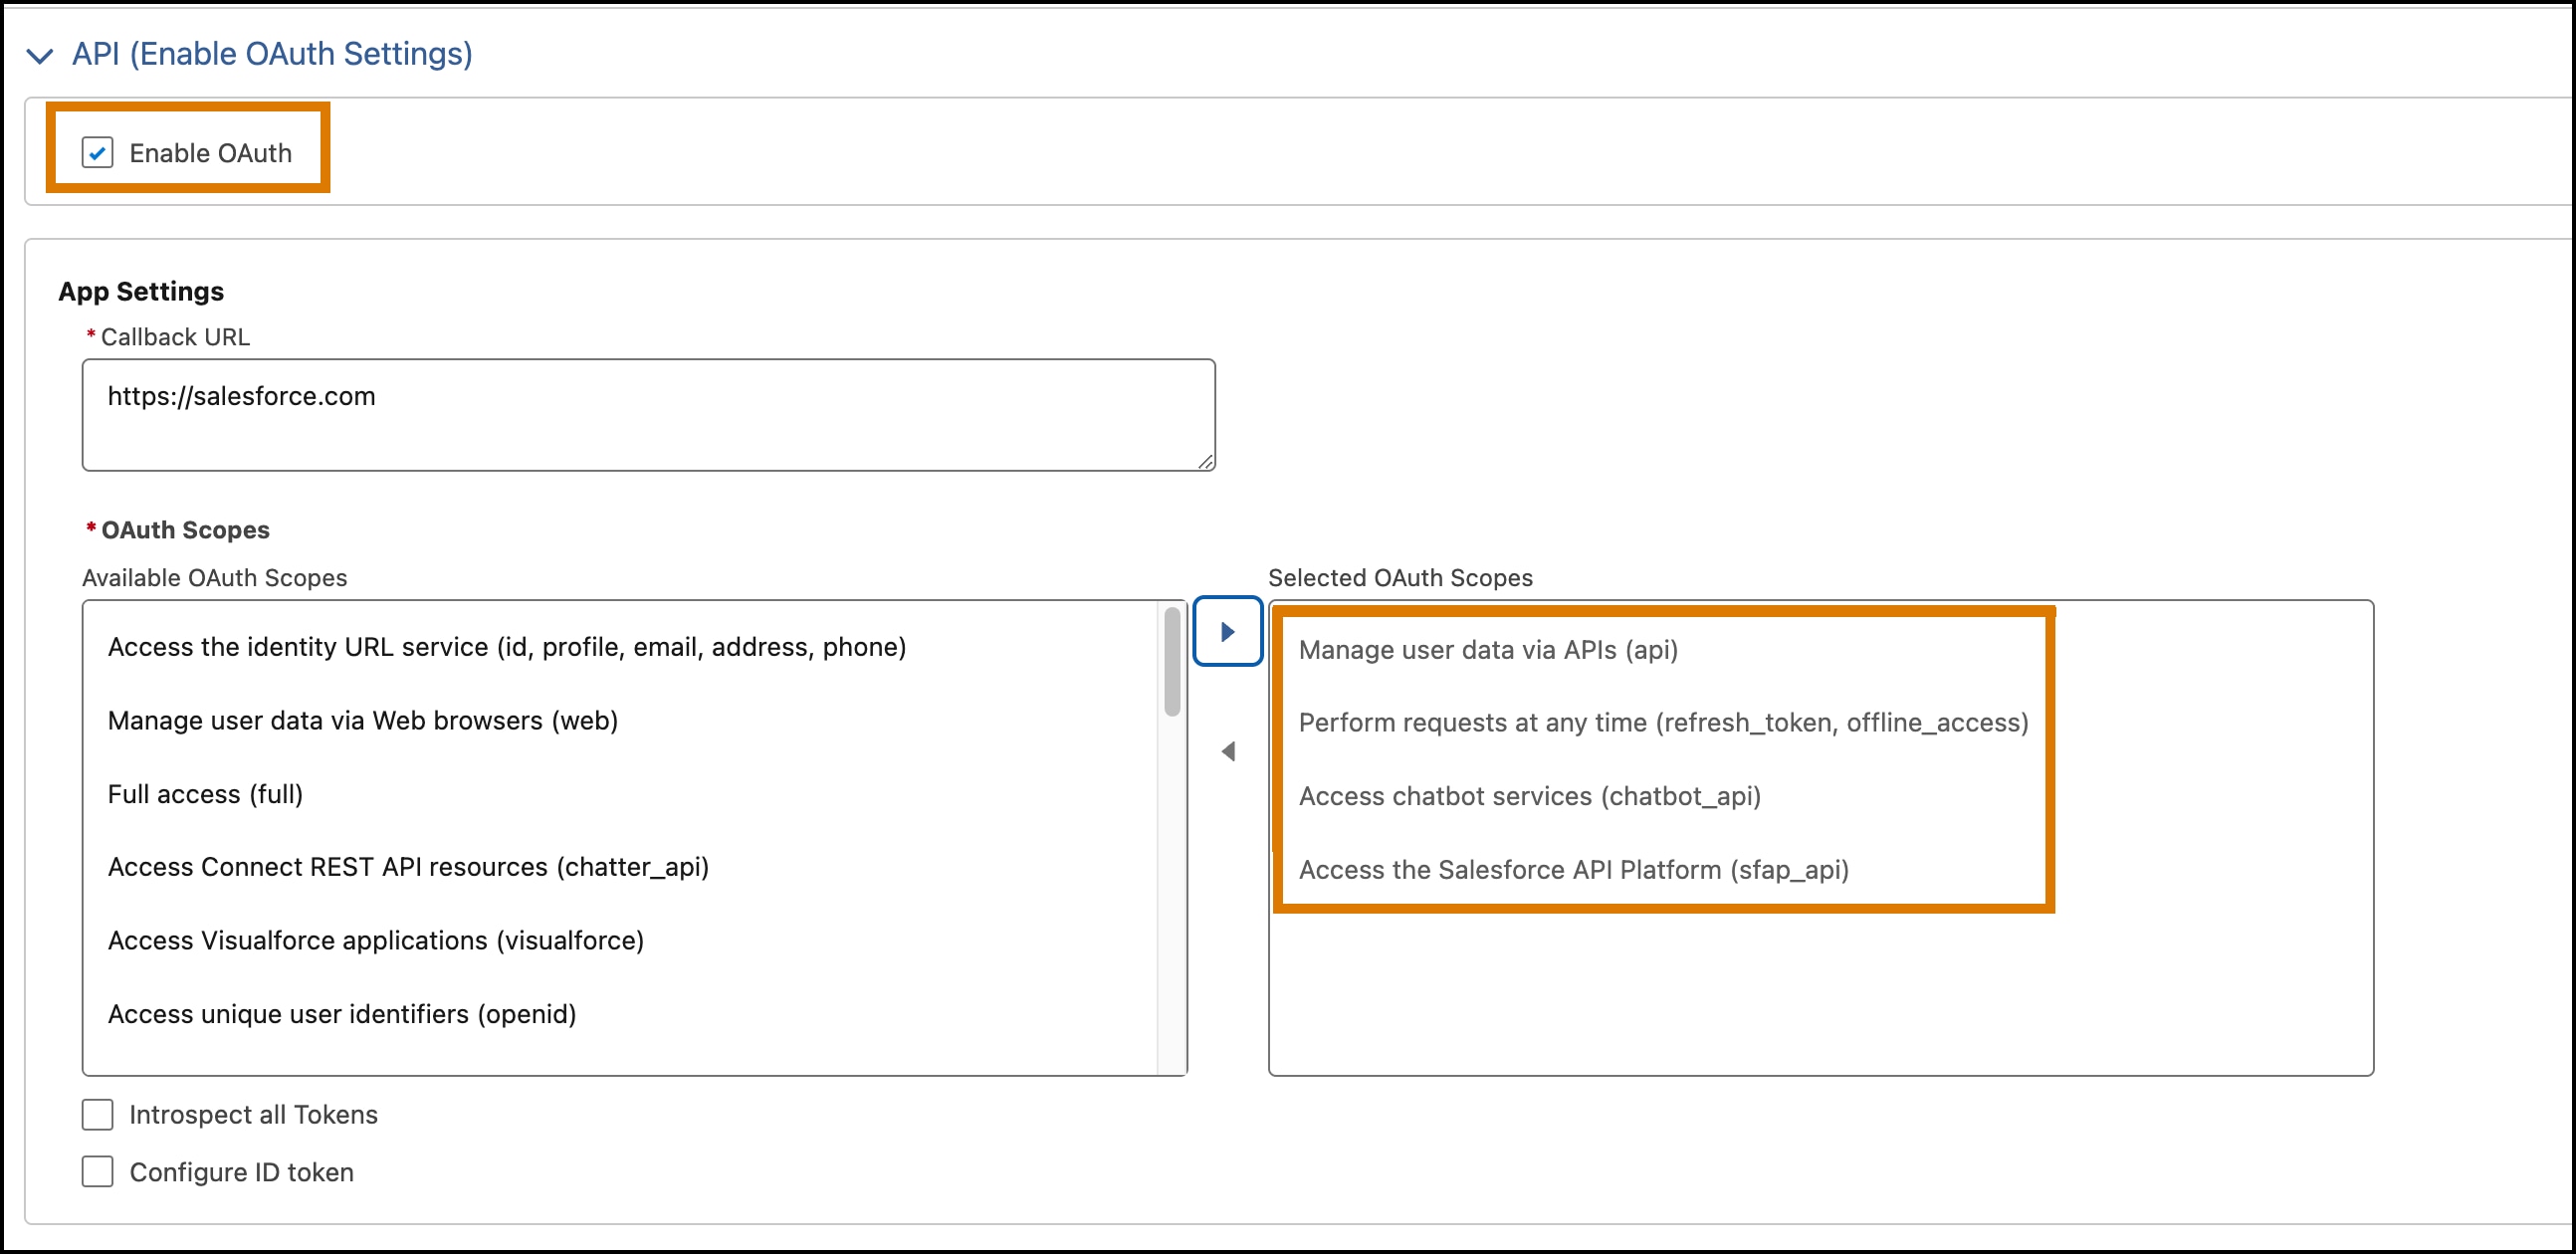
Select Enable OAuth and use these OAuth scopes.
- Manage user data via APIs (api)
- Perform requests at any time (refresh_token, offline_access)
- Access chatbot services (chatbot_api)
- Access the Salesforce API Platform (sfap_api)
-
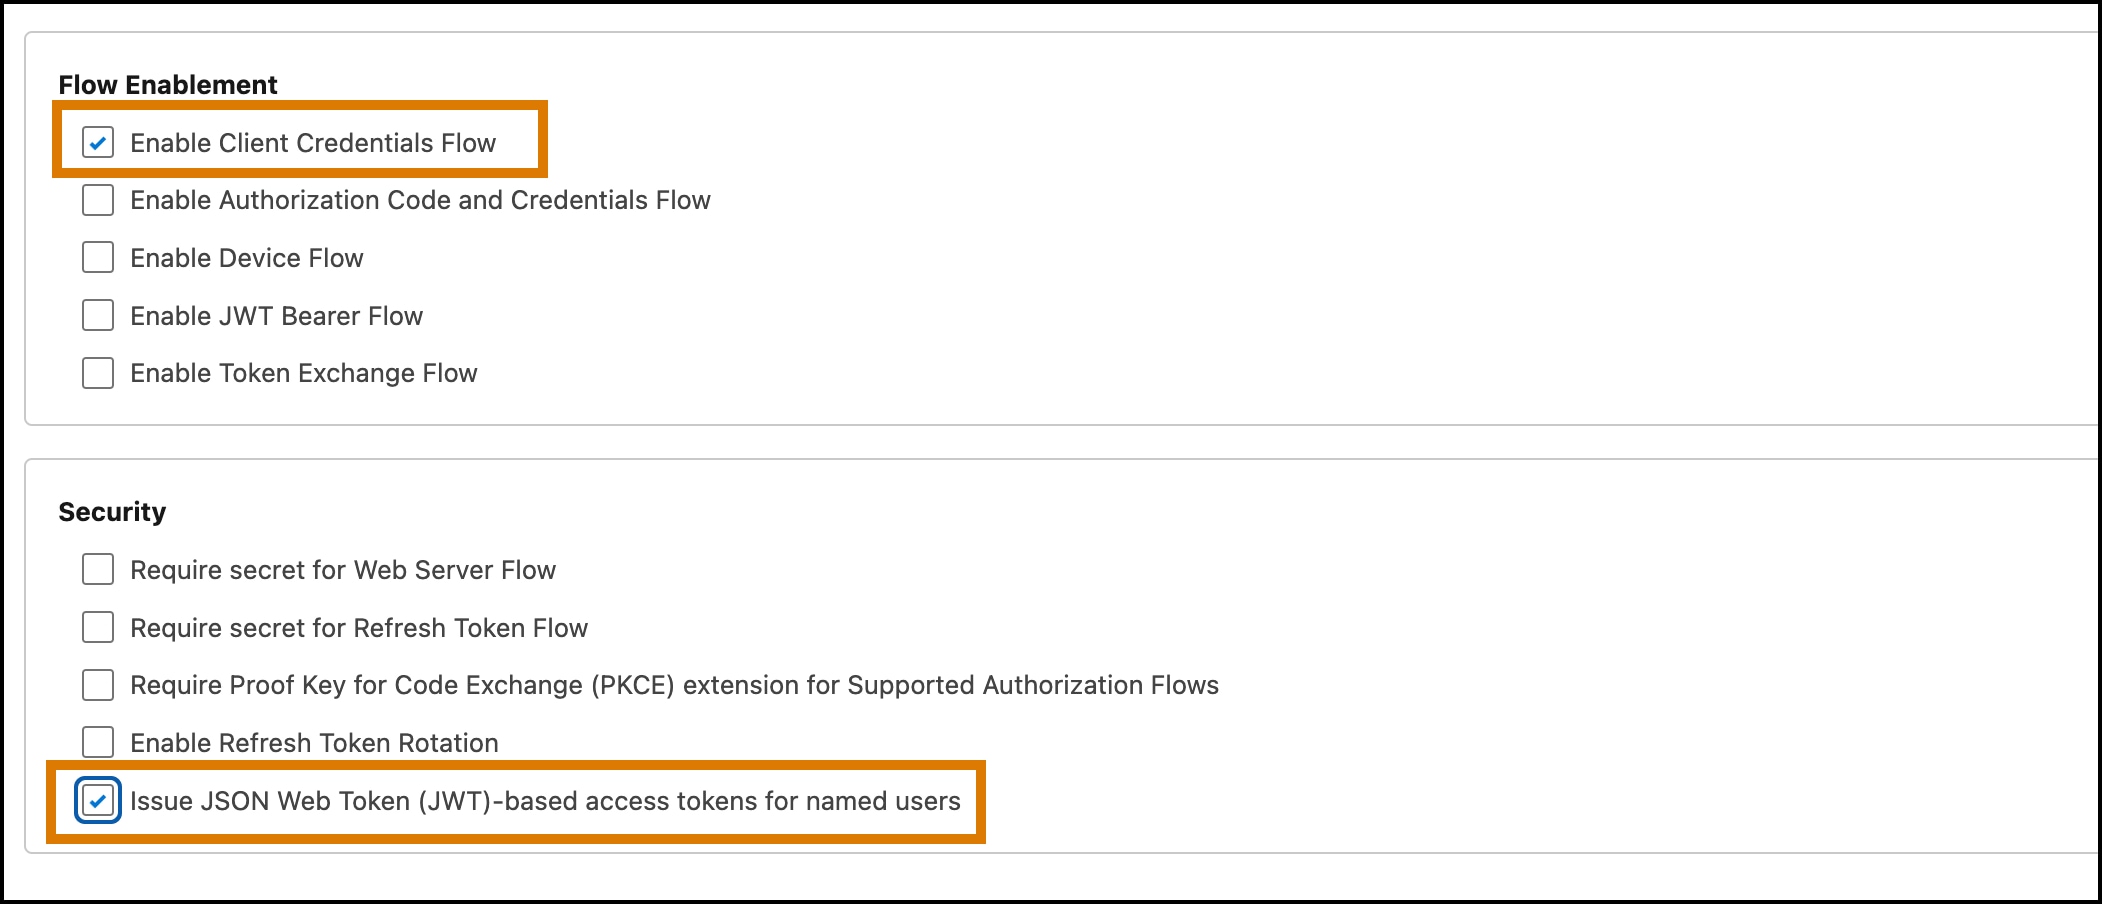
Select these additional OAuth settings.
- Enable Client Credentials Flow: Allows your app to exchange its client credentials for an access token.
- Issue JWT Web Token (JWT)-based access tokens for named users: Allows your app to issue tokens for named users.
-
Deselect:
- Require secret for Web Server Flow
- Require secret for Refresh Token Flow
- Require Proof Key for Code Exchange (PKCE) extension for Support Authorization Flows
-
Create the app.
-
From your app settings, click the Policy tab.
-
Click Edit.
-
From the OAuth Flows and External Client App Enhancements section, check Enable Client Credentials Flow.
-
Set the Run As (Username) field to the email address of a user that has at least API Only access.
-
Save the changes.
To create a token, you need the consumer key and consumer secret from your external client app.
- From your app settings, click the Settings tab.
- Expand the OAuth Settings section.
- Click the Consumer Key and Secret button, and copy your key and secret. You need these values to mint this token.
All calls to the Agent API require a token. Create a token by using the consumer key, consumer secret, and your domain name.
MY_DOMAIN_URL: You can get the domain from Setup. Search for My Domain. Copy the value shown in the Current My Domain URL field.CONSUMER_KEY,CONSUMER_SECRET: You can get the consumer key and secret by following the instructions in Obtain Credentials.
The previous command returns a JSON payload similar to this response.
Copy the access token specified in the access_token property. This token is required when making requests to the API.
After you set up your app and created a token, you’re ready to call the API. Before making the call, gather this information.
AGENT_ID: The ID of the agent that you want to interact with. The method for obtaining this ID depends on which builder you used to create your agent. See Get the Agent ID for an Agent for detailed instructions.ACCESS_TOKEN: The token that you created in Create a Token.RANDOM_UUID: A random UUID value that you provide to represent the session key. You can use this parameter to trace the conversation in your agent’s event logs.MY_DOMAIN_URL: From Setup, search for My Domain. Copy the value shown in the Current My Domain URL field.
Be sure to use the right URLs for your org.
- Use your My Domain URL (for example,
some_domain.my.salesforce.com) and not simply the domain name displayed in your browser (some_domain.lightning.force.com). - If your org is on Government Cloud, replace
api.salesforce.comwithapi.gov.salesforce.comin all Agent API endpoints.
This curl command creates a new agent session with the Agent API.
The bypassUser parameter indicates whether to use the agent-assigned user instead of the logged in user. If set to true, the API uses the user associated with the agent. If set to false, the API uses the user associated with the token. For this client credentials flow scenario, we set the value to true. However, you may need to change this value depending on your use case.
When this call succeeds, you receive a response with a session ID and additional info. Use the session ID to continue the conversation with the agent.
Congratulations, you’ve successfully started using the Agent API! To continue using the API, see Agent API Examples and the Agent API Postman Collection.