Show Personalized Recommendations in Flows
Enhance your users' experience by embedding personalized recommendations directly within Salesforce Flows using the Get Personalization Decisions invocable action. This action uses the Personalization Decisioning API to retrieve tailored suggestions based on contact information. By configuring the input parameters and using the provided Apex classes, you can show relevant content, product recommendations, or service solutions within your record pages, agent consoles, and other Flow-driven processes.
This example describes how to use the Get Personalization Decisions invocable action to configure a flow that retrieves and displays personalized recommendations for a contact record.
Before you begin, make sure you have:
- A fully configured personalization point
- A Data Cloud data space with unified individual data
- From Setup, in the Quick Find box, enter Flows.
- Select Flows and then New Flow.
- Select Start from Scratch and click Next.
- Select Screen Flow and then click Create.
To map values from your contact record and personalization point to the Get Personalization Decisions action and then show the result to a screen, add the default Apex classes to your Flow.
-
Open the Toolbox and click New Resource.
-
From the Resource Type dropdown, select Variable.
-
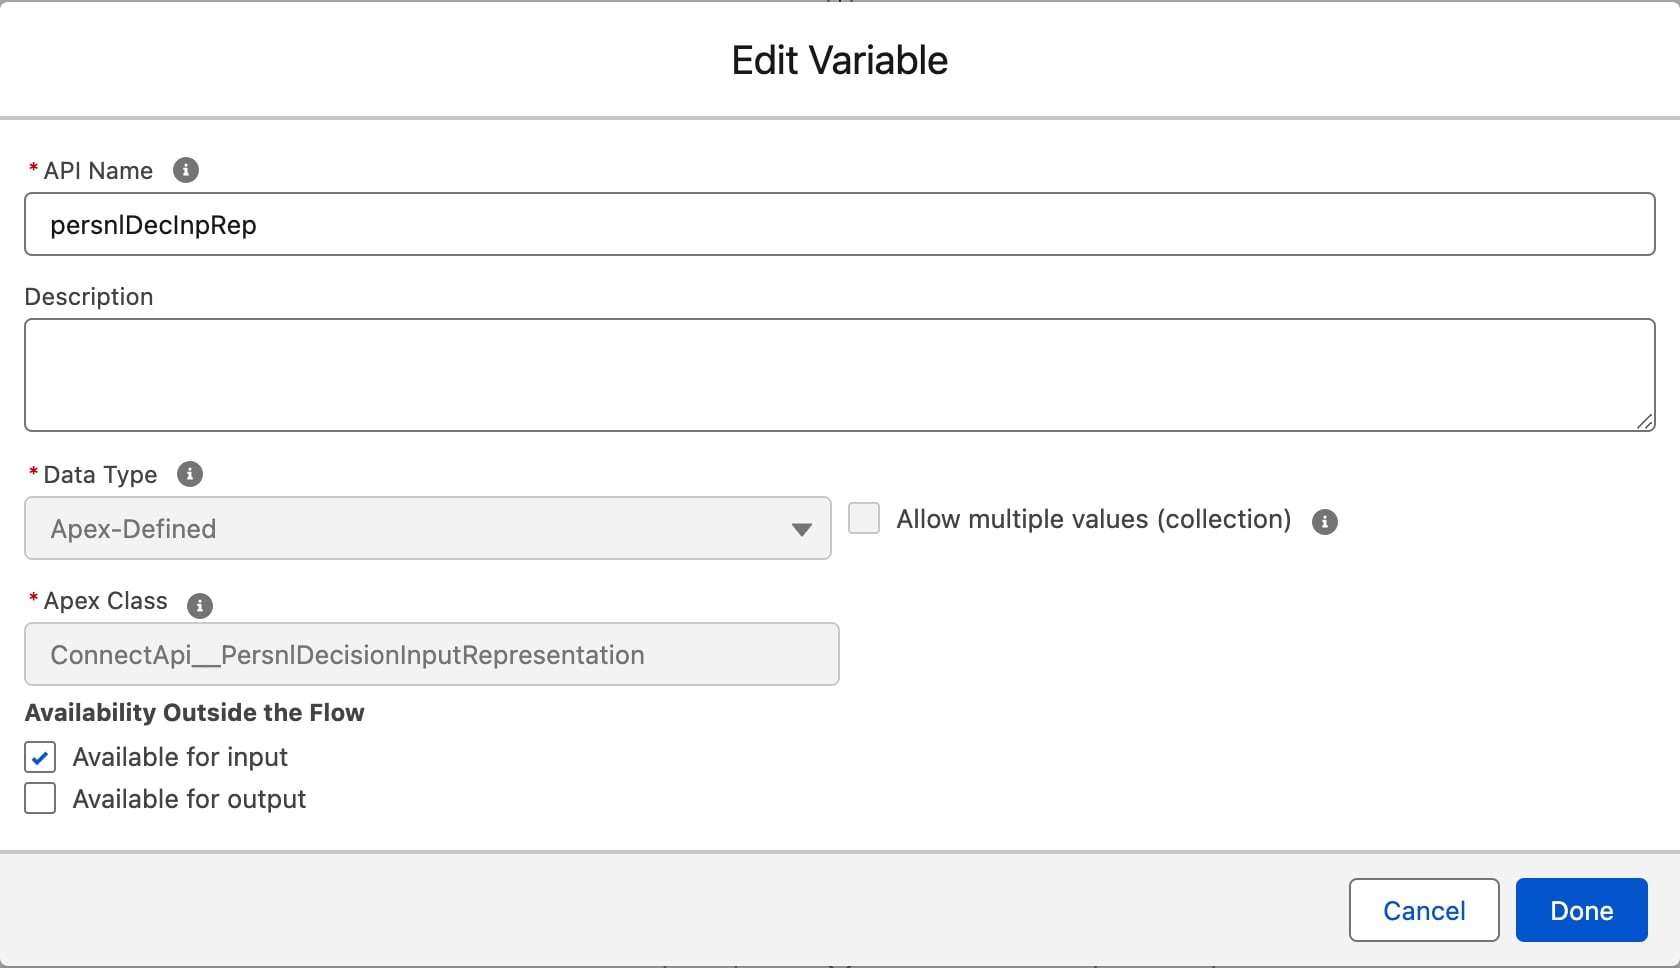
Provide an API Name. For example,
persnlDecInpRep. -
From the Data Type dropdown, select Apex-Defined.
-
Leave Allow multiple values (collection) unchecked.
-
Search for and select the Apex class
ConnectApi__PersnlDecisionInputRepresentation. -
Check Available for input and then click Done.
-
Repeat the preceding steps to create these resources.
Apex Class Example API Name Purpose ConnectApi__PersnlDecisionOutputRepresentationpersnlDecOutRepTo reference personalized data, recommendations, and diagnostics information when displaying the output to a Contact record. ConnectApi__PersnlPointInputRepresentationpesrnlPointVariableVariable for personalization point names.
To pass the Contact’s ID through the Flow a variable is needed to store it.
- Click New Resource.
- From the Resource Type dropdown, select Variable.
- Under API Name, enter
recordId. - From the Data Type dropdown, select Record.
- Under Object, search for and select Contact.
- Check Available for input and then click Done.
Assign the ID from the Contact to the variable. This variable will be used to find the Unified Individual in Data Cloud.
- After the Screen Flow element, add an Assignment element.
- Enter a Label and API Name.
- Under Variable, search for and select the Flow global variable for Current Record
{!$Flow.CurrentRecord}. - For Operator, leave Equals selected.
- Under Value, choose the variable you created for the Contact resource
{!recordId.Id}.
For more information on adding record context to your flows, see Add Record Context to Your Flows. For considerations to keep in mind before using flow actions, see Flow Action Considerations.
For your flow to correctly identify and reference the specific personalization point you’ve configured, you’ll need to add personalization point resources.
- Open the Toolbox and click New Resource.
- From the Resource Type dropdown, select Variable.
- Enter an API Name. For example,
PersnlPoint_ApiName_Action_Input. - From the Data Type dropdown, select Text.
- Set Default Value to the API name of your personalization point, and then click Done.
- Add a Get Records element after the Assignment element. This element finds the unified individual data from Data Cloud that matches the contact information.
- For Label, enter
Get Unified Individual for Contact Record. - Select Data Cloud Object as the Data Source.
- Use the Data Space dropdown to select the data space you’d like to use.
- Under Object, search for and select your unified individual data model object (DMO). For example,
Unified Individual. - For Condition Requirements, select All Conditions Are Met (AND).
- Under Field, search for and select the field that represents a contact’s first name. For example,
ssot__FirstName__c. - For Operator, select Equals.
- For Value, select the variable for the contact record and the attribute for First Name:
{!recordId.FirstName}. - Click Add Condition.
- Under Field, search for and select the field that represents a contact’s last name. For example,
ssot__LastName__c. - For Operator, select Equals.
- For Value, select the variable for the contact record and the attribute for Last Name:
{!recordId.LastName}. - Leave the rest of the configuration as is.
- Add another Get Records element after the Get Records element for unified individual data. This Get Records element finds the unified link individual from Data Cloud that matches the contact information.
- For Label, enter
Get Unified Link Individual. - Select Data Cloud Object as the Data Source.
- Use the Data Space dropdown to select the data space you’d like to use.
- Under Object, search for and select your unified link individual DMO. For example,
Unified Link Individual. - For Condition Requirements, select All Conditions Are Met (AND).
- Under Field, search for and select the unique ID for the Unified Individual:
UnifiedRecordId__c - For Operator, select Equals.
- For Value, search for and select the Unified Individual ID that is retrieved from the record fetched by the Get Records element for Unified Link Individual:
{!Get_Unified_Individual.ssot__Id__c}.
Follow these steps to map the individualID you retrieved from Data Cloud and the personalization point from the input screen to ConnectApi__persnlDecisionInputRepresentation.
- Add an Assignment element after the Get Records element for Unified Link Individual ID.
- For Label, enter
Personalization Point and Individual ID Assignment. - Under Set Variable Values, configure these assignments:
Assignment Operator Example Assignment Assign the Apex-defined variable for personalization point name (the one associated to the Apex Class ConnectApi__PersnlPointInputRepresentation) to the personalization point resourceEquals {!pesrnlPointVariable.persnlPointName}Equals{!PersnlPoint_ApiName_Action_Input}Assign the list of personalization points from the Apex-defined variable for ConnectApi__PersnlDecisionInputRepresentationto the variable for personalization point namesAdd {!persnlDecInpRep.personalizationPoints}Add{!pesrnlPointVariable}Assign context.individualIdfrom the Apex-defined variable forConnectApi__PersnlDecisionInputRepresentationto the unified individual ID retrieved by the second Get Records elementEquals {!persnlDecInpRep.context.individualId}Equals{!Get_Unified_Individual.ssot__Id__c}
Next, pass in the variable you created in the previous step into the Get Personalization Decisions invocable action.
- Search for and add a Get Personalization Decisions invocable action after the Assignment element.
- Enter a Label.
- In the Personalization Decision Input field, select the Apex resource you created for the
ConnectApi__PersnlDecisionInputRepresentationApex class. - Enable Included with Specified Value.
- Under Invocation Type, enter
FLOW. - Expand Show advanced options.
- Check Manually assign variables.
- In the Personalization Decision Output field, select the Apex resource created for the
ConnectApi__PersnlDecisionOutputRepresentationApex class.
To process the personalized recommendations retrieved by the Get Personalization Decisions invocable action, add two Loops to the flow. The first loop iterates through the persnlDecisionOutputRepresentation.personalizations collection. Then, the second loop delves deeper, iterating through the persnlRecommendations array within each personalization object to access the specific recommendations tied to each personalization point. This approach ensures that your flow can efficiently extract and show all relevant recommendations on the Contact page.
- Add the first Loop element after the Get Personalization Decisions action.
- Provide a Label. For example,
Loop1. - Under Collection Variable, select
{!persnlDecisionOutputRepresentation.personalizationsto loop through the collection. - Specify the direction for iterating over the collection as you deem appropriate.
- Add another Loop element immediately after the first Loop.
- Provide a Label.
- Under Collection Variable, select the collection variable from your first loop. For example,
{!Loop1.persnlRecommendations}. - Specify the direction for iterating over the collection.
In this step, you’ll add a Screen element to show the personalized recommendations to your users on the Contact page.
-
Add a Screen element after the second Loop and label it.
-
Add a Repeater component to the canvas and provide an API Name.
-
Drag a Display Text component within the Repeater component and provide an API Name.
-
Use the Insert a resource… field to search for and insert resources to show your recommendations as shown in this example.
This example uses resource names and values referenced in this article.
-
Save and Activate your flow.
Finally, to add recommendations to your Contact page, edit the page by following these instructions.
- Exit Flow Builder and go to Contacts.
- Click any contact.
- Click the settings cog and then click Edit Page.
- Drag the flow component you created onto the page canvas.
- Select the flow you just created.
- Check Pass all field values from the record into this flow variable.
- Click Save.
A fully configured flow that retrieves and displays personalized recommendations for a contact record looks like this.
