Basic Personalization
This example demonstrates how to insert the first name, last name, and city name into an email message.
First, create a subscriber in your account.
- Click the Email app in the app switcher.
- Click Email.
- Click Subscribers in the top menu of the Email app.
- Click All Subscribers.
- Click Create.
- Click Next.
- Enter a subscriber key value for the subscriber in the Subscriber Key field.
- Enter the email address for the subscriber in the Email Address field.
- Click First Name and enter a value for the first name of the subscriber.
- Click Last Name and enter a value for the last name of the subscriber.
- Click City and enter a value for the city of the subscriber.
- Select the list you wish to place the subscriber on.
- Click Finish.
- Click Content.
- Click Emails.
- Click Create.
- Select HTML Paste.
- Enter a name for your email message in the Email Name field.
- Enter a subject for your email message in the Email Subject field.
- Add any preheader information you wish in the Preheader field.
- Select the location for your email message by clicking Select and choosing the location.
- Click OK.
- Click Save.
Paste the template below into the content section of your email message:
Given this data context:
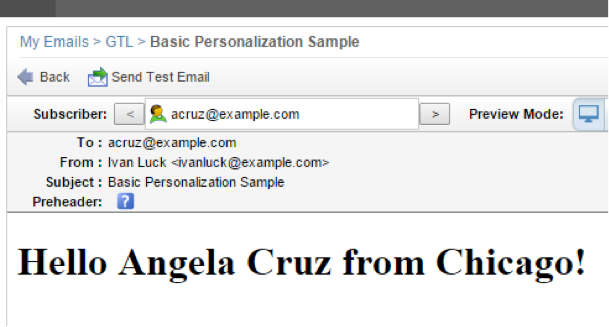
The message renders as displayed: