Path Optimizer Format
You can use Path Optimizer to split a journey into as many as 10 paths and then send contacts down the path that produces the best results.
The Path Optimizer activity sends contacts down the paths in the journey and then monitors engagement rates for each path. You can configure Path Optimizer to choose the winning path automatically, based on engagement rates, and specify how long it collects results before choosing a winning path. Alternatively, you can choose a winning path manually.
Path Optimizer can automatically choose a winner based on the engagement rates of email activities. To choose a winning path based on the results of a different type of activity, you can select the winning path manually.
With REST API, you can create a journey that includes Path Optimizer activities.
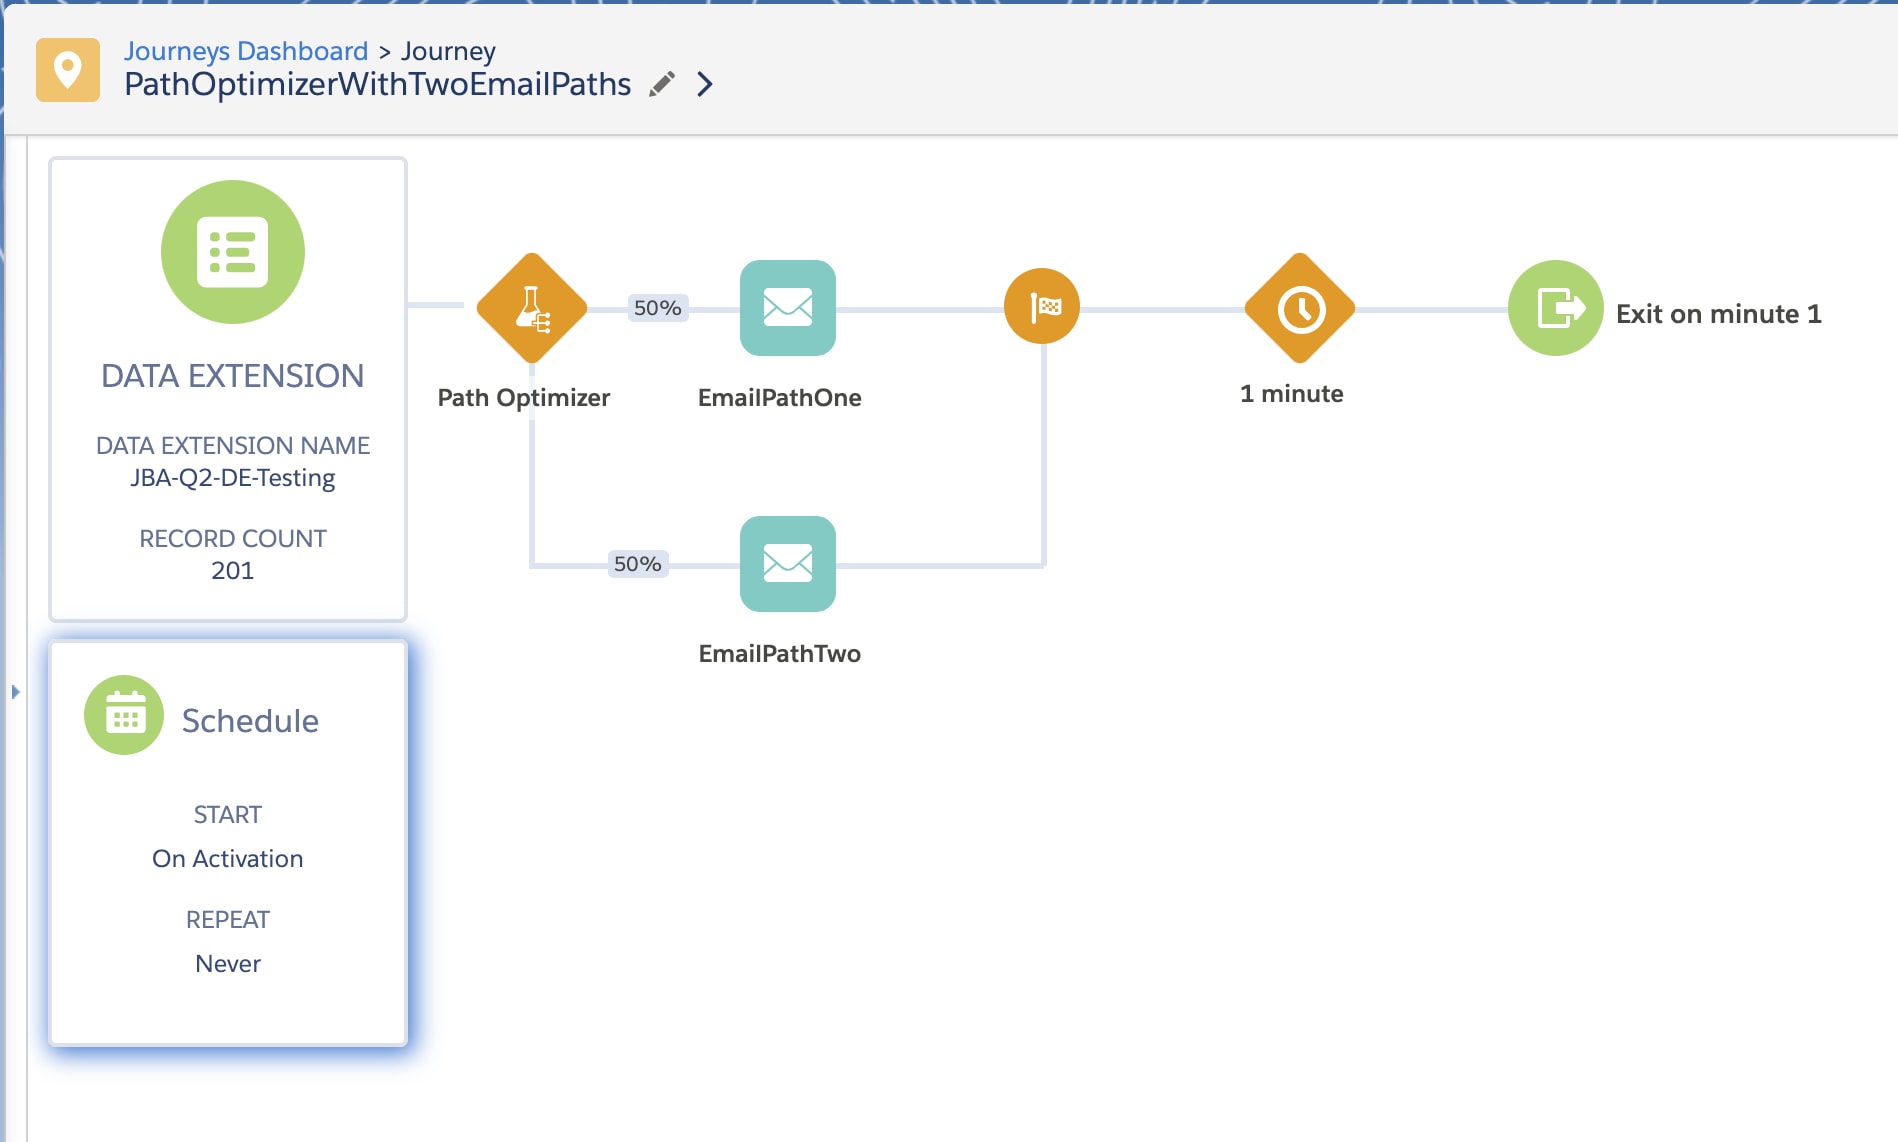
This image shows a basic journey that contains a Path Optimizer activity that splits into two paths. Each path contains a single email activity, after which the Path Optimizer activity finishes. Approaching the end, the journey waits for one minute, and then contacts exit the journey.
Let’s look at the steps involved in creating this journey. To see the request in its entirety, skip ahead to the Complete Examples.
When you use the API to create or update a journey, you can add a Path Optimizer activity by adding an activity with a type value of ABNTEST. This example shows a journey request object that creates a Path Optimizer activity as the first activity in the journey.
In the example, the outcomes array specifies that the Path Optimizer splits the journey into two paths. Path Optimizer sends 50% of the subscribers down one path and the remaining 50% down the other path. Each object in the array includes a next property. The value of this property specifies the next activity in that path.
The configurationArguments object contains these setup properties for the Path Optimizer activity.
- The
"holdbackPercentage": 0property specifies that no contacts are held back from entering the Path Optimizer. You can specify a percentage of contacts to hold back until a winner is determined. - The
"winnerEvaluationType": "Engagement"property indicates that the winner is chosen automatically, based on engagement rates. If you want to choose a winning path manually, rather than allowing Path Optimizer to do it automatically, change the value ofwinnerEvaluationTypetoManual. - The
"engagementWinnerMetric": "Clicks"property indicates that you want Path Optimizer to select the path with the highest click rate as the winning path. To choose a winner based on which path has the highest average open rate, change this value toOpens. to choose a winner based on which path has the lowest average opt-out rate, change this value toUnsubscribes. - The
"engagementPeriod": 3and"engagementPeriodUnits": "Days"properties specify that you want Path Optimizer to collect engagement data for 3 days. You can configure the evaluation period in hours or days with a minimum of 1 hour and a maximum of 99 days. For example, if you want to collect data for 6 hours, set the value ofengagementPeriodto6, and set the value ofengagementPeriodUnitstoHours.
Next, add steps in each path. This section of example code creates two email activities. One path refers to an activity with the key name of EMAILV2-1, and the other path refers to EMAILV2-2, so your request must include those activities.
Both of the email activities in this example specify the same next activity: ABNTESTSTOP-1. It’s important to include the ABNTESTSTOP activity in your request, because it limits which activities Path Optimizer considers when it picks a winning path. This section of code shows how to add an ABNTESTSTOP activity.
Our example journey concludes with a wait activity, after which contacts exit the journey. If you’re creating your own journey, add any additional steps within the activities array. This section shows the final wait step in our journey. To see how the entire request looks with all of the sections put together, see the complete API request example.
Creating journeys using the API can involve creating long request bodies, so we show both the complete request and the complete response here to make them easier to read.
A complete API request to create our sample journey is similar to this example.
The API response confirms the structure of the journey.