Connect Altair GraphQL Client to Salesforce
Altair GraphQL Client is an open-source tool that helps you debug GraphQL queries and implementations. The client provides schema documentation via introspection through a rich interface.
To query the API, you need the base URL and an API access token.
Alternatives to Altair GraphQL Client include GraphiQL and Postman. Use Postman if you want to explore and test GraphQL API without access to schema documentation.
- Salesforce Developer Edition
- Install Altair GraphQL Client based on your operating system.
Turn off warning alerts in Altair GraphQL Client. Warnings don’t affect the functionality of GraphQL and can be ignored. Click the Settings icon and select Settings. Turn on Disable warning alerts and click Save.
Next, get an API access token so you can send a request to your Salesforce org.
GraphQL API uses OAuth 2.0, similar to other Salesforce REST APIs. To get the API access token, follow the Connect REST API Quick Start.
To successfully send requests, GraphQL API requires an access token obtained by authentication. This Quick Start authenticates via Salesforce CLI. For production apps, we recommend that you use your own external client app and an OAuth authorization flow that fits your specific use case.
After you create an external client app and set up your OAuth authorization, you can use Salesforce CLI or run this curl command to get an access token.
Replace this value:
MyDomainName: A custom subdomain specific to a Salesforce org. For example,companynamecreates the URLhttps://companyname.my.salesforce.com.
The MyDomainName.lightning.force.com URL format isn’t supported for OAuth authorization. Use MyDomainName.my.salesforce.com instead.
The curl command returns your API access token in the access_token property. You need this access token to send a request via the GraphQL client.
Now that you have your access token, you’re ready to send a GraphQL API request to Salesforce.
The instructions assume you’re using Altair GraphQL Client on MacOS; steps can vary slightly if you’re using the client on another operating system.
To send a request:
-
Open the GraphQL client you installed.
-
Next to the POST option, enter your endpoint using the format
https://{MyDomainName}.my.salesforce.com/services/data/v{version}/graphql, for examplehttps://myorg-dev-ed.my.salesforce.com/services/data/v57.0/graphql. -
Edit the HTTP headers.
- Click the Set Headers icon (
 ) on the sidebar. The Headers prompt appears.
 - For the Header key field, enter
Authorization. - For the Header value field, enter the access token you generated in step 1. The format is
Bearer access_token. For example,Bearer 00DRM000000LnTv!AREAQN.therestofyourtokenhere. - To ensure proper encoding, click Add header.
- For the Header key field, enter
X-Chatter-Entity-Encoding. - For the Header value field, enter
false. - Click Done.
- Click the Set Headers icon (
-
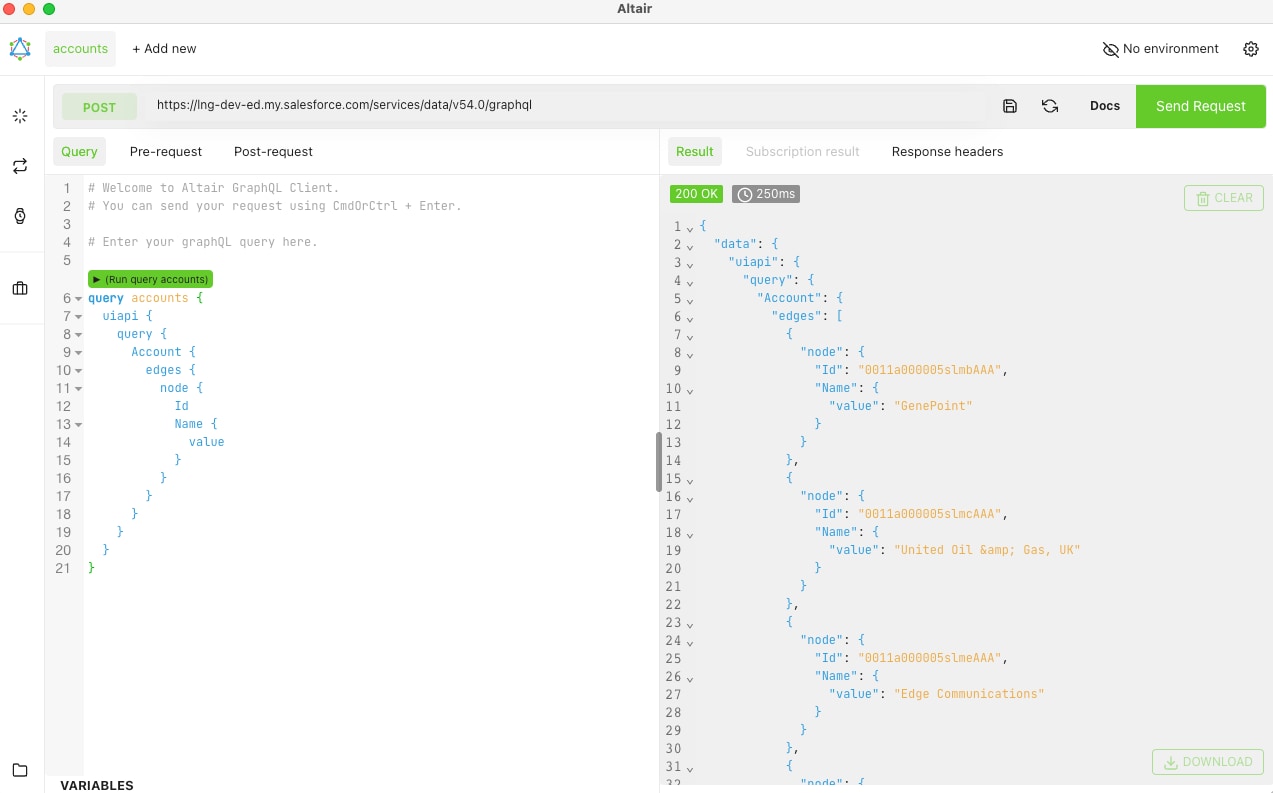
Back in the main client window, enter your query. You can use your own query or this example query.
-
Click Send Request or the ▶️ icon to run the GraphQL query. Alternatively, you can press Ctrl + Enter (Windows) or Cmd + Enter (Mac).
Altair GraphQL Client includes an editor for your query on the left, and the result window on the right. For more information, see the Altair GraphQL Client documentation.
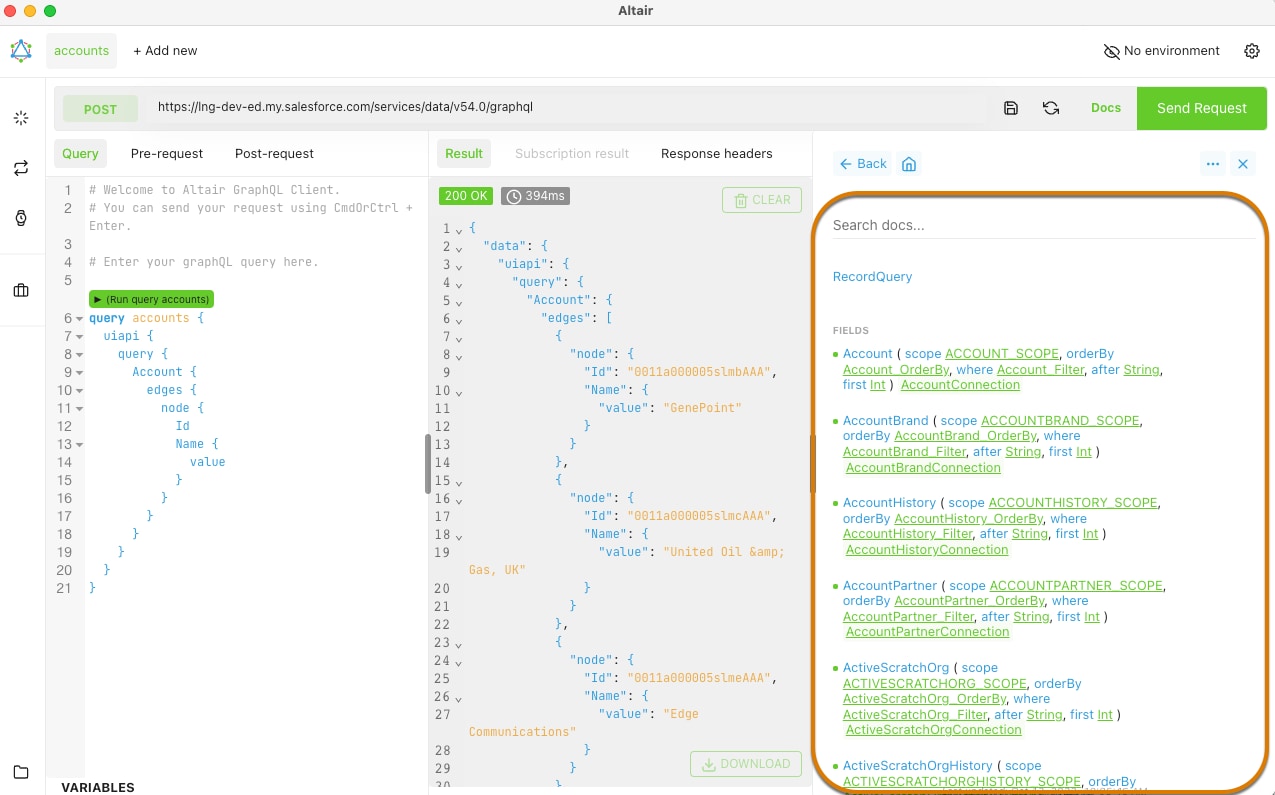
To explore the GraphQL API schema documentation:
The instructions assume you’re using Altair GraphQL Client on MacOS; steps can vary slightly if you’re using the client on another operating system.
- Click Docs. A panel opens to reveal the documentation explorer.
- If the explorer doesn’t display the types, click the Reload Docs icon (
 ).
).
When you load the schema, the panel displays the types and queries available in the Salesforce GraphQL API.
If you receive an error about invalid schema, verify that you set the correct encoding HTML header as described in sub-steps 4–6 in Step 2: Send a Request from Altair GraphQL Client.