1//myTreeGrid.js
2import { LightningElement, wire, track } from "lwc";
3import { NavigationMixin } from "lightning/navigation";
4
5import getNewCases from "@salesforce/apex/CaseController.getNewCasesForAccounts";
6
7const actions = [{ label: "Edit", name: "edit_record" }];
8
9const COLS = [
10  {
11    fieldName: "Name",
12    label: "Account Name",
13  },
14  {
15    fieldName: "CaseNumber",
16    label: "New Cases",
17    cellAttributes: {
18      iconName: { fieldName: "iconName" },
19    },
20  },
21  {
22    type: "action",
23    label: "Edit Record",
24    typeAttributes: {
25      rowActions: actions,
26      menuAlignment: "right",
27    },
28  },
29];
30
31export default class MyTreeGrid extends NavigationMixin(LightningElement) {
32  @track myData = [];
33  columns = COLS;
34  error;
35
36  @wire(getNewCases)
37  wiredCases({ error, data }) {
38    if (error) {
39      // Handle error
40      this.error = error;
41    } else if (data) {
42      // Process record data
43      var strData = JSON.parse(JSON.stringify(data));
44
45      strData.map((row, index) => {
46        if (row["Cases"]) {
47          row._children = row["Cases"]; //define rows with children
48          delete row.Cases;
49
50          let iconKey = "iconName";
51          row[iconKey] = "standard:case";
52        }
53      });
54      this.myData = strData;
55    }
56  }
57
58  handleRowAction(event) {
59    const action = event.detail.action;
60    const row = event.detail.row;
61    switch (action.name) {
62      case "edit_record":
63        this[NavigationMixin.Navigate]({
64          type: "standard__objectPage",
65          attributes: {
66            objectApiName: "Case",
67            actionName: "edit",
68            recordId: row.Id,
69          },
70        });
71        break;
72    }
73  }
74}


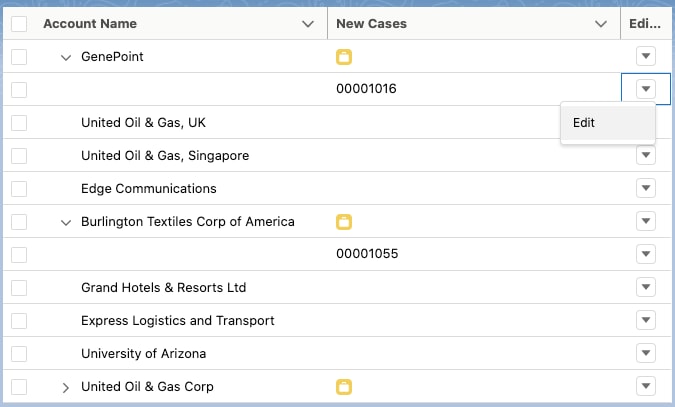
 j
j