Get Started with Salesforce Spiff Webhook API
A webhook provides authorized endpoints for Salesforce Spiff to sync third-party data in real time from an external source. A webhook includes a mapping that specifies how the third-party data maps to Spiff records.
After you set up a webhook and define a mapping, use the Spiff webhook API endpoints to test the webhook authentication, upsert records, or delete records.
To get started, complete these sections in Set Up a Third-Party Connector in Salesforce Spiff in Salesforce Help.
- Create a Webhook in Spiff
- Configure the Webhook Mapping
- Add Connector Fields
Make a note of the webhook secret that’s generated when you create the webhook in Spiff. This secret is required for authenticating webhook API requests. If you close the window without copying these values, you can’t recover them. You can only generate new tokens. See Refresh Webhook Tokens in Salesforce Spiff.
All endpoints in the Spiff Webhook API require a signature header, which is a HMAC-SHA256 cryptographic hash of the current time, the request body, and the webhook secret. The signature format is t={timestamp},v1={digest}, where {timestamp} is a UTC epoch timestamp and {digest} is a string representation of the HMAC-SHA256 digest.
Here’s a cURL example for generating a signature.
Replace these values:
-
WEBHOOK_CONNECTOR_ID: The ID of the webhook connector in Spiff. Go to Admin » Connectors in Spiff, find the Webhook connector, click the three dots menu, and select More Info. -
WEBHOOK_SECRET: The webhook secret that you generated in Spiff. -
SUBDOMAIN: The subdomain for your Spiff environment.- If you’re in the US, use
us1. - If you’re in the EU, use
eu1.
- If you’re in the US, use
-
KEY: The webhook secret that you generated in Spiff.
To verify that you generated the HMAC-SHA256 signature correctly, pass the signature in a header with the testWebhook endpoint.
Replace these values:
-
SUBDOMAIN: The subdomain for your Spiff environment.- If you’re in the US, use
us1. - If you’re in the EU, use
eu1.
- If you’re in the US, use
-
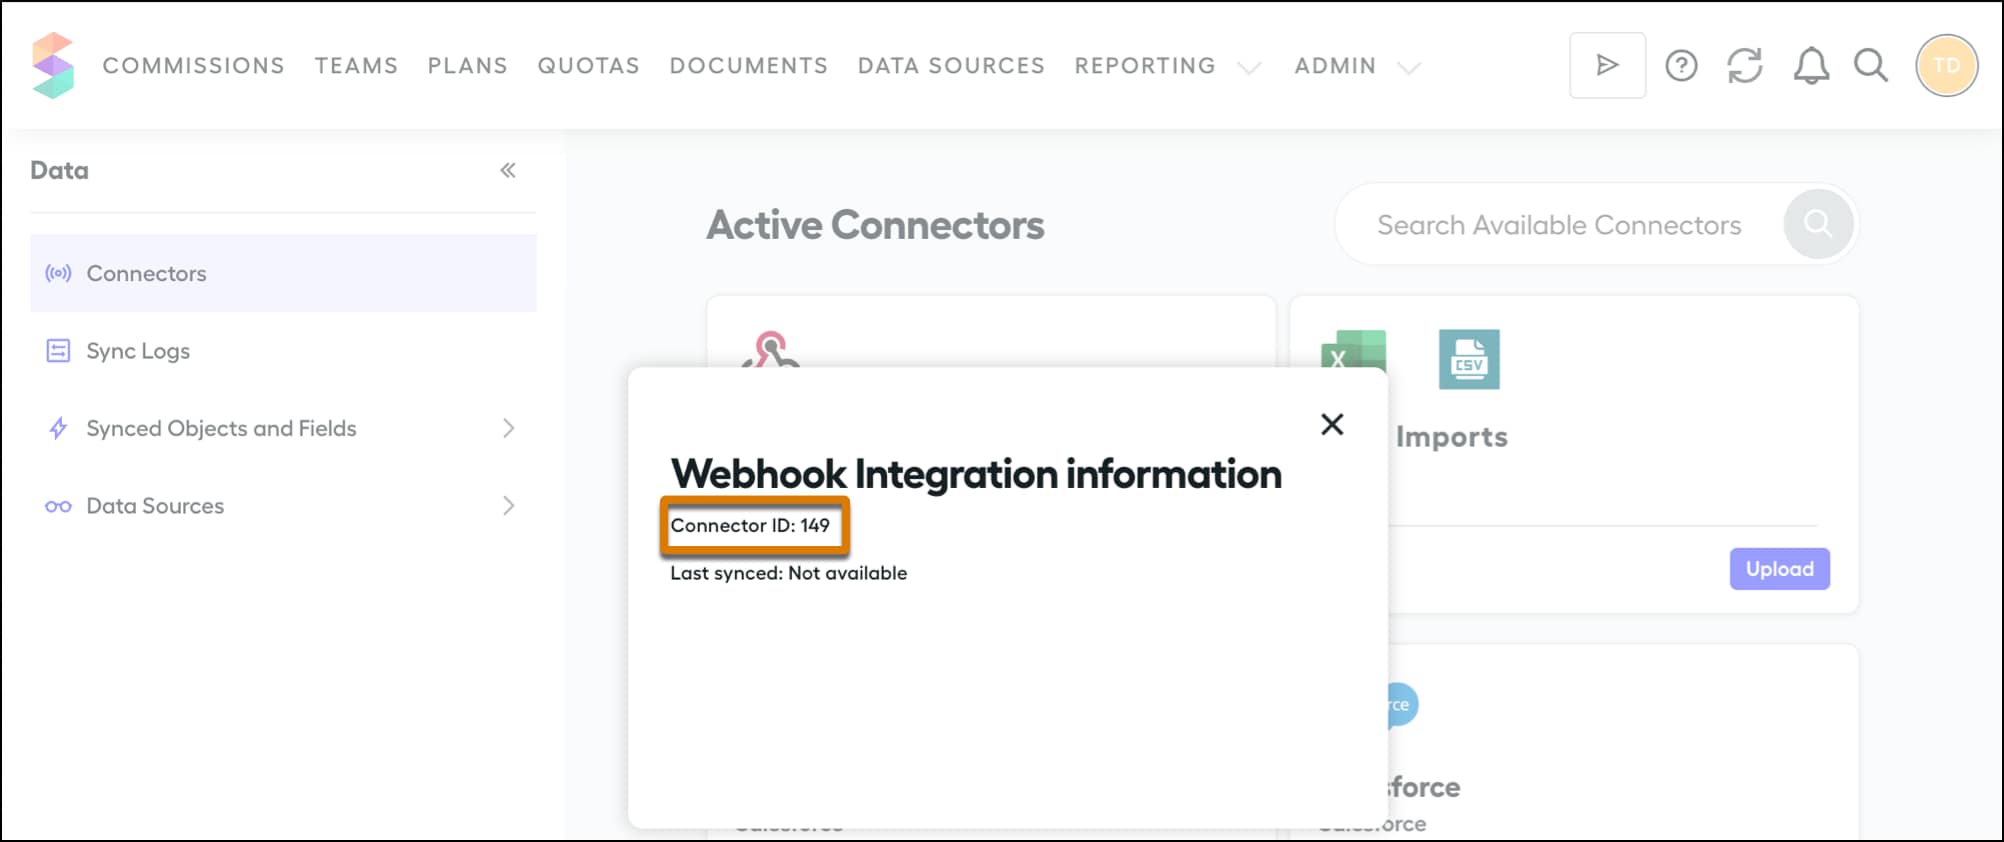
WEBHOOK_CONNECTOR_ID: The ID of the webhook connector in Spiff. Go to Admin » Connectors in Spiff, find the Webhook connector, click the three dots menu, and select More Info.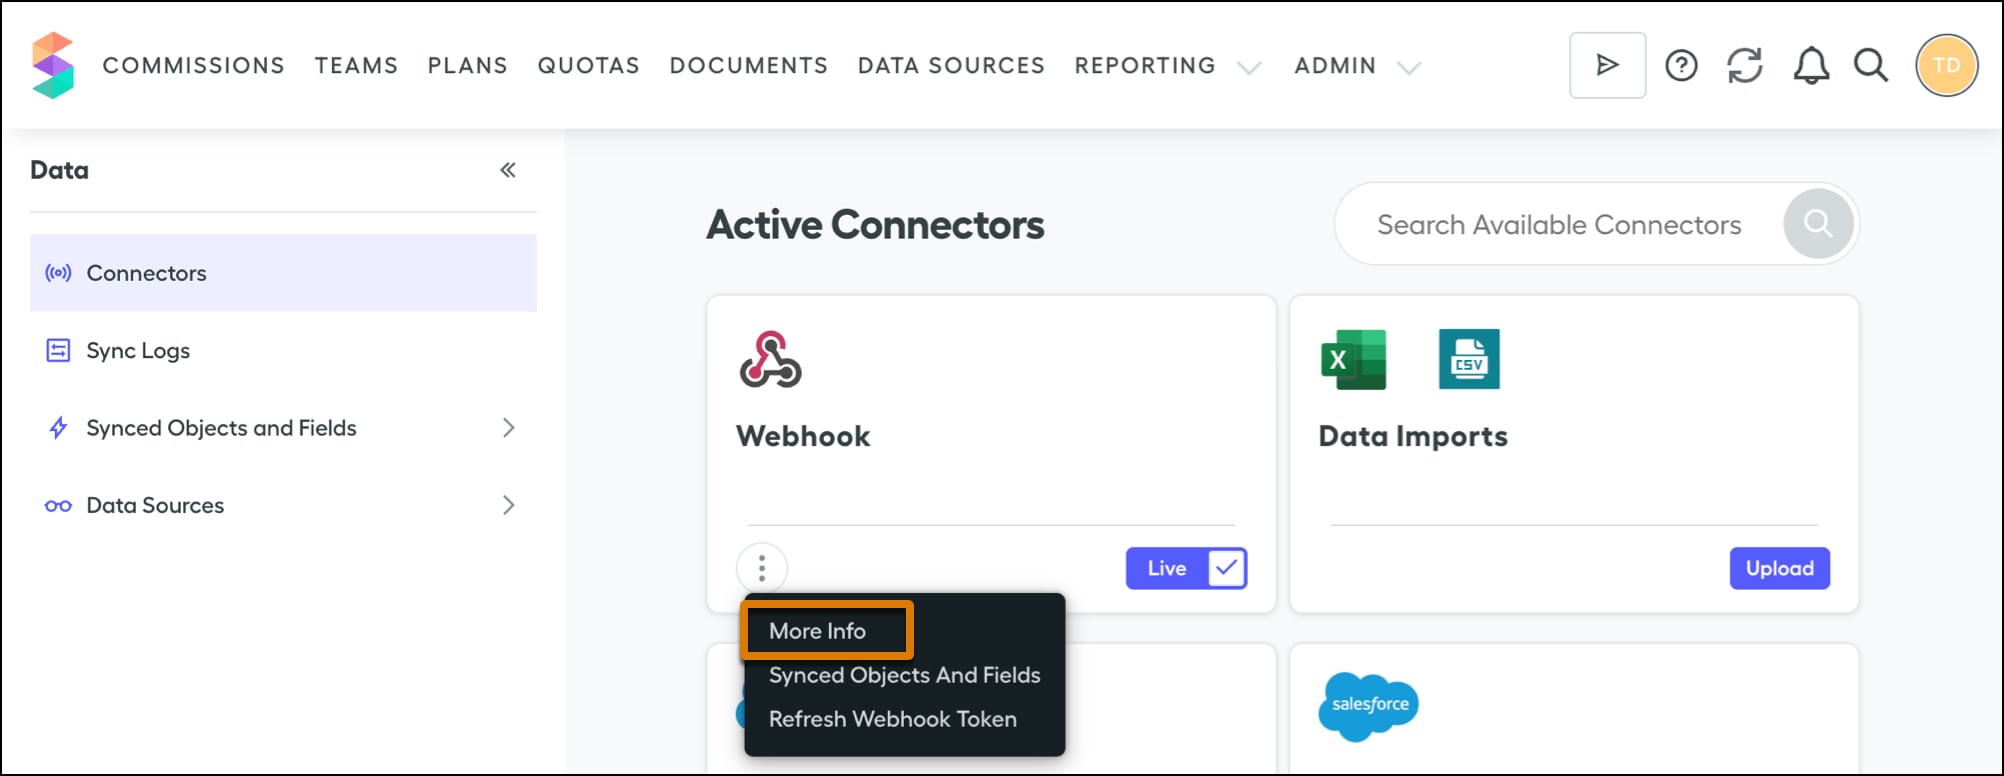
The ID is visible in the Webhook Integration Information window.
-
TIMESTAMP: The string representation of the UTC epoch timestamp when the signature was created. -
DIGEST: The string representation of the HMAC-SHA256 signature that you generated.
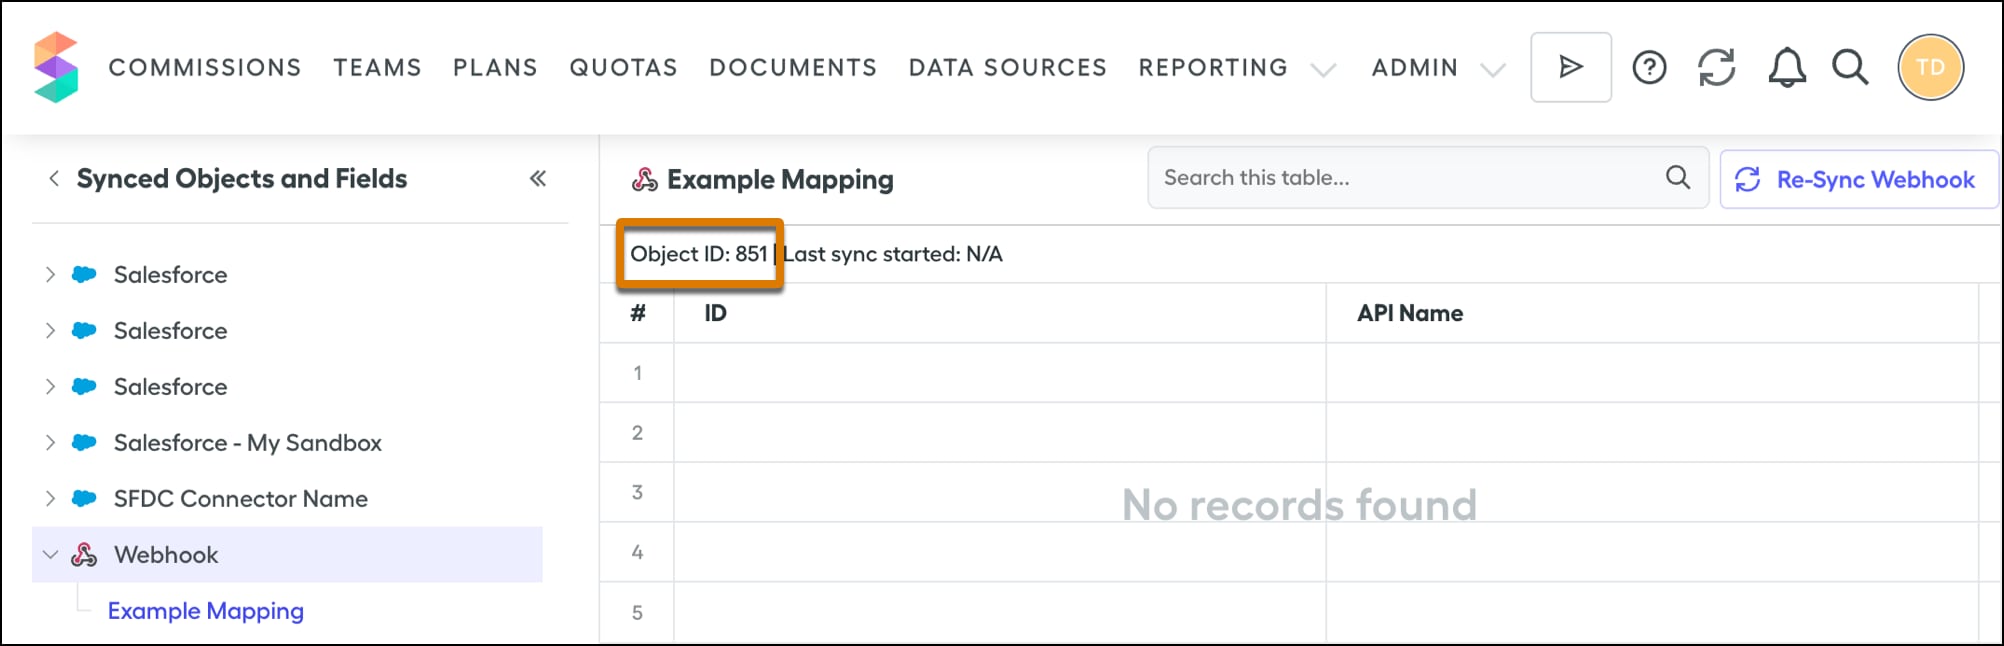
Other endpoints in the Webhook API require a MAPPING_ID, which is the ID of an object that the webhook maps from the third-party data source in Spiff. This ID is different from the CONNECTOR_ID used with the testWebhook endpoint.
-
In Spiff, go to Data Sources » Synced Objects and Fields.
-
Scroll to the Webhook connector.
-
Select a mapping.
The ID is visible under the mapping name.
You can now use the other endpoints in the Webhook API. See Spiff Webhook API. Make sure that you pass the signature header for every endpoint.
Each endpoint in the Webhook API allows a maximum payload size of 5 MB.
See Also
- Salesforce Help: Set Up a Third-Party Connector in Salesforce Spiff
- Trailhead: Deliver Smarter Incentives with Salesforce Spiff