The Summer ’17 release is upon us — bringing with it a ton of new tools for developers! We’re sharing quite a few resources about this release, including a post on the new UI API and our Summer ’17 webinar (link in ‘Resources’ section below). In this post, I focus on two key features coming to Lightning: standard action overrides and Lightning Data Service.
Standard Action Overrides In Lightning
There are six standard actions available for most standard objects and every custom object: new, view, edit, delete, list, and tab. In Visualforce, we can access these actions through the global $Action variable.
Until now, similar functionality hasn’t been accessible in Lightning. With Summer ’17, Lightning developers now have the ability to override the View, New, Edit, and Tab standard actions with custom Lightning components. By using the new lightning:actionOverride interface, we gain greater control over the look and feel of applications in both Lightning and Salesforce1.
Below, I’ve used the new interface to build a newContactLightning component, designed to override the New action on Contacts:
By adding the lightning:actionOverride interface to my component markup, it now shows up as an option in the action override menu, accessed via Setup’s (newly redesigned in Summer!) Object Manager:
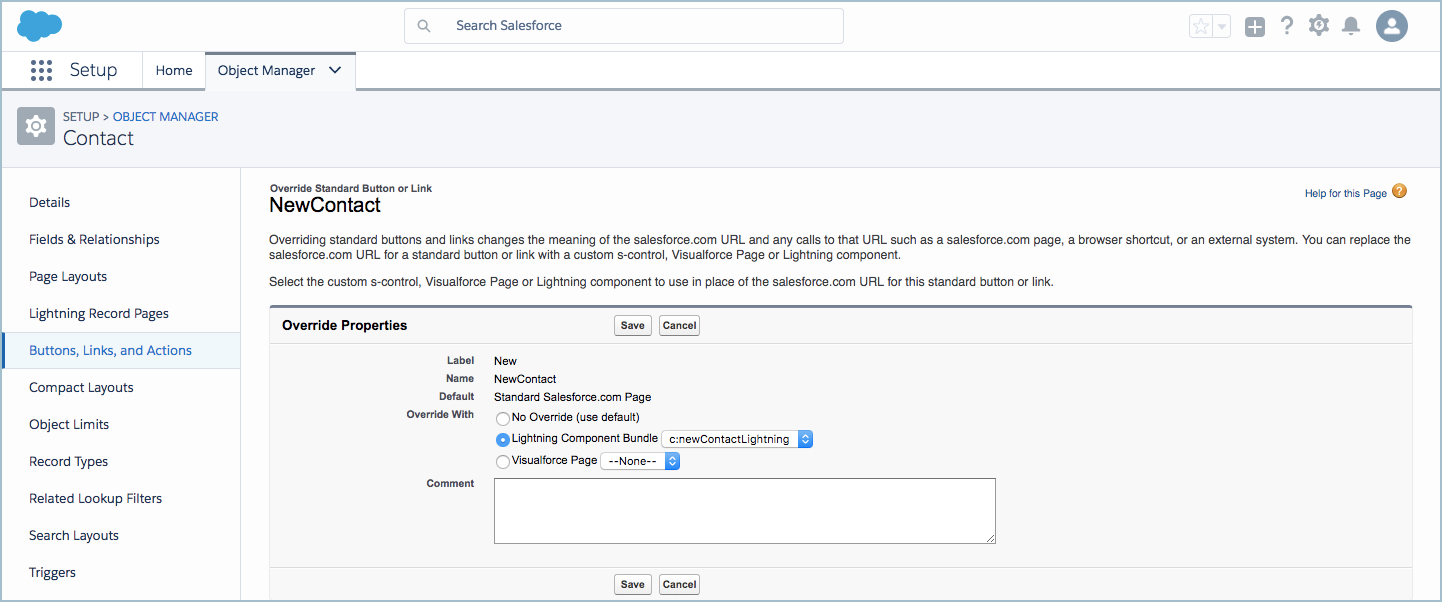
After selecting my Lightning component as the override for the NewContact action, my users now see:

Neat, right? Before you dive too far into experimenting with action overrides, keep in mind: in this release, Lightning component action overrides cannot be restricted to just one object, or just one action. This means my newContactLightning component will show up as an override option for any action override menu where Lightning component overrides are available.
Clear, precise naming conventions (for example, newContactLightning) can help lessen confusion for anyone working at the level of an object-specific action override menu. You can also enable your override components to behave appropriately in multiple contexts by using the force:hasSObjectName and force:hasRecordId interfaces, as outlined in this post.
For our newContactLightning example, I can quickly add a small conditional statement into my markup to give a visual cue (in the form of an error banner) to users who try to use this override in a place I haven’t had a chance to design:
By using force:hasSObjectName interface, I can let the sObjectName attribute provided for me control visibility of the banner. The ability to extend the use of this interface beyond components built for a record home page is also new in Summer. The extended functionality of force:hasSObjectName includes the ability to add the interface onto custom Quick Action components as well. Read more about the changes here.
In this case, the markup I added means that if my component gets chosen to override the Edit or New actions on Accounts, users will see:

Some other points to consider when building action override Lightning components:
- Components always display as a page, not a modal or panel (that is, not as a pop-up/smaller screen).
- Developers need to provide a complete user interface for overrides (that is, all buttons/navigation options for users, like Save or Cancel, and so on).
- In Summer ’17, Lightning component action overrides apply only in Lightning Experience and Salesforce1.
Lightning Data Service Is In Beta
Lightning Data Service lets you load, create, edit, or delete individual records in Lightning components without requiring Apex controller support.
In addition to bringing your components a performance boost, Lightning Data Service also helps make applications more efficient (and everyone much, much happier) by respecting field-level security and sharing! Huzzah!
But Lightning Data Service brings more to developers than just the ability handle CRUD operations consistently and securely. I can also incorporate data services into the look and feel of my components and apps—without slowing down my development to write enormous amounts of client or server-side logic.
As an example, I’ve used Lightning Data Service to build an alternate Account Highlights panel for use in a fairly busy console app:

And the code:
That’s it. No client- or server-side code needed. Just the addition of force:recordData to my markup gives my component the power of Lightning Data Services behind it. By using the layoutType attribute (and setting it to FULL), my component has awareness of every field included in the page layout for that record, so I can reference them as I build. For more detail about using the new force:recordData component, see the Lightning Components Developer guide (direct link below). We’ll also be going deeper into using force:recordData and the Lightning Data Service Beta in a forthcoming blog post.
Developers who have been working with Lightning Data Service during the developer preview will need to pay attention to some changes in markup associated with the progression to Beta. You’ll want to update components using the force:recordPreview base component, changing the element to force:recordData. In addition, the syntax for referencing targetRecord has changed. For more information, see the Summer ’17 release notes section on Lightning Data Service (direct link below) and the Summer release webinar.
These are just two of the features coming in Summer ’17. Be sure to take a look at the full run-down of what’s coming for developers in the release notes.
Resources:
- Summer 17 Release Notes (Action Overrides): https://releasenotes.docs.salesforce.com/en-us/summer17/release-notes/rn_lightning_action_overrides.htm?edition=&impact=
- Summer 17 Release Notes (Lightning Data Service): https://releasenotes.docs.salesforce.com/en-us/summer17/release-notes/rn_lightning_data_service.htm?edition=&impact=
- Summer ’17 Webinar: https://www.salesforce.com/video/924958/
- Force:recordData (Lightning Components Developer Guide): https://developer.salesforce.com/docs/atlas.en-us.208.0.lightning.meta/lightning/aura_compref_force_recordData.htm?search_text=force:recordData