Tools for Writing Apex Code
Use the Apex extension for VS Code to access code-editing features such as code completion, go to definition, view outlines of Apex classes and triggers, refactoring, and find syntactic errors in your code.
The Apex extension provides context-sensitive suggestions when you’re working in an Apex class or trigger. As you type, auto-completion lists members such as methods or variables. The auto-completion list also displays the documentation for the suggestions. Use these keys:
- Ctrl+space to view code completion suggestions
- Arrow keys to navigate between the suggestions
- Enter key to select from the suggestions
To change how suggestions are pre-selected, see IntelliSense - Suggestion selection.
Code snippets are available for scaffolding class and interface definitions, and a variety of statements, such as loops and conditional statements. When you’re working in an Apex class or trigger, run Insert Snippet from the Command Palette to view the available snippets. You can also view these code snippets as code completion suggestions.
Out of the box snippets for Salesforce development are available in these repositories:
- Apex Code Snippets
- HTML Code Snippets for LWC development
- JavaScript Code Snippets for LWC development
The real power of snippets comes with customizing snippets for your own use. Follow these steps to create a custom Apex snippet that lets you quickly write a simple SOQL query:
-
Run the Snippets: Configure User Snippets command from the Command Palette.
-
Select
apex.jsonto open the file. -
Add this snippet code to the file:
-
Save the file.
-
Use this snippet in your Apex class file by typing “soql” and selecting to add this snippet to your code.
-
The code snippet
[SELECT field1, field2 FROM SobjectName WHERE clause];is added to your Apex file.
For more information about snippets, see Snippets in Visual Studio Code.
In addition to the generic snippets feature available in VS Code, you can use custom templates to create metadata for an Apex class or trigger. Here’s an example of using a template for your Apex classes:
- Edit the
DefaultApexClass.clsfile with your custom code:
- Run the SFDX: Create Apex Class command from the Command Palette.
- Enter
ApexClassfor filename. - Accept the default directory location.
Confirm that the ApexClass.cls file contains your custom code.
To ensure that the Intellisense feature correctly prompts completion suggestions, you must refresh the SObject definitions. Run the SFDX: Refresh SObject Definitions command from the Command Palette.
You can now preview, view, or go to definitions of:
- User-defined Apex
- Classes (from definitions of extending classes)
- Constructors
- Interfaces (from definitions of implementing classes)
- Methods
- Properties
- Variables (local and class variables)
- Standard objects
- Fields (standard and custom fields)
- Object definitions
- Custom objects
- Fields
- Object definitions
When you refresh SObject definitions, the extension uses the default org to generate Apex classes. These classes represent the standard and custom objects that the current user has access to. We recommend that you don’t edit these representative Apex classes because these classes are intended to be read only. If they’re modified, it may impact the auto-completion suggestions. Also, the changes are lost when you refresh the SObject definitions.
Whenever you refresh SObject definitions, the representative Apex classes are deleted and regenerated. You can modify the SObjects either by updating the objects’ .object-meta.xml and .field-meta.xml files; Or by making changes declaratively in the default org. After modifying the SObjects, make sure to sync your local project and the default org.
When you launch the Salesforce CLI Integration extension (which is part of the Salesforce Extension Pack) for the first time and the salesforcedx-vscode-apex.enable-sobject-refresh-on-startup setting is enabled, SFDX: Refresh SObject Definitions command is executed automatically if your project doesn’t contain any Apex classes. After you add or edit standard or custom objects or their fields, make sure to run this command.
Apex extension provides go to definition support for user-defined Apex such as classes and methods, standard objects, and custom objects.
- To preview a definition, press and hold Ctrl (Windows or Linux) or Cmd (macOS) and hover over the item whose definition you want to see.
- To view a definition, right-click the item and select Peek Definition, or press Alt+F12.
- To jump to the location of a definition, right-click the item and select Go to Definition, or press F12.
You can find all references to user-defined Apex such as classes, class variables, enums, interfaces, methods, and properties. To find references, right-click the item and select Go To References or press Shift+F12; Or right-click the item and select Find All References. The reference results are displayed in the left pane of the editor window.
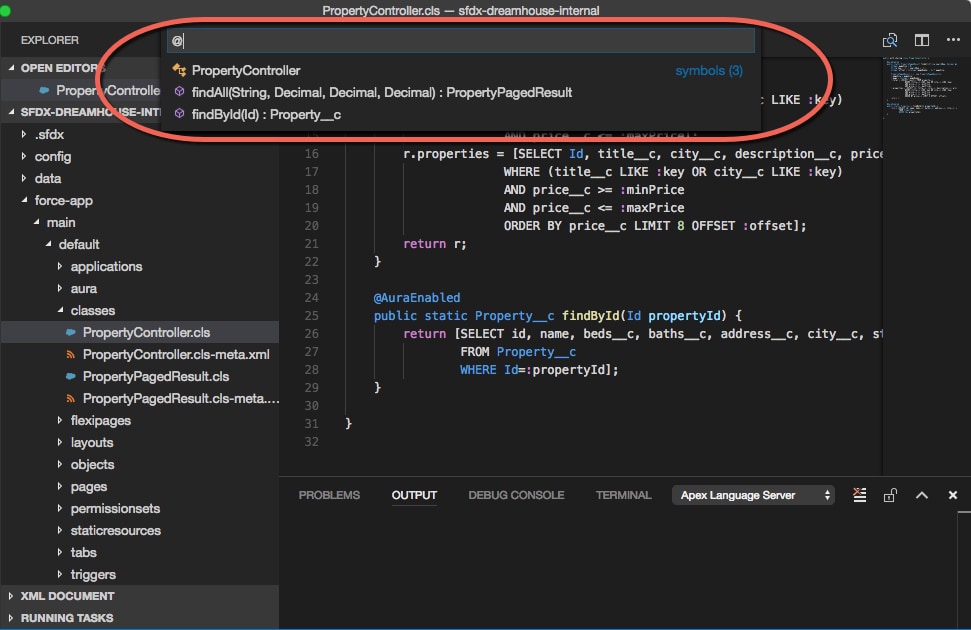
The Apex outline view shows the structure of the Apex class or trigger that’s open in the editor.
- To view the list of the symbols in the file, press Ctrl+Shift+O (Windows or Linux) or Cmd+Shift+O (macOS).
- To go to one of the symbols, select it from the list.
The Explorer in the Side Bar also provides an Outline view to assist you while working on your project.
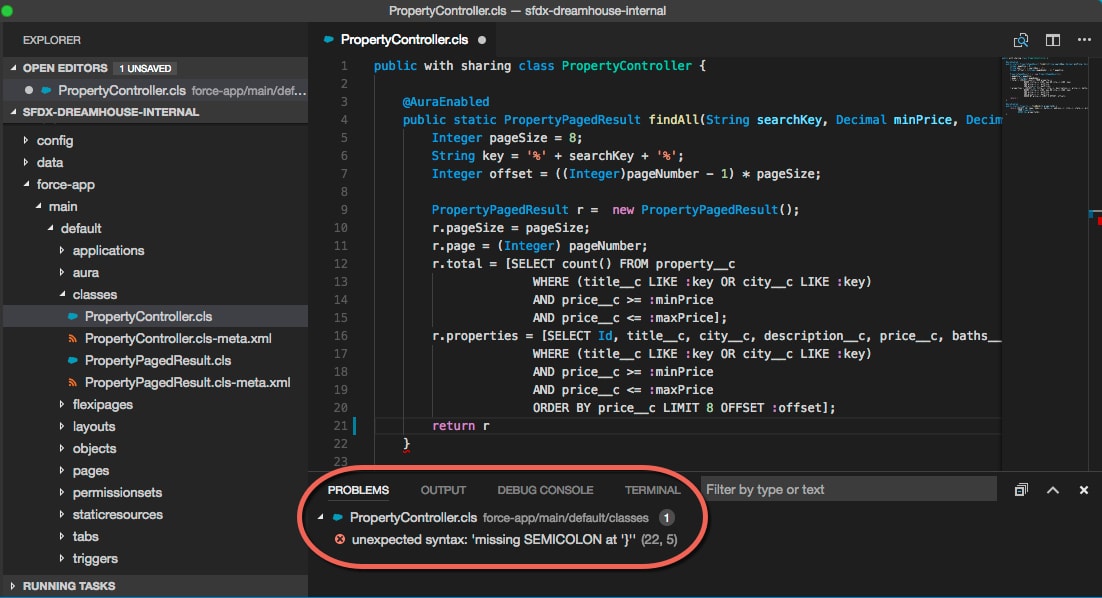
Any syntax errors such as a missing semicolon or a bracket are marked with a red squiggly line in the editor. The Problems panel also lists the syntax errors. To go to the source file with the syntax error, double-click the error.
When you reference a method that isn’t declared in your source, use the Quick Fix widget to automatically declare the method.
Declare Missing Methods quick fix can be invoked in the following ways:
- When you click the name of an undeclared method, a light bulb appears on the left side of the editor window. Click the lightbulb and then click Create method ‘yourMethod’ in ‘yourClass‘ to make the quick fix.
- Hover over the method name and click Quick Fix in the pop-up window. Then, click Create method ‘yourMethod’ in ‘yourClass‘ to make the quick fix.
The keyboard shortcut for the Quick Fix widget is Cmd+ in macOS and Ctrl+ in Windows and Linux.
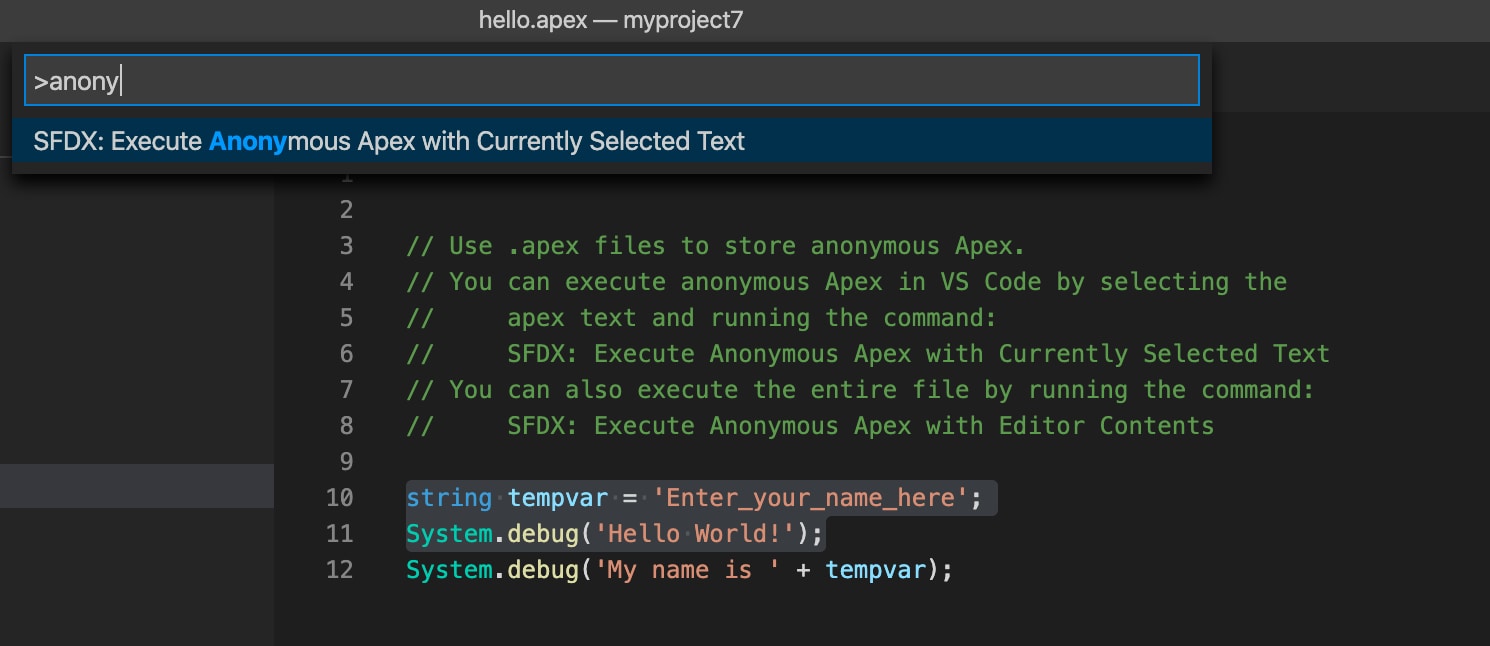
It’s common to keep Apex code in your project for executing certain tasks. By default, a new project has a folder scripts/apex that contains an example hello.apex file. We recommend that you use this folder to create your Anonymous Apex files using the .apex file extension.
You can execute Anonymous Apex in Visual Studio code in two ways:
- Select any Apex code and run the command SFDX: Execute Anonymous Apex with Currently Selected Text.
- To execute the entire context of a file, run the command SFDX: Execute Anonymous Apex with Editor Contents.
In both cases, the result of the executed code is printed to the output pane.
It’s common to keep Apex code in your project for executing certain tasks. By default, a new project has a folder scripts/apex that contains an example hello.apex file. It’s recommended that you use this folder to create your Anonymous Apex files using the .apex file extension.