LWC Development Quick Start
Create a Lightning web component called contactList that displays contact names and phone numbers in your app. You get the contact information to display from an Apex class called ContactController.
- In VS Code, run the command SFDX: Create Project from the Command Palette to create a Salesforce DX project if you don’t have one.
- Run SFDX: Open Default Org to log into the org to which you want to add the LWC.
- Run SFDX: Refresh SObject Definitions to get completion suggestions for your SObjects related code.
- Run SFDX: Create Apex Class and create a class called
ContactController.
Next let’s add a method called getContacts to this class. Make this method both public and static. Because it’s a static method, you don’t need to create an instance of the class to access the method. You can use the name of the class followed by a dot (.) and the name of the method. This method queries a set of fields on the contact object. Paste this code into ContactController.cls:
Next, add the LWC component that displays the contact information.
- From the Command Palette, run SFDX: Create Lightning Web Component and create a component called
contactListin the default location. - In the
contactList.htmlfile, cut and paste the following code, then save the file:
- In the
contactList.jsfile, cut and paste this code and save:
- Cut and paste the following code in the
contactList.js-meta.xmlfile and save:
- Right-click the default folder under
force-app/mainand run SFDX: Deploy Source to Org to deploy your code to the org.
- In Visual Studio Code, open the Command Palette and run SFDX: Open Default Org. This command opens your org in a separate browser.
- From the App Launcher find and select Sales.
- Click Setup gear then select Edit Page.
If you don’t see Edit Page, click the Setup gear and open the setup page. In the search field at the top of the page, type “Home”. In the Home menu, toggle Advanced Seller Home off. Now, go back to your Sales app and reload it. Click the Setup gear icon again. This time, you’ll be able to select the Edit Page option.
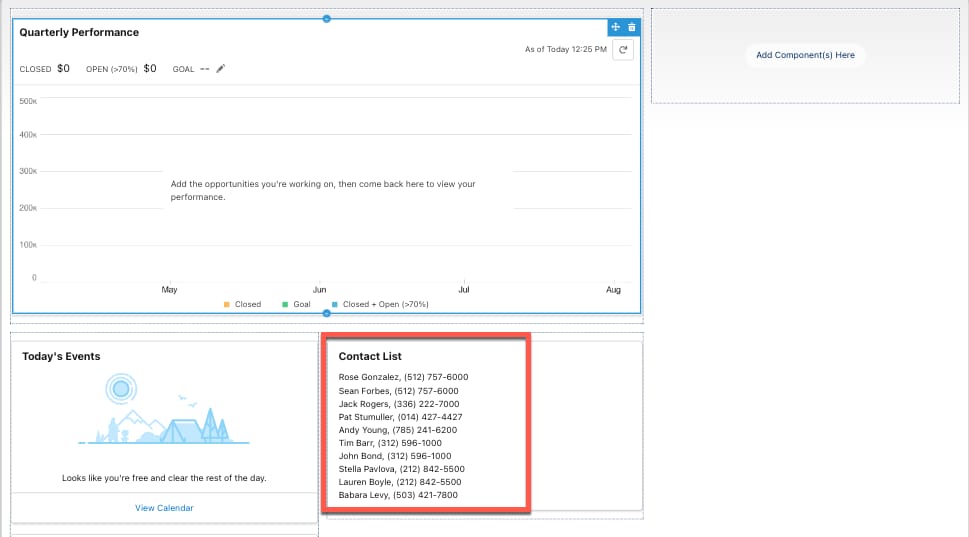
- Drag the
contactListLightning web component from the Custom area of the Lightning Components list to the top of the Page Canvas. - Click Save.
- Click Activate.
- Click Assign as Org Default.
- Click Save.
- Click Save again, then click Back arrow to return to the page.
- To view your new component, refresh the page.