This is the second installment in a five-part series, looking at the changes and opportunities Salesforce DX offers app developers today. Over the course of this series, we’ll talk about:
- What Salesforce DX is (and isn’t)
- Paths to Adoption
- Getting Started with the Salesforce CLI
- Scripting and the CLI
- Continuous Development with Salesforce DX
The content in this series is a collaboration between the Salesforce DX and Salesforce Evangelism teams.
Putting all the pieces together
In our first post, we looked at what functionality Salesforce DX contains (and what it doesn’t contain) and how to decide if adoption of the current version of Salesforce DX might benefit your team. In this post, we’re going to dive deeper into some of the tools involved in Salesforce DX, as well as how to start thinking through adoption and approaches to migrating your metadata into a Salesforce DX compatible format.
If you completed the App Development with Salesforce DX module recommended in the first post, you’ll be familiar with the various tools that are actually involved in working with Salesforce DX. If you haven’t yet seen that post or completed that module, now is a great time to pause and come back when you’re caught up!
Let’s take a closer look at three key pieces of the Salesforce DX toolset: the Salesforce CLI, the Dev Hub, and scratch orgs.
Why CLI?
We often hear “Why is Salesforce DX focused around a CLI? Wouldn’t it be better to have an application with a UI? That would help more people use Salesforce DX. Also, then we wouldn’t have to remember all those different commands and parameters.”
Here are some reasons why Salesforce DX is based on a CLI:
- Tying Salesforce DX to a specific UI would limit how you can benefit from Salesforce DX. The Salesforce CLI does a ton of heavy lifting for you, like handling the communication to your different Salesforce orgs in an standardized way. By exposing that power in a CLI tool, you can leverage these functions with the different tools you or your team want to use — like a shell script, a continuous integration system, or the IDE of your choice (more on that later).
- A UI can increase how efficiently you work with a system—to a point. But with all the different options for how you may want to use Salesforce DX, trying to tie everything back to a single UI could become quite overwhelming. How many configuration dialogs do you want to go through before finally executing a task like pushing a specific change to a scratch org? Or getting the status of an asynchronous job? And are your steps the same as all other developers on your team?
With the complexity of many systems today, CLIs are often one of the few common ways developers work. It doesn’t matter if you handle native iOS apps with Carthage, cloud applications with the Heroku CLI, or handle Java-based micro-service applications using Gradle or Maven, just to name a few. CLIs are everywhere.

We’ve mentioned IDEs a few times before. There are many great partners who have built custom integrations into IDEs to simplify the Salesforce development experience over the years. To do this, all those partners had to first build their own toolset. With the Salesforce CLI, everyone can now use the same toolset plus build custom features (and/or a UI) on top of that, without having to first re-invent the wheel. While we evolve the feature set of the CLI, partners can now focus on evolving and innovating their additions to your Salesforce development experience.
Set up your Dev Hub and Salesforce DX users
Ok, so we know the Salesforce CLI is a tool that can be used on its own or with a variety of IDEs and other tools. But if you try to just install the Salesforce CLI and run Salesforce DX commands, you’ll find quite a few commands will first need you to authenticate into a Dev Hub. This functionality is what allows you and your team to create and manage temporary environments called scratch orgs.
You can turn on Dev Hub functionality in your Production org or, if you want to evaluate Salesforce DX first, in a special Salesforce DX trial org. Under Setup > Dev Hub, you’ll see two toggles. The first one will enable the Dev Hub functionality, and the second is related to enabling developer controlled packaging (more on that below). Once you enable Dev Hub capabilities, you cannot undo the change— keep this in mind when enabling this functionality in Production. The Salesforce DX Setup Guide walks you through this process and has more information about what enablement means for your org.
After you’ve enabled Dev Hub capabilities in an org, you’ll need to create user records for any members of your team who you want to allow to use the Dev Hub functionality, if they aren’t already Salesforce users. Three types of licenses work for Salesforce DX users: Salesforce, Salesforce Platform and the new Salesforce Limited Access license.
You’ll also want to create a permission set for your Salesforce DX users, if they aren’t assigned to the standard System Administrator profile. Again, the Salesforce DX Setup Guide walks you through this process.
Making a plan to adopt
There is no one-size-fits-all path to adopting Salesforce DX. Org size, amount and kinds of customization, skills within the team, existing tools, and company policies will all affect what using Salesforce DX looks like for every team. One way to start the process is to focus on the specific parts of Salesforce DX you want to adopt. Ask yourself what it will take to adopt those features. Then you can build and prioritize your adoption roadmap based on what’s practical for your org and team.
Let’s walk through some possible adoption paths and considerations.
Adopting the Salesforce CLI
This is a fairly simple place to start. You can integrate the Salesforce CLI into your developer workflow, whether or not you choose to use scratch orgs or even source control systems. The CLI works with a wide variety of environments: Developer Edition (DE) orgs, production orgs, sandboxes, etc. To adopt the CLI, you’d want to make sure you and your team installed and set up the CLI correctly. Then you’d want to see if there is a plugin for the Salesforce CLI available for your favorite IDEs.
We’ll go more in-depth about the power of the CLI in our next post.
Adopting source driven development
The degree of difficulty in migration to Salesforce DX will depend on the size of your org and the extent of your customizations. It will also matter whether or not your team followed best practices such as using naming conventions or documenting your code and configuration.
The nature of your org’s code base and declarative automations will also matter. Are classes organized into domain or service patterns? By functional groups? Are processes organized by object? All of these will impact how difficult you’ll find it to identify and organize dependencies in your org’s metadata.
You’ll need to be able to identify and organize dependencies in order to make a representation of your org in source control that’s modular. This will allow you to be able to pull a relevant set of metadata from source control into a distinct Salesforce DX project, which will be the basis of your initial app development work. (We’ll look at the format for Salesforce DX projects more closely in our next post.) Working in this format has some distinct benefits:
- It is easier to maintain, iterate and introduce changes to functionality into a focused Salesforce DX project, as opposed to making changes to an undifferentiated monolith, like a sandbox, where it can be difficult to isolate the impacts of change.
- Salesforce DX projects promote modular development and all the good things that come with it — ownership of functionality, efficient change management, quicker test runs, maintainability of code, etc.
- The end-to-end development cycle becomes more efficient, reducing the cost of building new features (and giving you more time to focus on building stuff).
- Breaking your metadata into Salesforce DX projects can help with adoption of unlocked packages. If you’ve started organizing your metadata into Salesforce DX projects, each project could possibly become the source of an unlocked package. The next section goes more in-depth about unlocked packages.
For an in-depth look at how to convert a specific group of metadata into a Salesforce DX project, check out Christophe Coenraets’ post Migrating Existing Projects to Salesforce DX. The App Development with Salesforce DX module on Trailhead has a unit that walks you through this as well. The process outlined involves creating an unmanaged package and then working with the CLI to convert that unmanaged package into a Salesforce DX project. As you begin to untangle your org’s dependencies, you can use this process (and repeat it as you encounter some trial-and-error) to isolate potential project shapes in your metadata.
If you’re wondering about how to start thinking about projects, read on! We’ll talk more about this as we talk about packaging.
Adopting scratch orgs
Scratch orgs are one of the biggest changes (and gifts) Salesforce DX brings to your development team. These temporary Salesforce instances are designed to allow you to easily and quickly build and test changes. They can last anywhere from 1-30 days and the default lifespan is 7 days. Scratch orgs can be created in minutes and they expire without any additional management from a team member.
Scratch orgs, though amazing, will not replace your need for sandboxes.
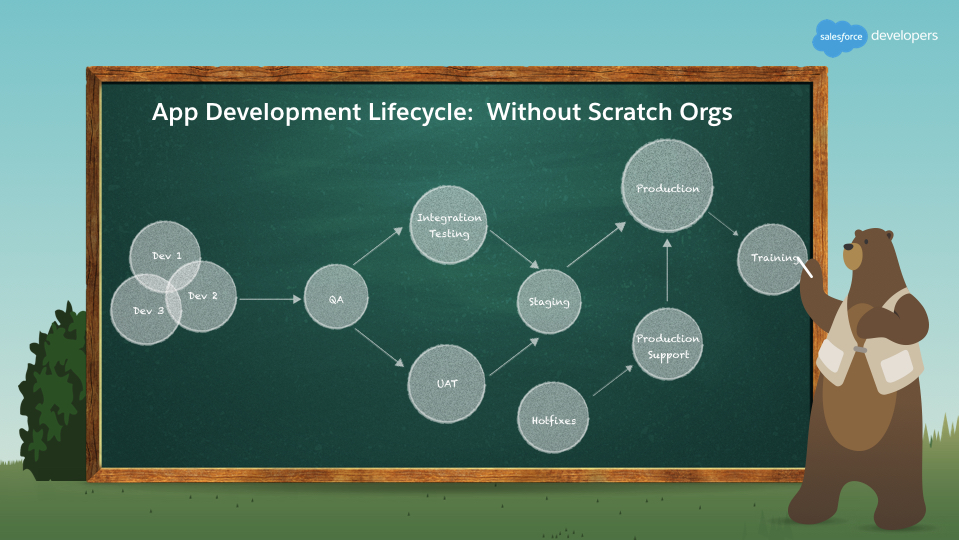
Scratch orgs can be a great alternative or complement to the developer sandboxes, which may get crowded during the initial stages of app development. But scratch orgs won’t perfectly mirror your production environment (more on that in our next post). They’re also not the place for end-to-end integration testing, testing with large data volumes, user acceptance testing or training. You’ll want to make sure your team is clear on when and how to use scratch orgs, and when they should be using sandboxes.

Adopting unlocked packages
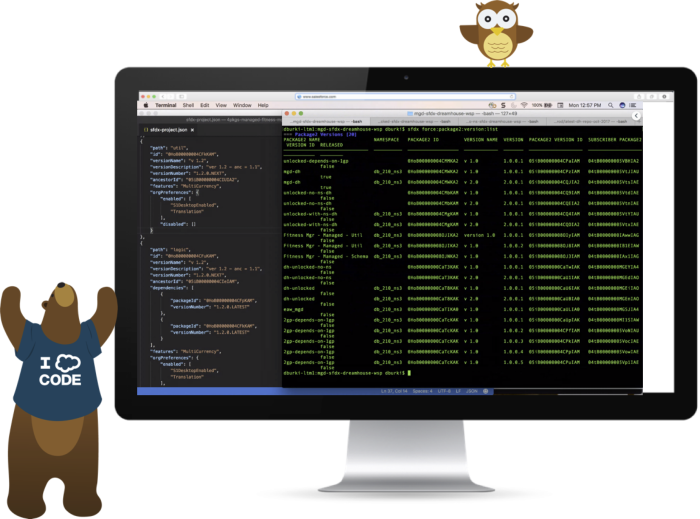
The last piece of the puzzle is packaging. Unlocked packages are intended to provide a repeatable, scriptable and trackable vehicle for introducing and managing change in your orgs. When you use unlocked packages, packages become the containers you use to organize your metadata. Packages also become the way you migrate that metadata between environments. If you’ve put in the work to adopt source control and broken your org into discrete projects, then adopting unlocked packages could be the final step in your Salesforce DX adoption process — and a great boost to your development team’s productivity.
Unlocked packages are in open Beta for Spring ’18. This means it’s possible to get started exploring the functionality, but there are known limitations. For example, you’ll find there are pieces of metadata in your org that won’t bundle into packages right now, like users or sharing settings.

Unlocked packages allow you to decide what pieces of metadata should be in a package (hence the name). This means you can experiment with how you want to define packages, as well as update and change your packages into the future. The process of adopting unlocked packages will have overlap with the process of adopting source driven development. Identifying potential packages within your production environment is similar to deconstructing your org into modular pieces for source control.
Best practices around developing packages are still evolving. As you think about package development, there are a few ways to think about what a ‘package’ might mean for your org. One of the first places you’ll probably focus is how to best organize metadata most intertwined with other parts of your org. Custom fields you’ve added to core objects, heavily used custom objects, triggers, etc. might fall into this category.

As you think about how you organize packages, or look at breaking your org into projects for source control, think about how your teams approach building new functionality or handling requested changes. Do you think about it in terms of impacted business units? Impacted processes? Functional grouping?
As you move beyond your base packages or projects, think about how your users engage with production. Is your org segmented by discrete business units or departments? Do you have different applications for different roles within business units? Applications designed to support people working on different devices?
The road to adopting packages, and breaking your org into modular units for source control, will require flexibility and some trial-and-error. You’ll need to be willing to experiment and spend meaningful time analyzing your experiments. If you’re interested in beginning to work with unlocked packages, you should be sure to join the Packaging 2.0 Beta group in the Trailblazer Community.
Ultimately, as you plan your Salesforce DX adoption journey and deal with the ups and downs of learning, you’ll want to stay focused on the key reason to adopt: Salesforce DX helps your development team spend more time innovating and less time troubleshooting.
What’s next and what to do now
In the next installment of this series, we’ll dive deeper into the use cases around the Salesforce CLI, as well as the basics of Salesforce DX project configuration.
You should also be sure to register for the upcoming Ask Me Anything (AMA) with the Salesforce DX Product Management team, coming up on February 27! And if you’re looking to get more hands on with Salesforce DX at TrailheaDX, check out the Emerging Tech for Developers Bootcamp.
There are also great resources on Trailhead to help you brush up on skills like app lifecycle management, as well as ways to start exploring source control: