Spring ’18 holds a ton of exciting features for developers. We’ll be covering a number of these in a series of posts like this one. In this post, we’re going to focus on a few (completely awesome) changes to flow: launching a flow from an object-specific action, and adding custom Lightning Components to flow.
The power of these changes allow you to mix-and-match declarative (clicks) and programmatic (code) features in order to customize your processes and user experience in really exciting ways. Let’s dive in to some examples.
Level up your flow screens with custom components
Spring ’18 brings a new user interface to Lightning Components: lightning:availableForFlowScreens. We previewed this feature (in Pilot Winter ’18) during the Salesforce for Developers Keynote. Now everyone can incorporate custom Lightning Components as screens in flow.
We’re using the Pure Aloe sample application, which is based on the Karibu demo featured at Dreamforce. In this example, we’re creating a flow to help users control irrigation processes for Harvest Fields. The UI of the flow itself should be fairly simple. Pure Aloe staff need the ability to decide when to start irrigation, and how long to leave irrigation on. They should also be able to add details to the alert that will be sent out to other Pure Aloe staff about the scheduled irrigation. Pure Aloe users don’t want this process to take too many steps or clicks.
Behind the scenes, the flow needs to accomplish several different things. We need to update record values, send an alert about the scheduled irrigation (because watering staff members isn’t what Pure Aloe is going for), and log the manual irrigation event for reporting purposes. Also, Pure Aloe has some business logic around how many manual irrigations are acceptable. So if a user triggers a manual irrigation that exceeds the accepted limits, Pure Aloe wants to make sure maintenance teams get that information, too.
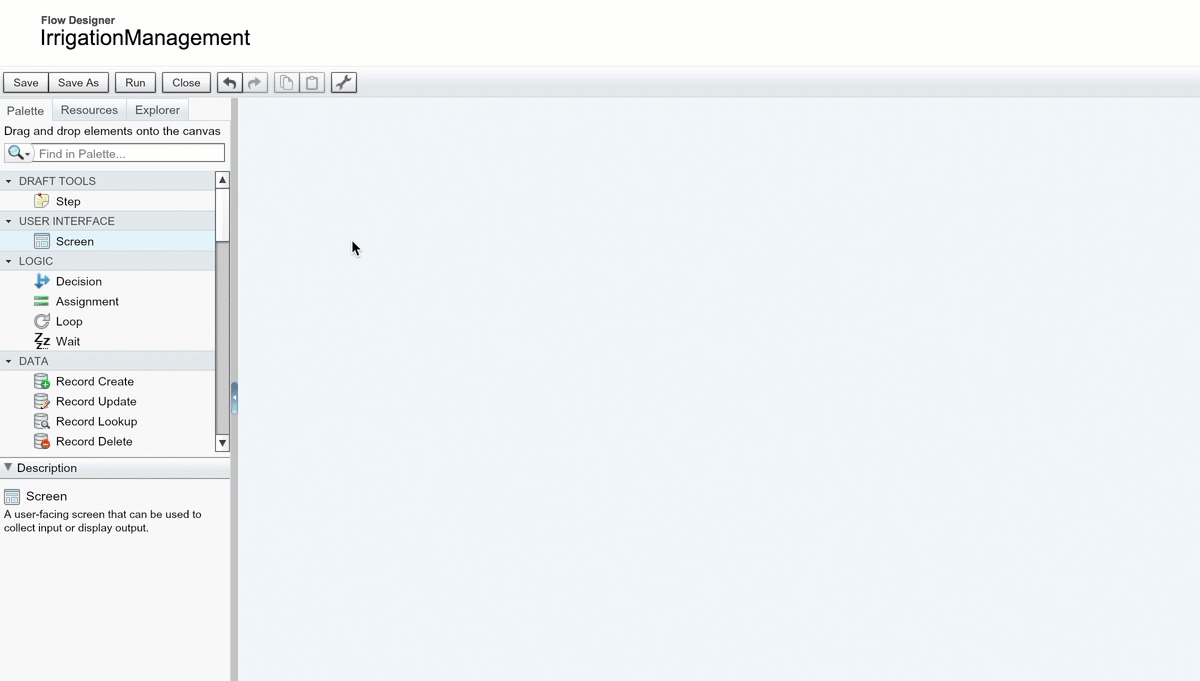
The first thing we’re going to do is create our UI. We’re using a custom component called IrrigationManager.
Here’s our component markup:
And our component’s design file markup:
Code Highlights
- Design attributes: These tags are what make our
aura:attributesaccessible in the Cloud Flow Designer UI. Thelabelvalue is what users will see when working with/selecting attributes in the designer UI. - Base components: We’re using a few Lightning Base Components to give Pure Aloe users an efficient input form. Using
lightning:accordionkeeps the form from taking up tons of space on a record page, without making users click ‘Next’ or ‘Previous’. We’re also simplifying data entry (and quality) by using thelighting:inputandlighting:sliderbase components. - Aura attributes: We’ve got a fair number of
aura:attributetags on this component. Some attributes have default values coming in from our flow, likedurationandstartTime. We’re also doing some work to gather user input in our component and then pass back that information to our flow. You can see this pattern in themsgText,addedMsgTextanddefaultMsgattributes. We’re prepopulating a basic message for users with thedefaultTextattribute. Users add any other text they need with theaddedMsgTextattribute. And we’re showing users a preview of the message in our component, and then passing the complete text, with any additions made by our users, back into our flow with themsgTextattribute.
Ok. Now that we have our component, let’s get our flow together!
Put your component to work in a flow
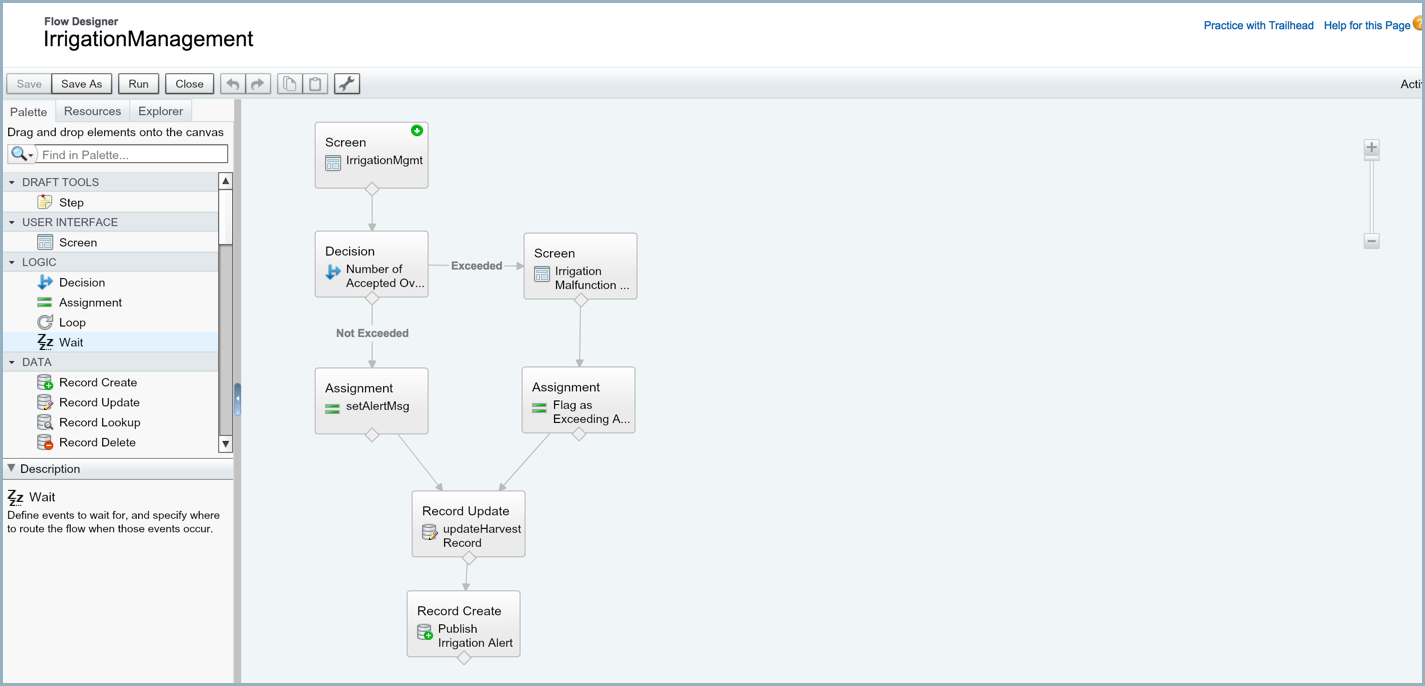
In the flow designer canvas, you won’t find a list of your custom components with the lightning:availableForFlowScreens interface in the palette section. You’ll still need to first select ‘Screen’ from the User Interface section. Then, once you’ve added the screen, scroll to the bottom of the ‘Add a Field’ tab. There, under Extensions, you’ll see the option of ‘Lightning Component’. Once you’ve selected that, you can then choose to display any components implementing the flow screen interface. The full process looks like this:
Our finished flow, in the Cloud Flow Designer canvas:
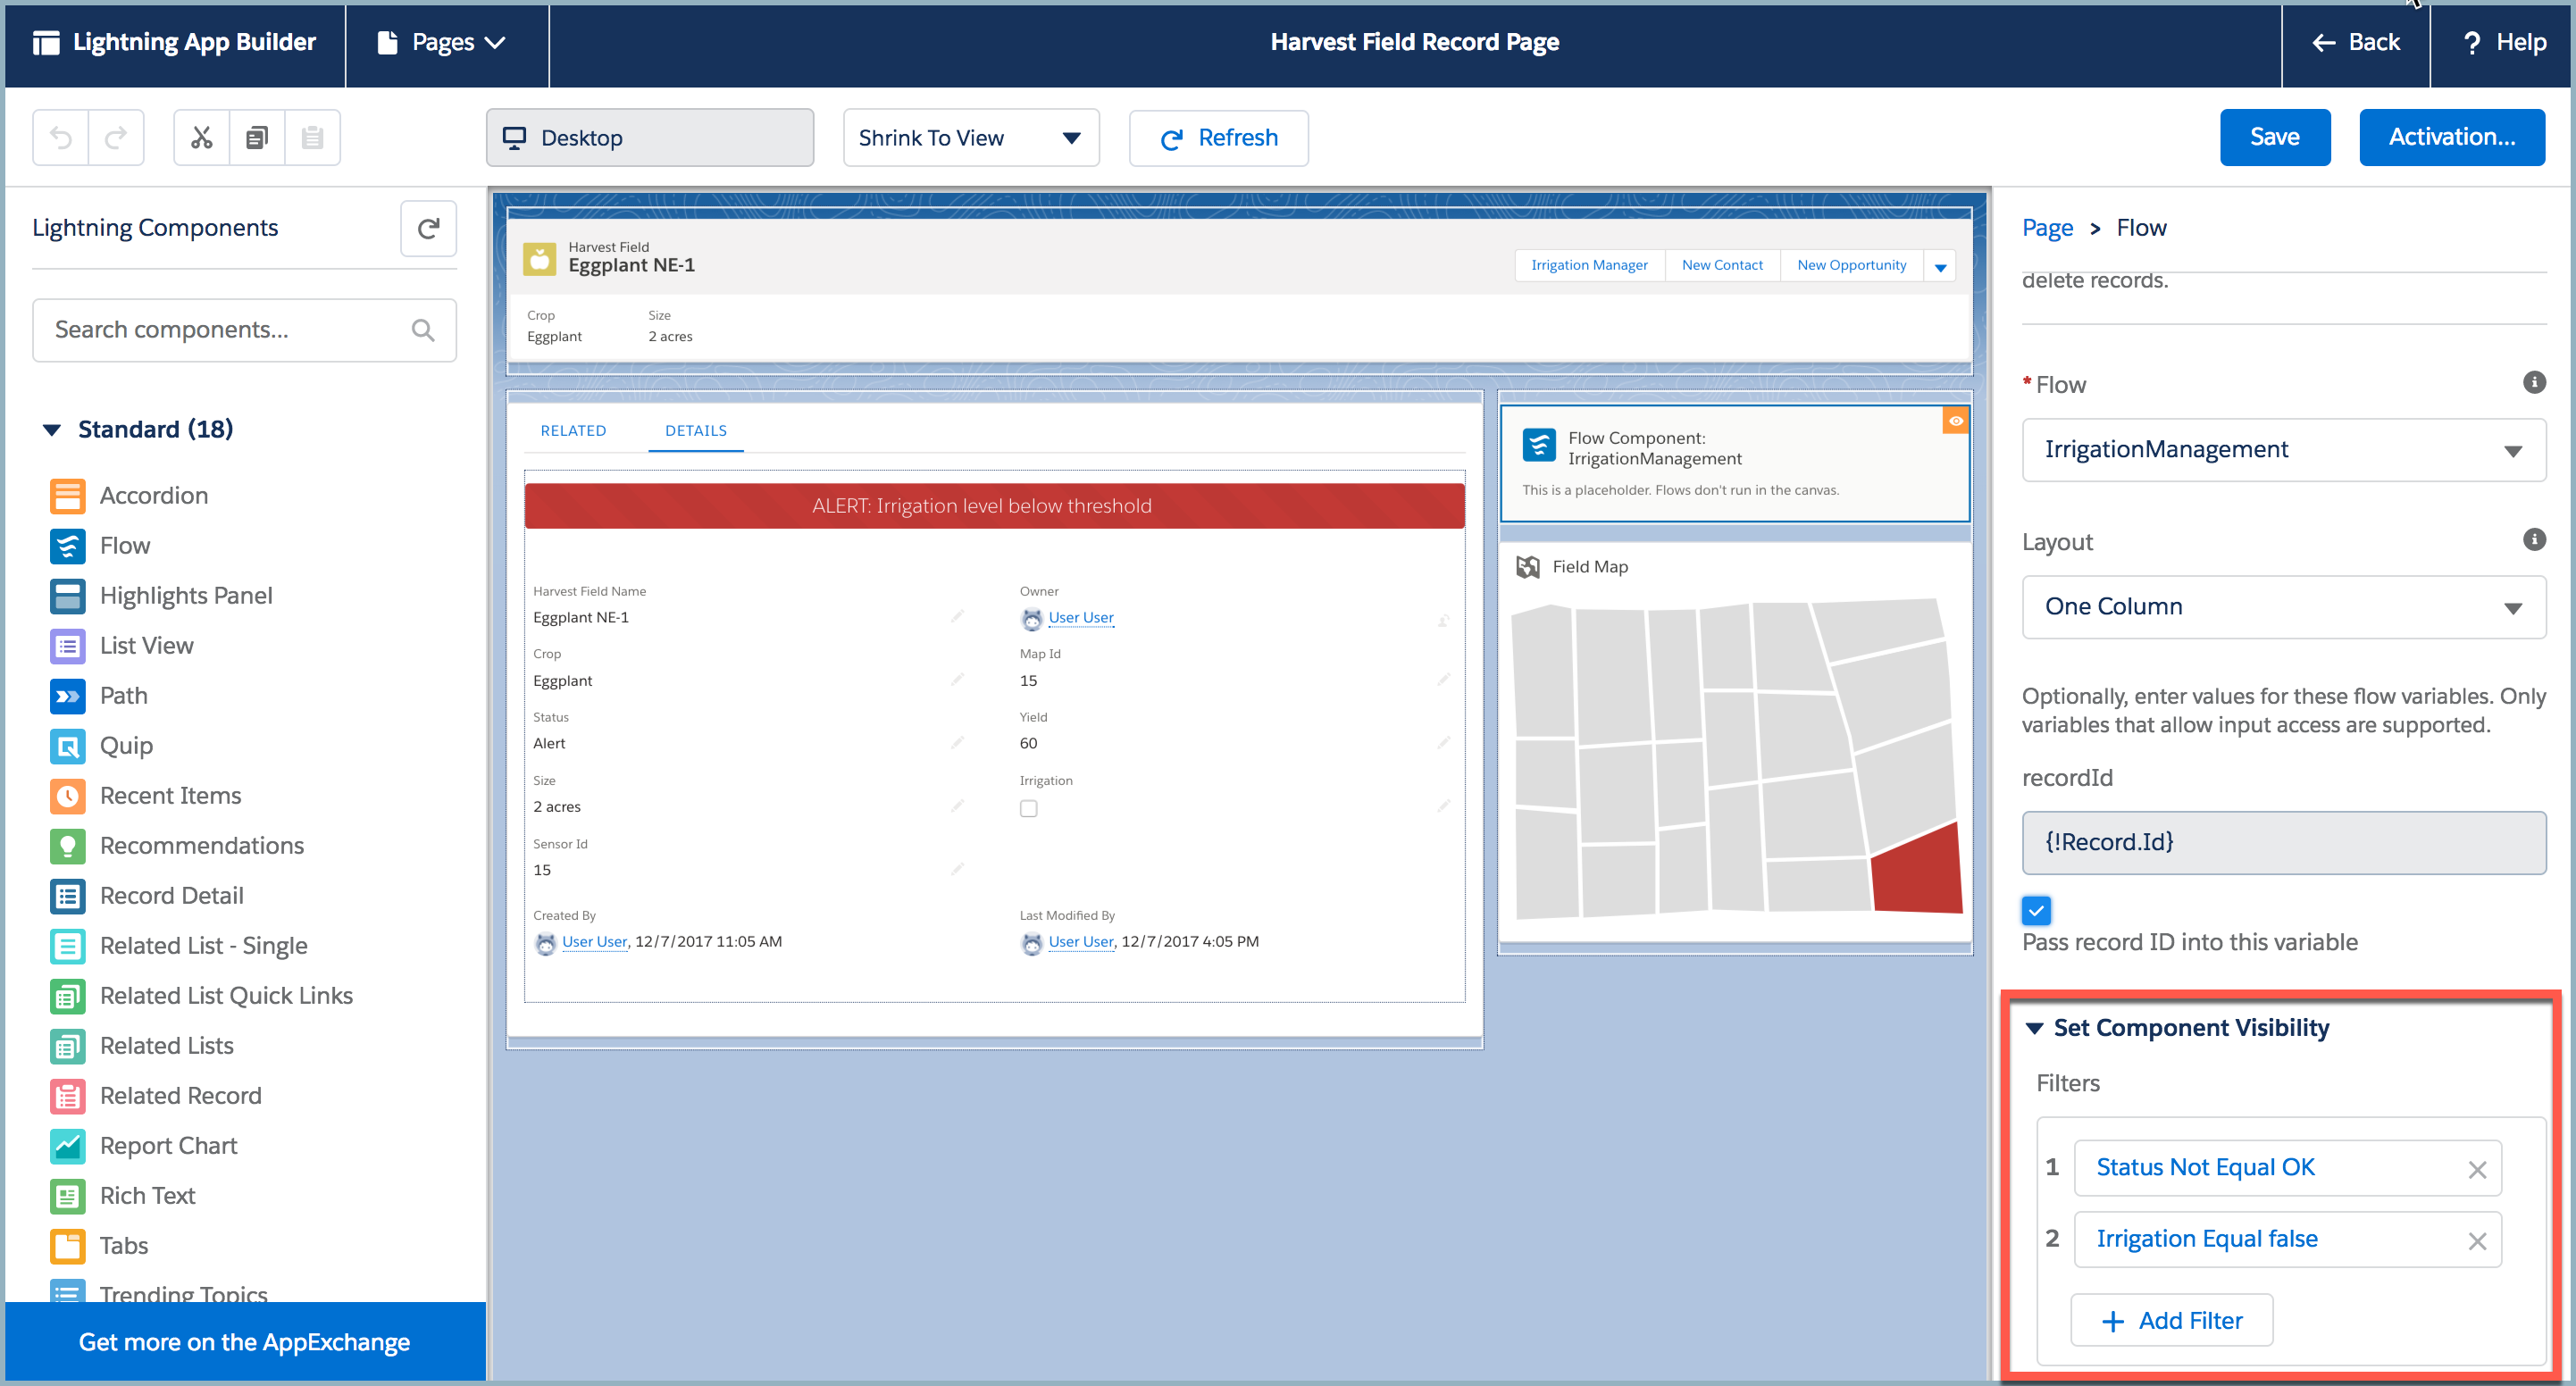
Now that we’ve got our flow configured, we can add it onto the appropriate record page using the standard flow component provided by Salesforce. This component allows you to pass the record Id into your flow, if you’ve configured a variable in your flow that allows for input access. We can also set a conditional filter on that component, in order to render our flow only when a particular record needs intervention.
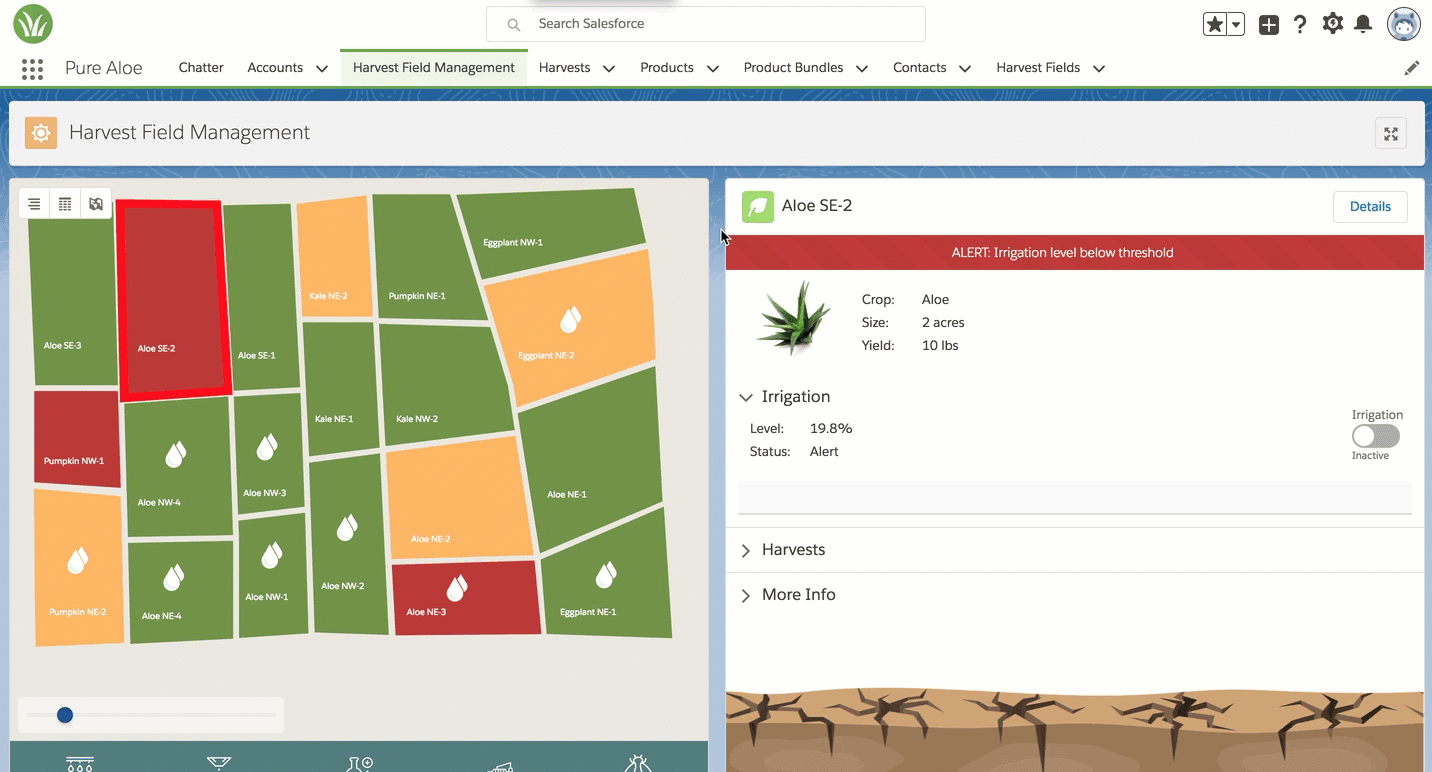
And huzzah! Our finished flow, in action:
Flow Highlights:
- Pre-populated values: Our flow has default values for both the fields users are required to fill out for the Irrigation Settings section. These values come in from constants defined in our flow. So if you want to change those values, just update the flow constants.
- Streamline performance: Combining static and dynamic values, and data operations that depend on user inputs and existing record values can often be awkward in flow. Using the power of our custom component (like two-way data binding and Lightning Data Service) to capture more complex input or pass along field values means we can eliminate many of the extra steps or complex formulas that often make flows fragile or hard to support.
- Streamline user experience: We’ve added a filter to control the visibility of the flow on our Harvest Field record page. When our flow updates the Harvest Record, the update affects one of the fields referenced in our dynamic component filter. This removes the flow from the record page, making sure that users don’t accidentally complete the flow multiple times, and keeps the page focused on enabling users.
There be gotchas
There are some pragmatics about how the Spring ’18 version of the lightning:availableForFlowScreens interface works that you need to keep in mind:
- Lightning Data Service: In its current form, you cannot pass a variable with a datatype of Id from flow into your lightning component. You’ll need to declare whatever attribute you intend to pass to your
<force:recordData>component’s recordId attribute as a string. Also, double-check your force:recordData syntax, as any errors there will prevent Lightning Data Service from actually loading the record for your component. The failed load will be silent, but you’ll see that your component has null values for your<force:recordData>attributes. - Form input validation: If you choose to use a Lightning Component as a form within your flow, you won’t be able to validate user inputs through the native flow runtime engine. This extends to enforcing requiredness of particular fields. You can display field requiredness (as you can see we’re doing in our markup), but the markup doesn’t enforce values. In our example, we’re setting default values to ensure that our flow persists a valid value, even if a user forgets a field. (The use of
<lighting:input>also helps eliminate user data entry errors.) - Initializing variables from flow: If you choose to use a flow variable to provide a value for one of your component attributes, be aware that you need to pass a valid value into your component, like the
$GlobalConstant.EmptyStringvalue provided by flow. Leaving variables without any kind of default value in flow will result in users getting an error when the flow tries to render your custom component. - Aura:attribute data types and flow versions: Management of your old/inactive flows is even more critical with flows using custom lightning components. If you try to change the data type of an aura:attribute, any existing version of a flow (inactive or active) referencing that attribute will block your ability to save the component markup changes. You’ll need to delete all references to the attribute before you can successfully save. (The error message returned upon save gives you a list of all the flow versions with a reference, FWIW.)
- Sharing is…tough. This new capability in flow gives you the ability to blend declarative and programmatic tools extremely powerful ways. You’ll want to make sure you and your team are clearly defining how to manage these new hybrid designs. Naming conventions, variable management, and child process/action invocations are just some of the areas you’ll need to have clear and consistent logic. In the sample, you can see that our component’s scope is user experience and form functionality. Our flow handles additional record creation, updates and business logic. We’ve also put the definition of default form values into constants in our flow, rather than defining them in our component’s markup or design file.
Use Flows as Quick Actions
Quick Actions (aka object-specific actions) got a major upgrade earlier this year, with the ability to choose a Lightning Component as the basis for a Quick Action. With Spring ’18, you can now choose to use a flow!
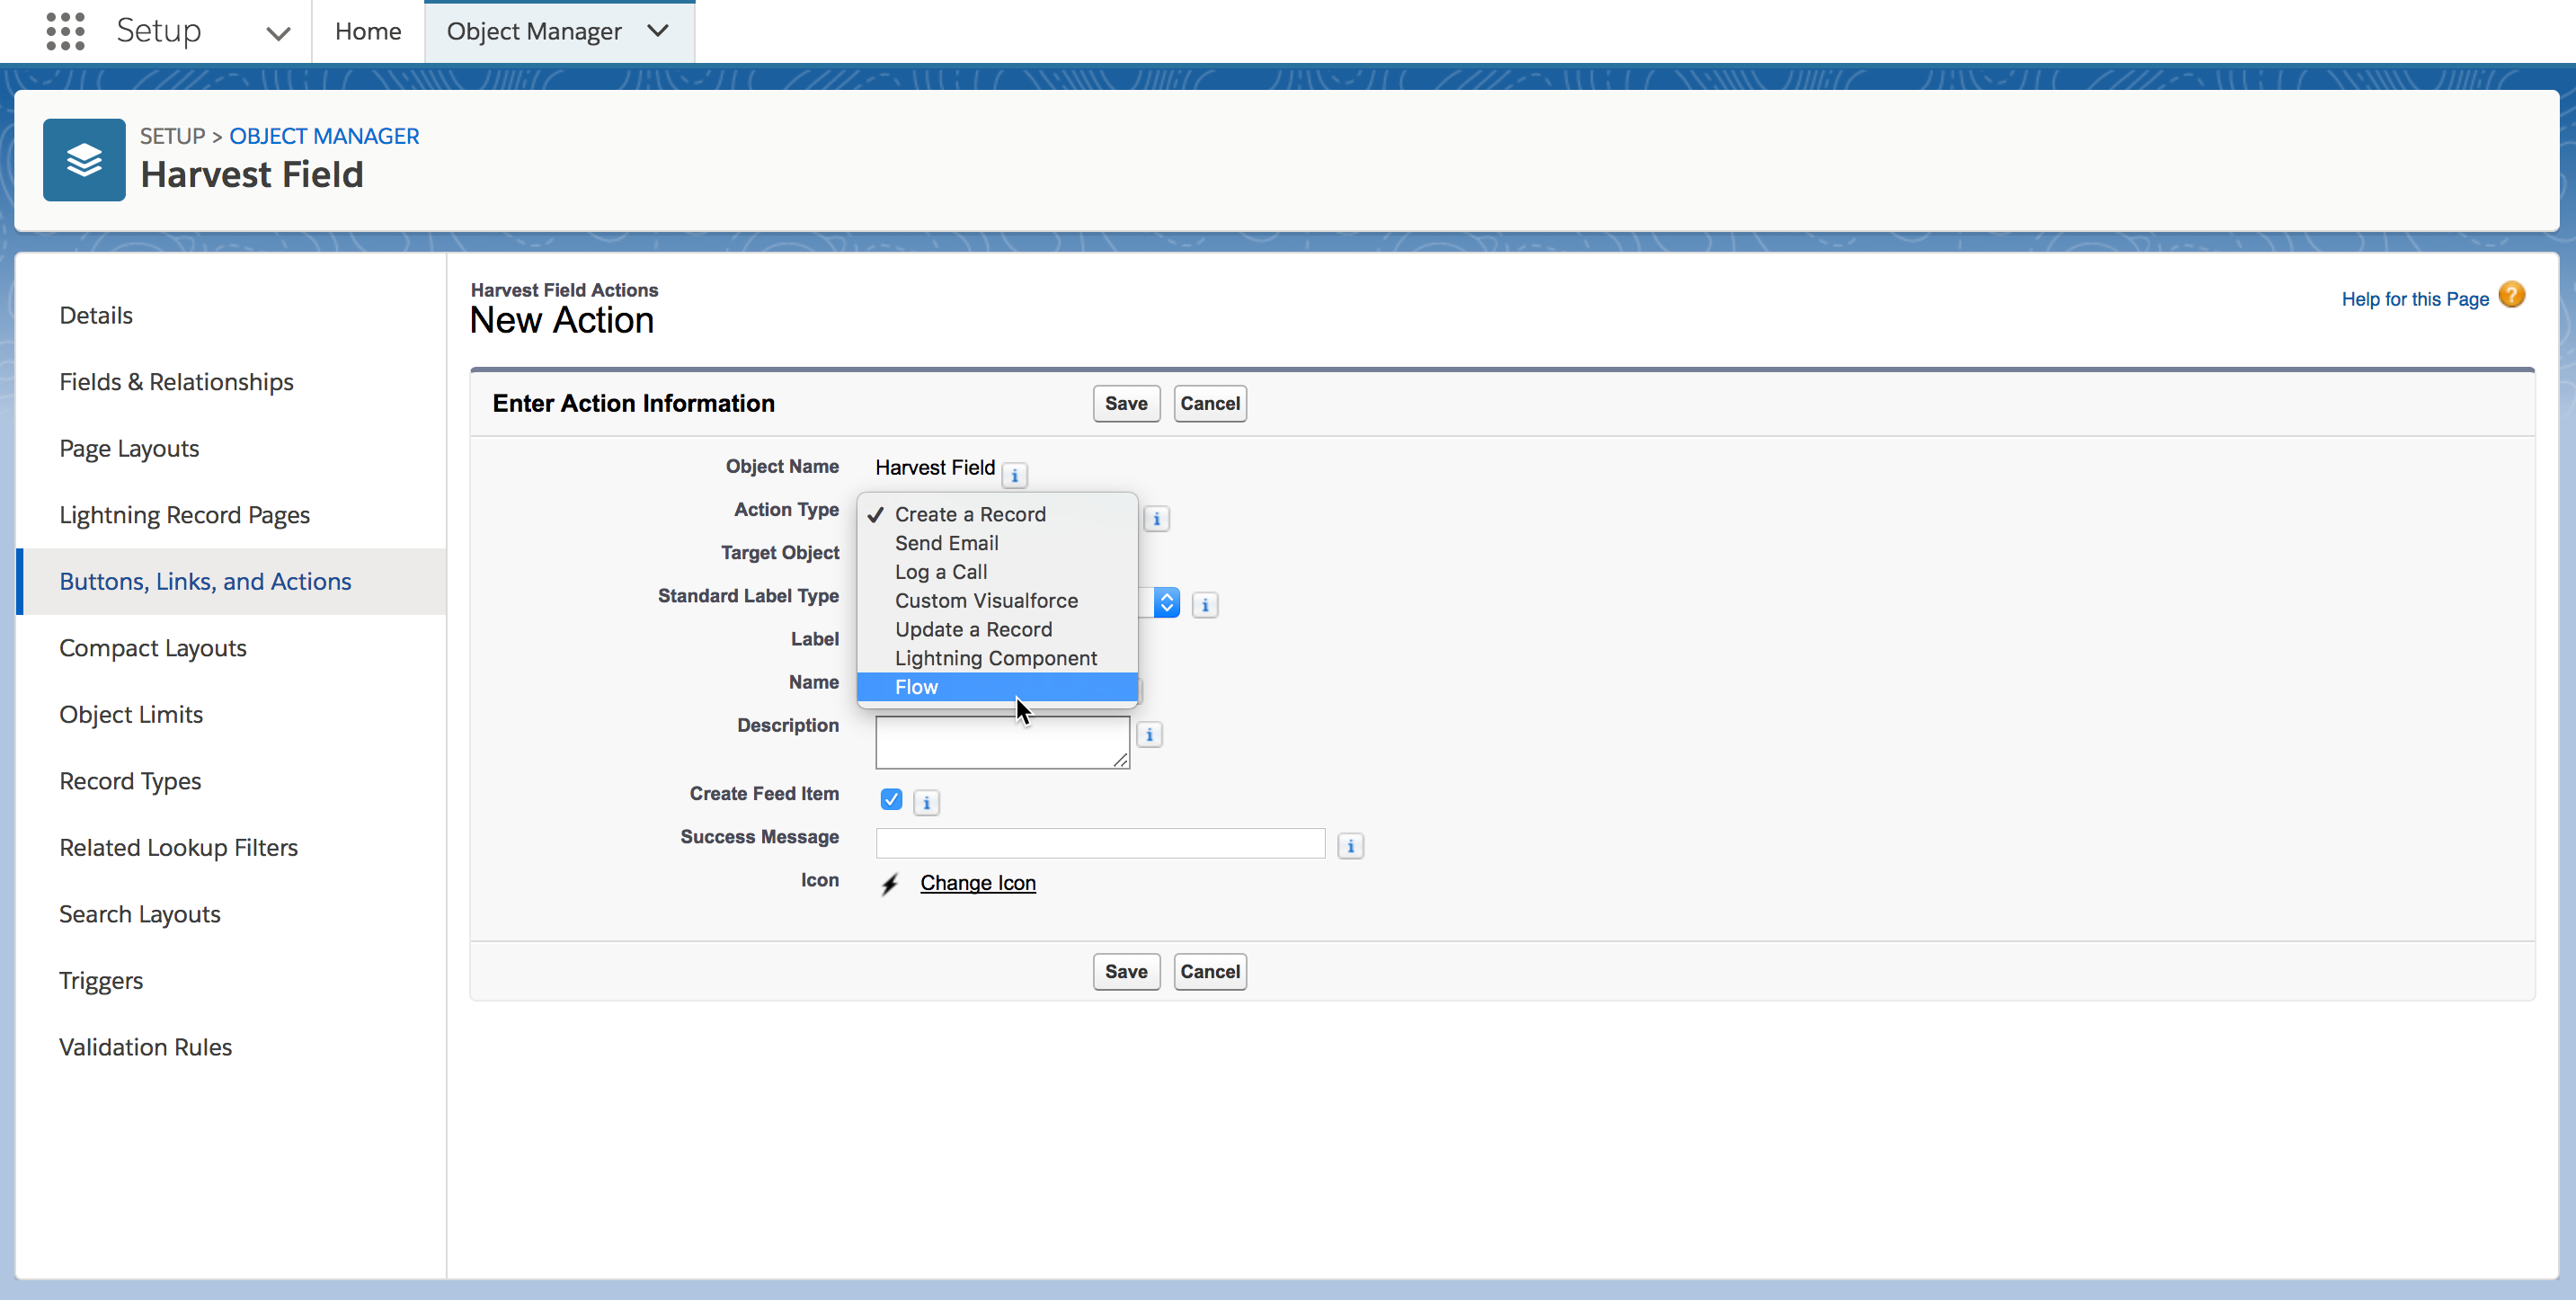
We can easily re-use the IrrigationManager flow and component, and get it on the page for Pure Aloe staff to access quickly at any time:

In the Cloud Flow Designer, you can suppress the Salesforce-provided title that appears at the top of a flow by default. (Uncheck the Show Header box.) However, you cannot suppress the system-provided title that appears when you use a flow as a Quick Action. Keep this in mind when designing the UI for your flow screen, whether using a native flow screen or a custom component. Even if you don’t anticipate using your flow as a Quick Action immediately, you’ll want to make sure fits well wherever it may be used.
Summary
The new functionality of Spring ’18 means it’s a great time to dive in and explore the power of flow. If you’re looking to get started, check out the linked resources. If you’d like to get your hands on the sample code and flow shown above, look at the Pure Aloe app on Github.