You can curate and customize the content you create in Salesforce CMS for specific channels. At Capricorn Coffee, the content management team wants to curate the content that they’ve created. This will help them to organize their content and present it to their audiences more effectively. In this blog post, we will follow the steps that the Capricorn content managers took to curate content for the main Capricorn website.
But first, what is content curation? Content curation is the art of sourcing, filtering, and repackaging all forms of existing content. You can share curated content with a specific audience to add value to their digital experience and save them time. For example, Capricorn’s content managers want to curate a list of events related to coffee on the site, as shown below. After curating the content, they’ll be able to quickly organize and present information about events to internal and external audiences.

Let’s look at the steps they took to create the content collection.
Prerequisites
User permissions:
- Create and Set Up Communities and View Setup and Configuration.
- Publish content to be curated to Community.
Scope:
- This functionality is supported in Lightning Communities only.
Associating topics for content
In order to tie related pieces of content (such as events) together, the Capricorn team needs to tag the content. They can do so using topics. Topics help to organize and expose content appropriately and make search easier. As you see below, Capricorn created the topic “Coffee Events” and tagged relevant content. Let’s see how they added the topic, and then assigned content to the new topic.
Add topic:
- Click on the Content Management tile in Workspaces related to the Community where the content is published.
- Navigate to Topics and add a Topic as shown below. Select Enable for Content to allow Topics to be assigned to the content.

Assign Topic to content
Assign the Topic “Coffee Events” to the content. With a topic assigned, Capricorn will be able to filter content dynamically into the coffee events content collection.

Now let’s look at how Capricorn groups the related content.
Handpick a collection of content
As noted above, you curate content into collections. With content grouped in a collection, you can dynamically reference it while building community. Any type of content you publish to a community can be assigned a topic and placed into a collection. However, all content in a collection should be the same type of content.
Manual collections
You can manually add related content into collections. This is helpful when building a customized collection because it is flexible. You can choose related content manually and add it into a collection using the steps explained below.
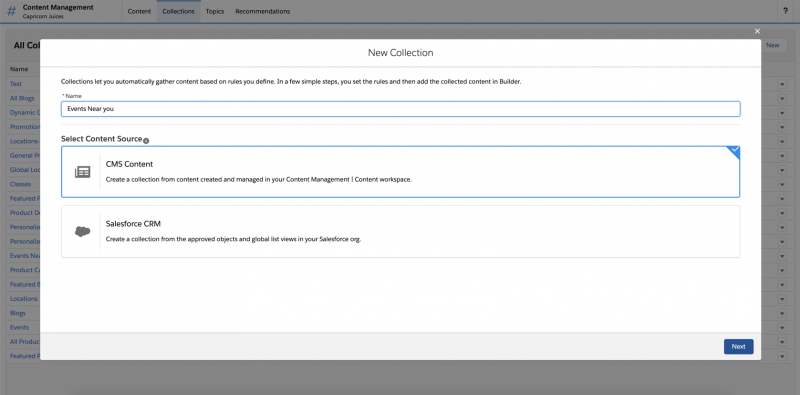
Create collection
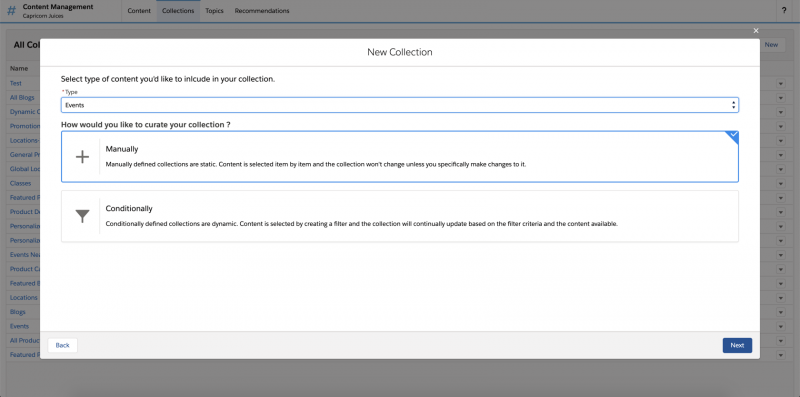
Click on the Collections tab in Content Management and start creating the collection by choosing “CMS Content.” Select a content type and choose “Manually” to curate the collection as shown below.
Choose and pick content
Choose content for the collection, and your collection is ready for consumption in building experience/community.

Filtering content dynamically into collection
There is an even cooler way to filter content dynamically based on associated topics.
Dynamic collection
We’ve already assigned topics for the content, but you can also automate the task of organizing content into collections. Let’s look at the steps required to automate the content into collection based on associated topics.
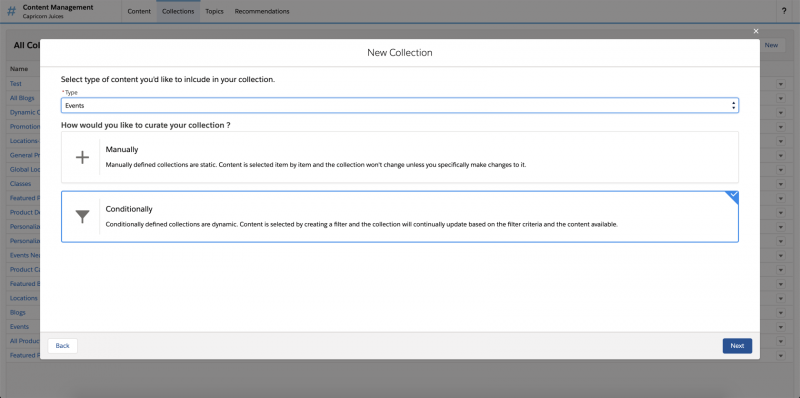
Click on the Collections tab in Content Management and start creating a collection by choosing “CMS Content.” Select a content type and choose Conditionally to curate collection as shown below.
Add condition to filter content into collection
Let’s add the Condition that will filter content into the collection.

Content in a collection is ready for consumption in community building. You can build rich experiences with collections, as shown below.

CRM data as content into collection
Companies like Capricorn often have very rich data in their CRM database that they want to expose on their digital touchpoints. For example, Capricorn might have a list of open cases for a customer on the Capricorn customer portal OR custom objects like Locations which capture the list of all of Capricorn’s retail locations around the world. With Salesforce CMS, one can easily tap into CRM data (standard and custom objects) and expose this in rich visual ways.
Let’s see how Capricorn’s content managers use CRM-based collections to expose CRM data in creative ways.
Prerequisites:
- To allowlist a CRM/CUSTOM object, the user must have edit access on the object.
- For a CRM collection to be rendered on unauthenticated pages, read access must be enabled on the CRM/CUSTOM object in the guest user profile.
Allowlisting CRM objects
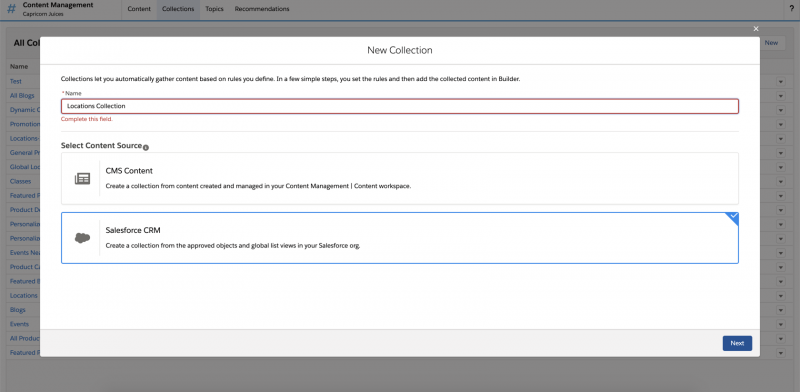
Select the Salesforce CRM tab under content management and click Add CRM Connections to choose a CRM object to allowlist so that data can be added into a collection. All Standard objects and Custom objects are supported. Let’s review the steps Capricorn took.
Allowlisting standard objects
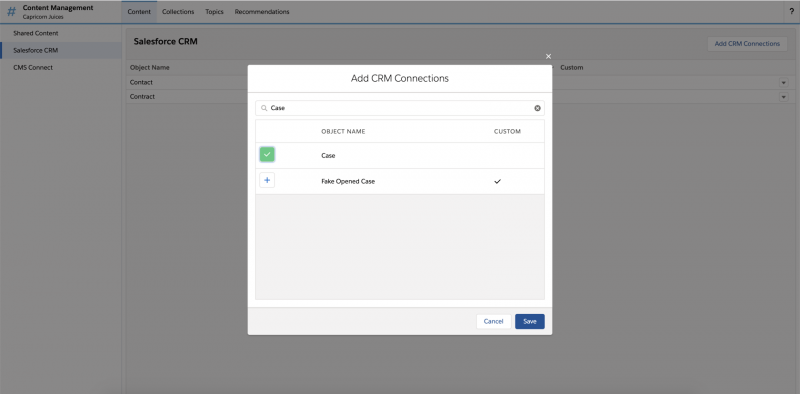
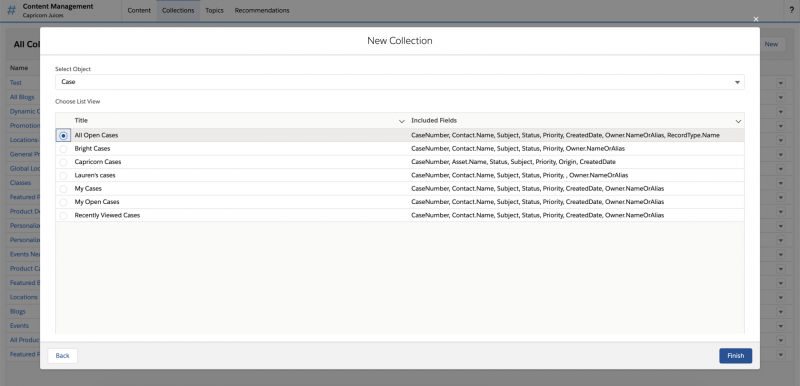
Use case: When a business customer logs into the Capricorn Coffee B2B site, Capricorn wants to expose a list of cases associated with the coffee accessories the customers sell in a retail location. To do this, Capricorn allowlists the Salesforce standard “Case” object into a collection and associates a list view, as shown below.
To follow the steps Capricorn took, select the Salesforce CRM tab in the Content Management tile in Workspaces related to community. Search for the standard object “Case” and allowlist the object.
Collection on CRM data
Start creating a collection and select “CRM Data” and pick the object that you allowlisted. Choose the global list view, which will have the CRM data. More details about creating global list view can be found here.

The collection with CRM data is ready for consumption for building community.
Allowlisting custom object
Next, on the Capricorn website, Capricorn’s content managers want to showcase the list of all retail locations of Capricorn Coffee. This list of locations is stored in the custom object “Location.” See the steps Capricorn followed to expose this below.
Allowlist the custom object:

Create collection on CRM data of custom object
Create collection, choose CRM data, and select the custom object. Choose the global list view that will show the data present in the object.
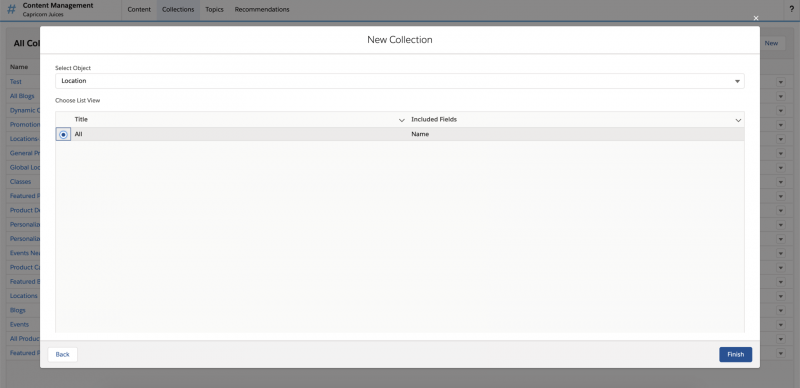
The collection with data from Custom “Location” object is ready for consumption in experience/community building.
Note: Knowledge Base (KB) and Content Version (CV) objects are not supported for CRM as Content.
References
Blog posts in this series
- Deliver Beautiful and Contextualized Digital Experiences with Salesforce CMS
- Use the CMS App to Create Content
- Use Layouts to Unleash the Power of CMS
- Content Delivery API to Extend or Integrate Content
About the author
Pradeep Kumar Saraswathi
Pradeep is working as LMTS at Salesforce.org, based in Hyderabad, India. He has been working on UI for the last several years architecting, developing and improving User Experience. You can connect with Pradeep on LinkedIn.