This is the fourth blog post of a five-part series.
Building a Slack app that integrates with Salesforce involves some challenges, such as knowing the right integration capability to use on each case, picking the right authorization flow, and implementing it securely. This is the fourth blog post of a series in which we cover the whole process of creating a Slack app that integrates with Salesforce from scratch. Learn along with us while we build Ready to Fly, our new sample app for submitting and approving travel requests in Salesforce without leaving Slack.
Note: some parts of this app have been live coded by my colleagues Mohith Shrivastava (@msrivastav13) and Kevin Poorman (@codefriar) in their codeLive video series: Building with Slack.
Check out the rest of the blogs in this series here:
- Part 1 – Architectural Overview
- Part 2 – Bolt
- Part 3 – Integrating with Salesforce
- Part 5 – What’s Coming Next
Improving the developer experience
So far, we’ve seen how the different parts of our Ready to Fly app are architected and how we make the different systems interact. You could build the whole app while pushing changes to Salesforce and Heroku each time, however, we can obtain a much better developer experience by running our Node.js app locally and using a debugger.
Local development with Socket Mode
The simplest option to run a Slack app locally is to run it in Socket Mode where Slack provides a WebSocket URL dedicated to your app. WebSocket is a protocol that, unlike HTTP, allows bi-directional communication between the client and the server. Using Socket Mode, you don’t need to expose a public HTTP endpoint to receive events from Slack. The URL with which Slack communicates is created at runtime and refreshed regularly by Bolt. Socket Mode can also be used to run apps behind a firewall. Learn more by reading the instructions to run your app in Socket Mode.
However, there are some cases in which Socket Mode can not currently be used for local development, for example, if you need to:
- Implement the Slack OAuth flow (e.g., for directory apps) to store installation information securely
- Call out from Salesforce to a custom HTTP route defined in Slack
- Use a custom ExpressReceiver to route HTTP requests when the out the box receiver doesn’t work for you
In those cases, the alternative option is to use a tunneling solution, such as ngrok. This is what we had to use in the last stages of developing Ready to Fly. As we implemented a callout from Salesforce to Slack, we also needed a custom ExpressReceiver to use the express-session library as the out-of-the-box one doesn’t support middleware.
Local development with ngrok
Ngrok exposes your local server to the outside through a secure tunnel. When you run it, it provides a public URL that you can use in your integrations, for instance, to call out from Salesforce to the Node.js app that’s running on your local machine.
You have several options to install ngrok. In our case, I decided to use npm:
1npm install ngrok -gNext, you’ll have to sign up. Once logged in, navigate to “Setup & Installation“ and copy your auth token as you’ll need to store it in your local machine.
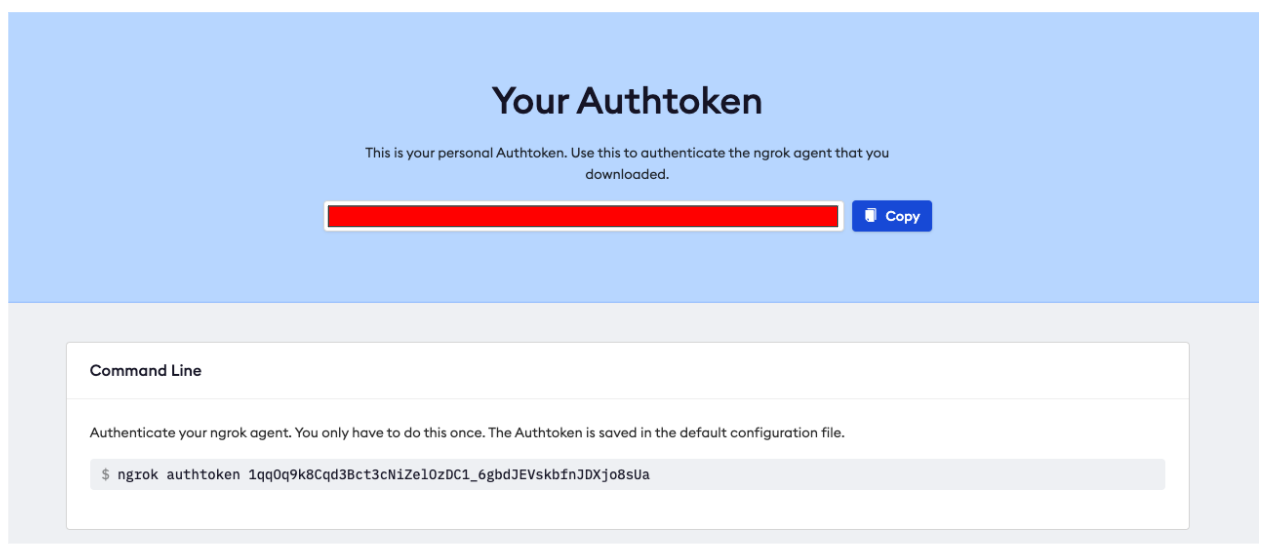
The easiest way to store your auth token is to run:
1ngrok authtoken my_auth_tokenAnd that’s all! After that, you’ll be able to run an ngrok tunnel as follows:
1ngrok http 3000
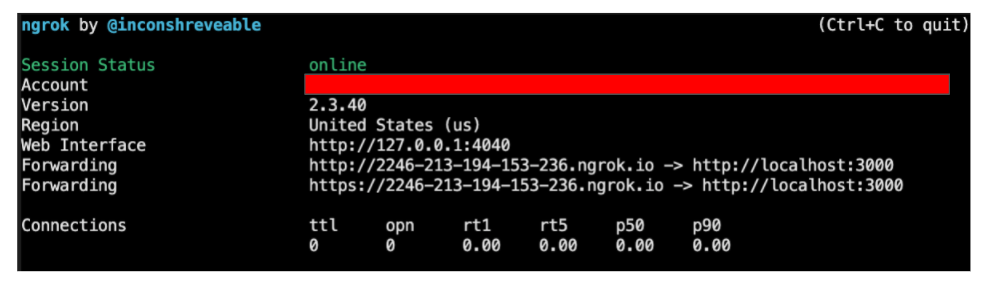
In the image above, we can see how the ngrok tunnel is running. Requests that arrive to http://2246-213-194-153-236.ngrok.io will be forwarded by ngrok to http://localhost:3000.
Let’s see now how to configure Slack, Salesforce, and the Node.js app to use that ngrok public URL. You’ll have to copy the public URL to several places (be sure to copy the HTTPS one!):
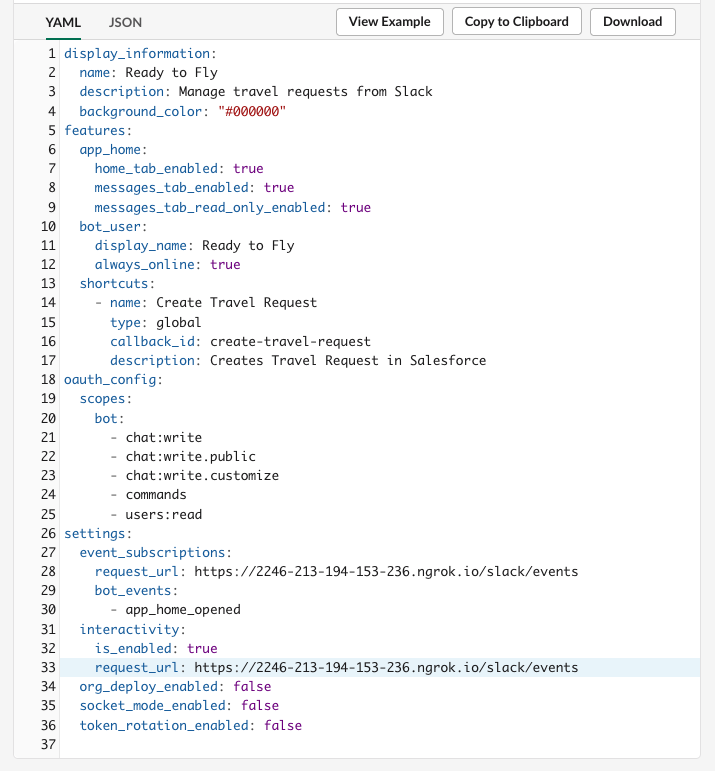
1. Copy the public URL into your Slack app request URLs. You can find the Slack app configuration at api.slack.com.
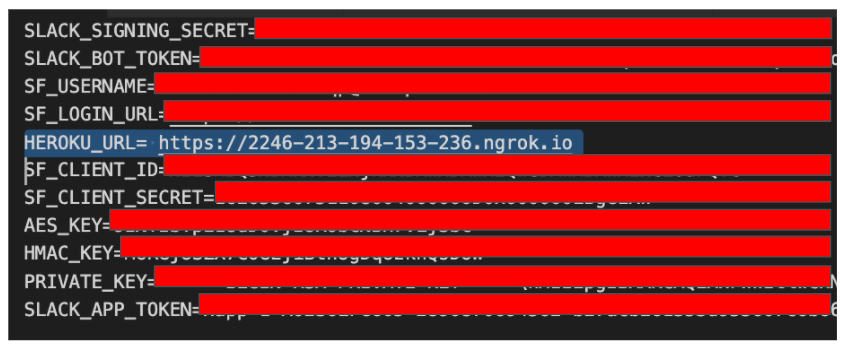
2. Copy the public URL into the Node.js app .env file to override the HEROKU_URL environment variable.
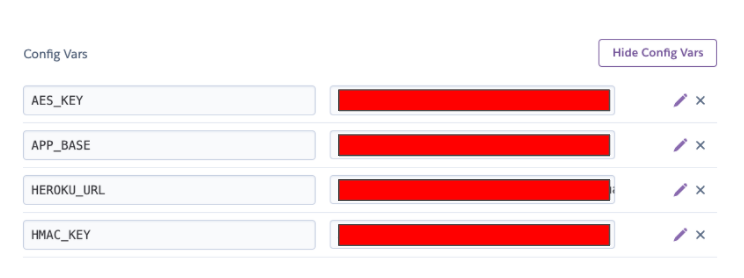
It is a best practice to store configuration in environment variables. That way, configuring different execution environments is straightforward, and tokens and secrets are kept secure, separate from your source code. As part of the setup done by the Salesforce Slack Starter kit, environment variables are set up in Heroku via config vars, but also in a local .env file that’s never committed to the repo.
Then, we use the dotenv npm library to read them in the Node.js app code, which means that the Heroku vars will be used when the app runs on Heroku. But when executing locally, the .env file vars will be used instead. That is the file where you’ll have to update the HEROKU_URL environment variable value to point to the ngrok public URL.
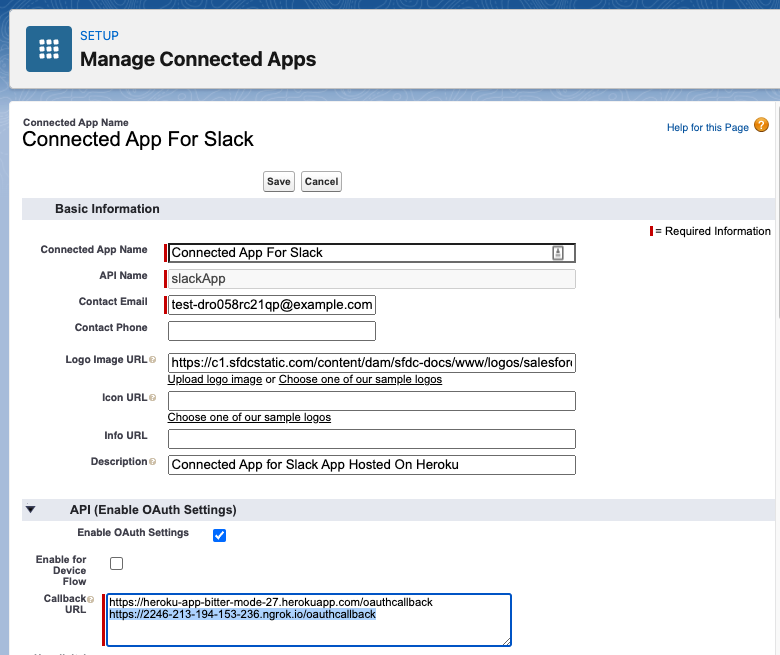
3. Add the ngrok public URL in the connected app callback URL field in Salesforce. That’s what we use for authorization. You’ll find the connected app definition in “Setup → App Manager.”
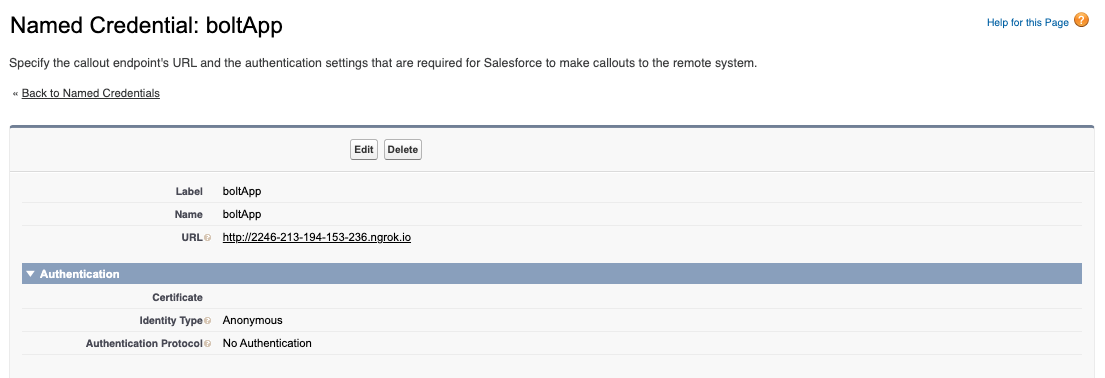
4. Modify the boltApp named credential to contain the ngrok public URL. This is the one that we’ll use to call out from Salesforce to Slack, and we need to make Salesforce allow it!
Now you are prepared to run Ready to Fly locally! In another terminal (different from the one in which you’re running ngrok), execute node app.js. Your app will run in https://localhost:3000 and ngrok will tunnel any incoming requests to that address. You can then make changes to the code, as well as start and stop the app as many times as you want, which makes development much easier and more productive.
Debugging
To maximize productivity even more, and as your app now is running locally, you can attach a debugger. A simple and effective way to do it is to use VSCode:
- Go to the “Run & Debug” tab in VSCode
- Select “JavaScript Debug Terminal“ in the dropdown and click on the Play button
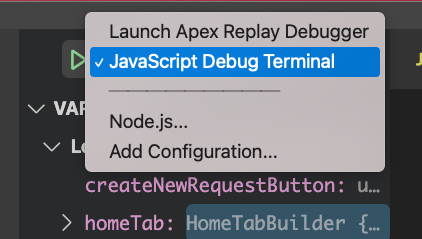
- Add breakpoints to your code!
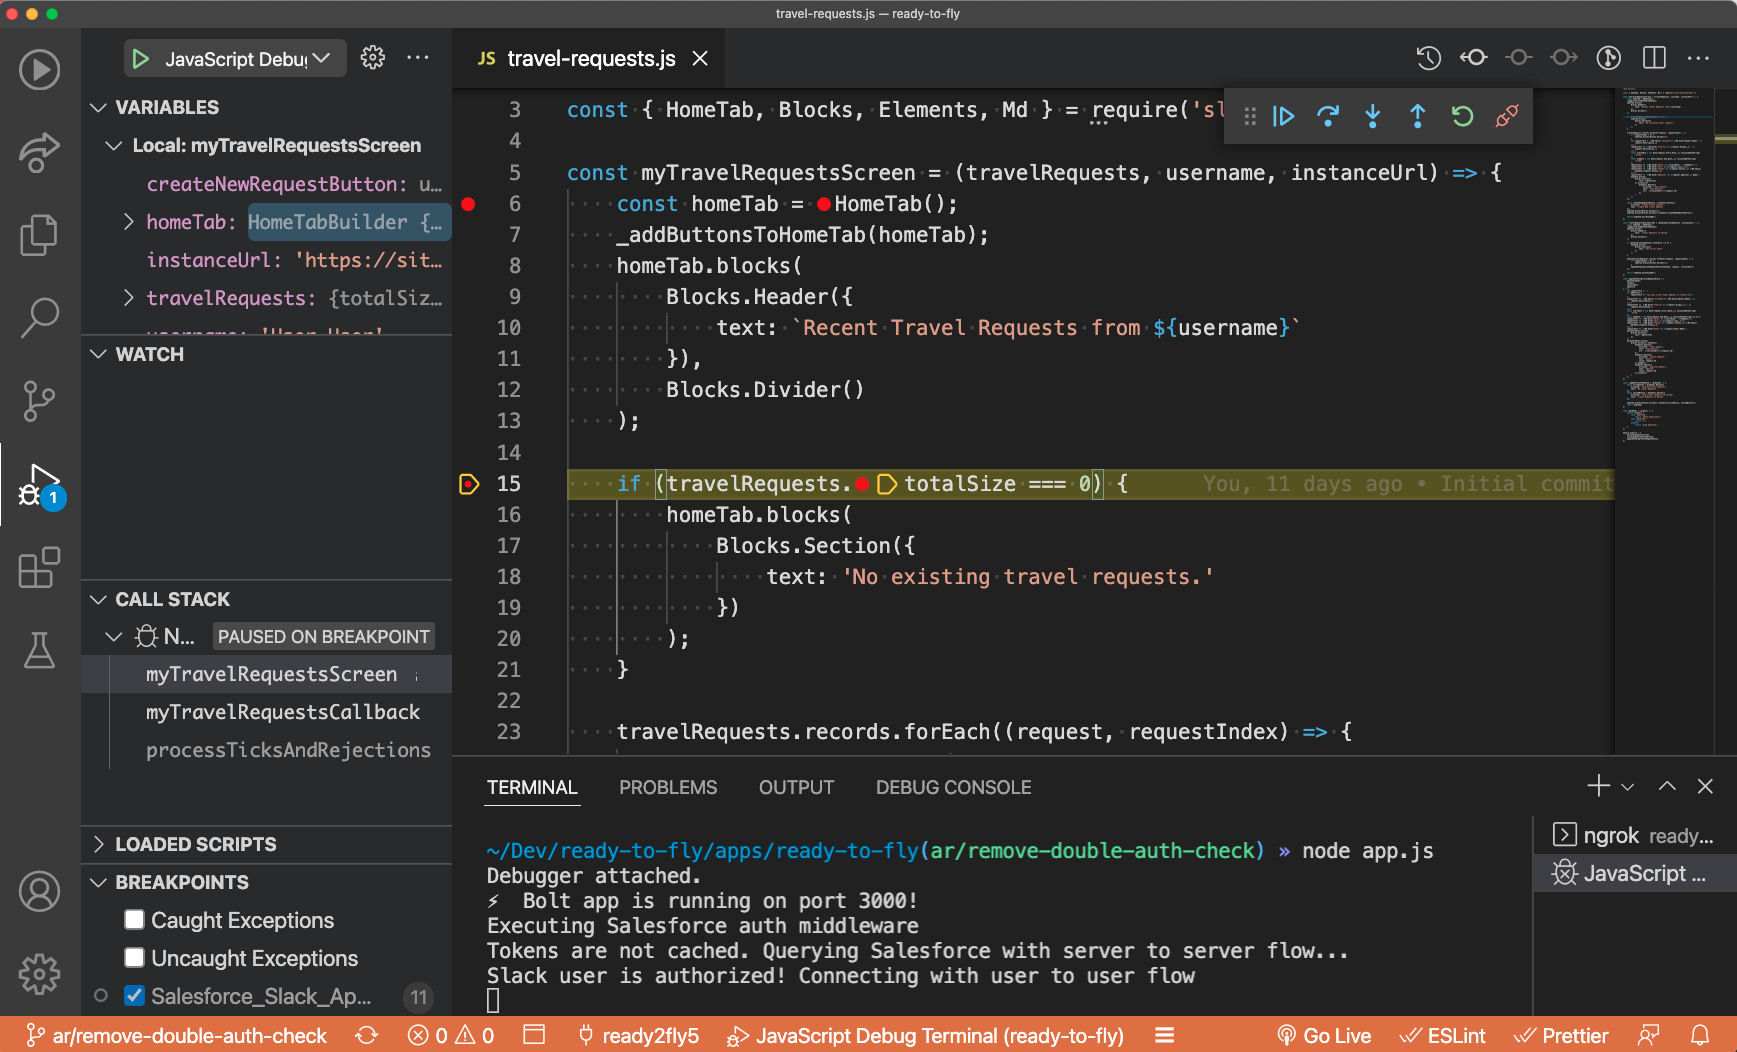
- Finally, run the app in the JavaScript debug terminal with
node app.js. Remember to stop any other running instances of the app beforehand to avoid the port being used. When you interact with the app, from Salesforce or from Slack, the code will stop in the reached out breakpoints, and you’ll be able to examine the variables, call stack, etc., which becomes extremely effective when developing the Node.js app!
Other developer tools
Finally, I want to mention something else that was very helpful for me: the Slack developer tools. These allow you to get quick access to Slack’s API docs inside of Slack, retrieve useful information like conversation and workspace IDs, and investigate the structure of channel messages. Give it a try!

Wrapping up
In this blog post, we’ve covered how to run the Node.js app portion of our integration locally. We’ve also seen how to use a debugger to be able to stop at breakpoints and inspect our code in depth. These tools, together with the Slack developer tools, will make you a much more productive (and happy!) developer when building a Slack app.
Be sure to clone the Salesforce Slack Starter kit and to try out local development with ngrok!
Stay tuned for the final blog post of the series in which we’ll cover the exciting features that Salesforce is working on to make the development of Slack + Salesforce apps much easier.
About the author

Alba Rivas works as a Principal Developer Advocate at Salesforce. She focuses on Lightning Web Components and Lightning adoption strategy. You can follow her on Twitter @AlbaSFDC.