There may come a time when you’ll need to integrate an application with your Salesforce org in order to accomplish a specific task, such as retrieving account or lead data from Salesforce. To do so, Salesforce provides a comprehensive set of APIs that address a wide range of use cases. Once you’ve figured out which API you want to use, your follow-up question will likely be: “How do I authenticate?”
This is where OAuth comes in. OAuth (short for “open authorization”) is an IETF standard for access delegation used as a way for internet users to grant applications access to their information on other sites, typically without sharing their passwords.
Salesforce has supported OAuth 2.0 and several of its flows for a long time. The most popular flow is the authorization code grant, which is the one you typically use when you connect a website (e.g., Airbnb to your Google account) for the sake of logging in. Salesforce lets you use that in several areas, such as your My Domain or Experience Cloud login pages, via an authentication provider.
This is great when you want user-based authentication whereby you want one system (your app) to connect to Salesforce in the context of a specific user.
Why implement the client credentials flow
However, occasionally, you want to connect your app to Salesforce’s APIs outside the context of any particular user. For instance, your app may be a backup app or an analytics app; it doesn’t know any username and it doesn’t hold any specific user’s credentials. Any other means of authentication is therefore off the table. This is where OAuth’s “client credentials grant” comes in. RFC6749 notes the following:
The client can request an access token using only its client credentials (or other supported means of authentication) when the client is requesting access to the protected resources under its control, or those of another resource owner that have been previously arranged with the authorization server (the method of which is beyond the scope of this specification).
In OAuth parlance, client credentials are the client identifier and the client secret. In Salesforce parlance, we call those the consumer key and secret. You can find them in your connected app under the section labeled API (Enable OAuth Settings) as seen in the screenshot below.

Click on Manage Consumer Details, which will take you to the screenshot below.

Configuring the flow
Under Setup > App Manager, create a new connected app. In the details screens, provide a name and contact in the basic information section. What you choose doesn’t really matter there. Let’s focus instead on the following section, API (Enable OAuth Settings).
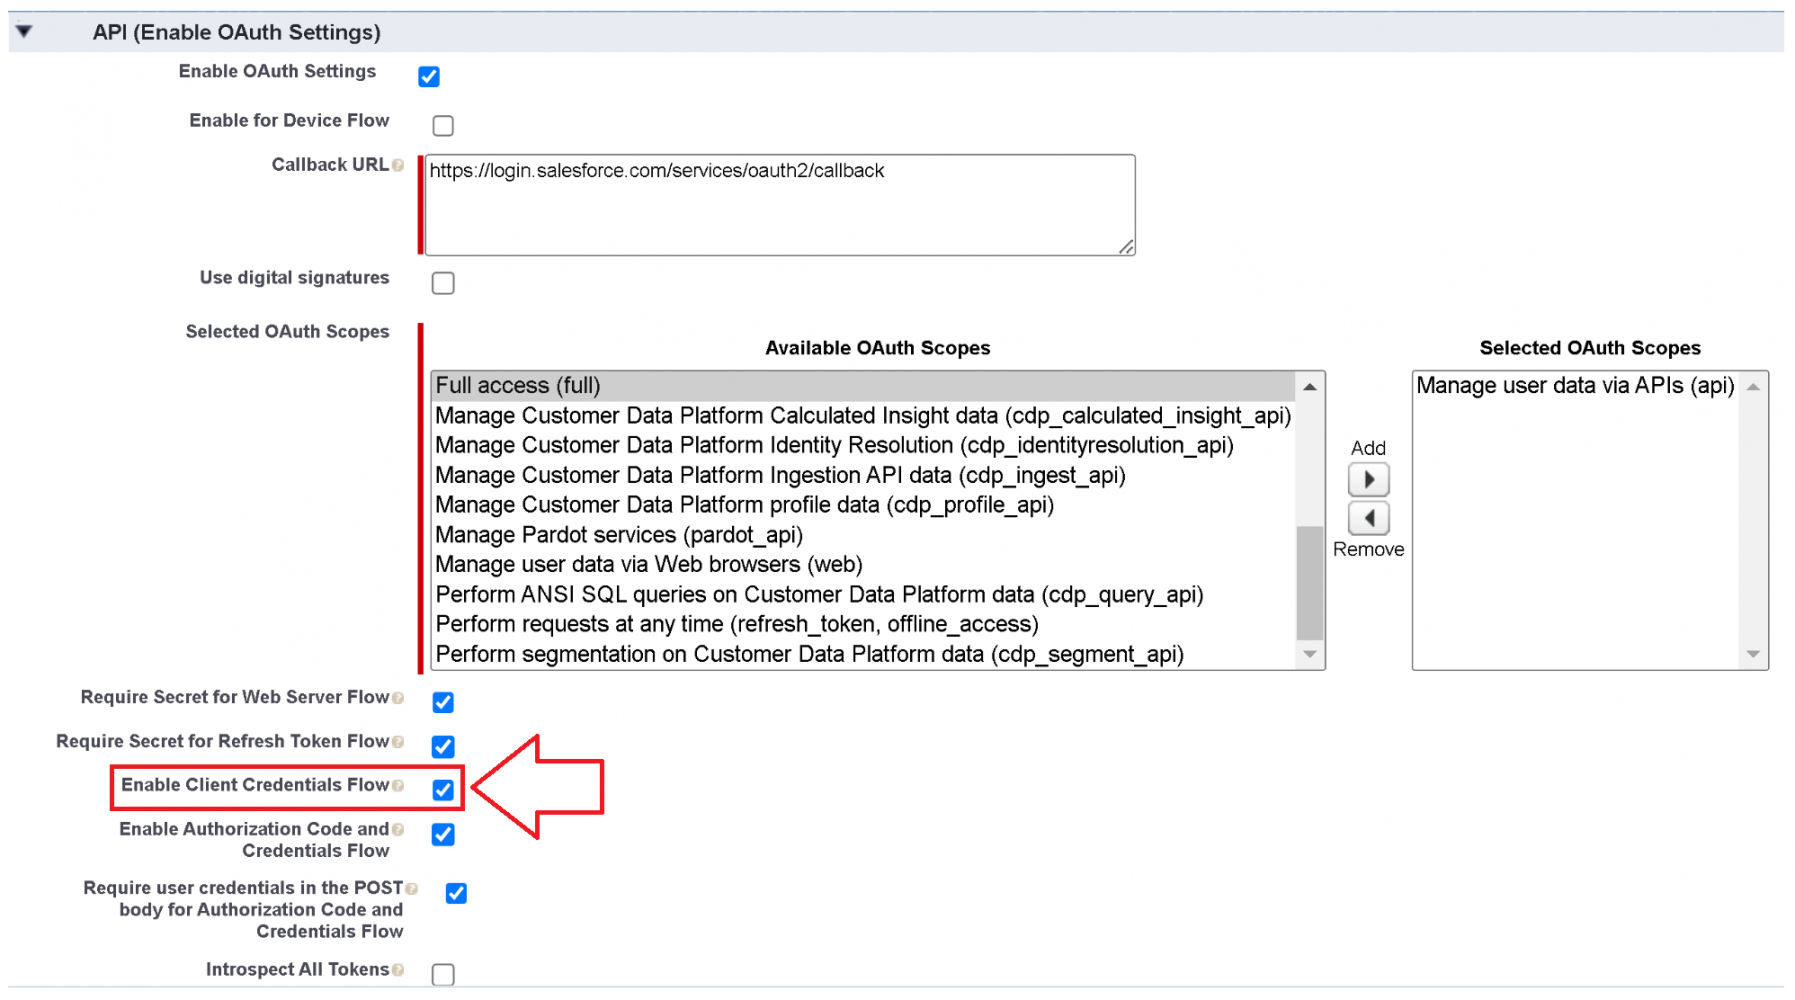
Select the checkbox next to “Enable Client Credentials Flow.” This will enable the OAuth flow for the selected connected app and OAuth scopes. Then, choose your scopes; because this is meant for API access, you should choose the API only scope.
Once you’ve done that and saved your app, you need to go manage your app to edit the policies governing the app.

In particular, you’ll want to choose a user for the flow to “run as.” A user? Well, yes, everything in Salesforce runs in the context of a user, so even though this flow is meant to run outside the context of a user, we still need to map it to a user. Think of this as the “integration user” pattern. That user can be an admin or a user with permissions that allow them to touch all the data you’re interested in. In Spring ’23, the user must be “API Only,” but that requirement will be removed from Summer ‘23 onwards. Note that Developer Edition orgs do not have the API Only permission, so if you’re on Spring ‘23, you’ll need a different edition.

Testing it all out
Let’s use Postman for testing. We’re in luck as the Salesforce API Collection (brought to you by the amazing Philippe Ozil) already contains a sample for client credentials. All you need to do is open that sample and make sure your collection libraries contain updated values for:
client_id:You can find this value inside the connected app. In the drop-down menu next to the connected app, click on View. Then locate the API (Enable OAuth Settings) section and click on Manage Consumer Details. This will allow you to copy your consumer key and consumer secret (also known as the client ID and client secret).client_secret: See above.- URL: For example, your URL may be something like: https://login.salesforce.com.
Invoking this call will return an opaque access token that you can use in subsequent calls. Remember: this access token is issued for the “Run As” user. So, if you chose a user with a broad set of permissions (perhaps a sysadmin profile), then the access token gets as much. This is great for integrations, but it can be dangerous otherwise, so treat your token with care. Create a dedicated integration user and scope their access using permission sets to the smallest possible subset of necessary features.
Here’s what the response looks like:
Conclusion
Now that Salesforce has added support for the OAuth 2.0 client credentials grant, it’s easier than ever before to establish server-to-server integrations that do not necessarily need user context. For more information, see the RFC for nitty-gritty details or our help page.
About the author

David Brossard is the Sr. Director of Product Management for Identity at Salesforce. He focuses on all things SSO and customer identity. He’s a founding member of IDPro and a contributor to standards, such as XACML and SCIM. David regularly speaks at identity conferences like Identiverse.