Note: This post has been updated to reflect the new capabilities in the Named Query API Beta that is available in the Winter ’26 release.
Salesforce is introducing a new capability, Named Query API, that simplifies how admins and developers can give agents and apps access to data in their org. With Named Query API, you can define SOQL queries from which you can then create custom agent actions for agents, and expose them as REST APIs for use by external applications.
In this blog post, we’ll walk you through the steps to simplify data access using Named Query API. You’ll learn how to create a Named Query API, view the Named Query API in the API Catalog, invoke the Named Query API as a REST API, download the OpenAPI document that describes the REST API for the Named Query API, create an agent action from the Named Query API, and incorporate that agent action in a agent.
How agents and apps currently access data
If you want agents and applications to access data in your org today, you have several options.
For agents:
- You can create a flow containing a Get Records element to return the data you want the agent to access, and then create a custom agent action from that flow
- Alternatively, you can create an Apex class that contains a SOQL query that returns the data you want the agent to access, expose the method of the Apex class as an invocable method, and then create a custom agent action from the invocable method
- You can then use the custom agent actions with your agents
While these approaches will provide your agents with access to the data, they impose the additional complexity of creating a flow or Apex class. Named Query API gives you a far simpler way.
For applications:
- You can use the REST API
/queryto send a SOQL query to your org to return the required data, however, this approach requires you to know SOQL - Alternatively, you can use the sObjects REST API to return a record using the record ID, but this approach does not allow the apps to query for a set of records that match a filter criteria
Named Query API gives you the ability to expose dedicated REST APIs that make required data available to applications using REST semantics.
Create and manage Named Query APIs
The first step is to create a Named Query API to expose the data that you want agents and applications to access. You create Named Query APIs in Setup: navigate to Integrations in the tree and select Named Query API. The list of Named Query APIs will be shown.
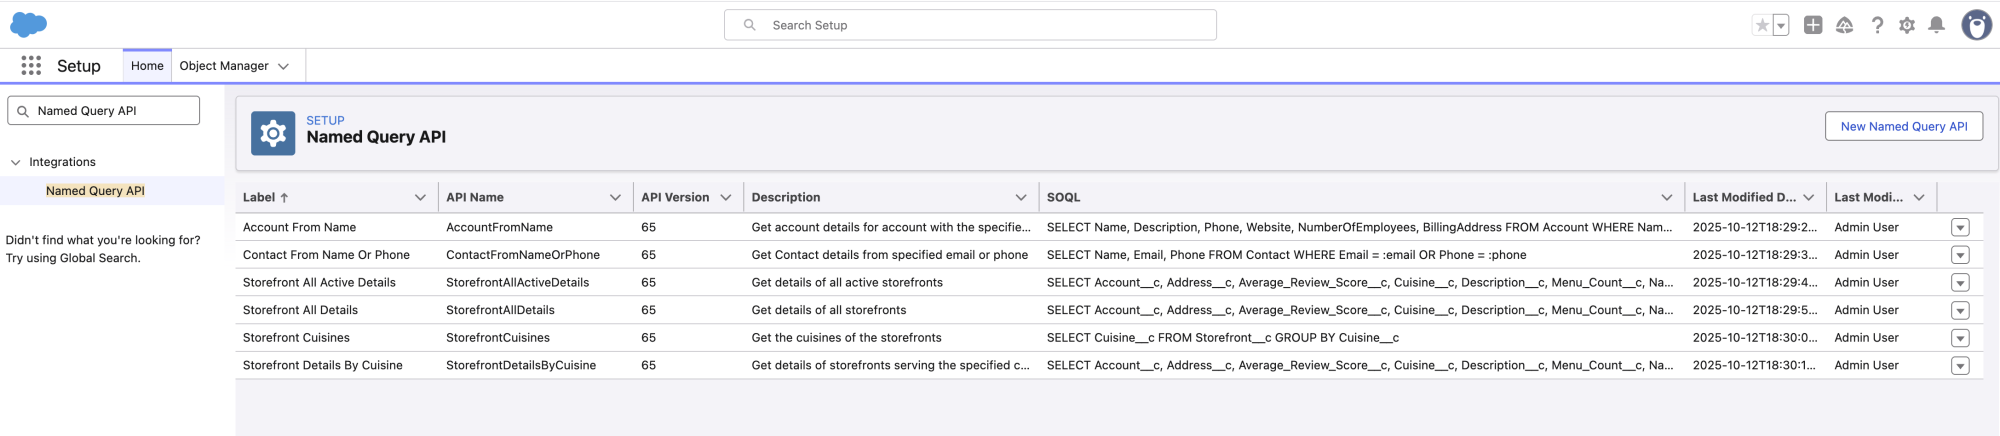
Click the New Named Query button to open the modal to create a new Named Query API.
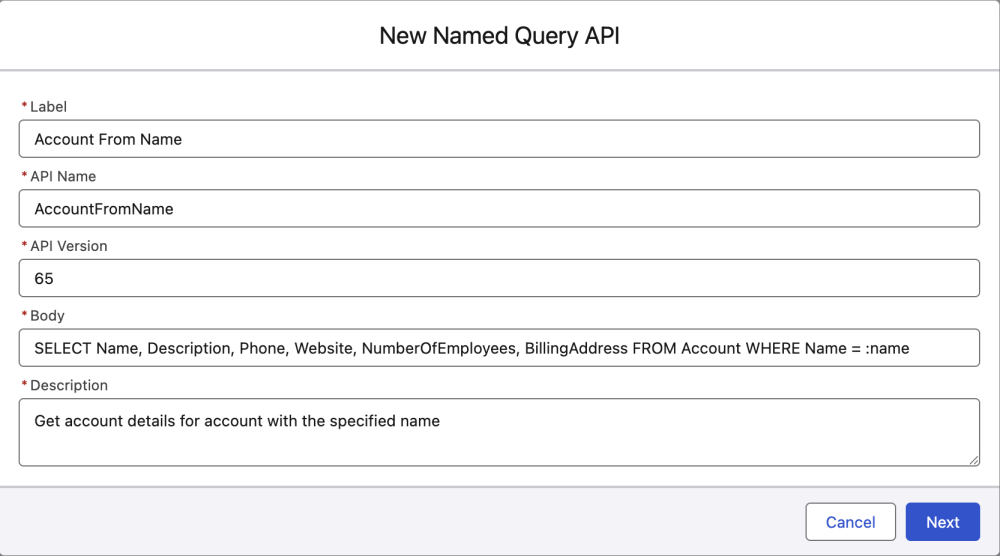
You can define filter conditions for the query by specifying parameters in the WHERE clause, with the parameter names prefixed with a colon, as shown in the above example. These input parameters will be passed into the Named Query API by the calling agents and applications.
For the Beta, Named Query API supports input parameters in the WHERE and LIMIT clauses.
Create Named Query APIs in VS Code
If you prefer a pro-code experience, you can create Named Query APIs in VS Code and deploy the metadata to your org.
For example, this GetAccountDetails.apiNamedQuery-meta.xml file defines the metadata representing a Named Query API. Deploying this metadata to your org will create the Named Query API which can then be managed in Setup.
View Named Query APIs in the API Catalog
When a Named Query API is saved, it is automatically viewable in the API Catalog.
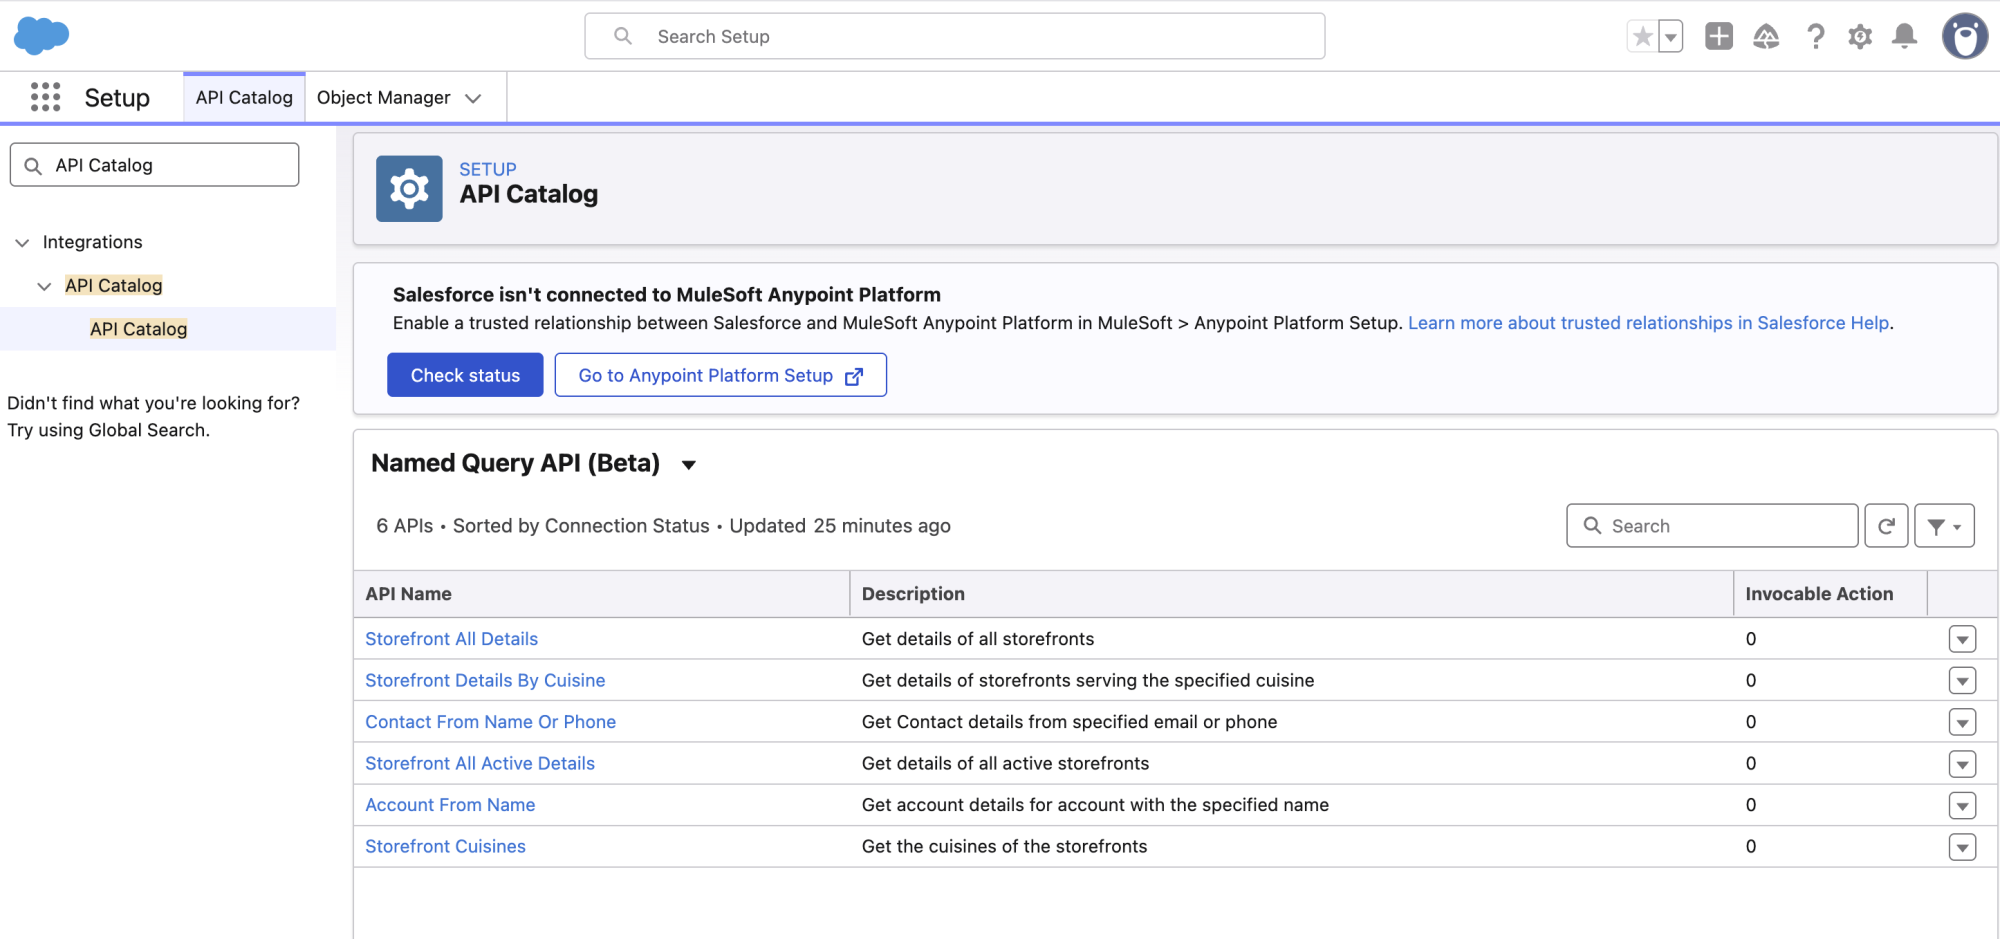
From this list, you can select a specific Named Query API to view its details.
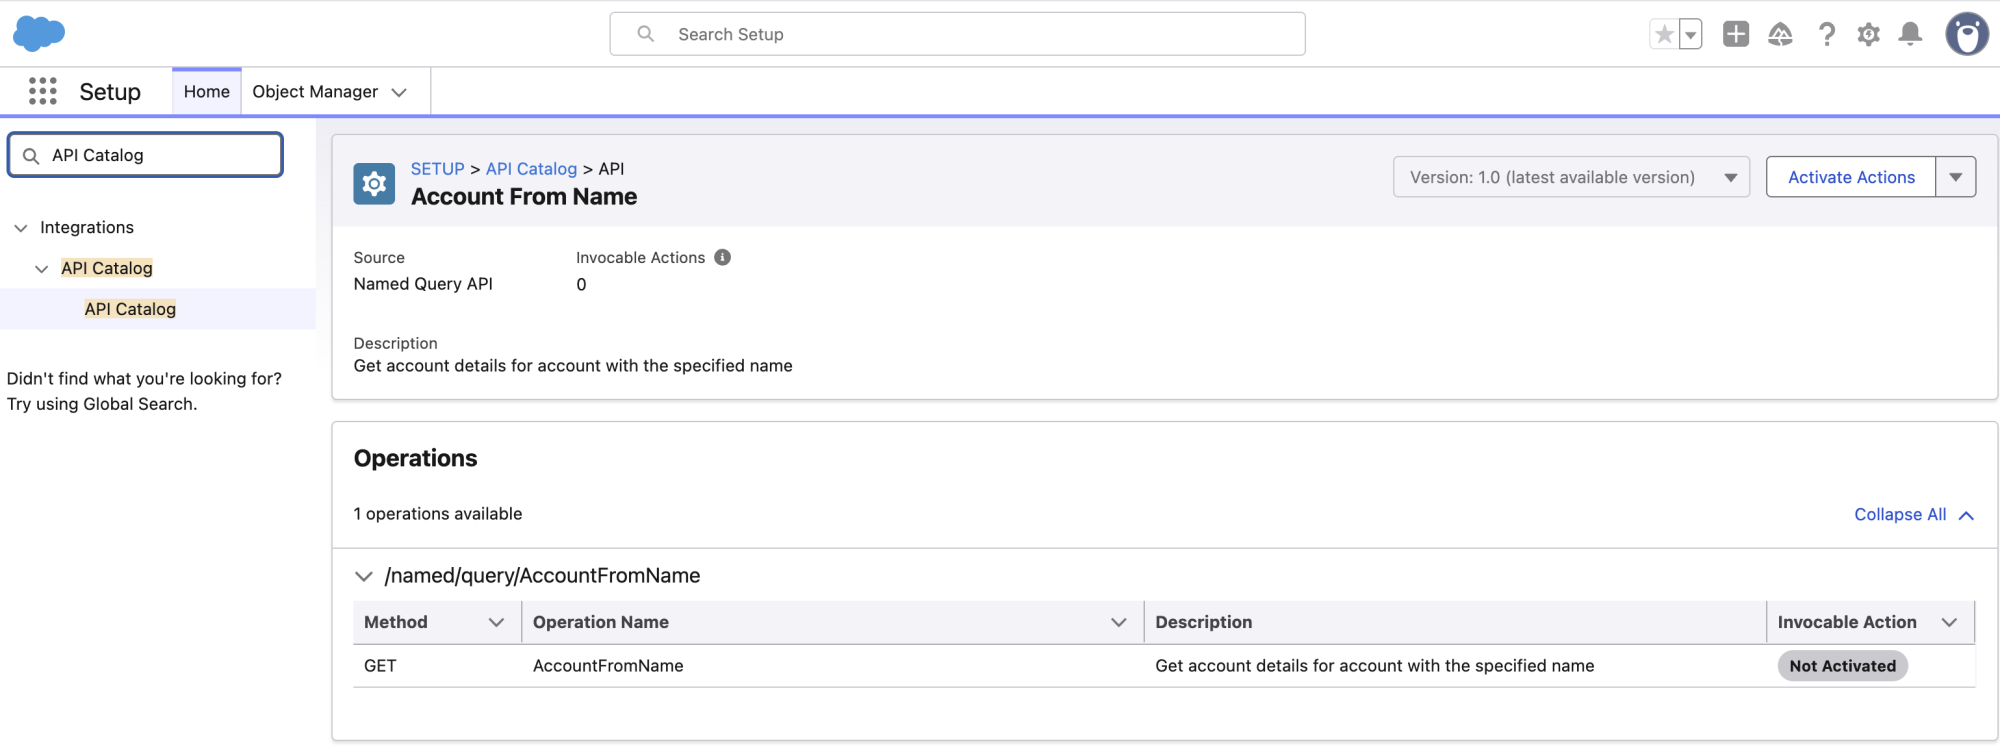
To use a Named Query API to create a custom agent action, the Named Query API must be activated for agent action use. This activation is performed in the API Catalog. The API Catalog indicates which Named Query APIs are activated. Once a Named Query API is activated for agent action use, then it cannot be edited or deleted in the Named Query API Setup; it must first be deactivated, which is done in the API Catalog. Before deactivating a Named Query API, make sure that it is not used by any agent actions.
Note: This activation does not have to be performed in order for the Named Query API to be used as a REST API.
Named Query API as a REST API
When the Named Query API is saved, it is automatically exposed as a REST API. The Named Query API in our example above would be exposed as the following REST API.
<my domain>/services/data/v65.0/named/query/AccountFromName?name=xxxx
The input parameters defined in the Named Query API are exposed on the REST API as query parameters, enabling external applications to easily pass them as input. Note that the user that executes the API request must have read access to the entity being queried.
The following REST API call invokes the example Named Query API passing in “Urban Eats Collective” as the value of the name parameter.
<my domain>/services/data/v65.0/named/query/AccountFromName?name=Urban%20Eats%20Collective
The Named Query API returns this response with the account details for the Urban Eats Collective account:
Download the OpenAPI document
If you have the REST API OpenAPI Beta enabled in your org, then you can download an OpenAPI document describing the REST API that the Named Query API is exposed on. See the documentation to enable and use the REST API OpenAPI Beta in your org.
This REST API call will generate the OpenAPI document for the AccountFromName Named Query API.
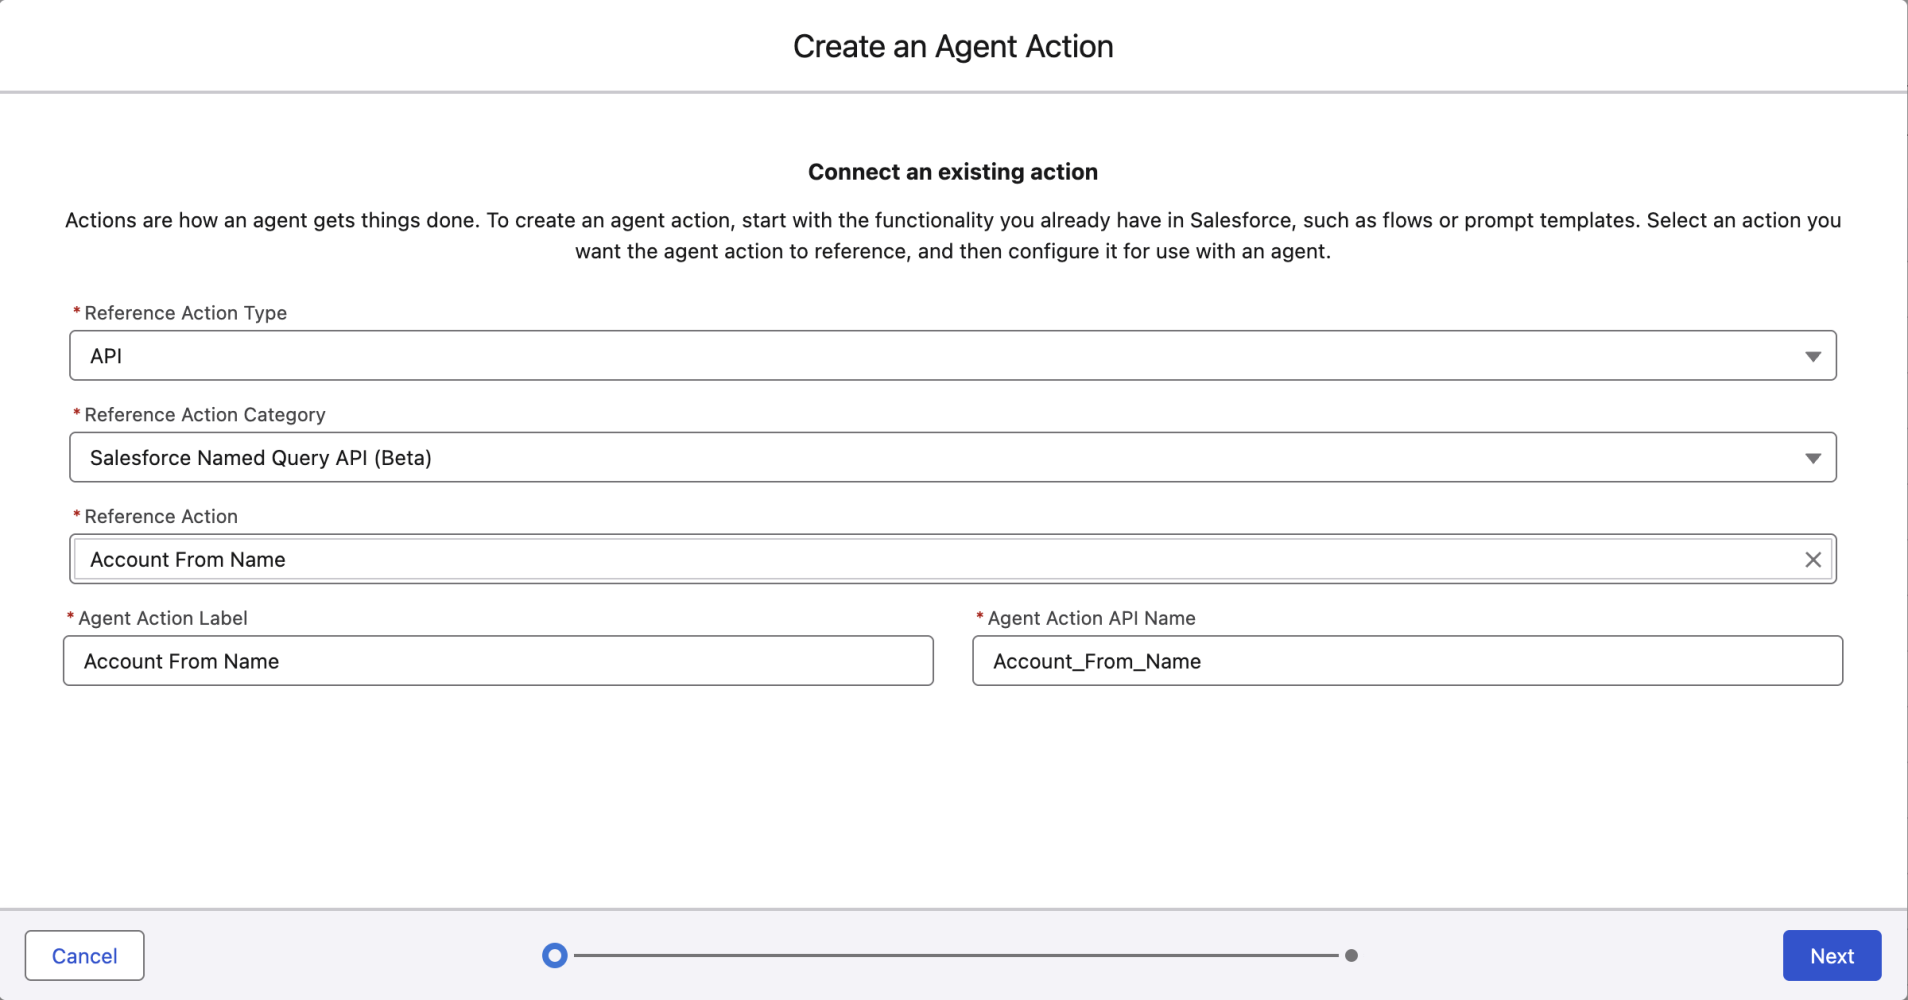
Named Query API as an agent action
Once your Named Query API is saved and activated in the API Catalog, then you can create an agent agent from it using the New Agent Action dialog in the Agentforce Asset Library screen in Setup.
Using Named Query API in an agent
The final step is to add your agent action to a topic and include the topic containing the agent action in your agents, and then those agents can start leveraging your Named Query API to access data in your org and address user requests.
Lastly, you’ll need to ensure that the user for whom the agent will invoke the Named Query API is authorized with read access to the object being queried.
Conclusion
In this post, we’ve shown how Named Query API simplifies data access for agents and applications in your org, compared to the alternative approaches.
To make data available to agents via agent actions, all you need to do is to write the SOQL query using a dedicated UI instead of creating a flow or writing an Apex class. And for applications, Named Query API makes it easy to expose dedicated REST APIs that make required data available to applications using REST semantics.
Named Query API is available as a Beta in October as part of the Winter ‘26 release. If you are interested in using Named Query API, please refer to the Create Actions from Named Query API (Beta) documentation on how to enable Named Query API in your org.
We need your feedback on the capabilities of this Beta, as well as how Named Query API can help power your agents and APIs, as this will influence the GA release. Please post your questions and/or feedback on the Beta to the Salesforce Integration Trailblazer Community. And if you want to highlight your use of Named Query APIs, we’d love to co-present your use case at TDX or Dreamforce … just let us know!
Further resources
- Documentation: Create Actions from Named Query API (Beta)
- Documentation: Generating an OpenAPI 3.0 Document for sObjects REST API (Beta)
About the author
Jeremy Westerman is the Director of Product Management for Salesforce APIs. He is responsible for Salesforce APIs that access data on the core Salesforce Platform. You can find him on LinkedIn.