Activate, Test and Configure Your Agent
With your flows in place, it’s time to bring your agent to life: activate, configure the necessary permission sets to secure access, and verify your agent’s performance.
- After you add Actions, click on the top right on Activate and Save.
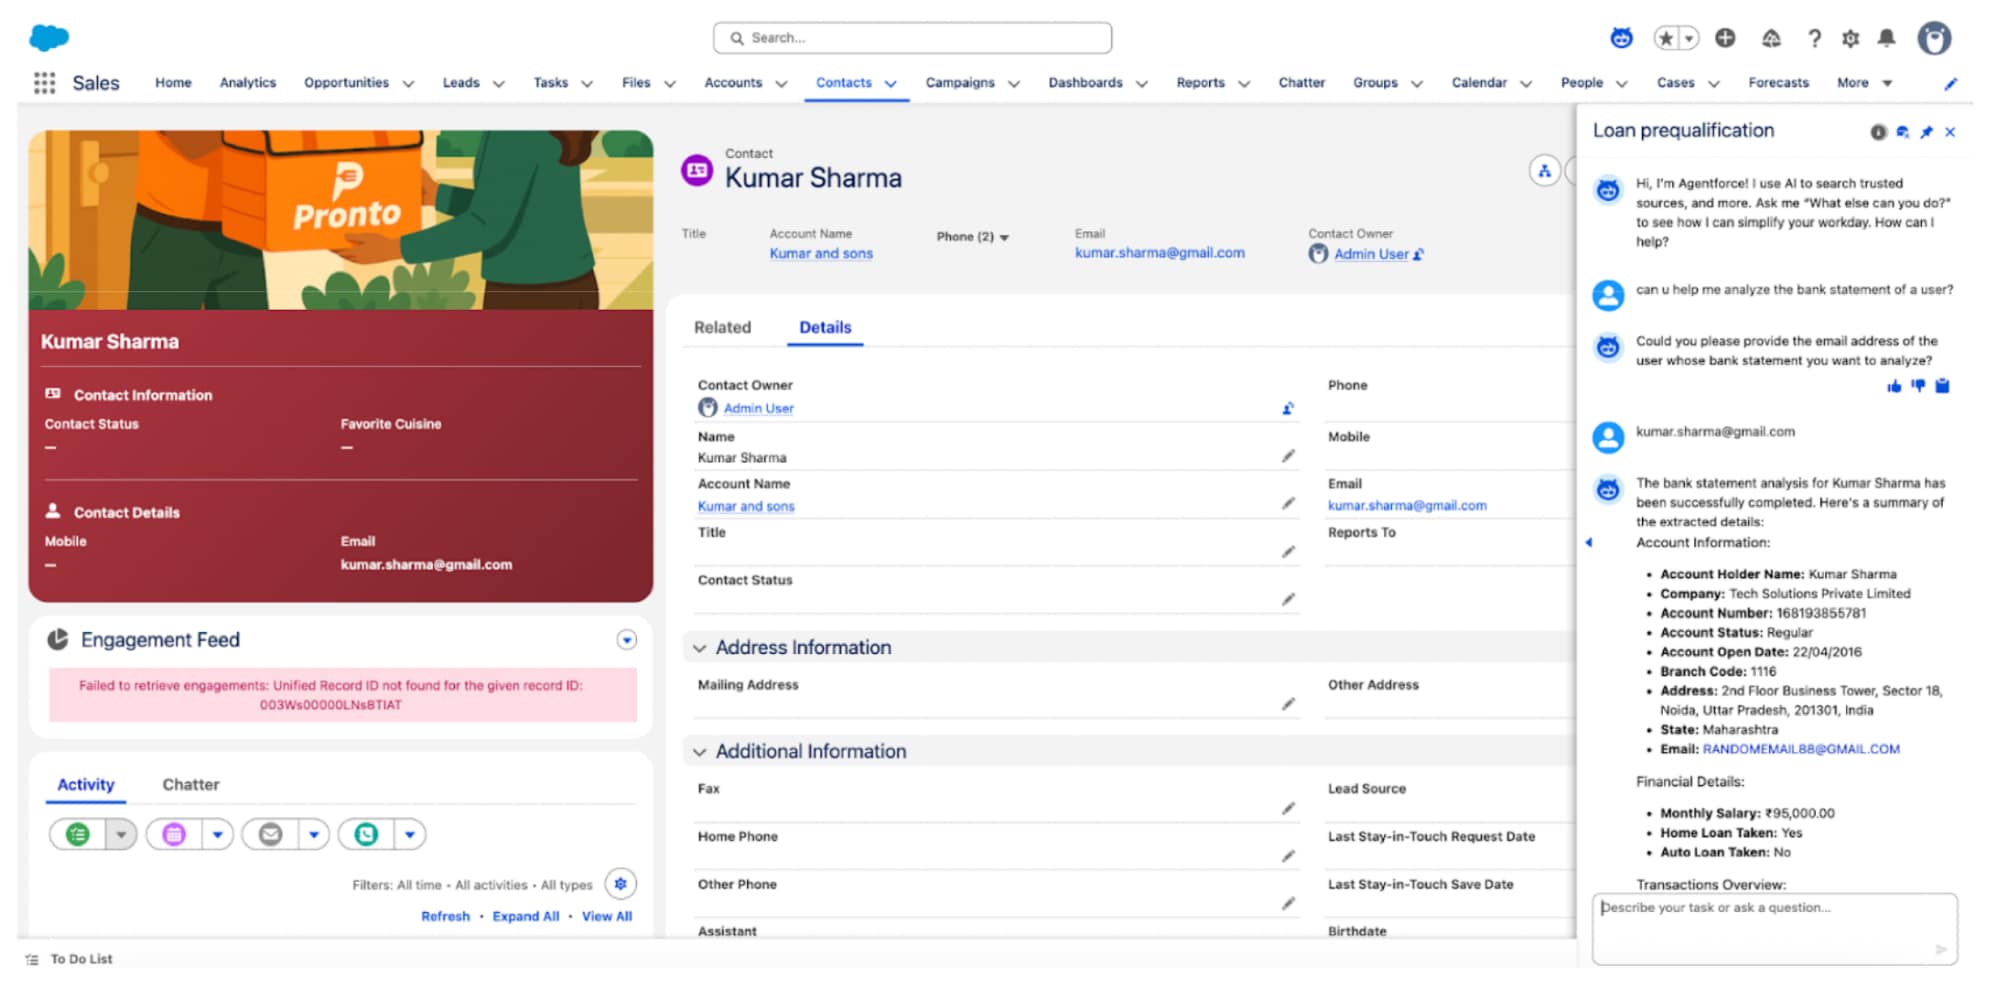
- Use the agent on the right side with this prompt: “Can you help me analyze the bank statement of a user?”
- If prompted, enter the email ID of the test contact you created earlier. Refer to Finalize Flow Retrieving File ID from Email Address.
- Go to Setup.
- In the Quick Find search bar, find and select Permission Sets.
- Click the New button.
- Enter the permission set Label: Loan Qualification Agent.
- Click Save (no other changes are needed).
-
Scroll down to the Apps section.
-
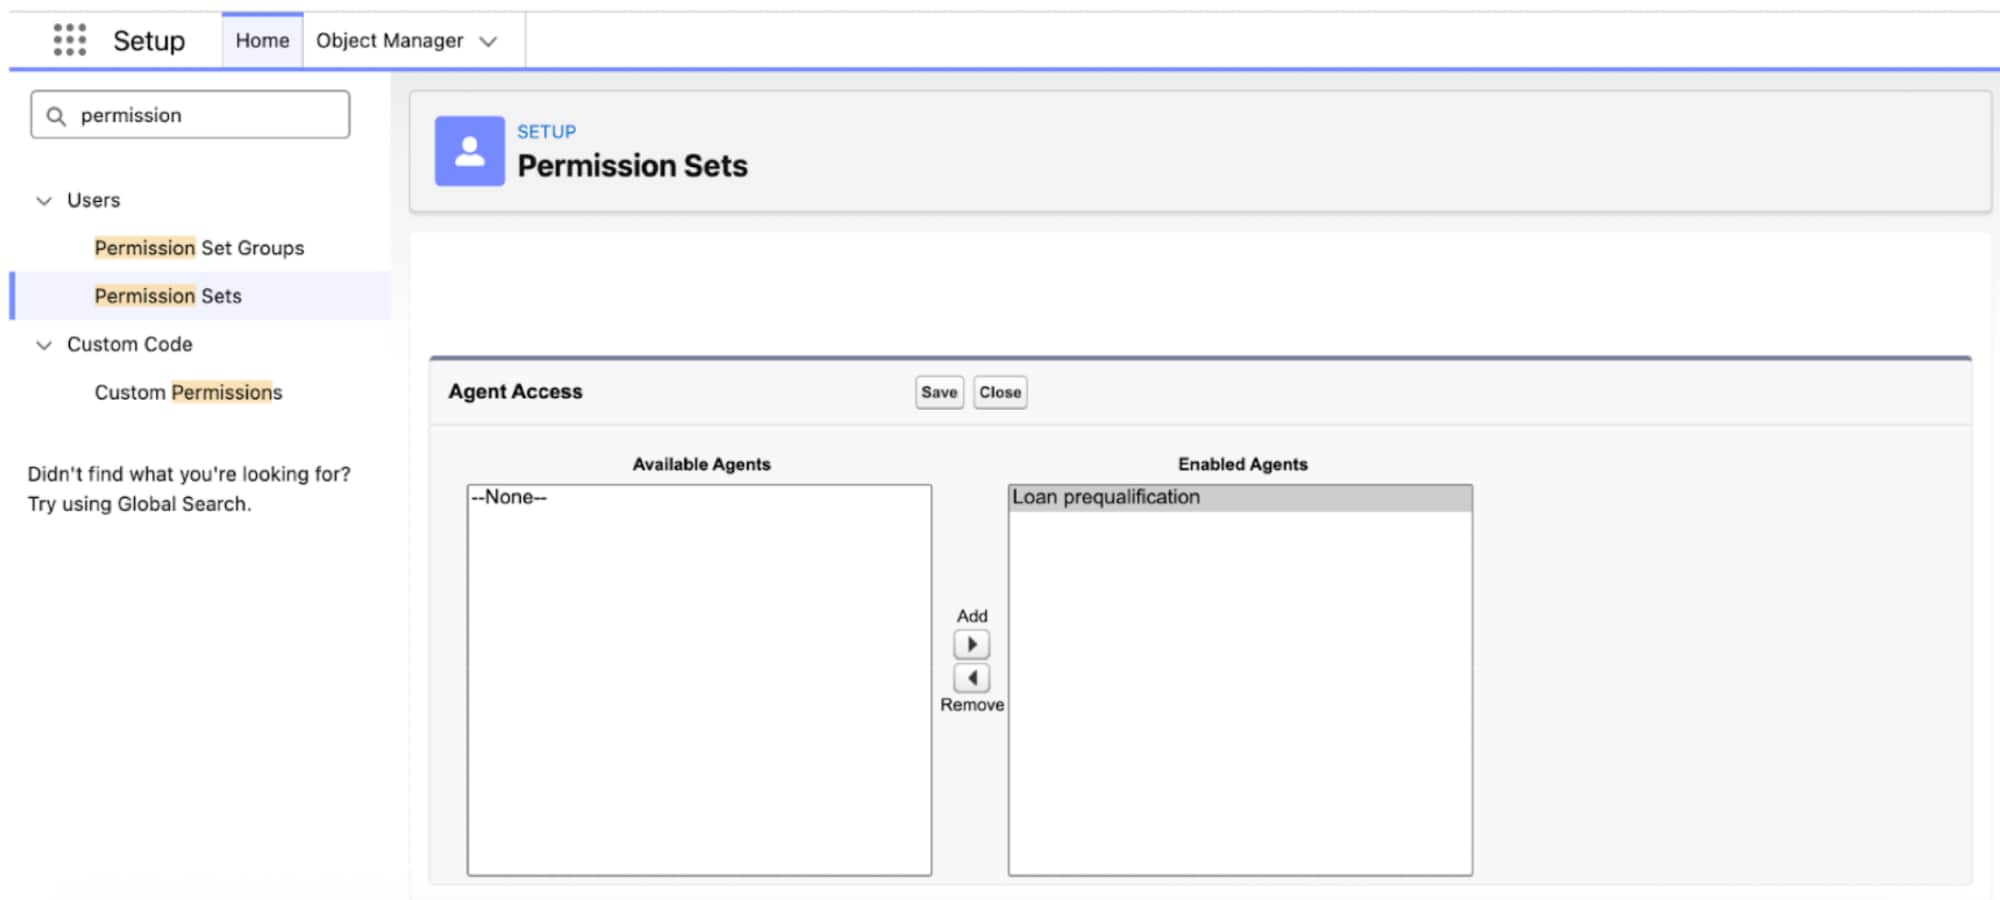
Find the Agent Access section.
-
Click Edit.
-
Move Agent:
- Find Loan Qualification Agent in available agents list.
- Move it to the right side (Enabled Agents). Alternatively, select the agent from the list and save your selection.
-
Click Save.
- Click Manage Assignments.
- Click Add Assignment.
- Select User: Filter the list to only see Admin Users, then select a user who has a visible Last Login date. Example:
demo-for@pronto-d25-demo.com. - Click Next.
- Click Assign.
Employee agents are scaled securely across your organization. Test it on your Sales Cloud.
- From the App Launcher, go to Sales.
- Refresh the page.
- Click the Agentforce button (on the top of the page).
- Your loan agent should now appear as available.
- Enter a test query with the same test contact you created earlier. Refer to Finalize Flow Retrieving File ID from Email Address.