Step 4 - Create Bank Statement Extraction Flow (Apex Wrapper)
Create a screen flow to invoke your Apex method that extracts data from the customer’s bank statement.
On the App Launcher, create a new flow to extract data from the customer’s bank statement.
- From the App Launcher, select Flows.
- Click New to create a new flow.
- Select the Autolaunched Flow (No Trigger) automation.
- In the Flow Builder, under Autolaunched Flow, click the + button.
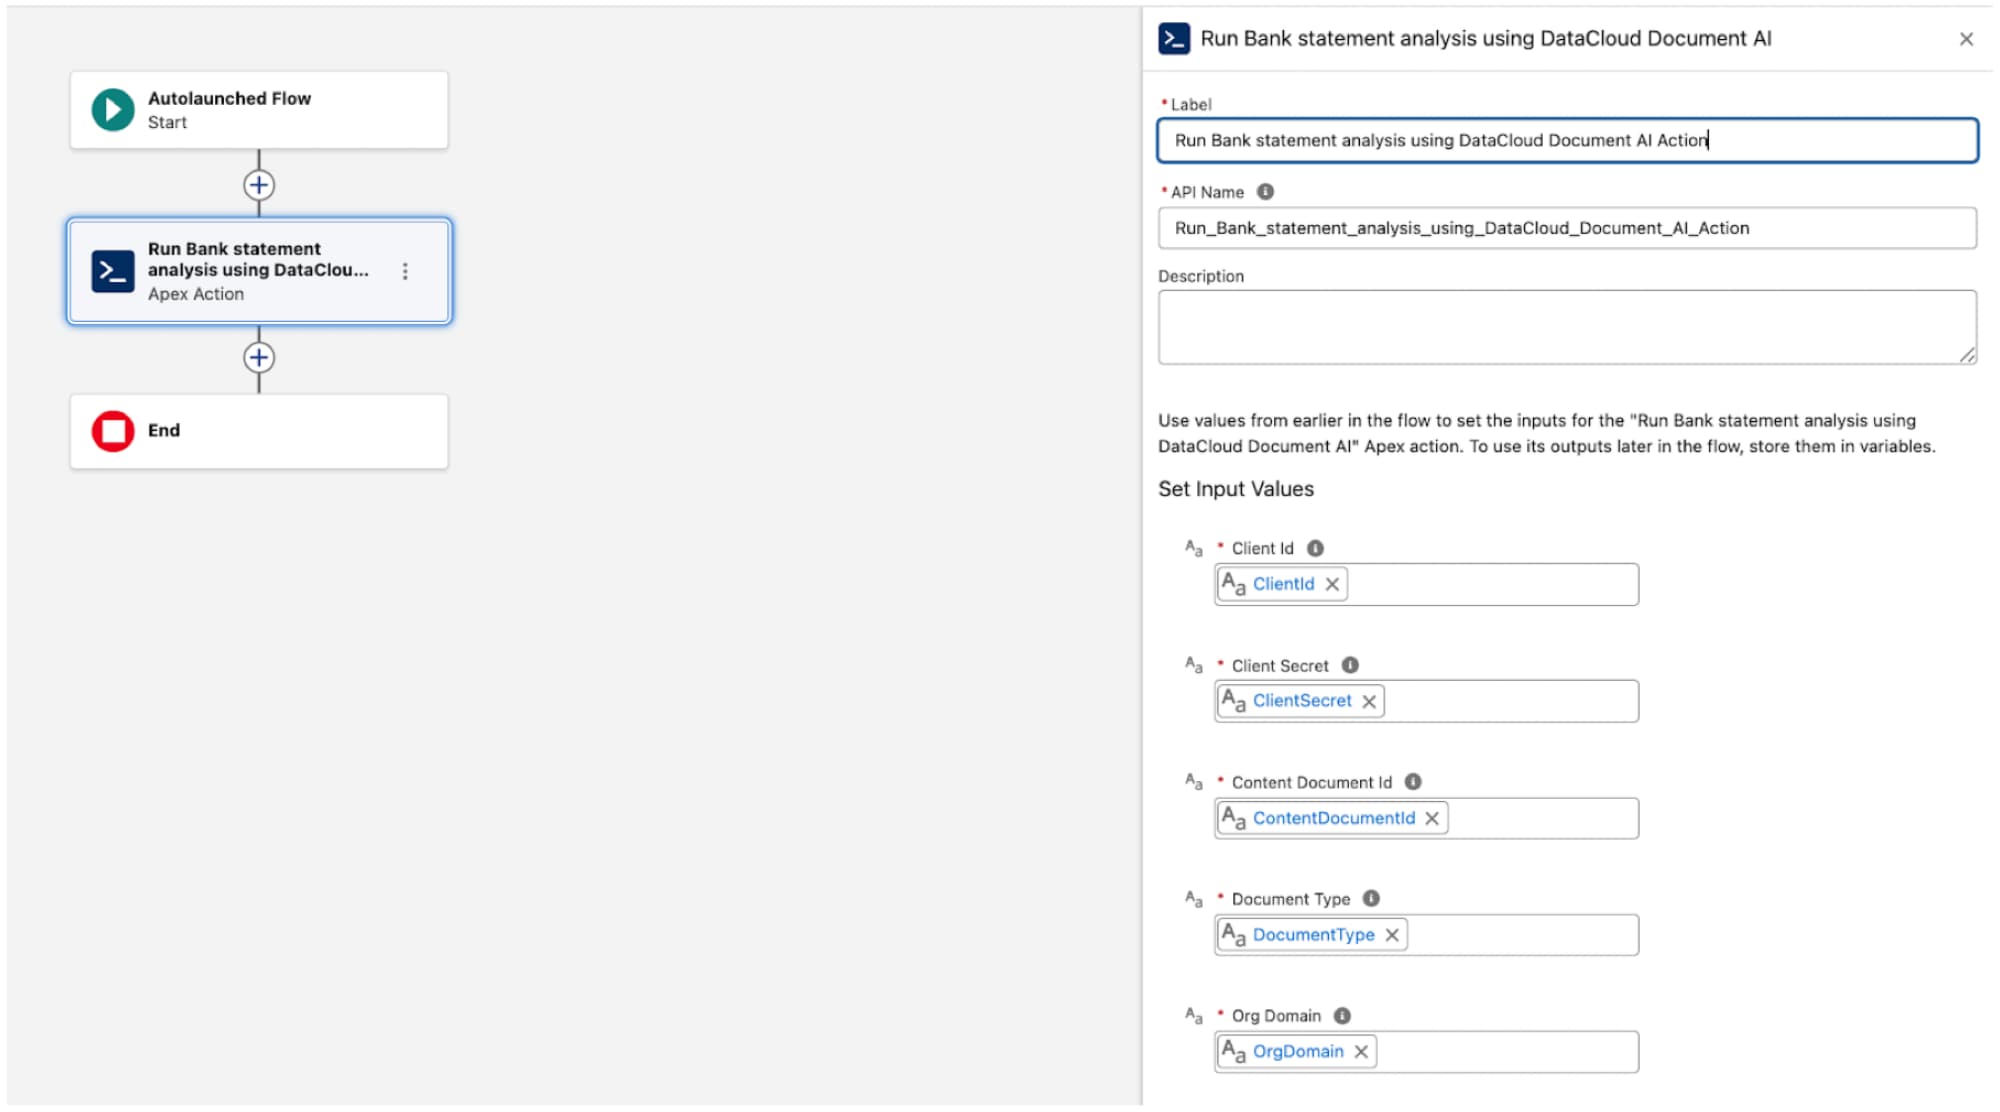
- Select Action, and search for your Apex method under Search Actions on the right (Run Bank statement analysis using DataCloud Document AI).
- Enter a flow label:
Bank_Statement_Extraction.
-
Open the toolbox on the top left and click New Resource to create input variables.
-
The New Resource modal opens. Select Variable as Resource Type.
-
Enter
ContactEmailas API Name. -
Select Text as Data Type.
-
Check the checkbox next to Available for input.
-
Click Done.
-
Repeat steps 2-7 for these items:
Org_DomainClient_IdClient_SecretDocument_TypeLLM_ModelContentDocumentIdIDPConfigId
-
Open the toolbox on the top left and click New Resource to create output variables.
-
In the New Resource modal, Select Variable as Resource Type.
-
Enter
Statusas API Name. -
Select Text as Data Type.
-
Select Available for output.
-
Click Done.
-
Repeat steps 2-7 for these items:
ExtractedDataJsonErrorMessage
-
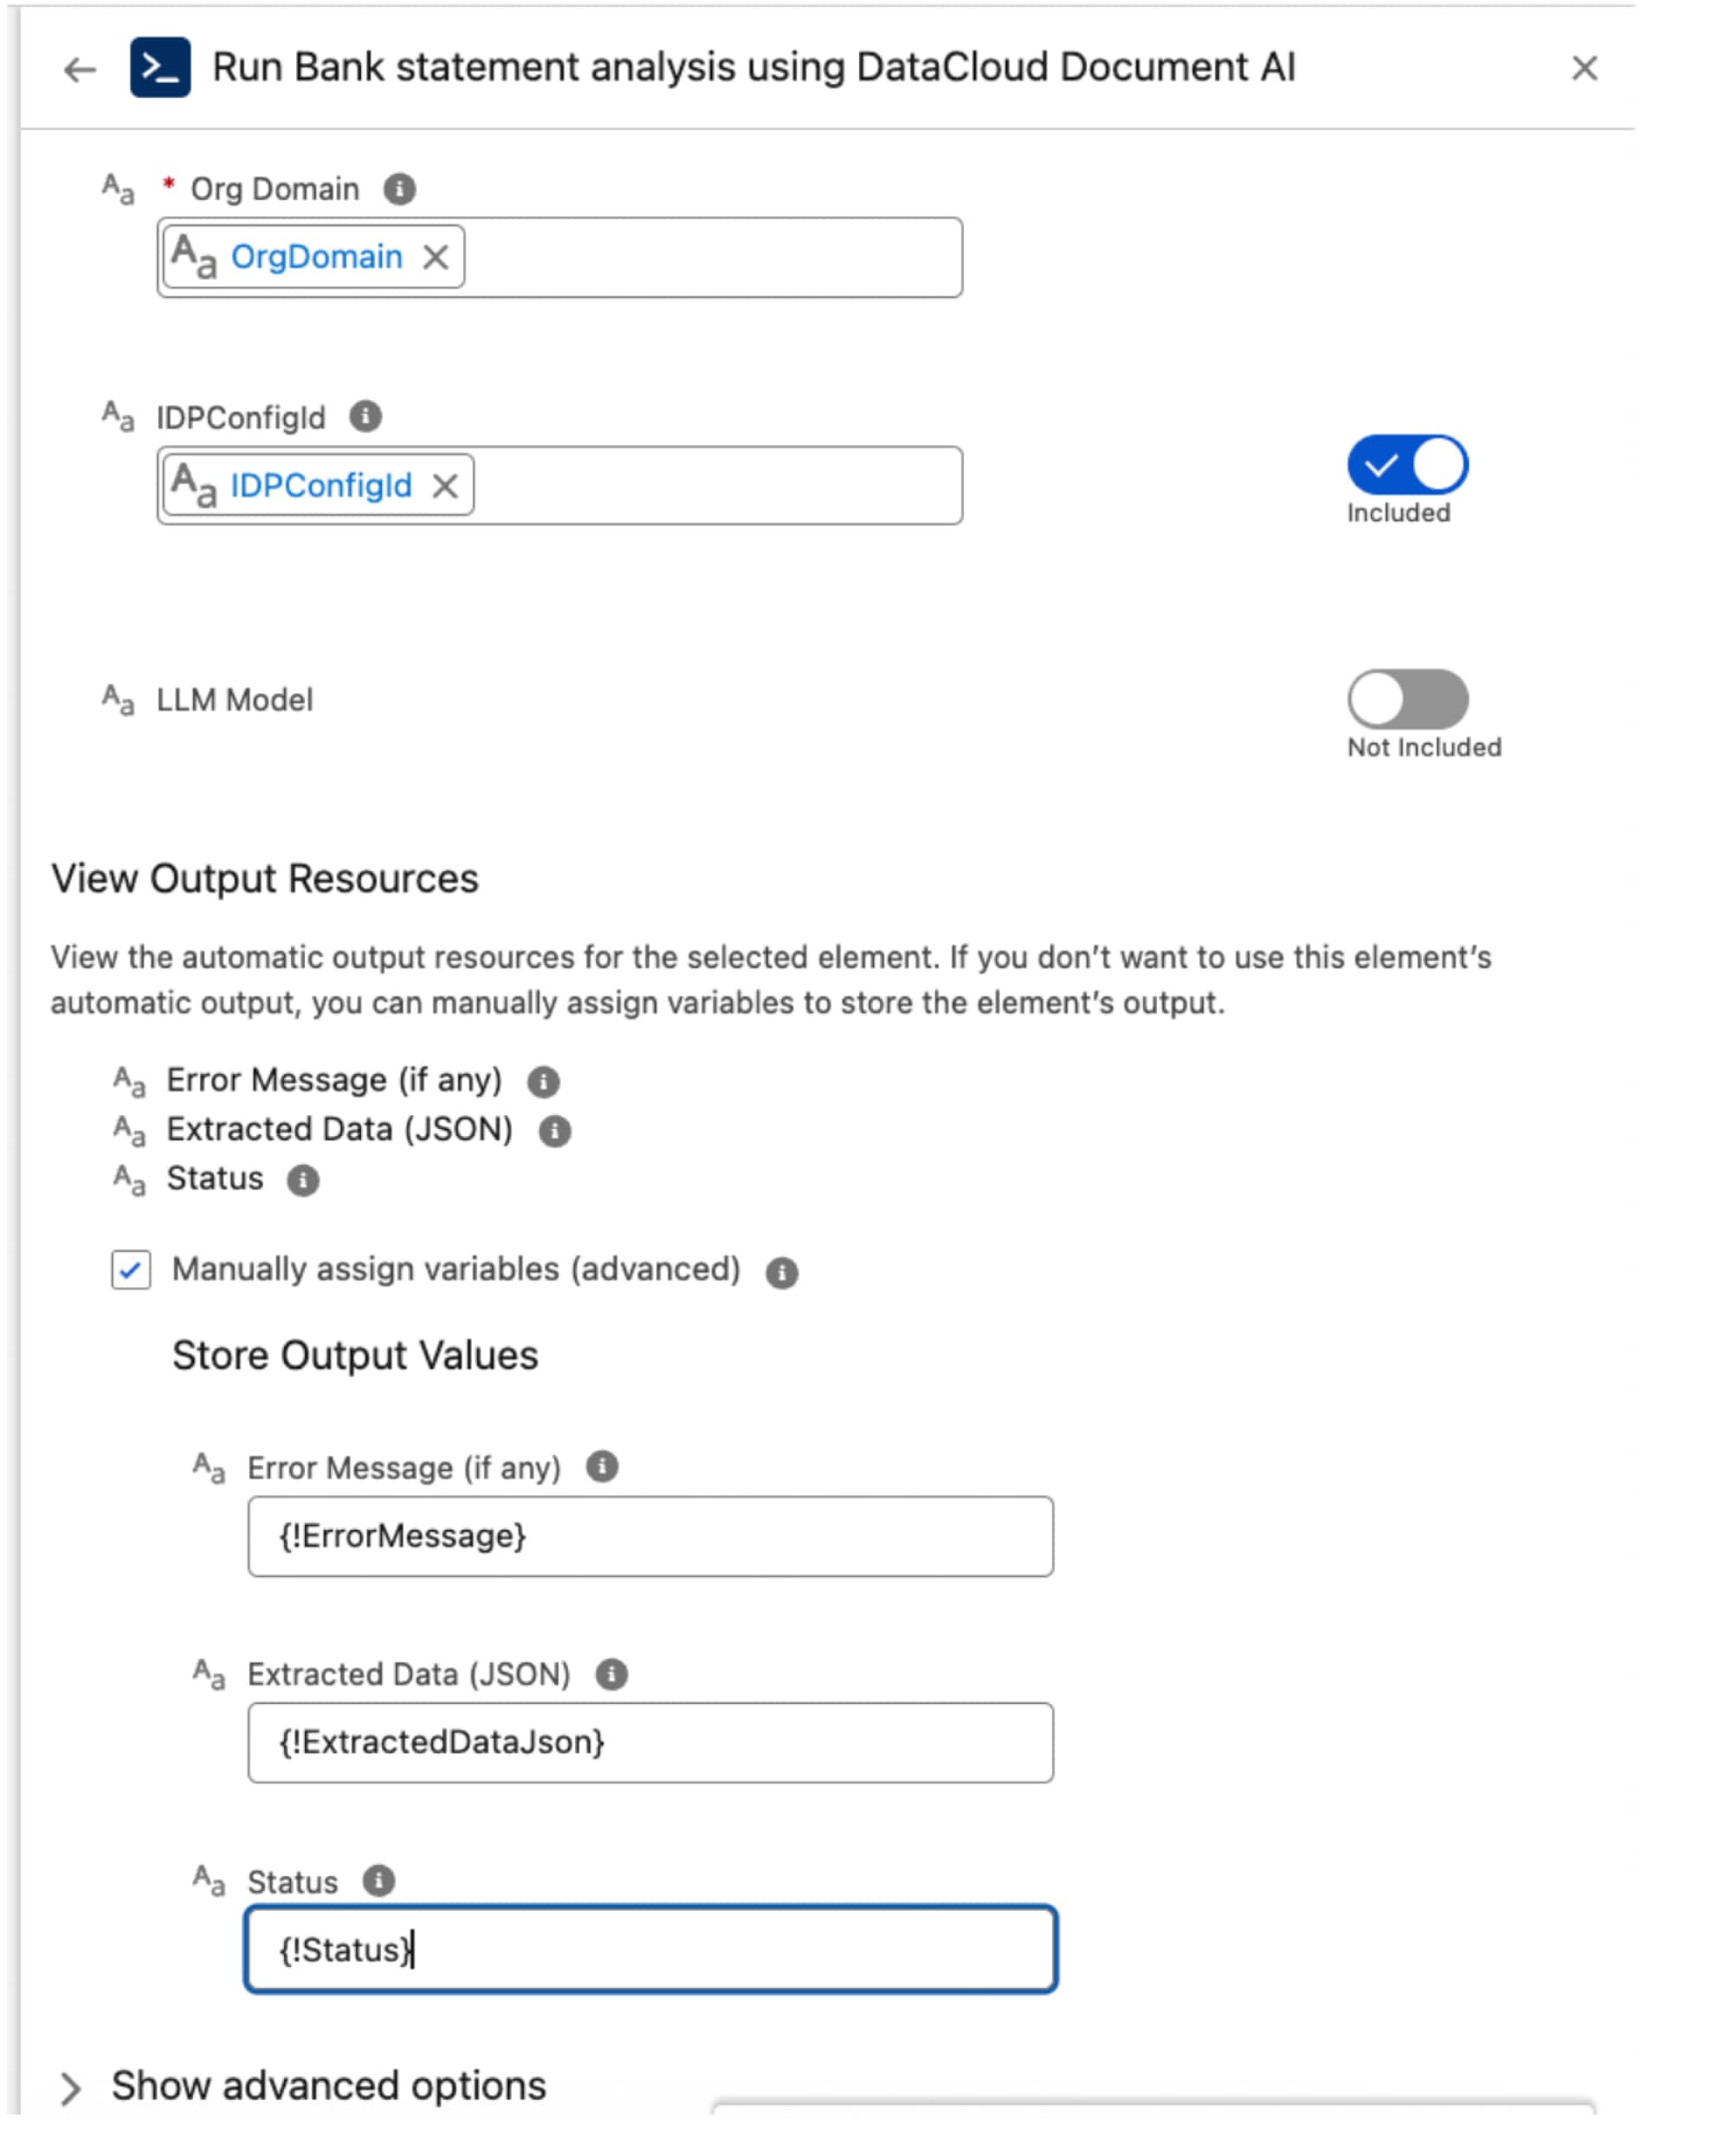
Under Set Input Values on the right, enter these values to map the inputs.
- Org_Domain → {!Org_Domain}
- Client_Id → {!Client_Id}
- Client_Secret → {!Client_Secret}
- Document_Type → {!Document_Type}
- LLM_Model → {!LLM_Model}
- ContentDocumentId → {!ContentDocumentId}
- IDPConfigId → {!IDPConfigId}
-
Under View Output Resources, select Manually assign variables (advanced).
-
Under Store Output Values, enter these values.
- Status → {!Status}
- ExtractedDataJson → {!ExtractedDataJson}
- ErrorMessage → {!ErrorMessage}
- Click the Save button, and save the flow as:
Bank_Statement_Extraction. - On the saving modal, go to Show Advanced. Under How to Run the Flow, select System Context Without Sharing–Access All Data.
- Click Save.
- On the top right, click Activate to activate the flow.
- Step 5 - Create the Loan Prequalification Employee Agent: Build your loan prequalification agent.