Passwordless Login with Email
Use the Shopper Login and API Access Service (SLAS) to send a registered shopper a one-time password (OTP) through email. No third-party integration is required for passwordless login with email.
- Registration: The shopper’s email must be registered with B2C Commerce.
- Volume limits: Sending emails for passwordless login counts towards your overall volume. The monthly quota limit for email mode for each
getPasswordResetToken,authorizePasswordlessCustomer,authorizeWebauthnRegistrationendpoint is 1,000 requests per non-production tenant instance. There’s also a maximum of 6 requests per user for every 10-minute window for theauthorizePasswordlessCustomerandauthorizeWebauthnRegistrationendpoint, and 3 requests per user for every 10-minute window for thegetPasswordResetTokenendpoint. - OTP Expiration: Generating a new OTP immediately invalidates any previously issued OTPs. The shopper must use the most recently generated code for passwordless login.
- DMARC policies: Support is currently limited to email sender domains with relaxed DMARC policies (
p=none).
If you haven’t already created a SLAS private client, follow the instructions in Authorization for Shopper APIs to create one and return to this guide. Only private clients can be used for passwordless login.
To configure a private client for passwordless login, follow these steps in the SLAS Admin UI:
- From the top navigation, click Clients.
- Click the Edit link next to the client ID that you created earlier.
- In the Scopes field, add
sfcc.pwdless_login. - To use 6-digit OTPs, select Six Digit TOTP?. If unselected, the default OTP length is 8 digits. This setting can only be configured for an existing client.

- Save the client.
Use a domain identity to send passwordless login and password reset emails from a delegated subdomain that you own (for example, mail.merchant.com). The delegated subdomain uses DMARC (Domain-based Message Authentication, Reporting, and Conformance) to ensure alignment between the domain your customers see in their inbox and the underlying Sender Policy Framework (SPF) and DomainKeys Identified Mail (DKIM) security checks managed by SLAS.
By handling these technical authentications through your delegated subdomain, SLAS verifies its status as an authorized sender to receiving mail servers. This verification enables the enforcement of a strict security policy, with the policy tag set to reject.
The p=reject DMARC policy tag instructs Internet Service Providers (ISPs) to discard mail from your delegated subdomain that doesn’t authenticate properly. This policy blocks any fraudulent emails attempting to spoof your domain, while allowing your legitimate account-related business communications to reach your customers reliably.
Before you create a domain identity, make sure that you:
- Own the domain or subdomain that you want to use (for example,
mail.example.com). - Have access to your domain registrar’s DNS settings so you can add NS (nameserver) delegation records.
- Have a configured SLAS private client.
- You can create a maximum of 2 domain identities per tenant instance.
- Subdomains must be globally unique across all SLAS tenants. If your desired subdomain is used by another tenant in the same realm, you receive an error.
- Domain identities can be shared across multiple channels within the same client.
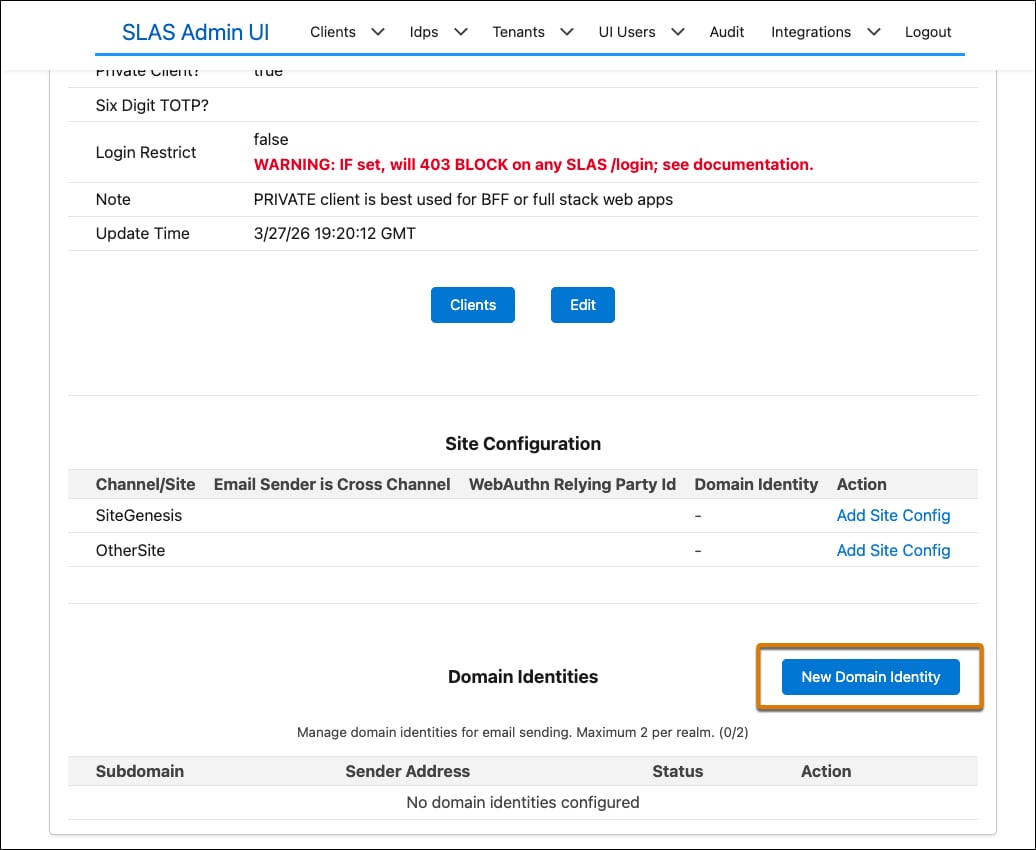
- From the SLAS Admin UI, navigate to your client and click Add Domain Identity.
- In the Subdomain field, enter the subdomain you want SLAS to send emails from (for example,
mail.example.com). - For From Address Prefix, enter the local part of the sender address (for example,
noreply). This value defaults tonoreplyif left blank. The final sender address is\<prefix\>@\<subdomain\>(for example,noreply@mail.example.com).
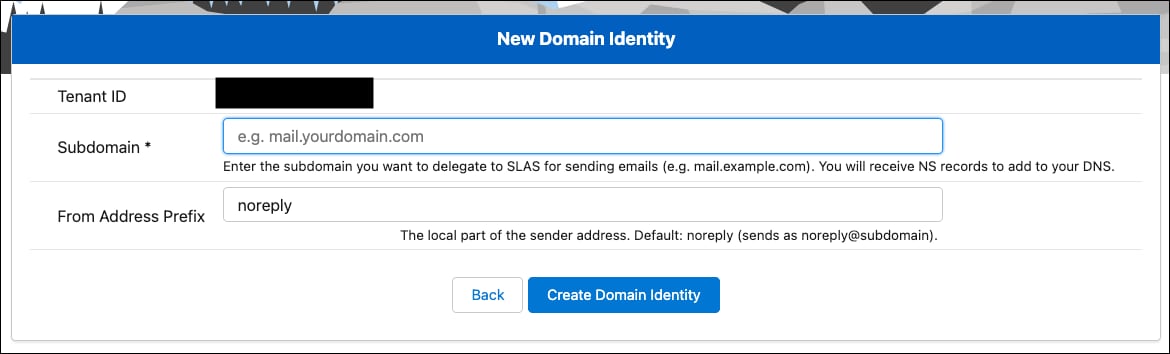
- Click Submit.
The domain identity shows a Pending verification status immediately after creation. Verification is completed after DNS delegation is in place and SLAS has confirmed the DKIM records.
After you create the domain identity, SLAS provides a set of NS (nameserver) records for your subdomain’s hosted zone. Add these NS records to your domain registrar’s DNS configuration as a delegation for the subdomain.
To allow SLAS to manage the technical authentication (DKIM/SPF) for your subdomain, you must delegate authority for that specific subdomain to SLAS. Add four NS (Name Server) records to your parent domain’s DNS zone. This configuration acts as a pointer, telling the internet: “If you are looking for mail.example.com, go ask these servers.”
- NS values: After you create the domain identity, the SLAS Admin UI displays the NS values.
- Where to add: Add these records to your root domain (for example,
example.com), not within a new zone for the subdomain itself. - Record name: The record name/host should be your subdomain (for example,
mail). - Record type: The record type must be NS. Do not use CNAME or A records for delegation.
For example, if your subdomain is mail.example.com, add these NS records to the DNS zone for example.com at your registrar.
After delegation is in place, AWS SES automatically verifies the DKIM CNAME records. This process typically completes within a few minutes to 72 hours depending on DNS propagation.
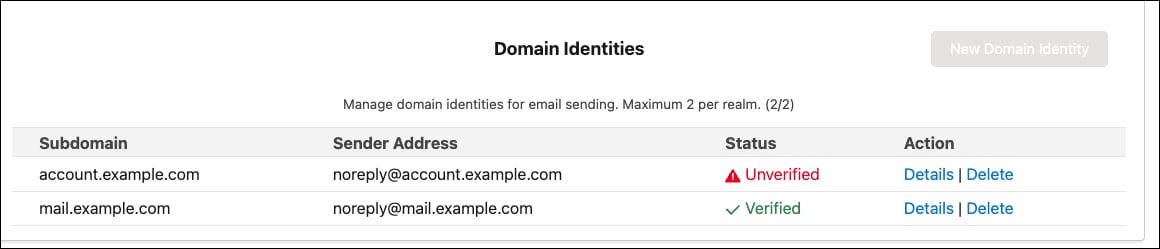
Check the domain identity verification status in the SLAS Admin UI. Each time you view the domain identity detail page, the verification status refreshes.
- A status of Verified means the domain identity is ready to use for sending emails. The DKIM status returned by SES is SUCCESS.
- A status of Pending means DNS propagation is still in progress. Continue checking back until the status changes. No action is required unless 72 hours have passed without verification.
Domain identities are assigned to channels, not directly to clients. This enables multiple channels to either share a single domain identity or use different domain identities.
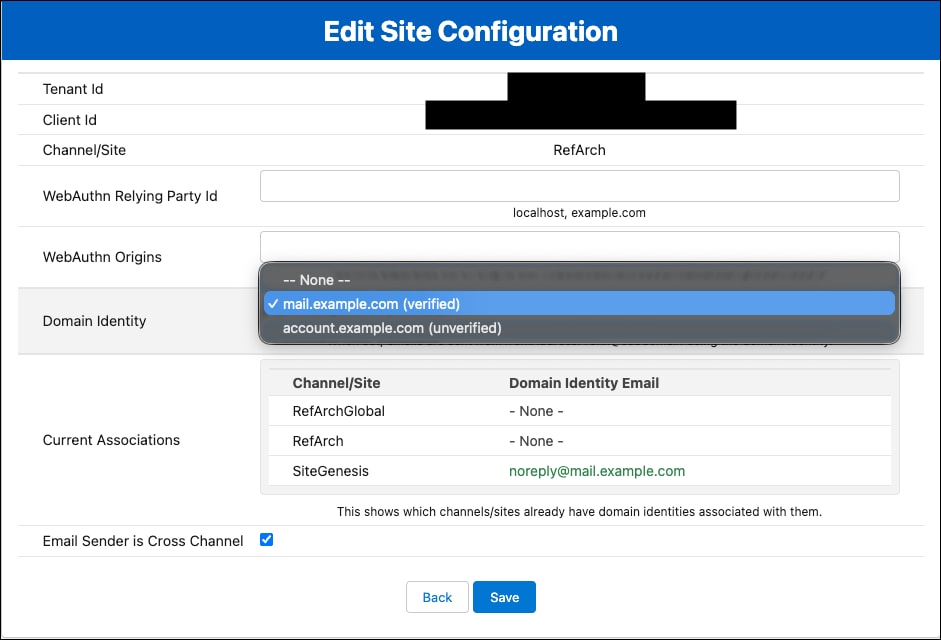
- From the SLAS Admin UI, navigate to your client and click Edit next to the channel you want to configure.
- In the Domain Identity dropdown, select the domain identity you created.
- (Optional) To use this domain identity as a fallback for channels that don’t have a domain identity assigned, select Cross Channel. When a channel has no domain identity configured and a cross-channel is set separately, SLAS falls back to the cross-channel’s domain identity.
- Save the channel.
To view all domain identities associated with your tenant, check the client detail page in the SLAS Admin UI. Click Details to show more information on the domain identity. The domain identity details include:
- Tenant Id: The tenant to which this domain identity belongs
- Subdomain: The registered subdomain (for example,
mail.example.com) - Sender Address: The full From address used in emails (for example,
noreply@mail.example.com) - Verification Status: Specifies whether the domain identity has been verified
- NS Records: The nameserver records required for DNS delegation
Domain identities can’t be edited after creation. To change the subdomain or from-address prefix, delete the existing domain identity and create a new one.
Deleting a domain identity removes the DNS record for the subdomain in SLAS. The four NS records that you pointed to will no longer host your delegated subdomain, so make sure to remove the NS records after domain identity deletion.
If the domain identity is used by any channel, you must remove it from all channels before deletion is allowed.
To delete a domain identity:
- From the SLAS Admin UI, navigate to the domain identity detail page.
- Click Delete.
- A confirmation page lists all channels currently using the domain identity. If any channels are listed, remove the domain identity from those channels first.
- Once no channels are using it, confirm the deletion.
Make a PUT request to the registerPwdlessTemplate endpoint. Set the actionType parameter to PWDLESS_LOGIN and the templateType parameter to EMAIL. In the link parameter, use ${token}, ${name}, and ${user_id} substitutions. In the template parameter, use the above and the ${link} substitution.
Emails with OTP that use the SLAS APIs for authorizePasswordlessCustomer will use these templates to send emails to shoppers. To send emails for the authorizeWebauthnRegistration endpoint, configure an additional email template with actionType as WEBAUTHN_AUTHORIZE_USER.
Here’s an example request body for creating a password login email template:
Finally, set the mode in the body of the request to email when using passwordless login or password reset to consume the out-of-the-box email OTP feature.
Example:
If a shopper reports that an email wasn’t received, Log Center can provide insights into what happened.
- General Search: Query for “Email send from SLAS encountered an issue” in Log Center for your tenant ID. Make sure that the time period includes the estimated email send time.
- Shopper-Specific Search: To look for a specific log event related to a shopper, use one of these options:
- Masked Email Address: Query for the masked shopper email address, of which a queryable form is usually the first three letters and an asterisk (for example, johndoe@gmail.com → query for
joh*) or the first letter and an asterisk (for example, joe@gmail.com → query forj*). - Correlation ID: If you’ve logged the correlation-Id when calling passwordless login for the shopper, directly search for the correlation ID in Log Center.
- Masked Email Address: Query for the masked shopper email address, of which a queryable form is usually the first three letters and an asterisk (for example, johndoe@gmail.com → query for
After finding the log event, examine the Type field to determine the issue:
| Type | Description | Diagnostic Information |
|---|---|---|
| Complaint | The email successfully reached the recipient’s mail server, but the recipient marked the message as spam. | ComplaintFeedbackType gives feedback provided by the ISP. |
| Reject | Email wasn’t attempted to be delivered, typically because a virus was detected. | The reason field can provide more detail for the flag. |
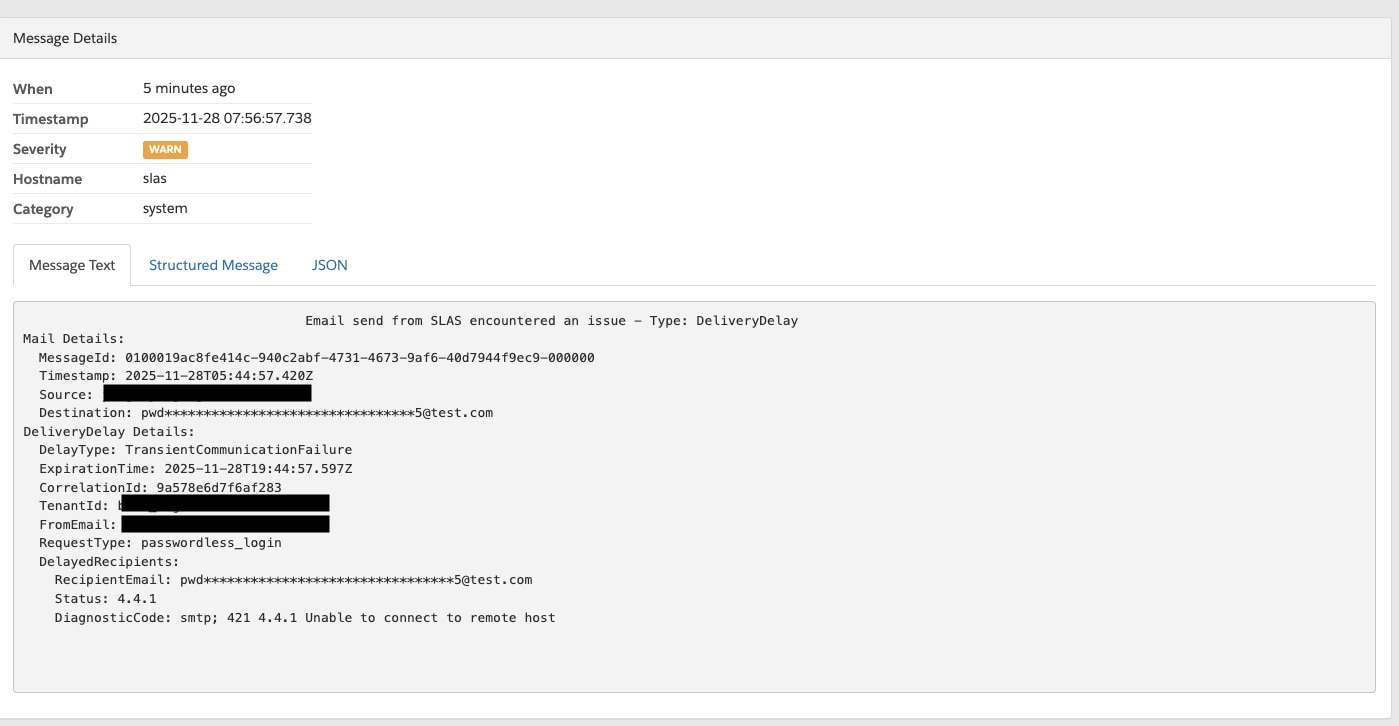
| DeliveryDelay | The email couldn’t be immediately handed off to the recipient’s mail server due to a temporary problem (for example., the recipient’s inbox was full or the receiving server had a transient issue). | DiagnosticCode field provides more specific information if it exists. |
| Bounce | The email was permanently rejected (a hard bounce), typically meaning the mailbox address doesn’t exist. (Soft bounces are included when delivery attempts stop.) | DiagnosticCode field provides more specific information if it exists. |
Here’s an example of a DeliveryDelay event in Log Center.