Preview Your Storefront in Business Manager with Shopper Context
Preview your storefront to verify how it looks based on shopper context including customer groups, date and time, source code triggers, and qualifiers. Use it to test changes to products, pricing, and marketing strategies in a staging environment before deploying to production so that your site displays correctly for specific scenarios like upcoming sales or seasonal campaigns.
- Create a storefront in Business Manager. See Quick Start: Create Storefront Next. For existing storefronts created outside of Business Manager via the CLI or the MRT API, connect them to Business Manager. See Connect an Existing Storefront to B2C Commerce.
- Make sure that shopper context is enabled. For storefronts created in Business Manager, shopper context is enabled. For other storefronts, enable shopper context. In Business Manager, select Administration > Global Preferences > Feature Switches, and select Enable Shopper Context. For more information, see Shopper Context.
- Enable shopper context qualifiers in the Shopper Context API:
effectiveDateTime,customerGroupIds,clientIp, andgeoLocationqualifiers. See Qualifier Support in the Shopper Context documentation. - Set up your site based on the functionality you want to validate in Storefront Preview. Examples:
- Set up custom qualifiers and customer group IDs using customer groups in Business Manager to apply rules for personalized pricing, products, or promotions.
- To see a personalized shopper experience, set up source code that calls the Shopper Context endpoints. This is required because Storefront Preview uses context information for personalization.
- Set up the pricing that you want to offer on a particular date. That way your specified pricing appears when you select that date in Storefront Preview. See Personalized Promotions, Shipping, and Payment Methods.
- Data and experiences shown in Storefront Preview don’t necessarily reflect the shopper experience. Shopper personalization uses the shopper context integration in Storefront Next, which wraps the Shopper Context API. Learn more about Shopper Context.
To use Storefront Preview:
-
In Business Manager, click App Launcher
 and then select Merchant Tools, select the site associated with your storefront, and then click Preview.
The storefront page opens in a new tab.
-
To view the storefront based on various settings, click the preview button on the banner of the preview site.
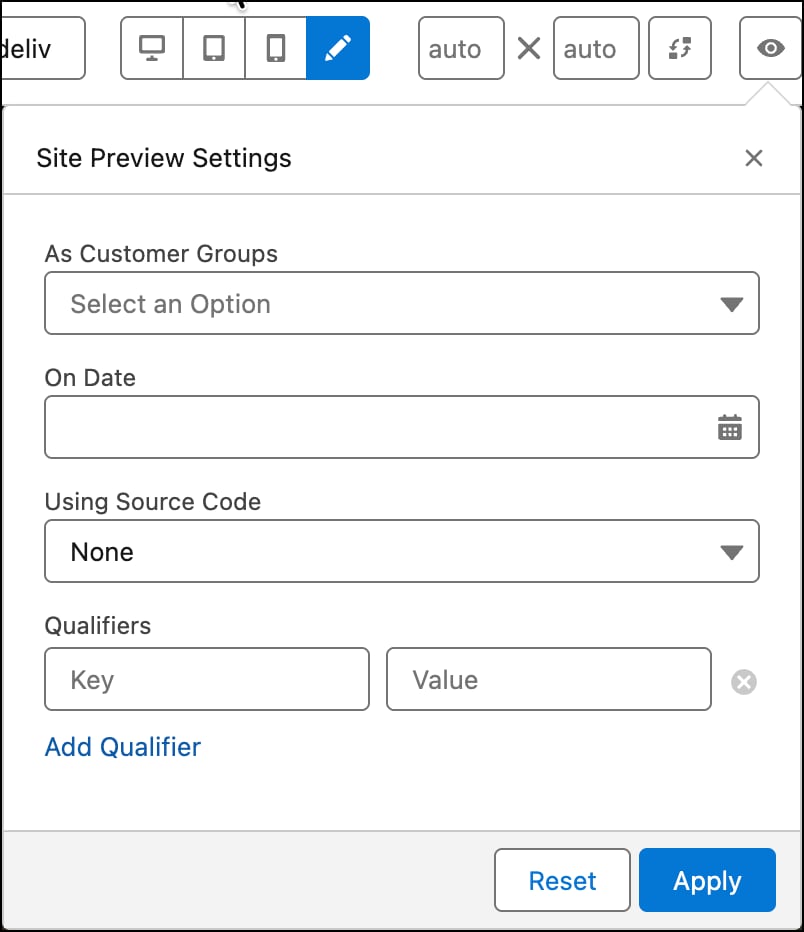
Enter preview settings for the site. All the preview settings are optional.
a. To view the site for a specific customer group, select a customer group from the picklist.
b. To see how the site looks on a specific date and time, select the effective date and time using the date picker in
On Date. The date and time displayed is based on your computer’s time zone and then converted to UTC time before sending the request that sets the context. If you don’t specify a date and time, the preview reflects the current date and time.c. To trigger the promotion or campaign assignment and price books, which are assigned to a source code group, select the triggering source code from the picklist.
d. To view the personalized prices, products, or promotions set up in Business Manager, enter the custom qualifiers as key and value pairs. The custom qualifier keys must be unique. You can define up to 20 custom qualifiers.
-
Click Apply.
You can now view the storefront using the context you want to preview. Interact with the storefront to verify the applied context. For example, select a particular size for a product to see any available discounted price.