Writing UI Automation Tests for POS
This article outlines the guidelines for customers interested in crafting their own automation test scripts to streamline testing scenarios. Our aim is to maintain a consistent approach to accessibility identifiers within the app for similar widgets.
To successfully execute UI Automation scripts with any chosen tool, the following prerequisites must be met:
- Acquisition of the IPA from the AppStore or install build from Testflight
- POS app version 9.8.1 or greater to ensure all UI elements within the POS app can be accurately identified.
- Bundle Id to use for the Testflight app: com.psstore.beta.ios
Point of Sale has certified the following tools for UI automation:
XCUITests
This is the tool used by the Point of Sale dev team for UI automation testing.
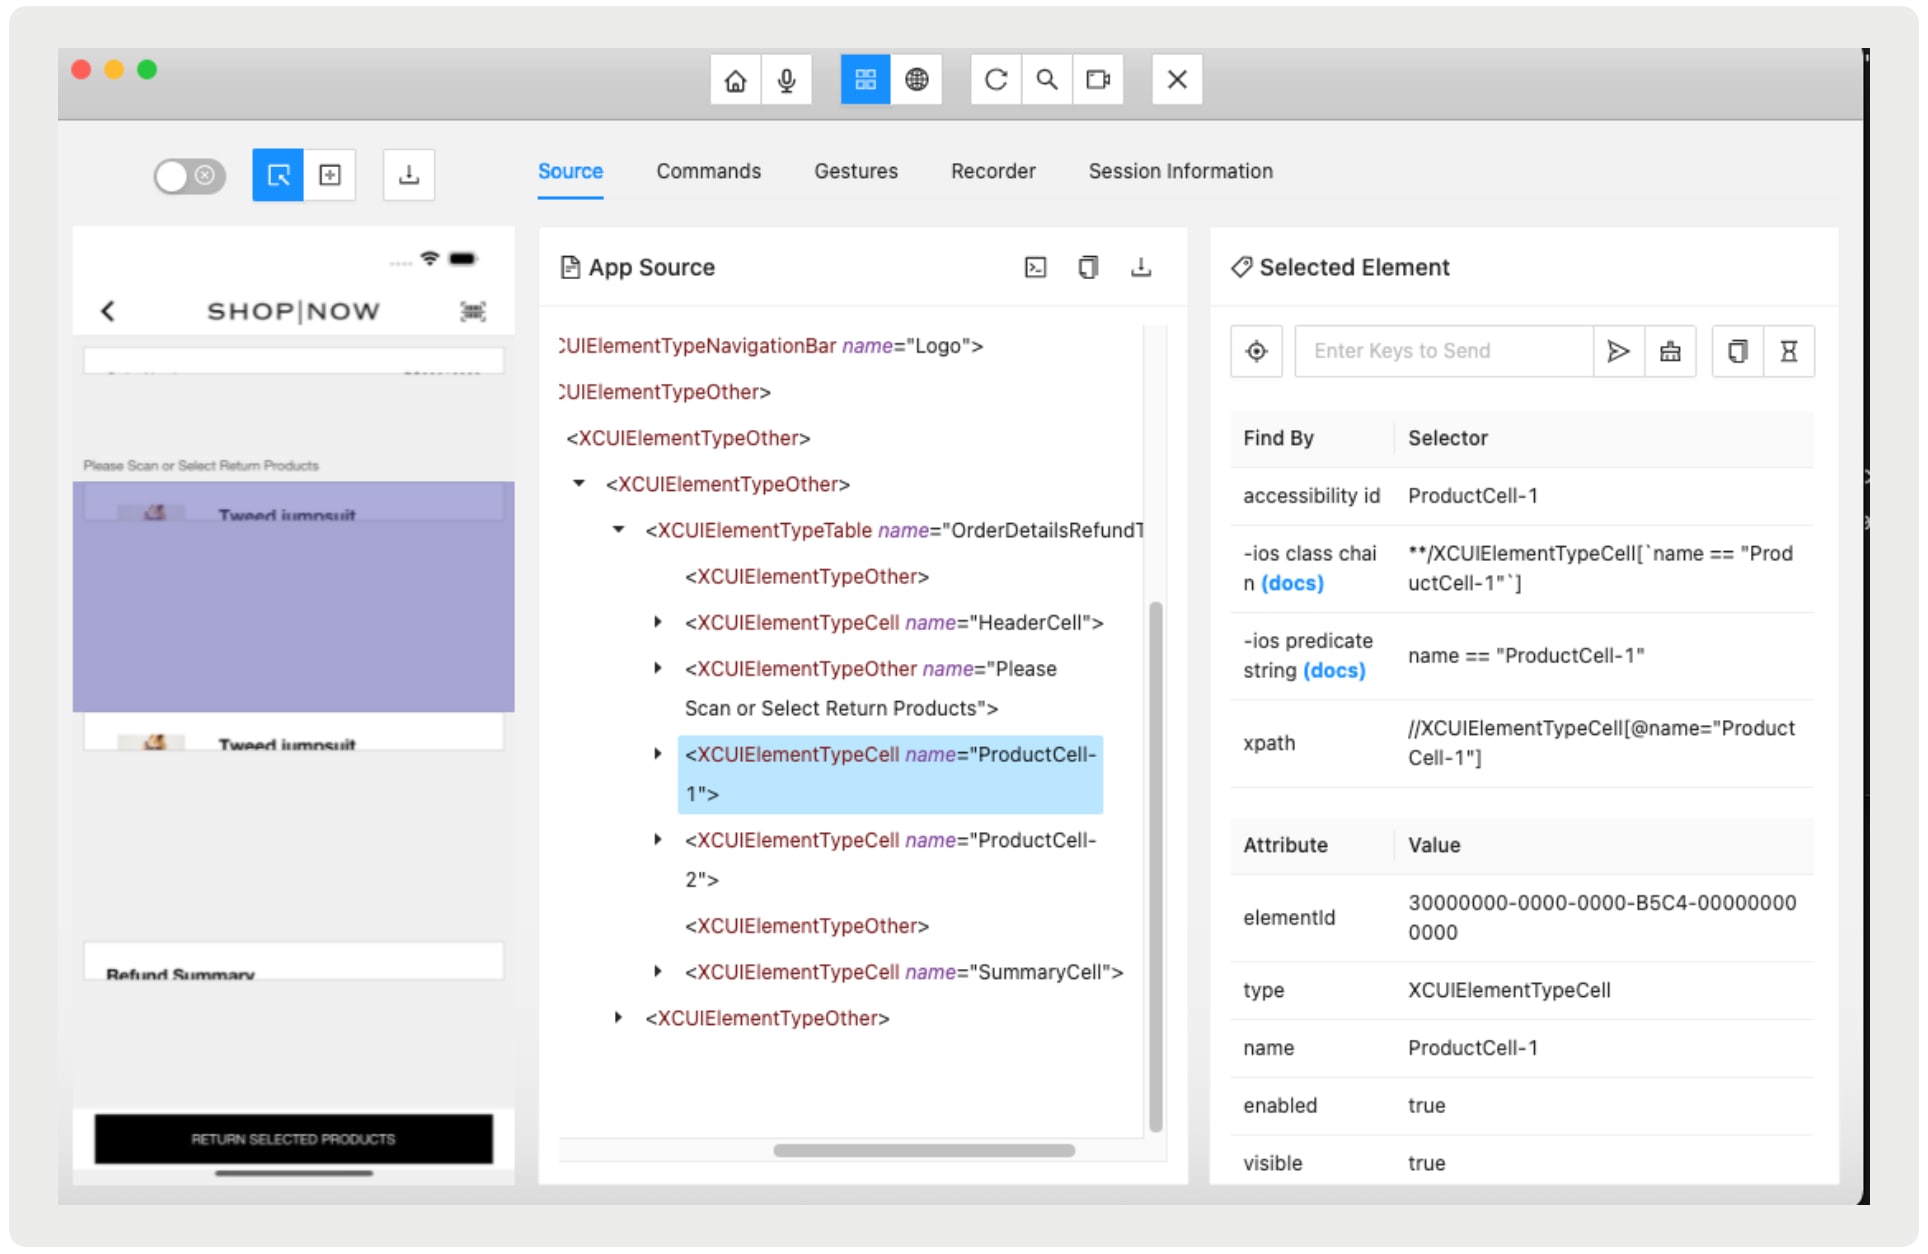
Highlighted for its ability to efficiently recognize and interact with the App UI Elements, as demonstrated by the below Appium Inspector screenshots.
Detailed Setup Instructions here
The POS app cannot be bootstrapped on a Simulator as you require camera to scan the activation QR Code for your merchant.
The POS app UI is crafted from two main sources: layouts generated from CMS and native screens directly implemented within the app. Both avenues employ UI elements. This section details the UI elements from these distinct sources, focusing on their identification for UI automation purposes.
Each UI element is assigned a unique identifier, facilitating their identification and interaction during automation processes.
To distinguish these elements effectively, they are tagged with accessibility identifiers. We employ specific strategies to determine these identifiers; expect this list of strategies to expand as our team further optimizes the accessibility identifier heuristics.
This section discusses the native UI screens. UI elements found here are also present in the Layout UI, though it’s important to note that Layout UI elements feature dynamic accessibility identifiers. More details on this are provided in the Layout Elements section.
| Element | Identifier Pattern | Example |
|---|---|---|
| UIBarButtonItem | HomeBarButton, ToggleCameraBarButton | |
| UISwitch | BillingSameAsShippingSwitch, SaveToProfileSwitch | |
| UIButton | SelectButton, EditCustomProductButton | |
| UITableViewCell | For list of cells: | AlterationOptionsCell-1, OrderEntityCell-1 |
| For individual cells or headers: | SummaryCell, TransferDestinationCell | |
| UITextField | ActualCashInDrawerField, CouponCodeField | |
| UITextView | AssociateDetailsView, -AdditionalFeedbackMessageView | |
| UISegmentedControl | FulfillmentTypeControl, StoreAnalyticsTimePeriodControl | |
| UIPickerView | AnalyticsTimePeriodPicker, PaymentMethodPicker | |
| UIDatePicker | StoreAnalyticsDatePicker, GenericDatePicker | |
| UIPageControl | LaunchImagesPageControl, ProductImagesPageControl | |
| UIActivityIndicatorView | FetchOrderHistoryActivityIndicator, CheckPSBackendConnectivityActivityIndicator | |
| UISearchBar | LayoutSearchBar, StoreSearchBar |
| Element | Identifier Pattern | Example (9.8.1 and onwards) | Example (prior to 9.8.1) |
|---|---|---|---|
| Layout Cells (these are views in landing screens of tabs that are used to navigate to other functionality in the app like tills, search, clienteling, etc.) | 1. ProductSearchCell 2. CustomerSearchCell 3. ExpressCheckoutCell 4. CashPickupCell 5. VendorReturnCell | 1. productSearch/listStyle=grid&preselectedVariantOptions=Color&productQuery=%2A&showControls=true&sort= 2. storeCRM 3. scanToCart 4. currentDrawer/pickup 5. vendorReturn/vendorreturn | |
| Layout Cells (that point to other layouts) | LayoutCell- Note: Function is derived from the Alt Text for ADA defined in the CMS for this layout. Since a layout can be a hosting view for any functionality, these have to be derived from CMS configs and are bound to change if updated on CMS. | 1. LayoutCell-StyleQuiz 2. LayoutCell-BOPISBOFISOrders | 1. Style Quiz 2. BOPIS & BOFIS Orders |
| Layout-Driven Text Fields / Pickers | Note: These are generated from CMS and the app makes a best attempt to keep this consistent with similar fields throughout the app. However, if configured with a custom field, we will add it to the accessibilityId. | 1. UsernameField 2. PasswordField 3. FirstNameField 4. FirstNameField | 1. UseridField 2. PasswordField 3. FirstnameField 4. Profile.FirstnameField |
| Layout Drive Text Fields (multiline) | NotesView | Order.NotesView | |
| Layout Driven Buttons | Note: This is the button action defined in CMS. If Button Action is missing, we will derive this from the deep link configured for the button. | 1. SignUpButton 2. SkipcustomerloginButton 3. PrintReceiptButton | 1. SignupButton 2. SkipcustomerloginButton 3. NoneButton |
| Layout Driven Checkboxes | 1. CheckButton 2. CheckButton 3. isPickupForAllItems | 1. NewslettersignupToggle 2. TermsToggle 3. IspickupforallitemsToggle | |
| Hamburger Menu Items | 1. AdvancedCartOptions 2. SuspendedCarts 3. SuspendedCarts-Customer-Current 4. QuoteLookup 5. QuoteLookup-Customer-Current 6. StoreSearch 7. SwitchCardReader 8. More 9. Drawers | 1. advancedCartOptions 2. storeSavedCarts 3. storeSavedCarts 4. quoteLookup 5. quoteLookup 6. storeSearch 7. switchCardReader 8. unknown (a submenu for more items) 9. unknown (a submenu for drawer stuff) |
In the POS app, there are various types of views, ranging from complex groupings like cart product lists to simpler lists, such as customer views. For these situations, top-level elements are indexed for easy access, for example, InStoreCartProductCell-1 or SelectAddressButton1.
To interact with specific elements within these groups, such as a delete product button, you should reference the primary grouped view and then locate the desired element. It’s not necessary to append an index prefix to every element within a group.
The example below adjusts the quantity of the second item in a cart and validates the change:
The above test case is written using XCUITest framework in Swift language.
The POS app displays a spinner on the UI during network calls, which disappears once the call is complete. Test cases account for this by pausing until the spinner vanishes, ensuring the network activity has concluded. This behavior is demonstrated in the provided example.
We cannot simulate hardware peripherals like card reader or printer to test the full functionality.
Cash Drawer - Set the test register Cash Drawer Mode to External if you don’t want the register to wait for a physical drawer to be opened.
Hardware Scanner - We recommend using the Camera Scanner for automation. Work with your testing tool to see if they support simulating barcode scans.
This section covers the essential aspects of creating and structuring UI automation tests for the POS app. It includes guidance on identifying UI elements, structuring test cases, and implementing best practices to ensure reliable and maintainable automation scripts.
The initial phase of writing UI automation involves identifying the specific UI screen and cataloging all its UI elements. With these elements identified, scripts can then be developed to interact with and manipulate the UI elements within that screen.
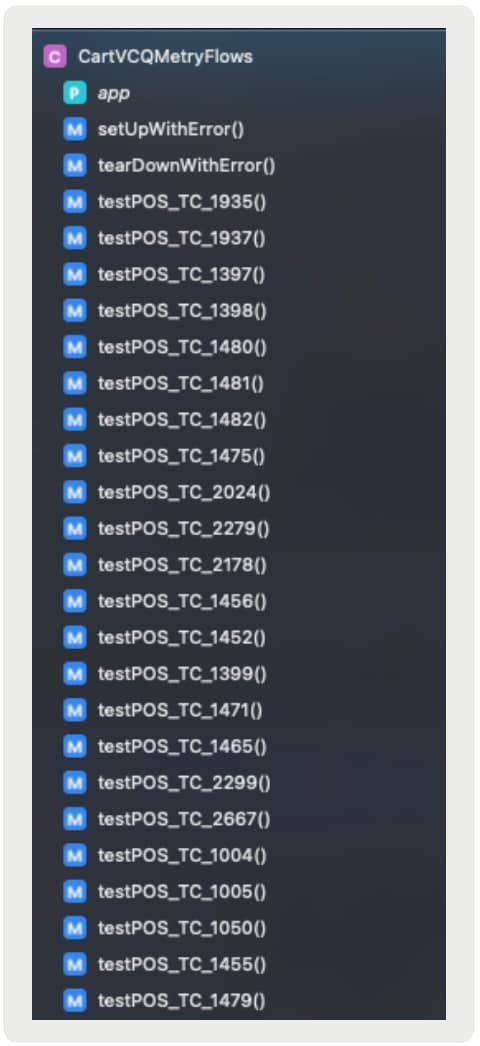
Leverage a Test Management Tool to systematically create a test case for each unique ID in your suite. This approach facilitates the alignment and comparison of results with your existing test cases. Below is an example illustrating how we structured our test cases for scenarios involving cart screen interactions.
- Device Preparation: Install the TestFlight app on your iOS device and enable it for your merchant account prior to testing. This eliminates the need for environment setup through test scripts. NOTE: If your automation tool is capable of scanning codes via device camera, you can indeed automate the bootstrapping and environment setup process.
- App Environment: Make sure to switch to staging environment and have this register created in our CMS before executing your tests. This should be a one time step. NOTE: If you are okay executing tests in production, this step is optional. This is left to the customer’s choice
- Till Management: Reconcile the previous day’s transactions and set up a new till early to prevent unexpected alert prompts during testing. This should be done daily or you can write scripts to do this first thing every day.
- Minimize Coordinate Usage: Avoid excessive reliance on coordinates for interacting with elements, as this practice can result in fragile tests.
- Issue Reporting: Immediately report any problems with element detection or inconsistency to the Point of Sale team for resolution.