Appium Setup for POS UI Automation Testing
Set up Appium and automate an app on a physical iPad using its bundle ID.
This section provides a comprehensive setup guide for configuring Appium to work with your iPad for POS UI automation testing. The setup process involves installing necessary tools, configuring Xcode, setting up WebDriverAgent, and configuring Appium Inspector. Follow each step carefully to make sure the setup is successful.
Before setting up Xcode and WebDriverAgent, install required command-line tools and dependencies. These tools provide the foundation for iOS automation testing and ensure compatibility between your development environment and iOS devices.
Xcode is essential for iOS development and automation. It provides the necessary tools, simulators, and device management capabilities required to work with iOS devices and WebDriverAgent.
- Open the Mac App Store.
- Search for “Xcode” and install it if not already installed.
- Open Xcode from the Applications folder.
- Go to Window > Devices and Simulators.
- Make sure your iPad appears under the Devices tab.
- On your iPad, go to Settings > Privacy & Security.
- Scroll down and select Developer Mode.
- Turn on Developer Mode and allow your iPad to restart.
- Open Xcode on your Mac.
- Go to Window > Devices and Simulators.
- Select your iPad from the list of connected devices.
- Copy the UDID displayed for your iPad.
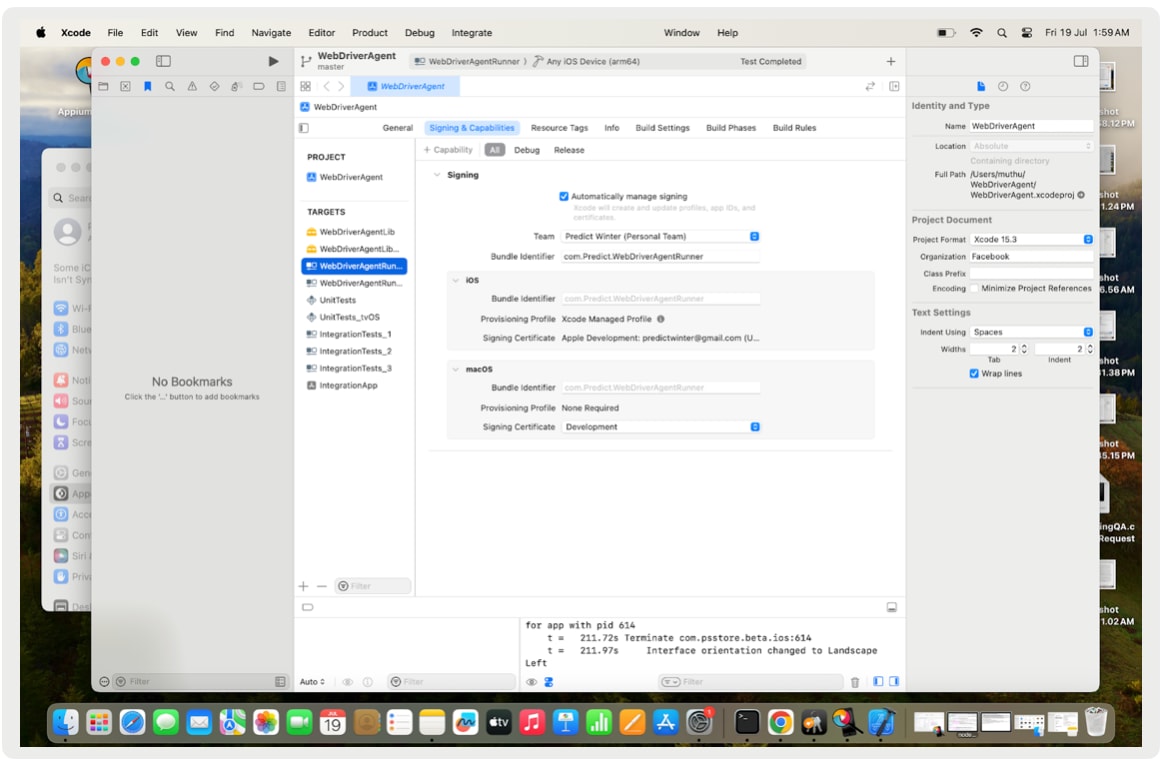
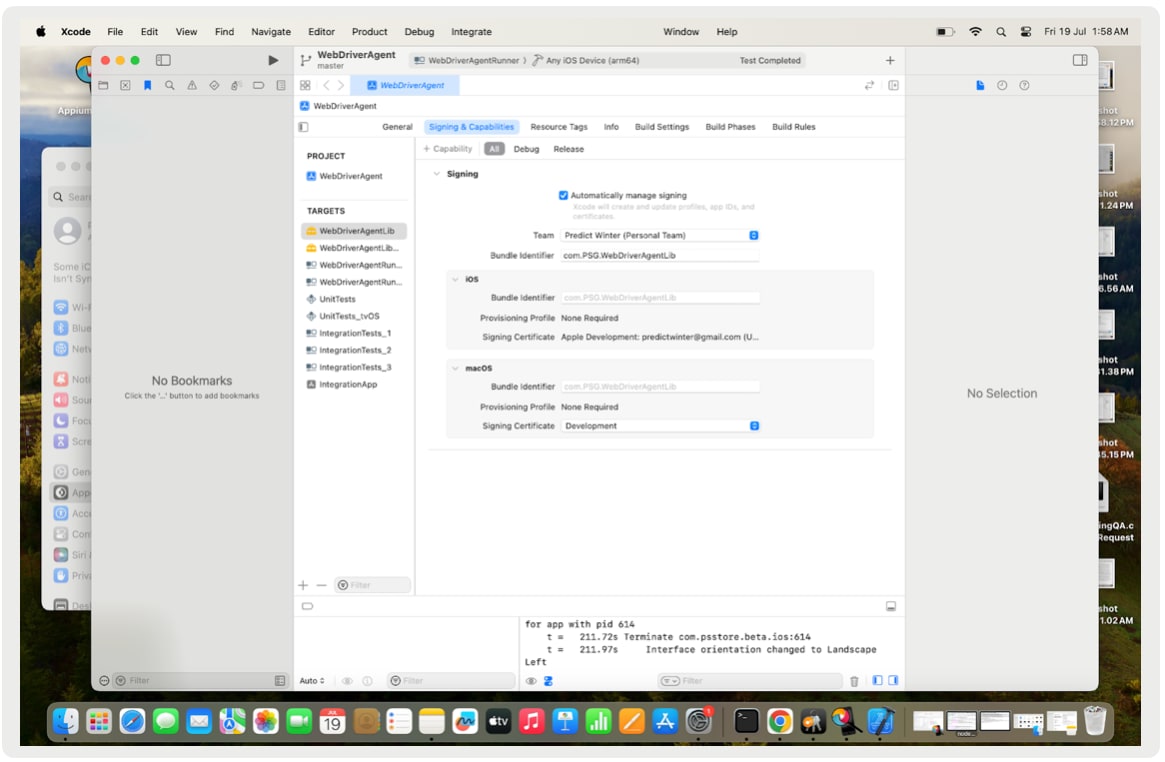
- In Xcode, select the WebDriverAgentLib target.
- Go to Signing & Capabilities.
- Select your development team from the drop-down list.
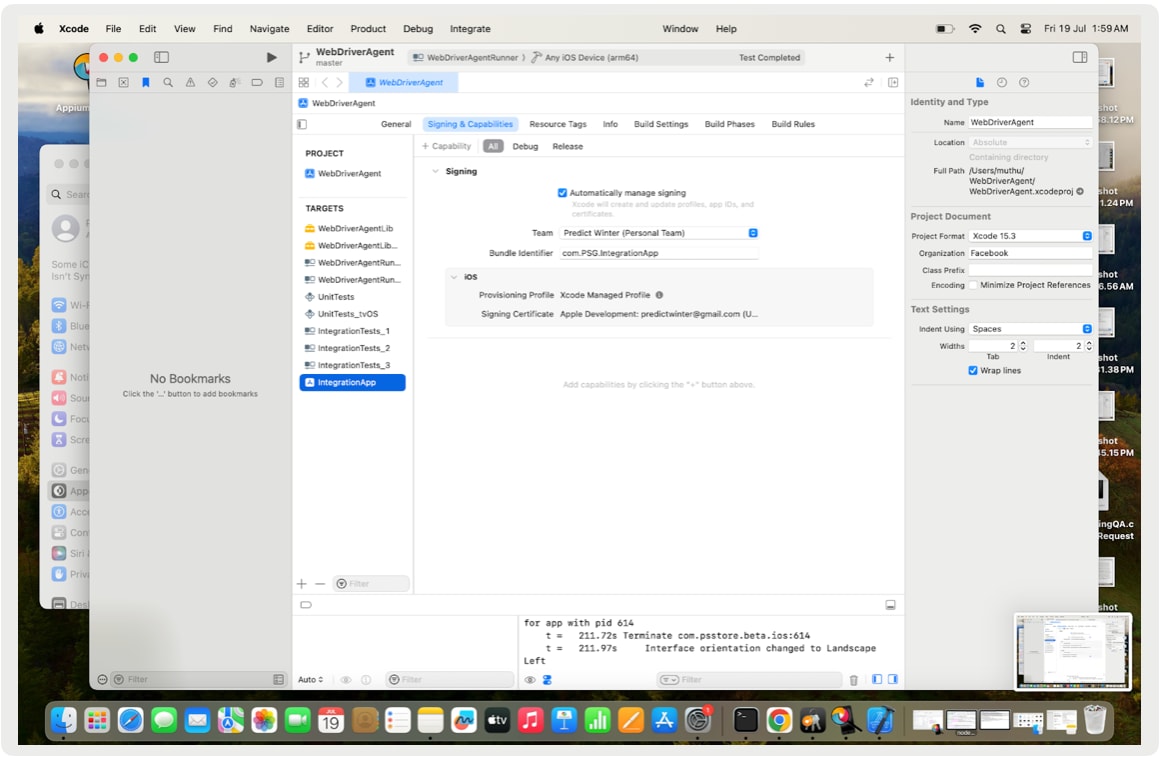
- Repeat steps 1-3 for the WebDriverAgentRunner and IntegrationApp targets.
- Select your connected iPad as the target device in Xcode.
- Choose the WebDriverAgentRunner scheme.
- Press
Cmd + Rto build and run WebDriverAgent on your iPad.
If the build-and-run process is not successful, try the following:
- Install the IntegrationApp by selecting it as the scheme and pressing
Cmd + R. - Execute a test of the WebDriverAgentRunner by selecting it as the scheme and pressing
Cmd + U.
After the test is triggered, access the WebDriverAgent at the following URL:
- Open a terminal window.
- Run the following command:
- Go to the official Appium releases page.
- Download and install the latest version of Appium Inspector for your operating system.
-
Open Appium Inspector.
-
Configure the following settings:
- Remote Host:
localhost(use your device IP if necessary) - Remote Port:
4723 - Remote Path:
/
- Remote Host:
-
Add the following desired capabilities:
- platformName:
iOS - platformVersion: (Your iPad’s iOS version, for example,
14.0) - deviceName: (Your iPad’s name, for example,
iPad) - automationName:
XCUITest - udid: (Your iPad’s UDID)
- app: (The bundle ID of the app you want to automate)
- platformName:
- Open Appium Inspector.
- Click on the Start Session button.
- The app specified by the
bundleIdshould launch on the iPad. - You should be able to inspect and interact with the app elements.
Here is an example of how the desired capabilities configuration should look in Appium Inspector:
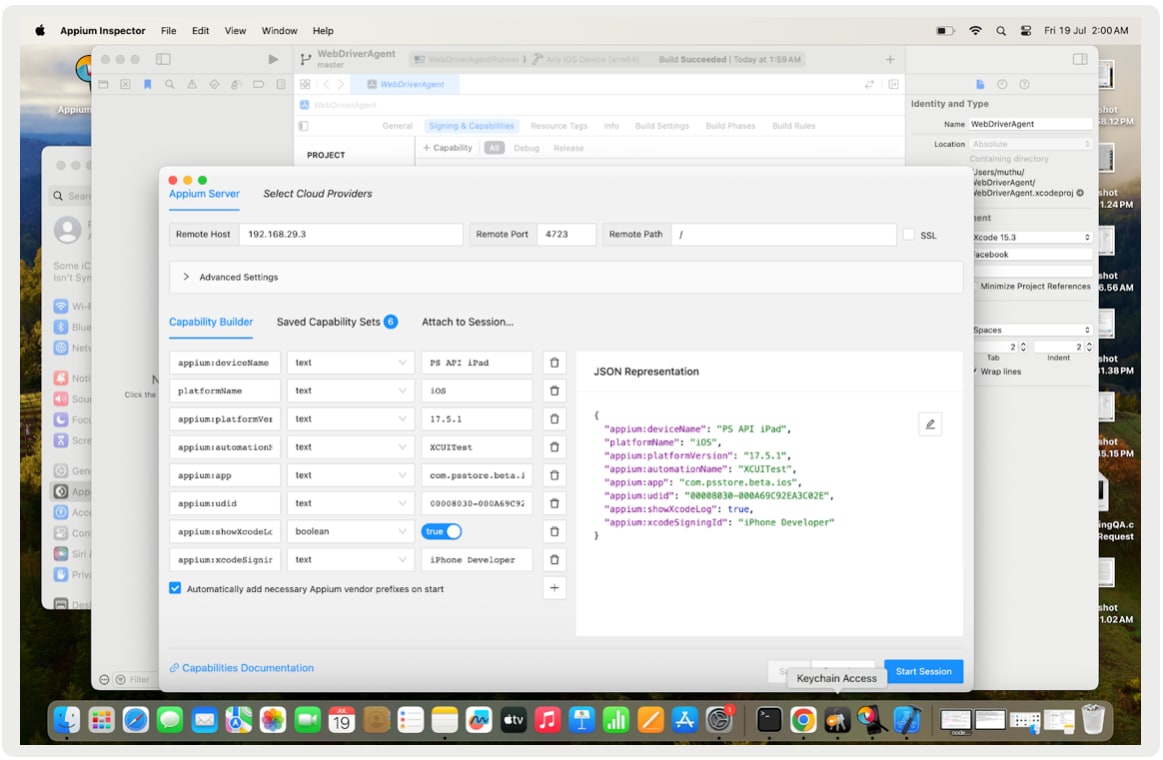
Replace the placeholders with the actual values specific to your setup.