Set Up Your Development Environment for Agentforce DX
Setting up your Agentforce DX environment is similar to setting up your Salesforce DX environment with some additional agent-specific tasks. If you’re a Salesforce pro-code developer, you’ve likely completed most of these tasks or are familiar with them.
The basic pro-code tools for creating and testing agents are Visual Studio Code (VS Code) and Salesforce CLI. VS Code is an integrated development environment (IDE) that includes a code editor, build automation tools, a debugger, and intelligent code completion. Salesforce CLI is a command-line interface that contains commands that you run from a terminal, such as the integrated terminal in VS Code.
You extend and customize VS Code by installing extensions. These extensions enhance your development workflow by adding languages, debuggers, and tools. Salesforce provides the Salesforce Extension Pack, a curated bundle of related extensions that are installed together. The Salesforce Extension Pack includes all the extensions you need for coding an agent:
The Salesforce Extension Pack also includes standard tools for developing on the Salesforce Platform. Use these tools to work with development orgs (scratch orgs, sandboxes, and Developer Edition orgs), Lightning Web Components, and SOQL.
Salesforce CLI contains equivalent commands for building agents, grouped under the agent topic, as well as other commands to develop on the Salesforce Platform. CLI commands are useful in a continuous integration (CI) environment.
To accelerate your development with AI assistance, the Salesforce Extension Pack also includes the Agentforce Vibes extension, a suite of agentic AI tools designed to help you develop Salesforce apps using secure AI models. Agentforce Vibes generates code from natural language prompts and automatically suggests code completions for you as you type.
A note about the two Agentforce Vibes products and how they work:
- Agentforce Vibes Extension (formerly Agentforce for Developers), as we’ve already mentioned, is a suite of agentic AI tools designed to vibe code Salesforce apps. It’s a standard VS Code extension that’s included in the Salesforce Extension Pack.
- Agentforce Vibes IDE (formerly Code Builder) is a web-based version of VS Code that you can use when you want to run VS Code inside a web browser. Agentforce Vibes IDE is pre-installed with the Salesforce Extension Pack and Salesforce CLI, so it’s all ready for you to start building agents. To set up Agentforce Vibes IDE, see Set Up Agentforce Vibes IDE.
The rest of this section assumes you’re installing VS Code and Salesforce CLI locally on your computer.
-
Install the Salesforce Extension Pack for VS Code from the VS Code Marketplace.
If you prefer to use open-source registries, install the extension pack from the Open VSX Registry.
-
Install Salesforce CLI on your computer.
-
Open VS Code.
-
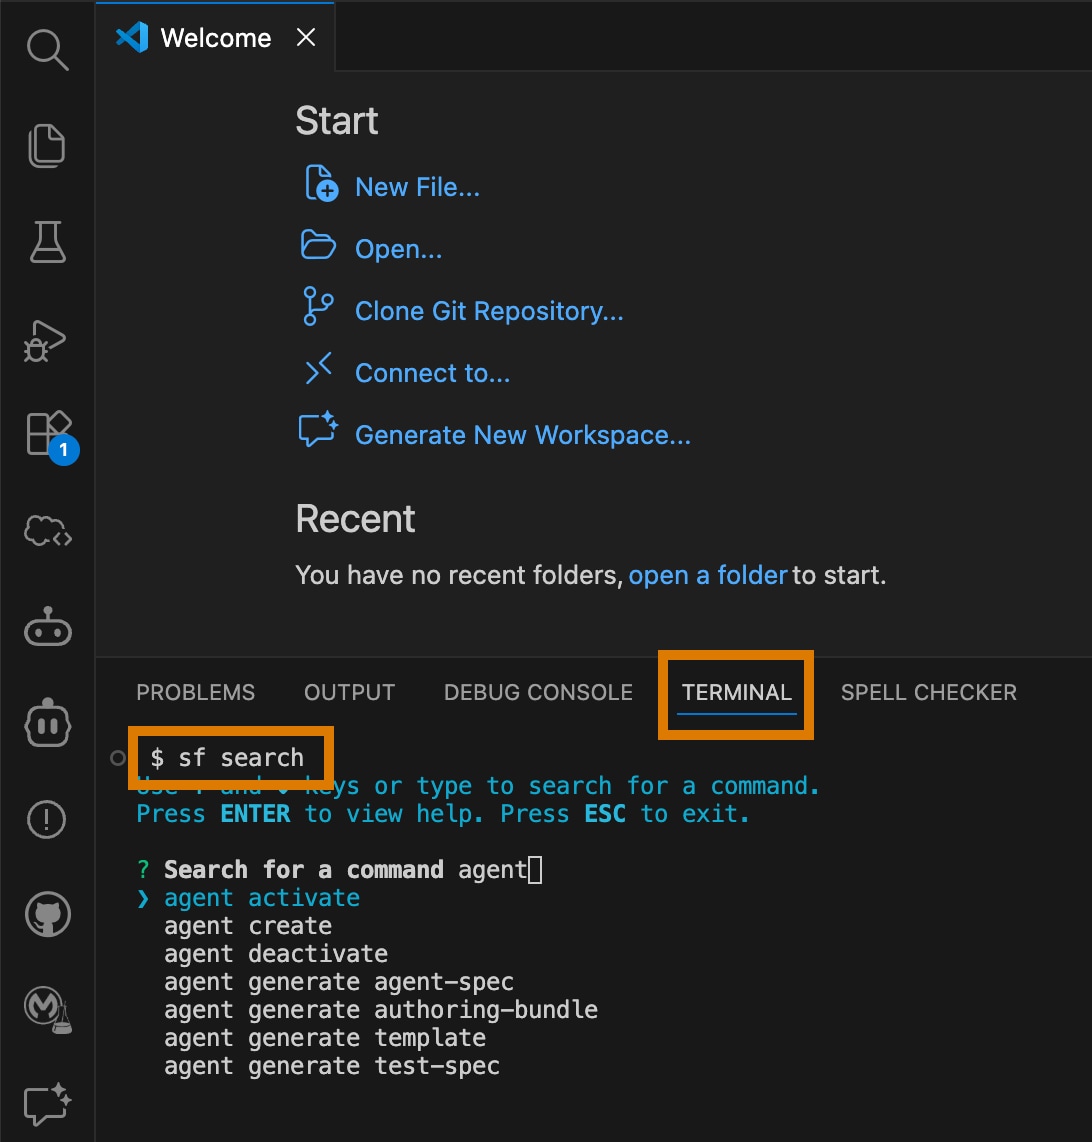
From VS Code’s integrated terminal, run the
sf searchCLI command and enteragentto view the available agent-related commands.A summary of the command appears at the bottom as you use the arrow keys to scroll through the list.
You can also run Salesforce CLI commands from a separate terminal (macOS, Linux) or command prompt (Windows).
-
To view detailed information about a particular command, such as its flags and examples of how to use it, use the
--helpflag. Use-hfor concise information.
If you’re new to pro-code development with VS Code, check out the Trailhead badge Quick Start: Visual Studio Code for Salesforce Development.
While we recommend that you use Salesforce tools, such as Agentforce Vibes, to develop a Salesforce agent with AI assistance, you can also use other AI tools such as Cursor or Claude Code if you prefer. Follow these steps for best results:
-
Install Salesforce CLI on your computer so the tools can run the
agentCLI commands. -
Download the Agentforce skills from the sf-skills GitHub repo and store them where your AI tool can find them. Check your tool’s documentation for details. Skills for the agentic development lifecycle contain the word
agentforce.These skills help you build, modify, debug and deploy Agentforce agents using Agent Script. They also provide comprehensive testing capabilities, including automated utterance derivation from agent subagents, preview-based smoke testing, trace analysis, and an iterative fix loop for identified issues.
Agent skills are folders of instructions, scripts, and resources that agents can discover and use to do things more accurately and efficiently.
Developers typically use either a sandbox or scratch org for Agentforce development, although it’s important to understand the capabilities and limitations of each before you start.
You can also use a Developer Edition org that has Agentforce and Data 360 enabled.
You can use both sandboxes and scratch orgs to develop and test agents, code, and do other configuration changes without compromising the data and apps in your production org.
Sandboxes are copies of your Salesforce production org. They contain the metadata that was in your org at the time they were created. Developers often use Developer and Developer Pro sandboxes, because they can be refreshed often, which brings in new changes from your production org. Partial and Full Copy sandboxes are useful for integration and user testing because they contain data from your production org in addition to the metadata, although this ability restricts how often you can refresh Partial and Full Copy sandboxes.
Scratch orgs are empty environments that don’t have any metadata or data from your Salesforce production org, so you can create them quickly. Scratch orgs are ideal for source-driven development where you externalize the metadata from your production org, then deploy the metadata to the scratch org when you want to work on a specific part of your app.
To select the appropriate developer environment, consider whether your agents require access to Agentforce Data Libraries and Data 360:
- No Data Libraries Required: Use scratch orgs configured for Agentforce development.
- Data Libraries Required: Use a sandbox org capable of connecting to Data 360.
Combining Data 360 and Agentforce is the best way to create successful agents. Therefore, we recommend that you work in a sandbox when using Agentforce DX. Developer and Developer Pro sandboxes are ideal choices. See Choose the Right Salesforce Org for the Right Job for a deeper dive into the available choices.
To create a sandbox, use one of these two methods:
- Salesforce CLI: Run the
org create sandboxcommand. See Sandboxes in the Salesforce DX Developer Guide. - Setup UI in your org. See Create, Clone, or Refresh a Sandbox in Salesforce Help.
To create a scratch org, run the org create scratch Salesforce CLI command. See Scratch Org Access for details about creating a scratch org definition file that automatically enables Einstein and Agentforce, which are required to use the agent commands.
If you create a DX project using the agent template, then the generated project includes a scratch org configuration file (config/project-scratch-def.json) that contains the required settings and features for creating an Agentforce-ready scratch org.
Use this form to sign up for a free Salesforce Platform environment with Agentforce and Data 360.
Although sandboxes are a copy of your production org, you must complete some additional manual configuration after the sandbox is created to enable Agentforce in it. Follow these steps to make sure that your sandbox or Developer Edition org is ready for Agentforce DX.
-
Log in to your sandbox or Developer Edition org.
-
If your agents don’t require Data 360, skip to the next step. If your agents require Data 360, turn on Data 360.
-
From Setup, find and select Data Cloud Setup Home.
-
Follow the directions in Turn On Data 360.
Data 360 setup can take up to 60 minutes to complete. The Setup page displays a message when it’s finished.
Don’t continue to the next step until the Data 360 setup is fully completed.
-
-
From Setup, in the Quick Find box, enter
Einstein Setup, and then select Einstein Setup. -
Make sure that Einstein is enabled. If not, select Turn on Einstein.

-
In the Setup Quick Find box, enter
Agent, and then select Agentforce Agents. -
Make sure that Agentforce is enabled.

If you just enabled Agentforce for the first time, refresh the page to see the New Agent button.
A Salesforce DX project provides a project structure for your org’s metadata (code and configuration), sample data, and all your team’s tests. Development teams store these items in a version control system, such as GitHub. Agents are like any other Salesforce customization in that they’re made up of metadata, so you still use DX projects to store and work with them.
We provide an agent template that creates a DX project containing a sample agent called Local Info Agent. A resort could embed this agent in its website to provide local weather updates, share information about local events, and help guests with facility hours. The agent demonstrates 3 types of subagents that use invocable Apex, a prompt template, and a flow; the DX project also includes the corresponding metadata that implements these subagents.
The template also includes a scratch org configuration file (config/project-scratch-def.json) that contains the required settings and features for creating an Agentforce-ready scratch org.
- Open VS Code, click View | Command Palette, and then select SFDX: Create Project.
- Select the Agent project template.
- Enter a name for your project, such as
agentforcedx. - Go to the location where you want to create the project, then click Create Project.
A Salesforce DX project opens in VS Code Explorer. This screenshot highlights where the sample Local Info Agent metadata files are located in the DX project’s package directory; later sections in this guide describe these files in more detail.

Open the README.md file at the project’s root directory to learn more about this agent-ready DX project.
To run Salesforce CLI commands directly in the integrated terminal, or from a separate terminal (macOS, Linux) or command prompt (Windows), use these equivalent commands for setting up a Salesforce DX project:
Authorize your sandbox or Developer Edition orgs so you can work in them with VS Code and the CLI commands. The easiest way to authorize your org is through a browser.
- In VS Code, click View | Command Palette and then select SFDX: Authorize an Org.
- Click Project Default.
- Enter an alias for your org, such as
agentforce. - In the browser window that opens, log in to your org with your login credentials.
- Click Allow, which allows Salesforce CLI to access your org.
- Close the browser window. Your org is now authorized and set as your default org.
Here’s the equivalent Salesforce CLI command that you can use in VS Code’s integrated terminal. Or run it in a separate terminal (macOS, Linux) or command prompt (Windows) from within your DX project.
To incorporate Agentforce DX tooling into your continuous integration and continuous deployment (CI/CD) systems, use the JWT-based authorization flow. This flow allows for non-interactive authorization, which is ideal for automated build and deployment pipelines.
Before you can use JWT authorization, you must create an external client app (ECA) in your Salesforce org and configure it with a digital certificate. The authorization process is the same as for standard Salesforce DX tooling. For details, see Authorize an Org Using the JWT Flow.
To build an agent with Agentforce DX, you need certain system permissions. When you authorize your sandbox or developer edition org, you log into the org with your username and password. If the user associated with your username is a system administrator, then you have all the required permissions and no further action is needed. An example of a system administrator is a user with the System Administrator profile.
If, however, you aren’t a system administrator, then you need certain system permissions depending on what you want to do.
-
To publish an agent’s authoring bundle:
Modify All DataManage AI Agents
-
To preview an agent:
Agent Platform Builder
An example of a non-system administrator is a user with the Standard User profile. Ask your system administrator to give you these system permissions by, for example, assigning your username a permission set that includes the permissions.
Generating an authoring bundle or validating the Agent Script file requires no additional system permissions.
Salesforce agents run in your org using a Salesforce user that’s assigned a specific profile and permission sets. You can create this user in your org using Setup or Agentforce Builder. Or you can use the org create agent-user CLI command.
The simplest way to create the agent user is to run this command in VS Code’s integrated terminal or from a separate terminal (macOS, Linux) or command prompt (Windows):
The required --target-org flag specifies the alias or username of the org where you want to create the user. The command uses these defaults when it creates the user:
- Generates a user called
Agent Userwith a globally unique username. - Sets the user’s email to the new username.
- Assigns the user the
Einstein Agent Userprofile. - Assigns the user these required permission sets:
AgentforceServiceAgentBase,AgentforceServiceAgentUser,EinsteinGPTPromptTemplateUser - Checks that the user licenses required by the profile and permission sets are available in your org.
You can change the agent user’s name and username with flags. This example sets the name to Service Agent and specifies a username template. The command appends a unique ID to the base username to ensure global uniqueness:
When the command completes, it displays the username it generated for the agent user, along with other useful information.
The generated user doesn’t have a password. You can’t log into Salesforce using the agent user’s username. Only Salesforce users with admin permissions can view or edit an agent user in Setup.
See Code Your Agent Using Its Script File for information about where to add the agent user’s username to its Agent Script file.
- Trailhead: Quick Start: Visual Studio Code for Salesforce Development
- Trailhead: Agentforce Vibes Extension.
- Salesforce CLI Setup Guide: Install Salesforce CLI
- Agentforce Vibes Extension
- Salesforce Extensions for VS Code
- Salesforce DX Developer Guide: Project Setup
- Salesforce DX Developer Guide: Authorization
- Salesforce CLI Command Reference
- Salesforce Help: Design and Implement Agents