Add Publish History Tab to Product Designer
Ensure that the user is assigned with a permission set that has the custom permission TMF 620 Outbound added.
See Custom Permission Set and Product Publish Event.
- Click your name. Click Switch to Lightning Experience.
- From Setup, in the Quick Find box, enter Permission Sets, and then select Permission Sets.
- Select
TMF Catalog Managerpermission set. - Click Object Settings available under Apps section.
- Click
Product Publish Eventsobject, then click Edit. - Make the tab settings as
visible. - Click Save
Perform the following steps to add publish history tab to the product designer view.
- From Setup, in the Quick Find box, enter App Builder in the Quick Find box, then select Lightning App Builder.
- Select Edit option under Actions for the
Default Product Console Record Page. - Click DETAILS tab. Click Add Tab button. A tab called
Detailsis added automatically.
- Change the Tab label to custom and input the custom label as
Publish History.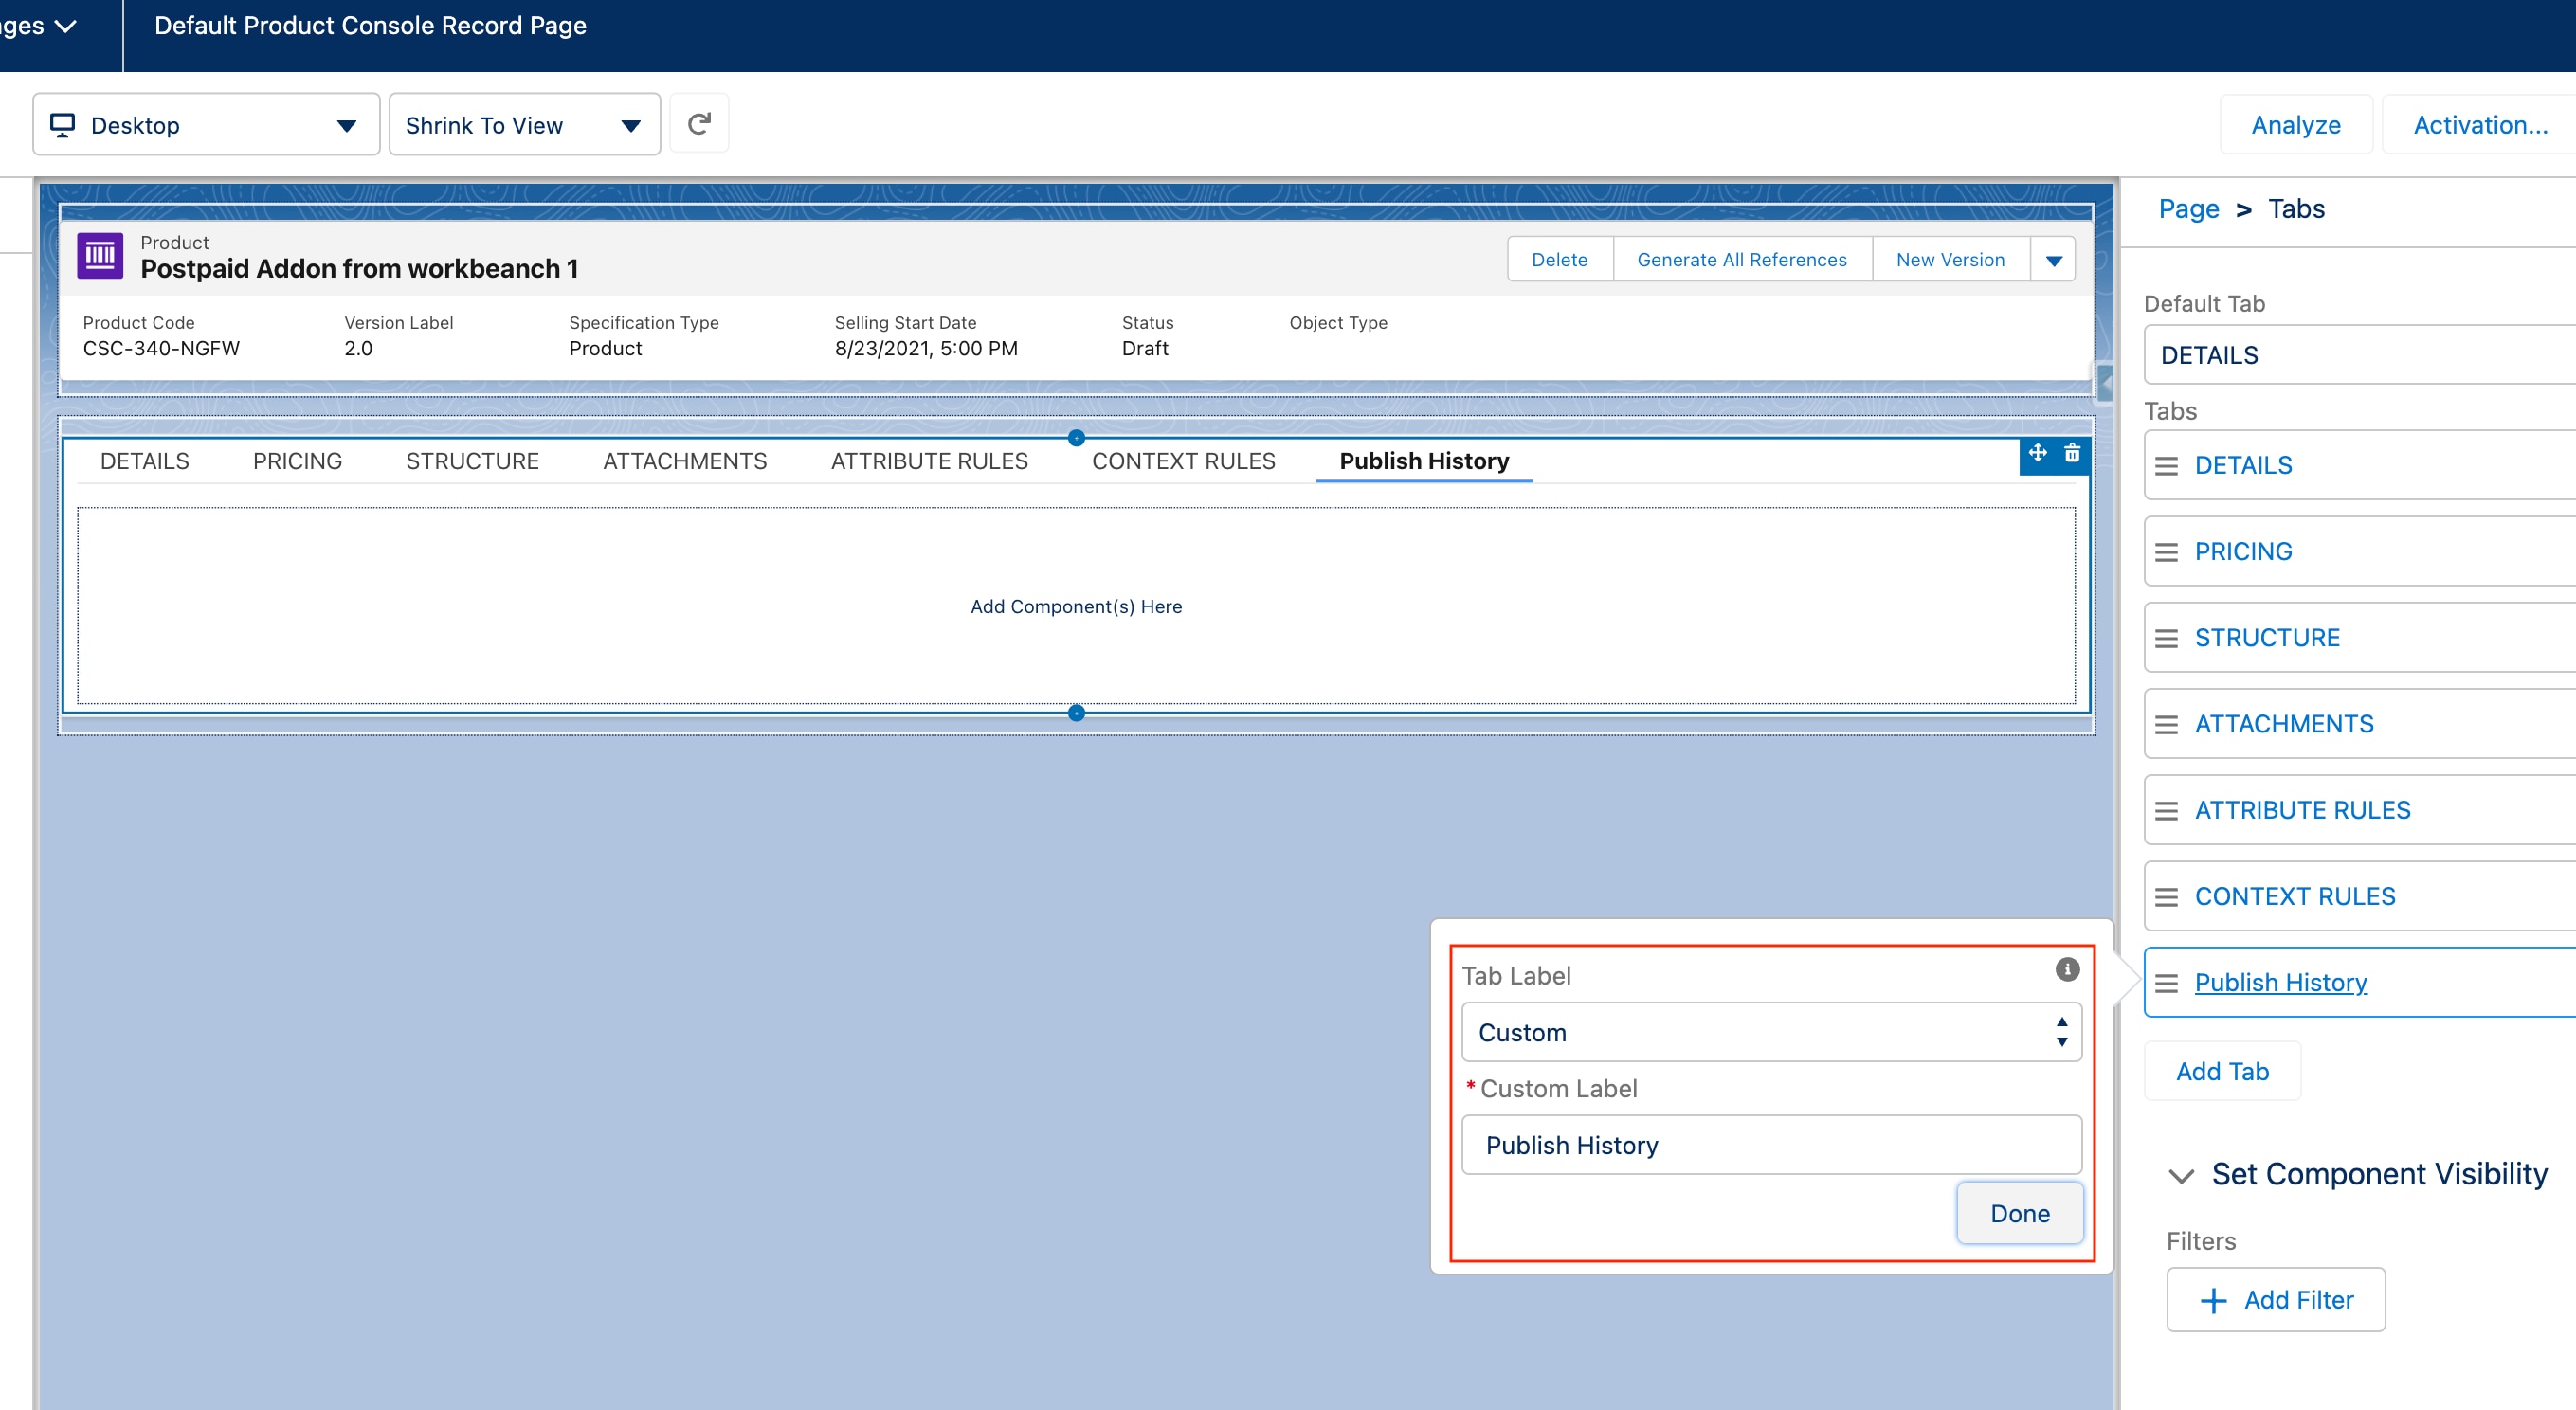
- Click Done.
- Click Publish History tab to add the component(s).
- Drag the
Related List Singlecomponent onto the component section. - Click on the component its properties. Perform the following changes.
- Change
Related ListtoProduct Publish Events - Change
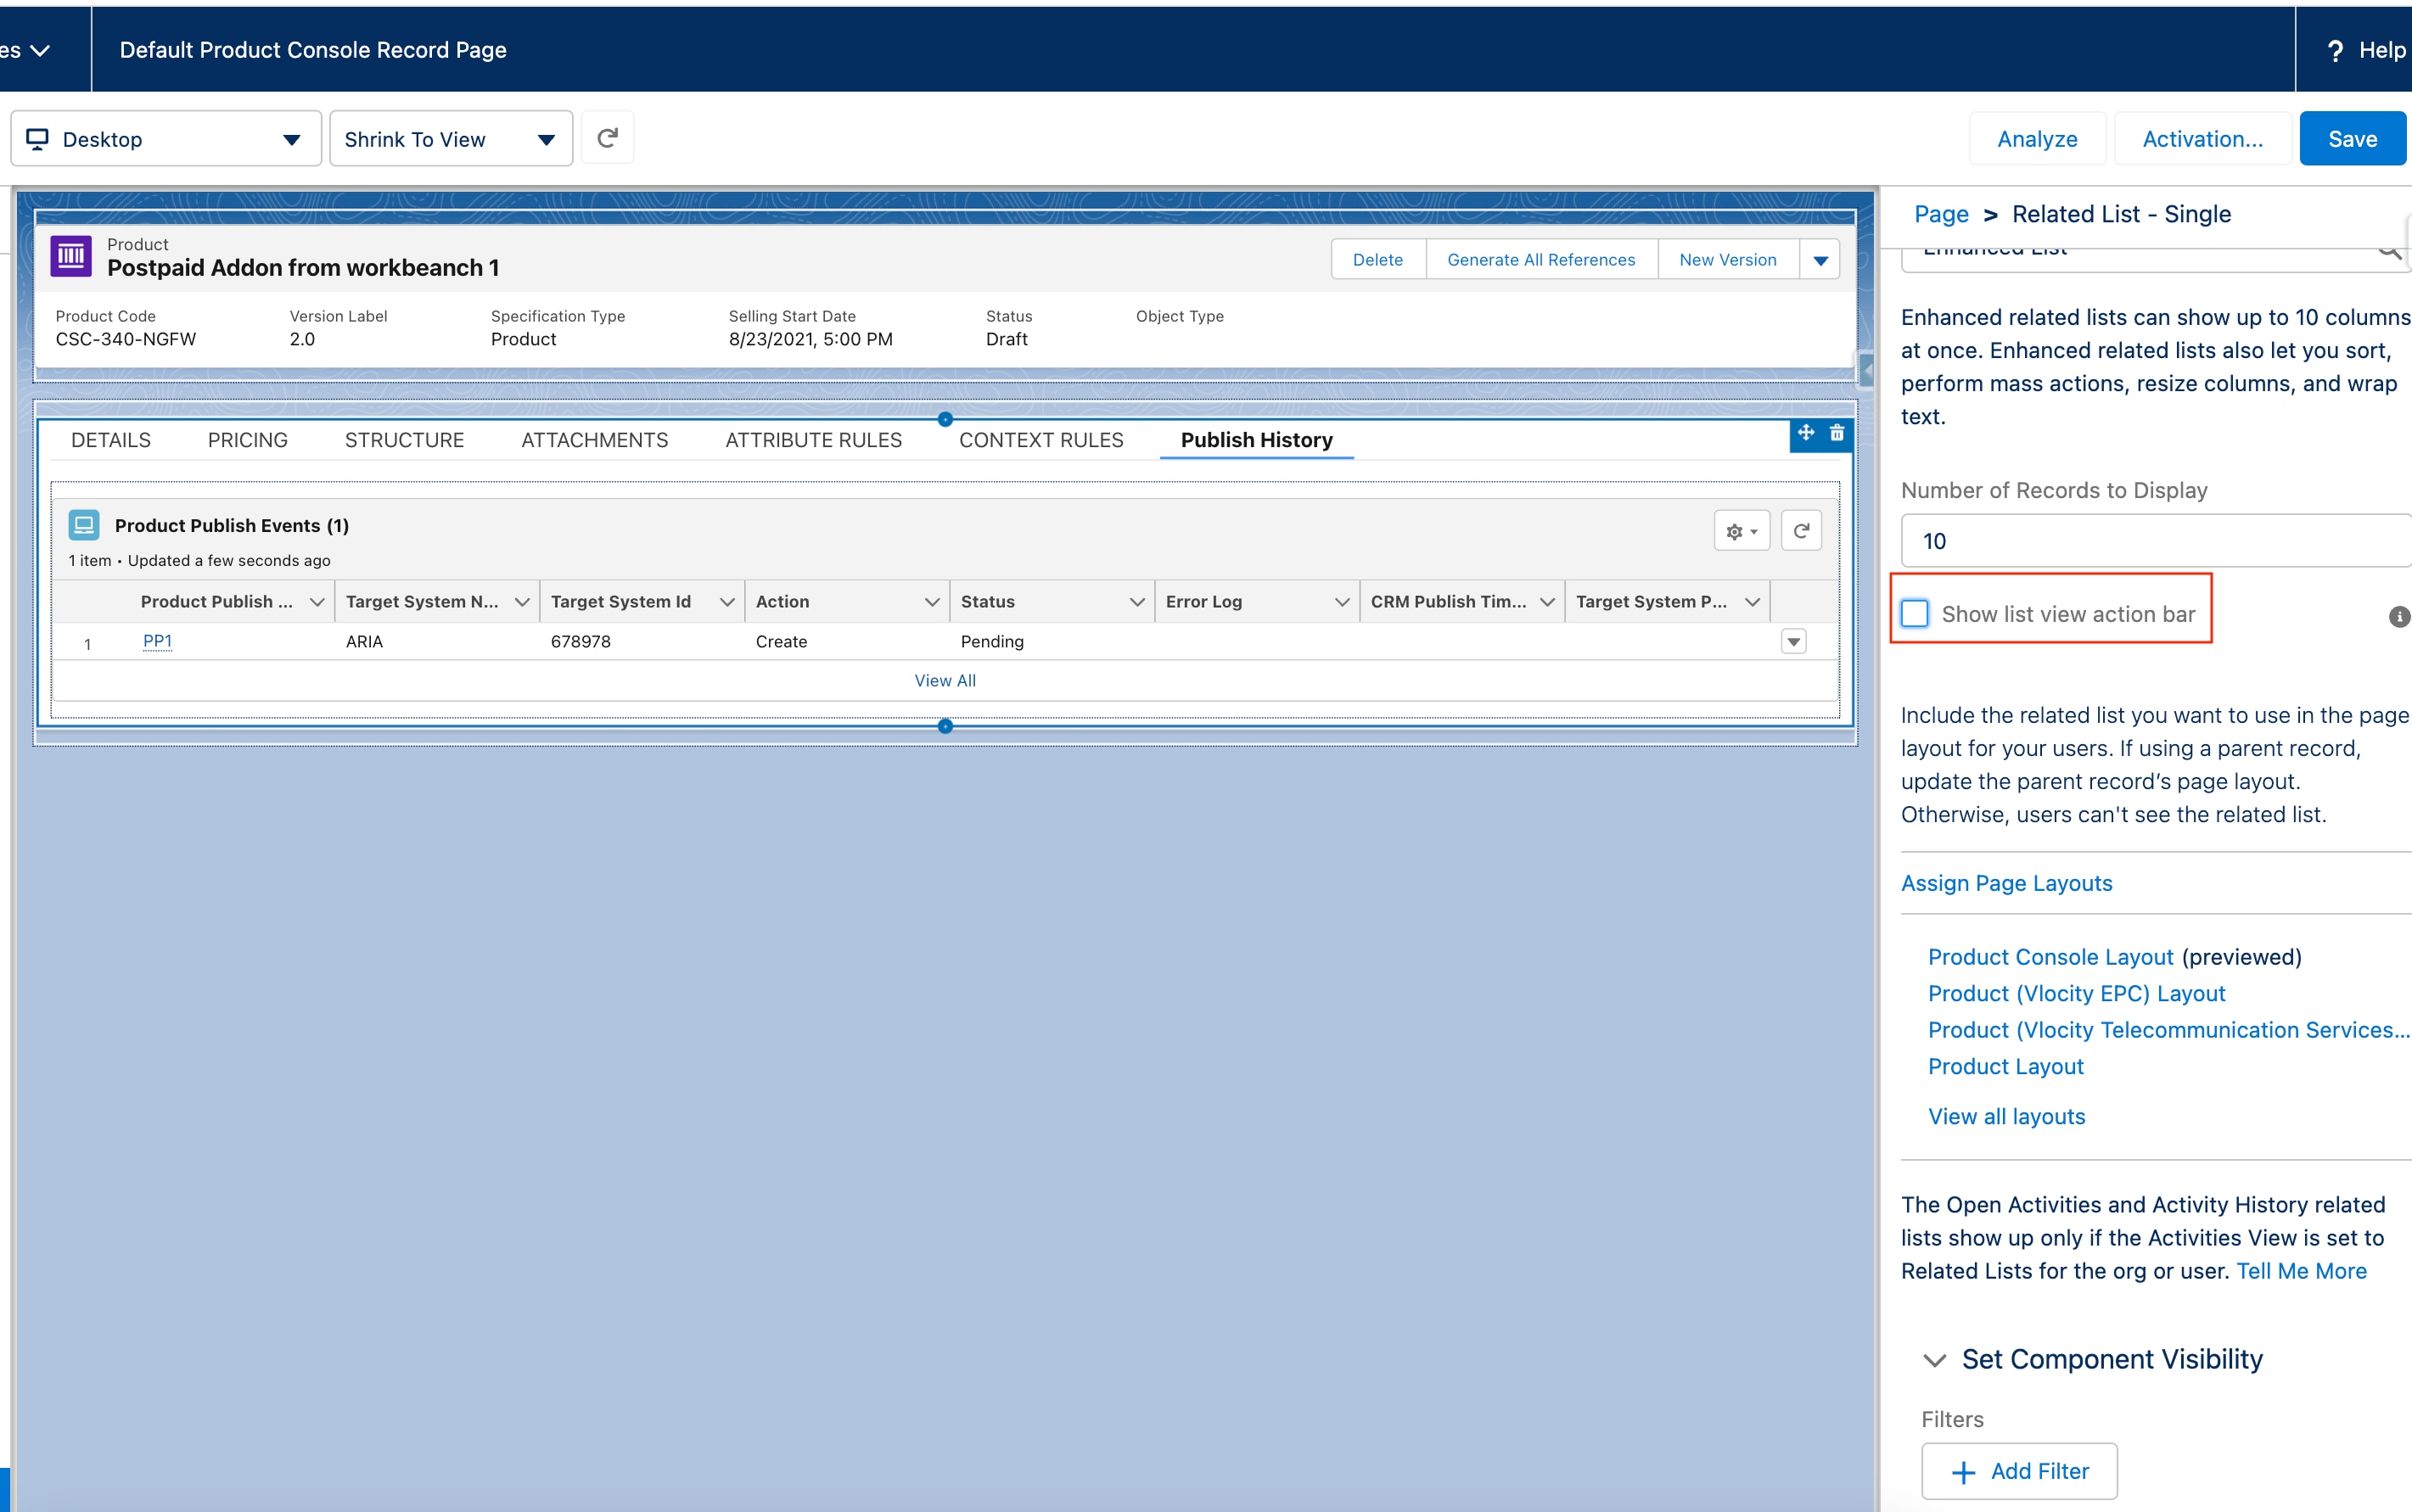
Related List TypetoEnhanced List - Uncheck
Show list view action baroption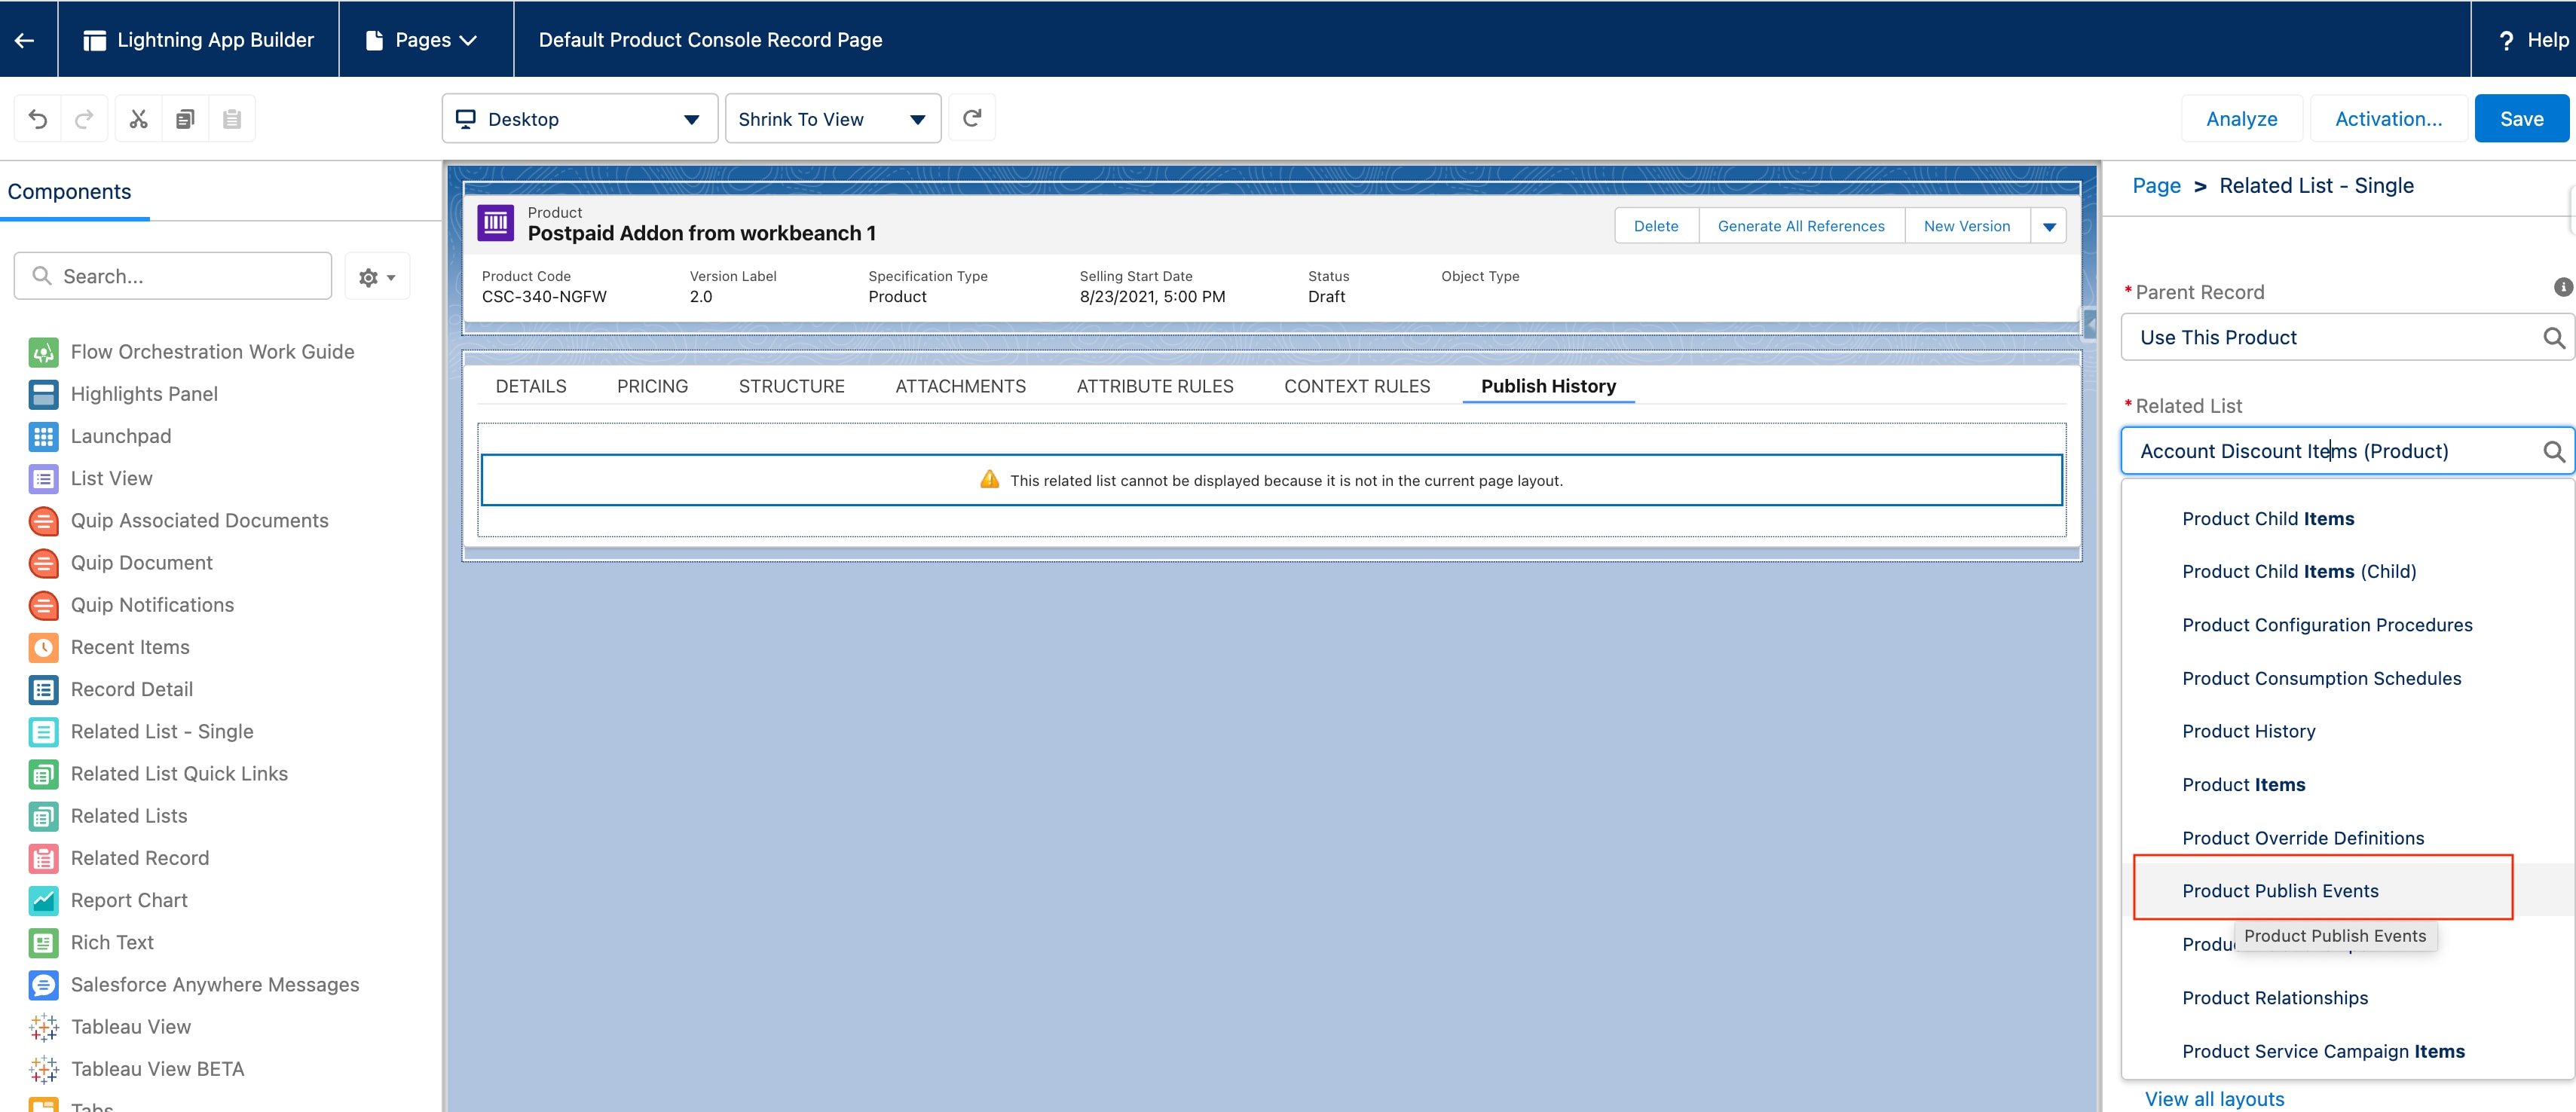
- Change
- Click Save.
Perform following steps for activation.
- Click Activation.
- Ensure that Product Console is set as Org default. Verify if Vlocity Product Designer is assigned as App Default.
- Click on App, Record Type, and Profile.
- Click on Add Assignments.
- Click on Product Designer
- select Master, Product, Product Template then click on Next 4.
- Select System Administrator > Next > Save.
Perform the following steps if you do not find any attributes displayed for the Product History tab.
- From Setup, in the Quick Find box, enter profiles in the Quick Find box, then select Profiles.
- Select the profile form which you have logged in.
- Under the Standard Object Layouts, search for Product and click View Assignment.
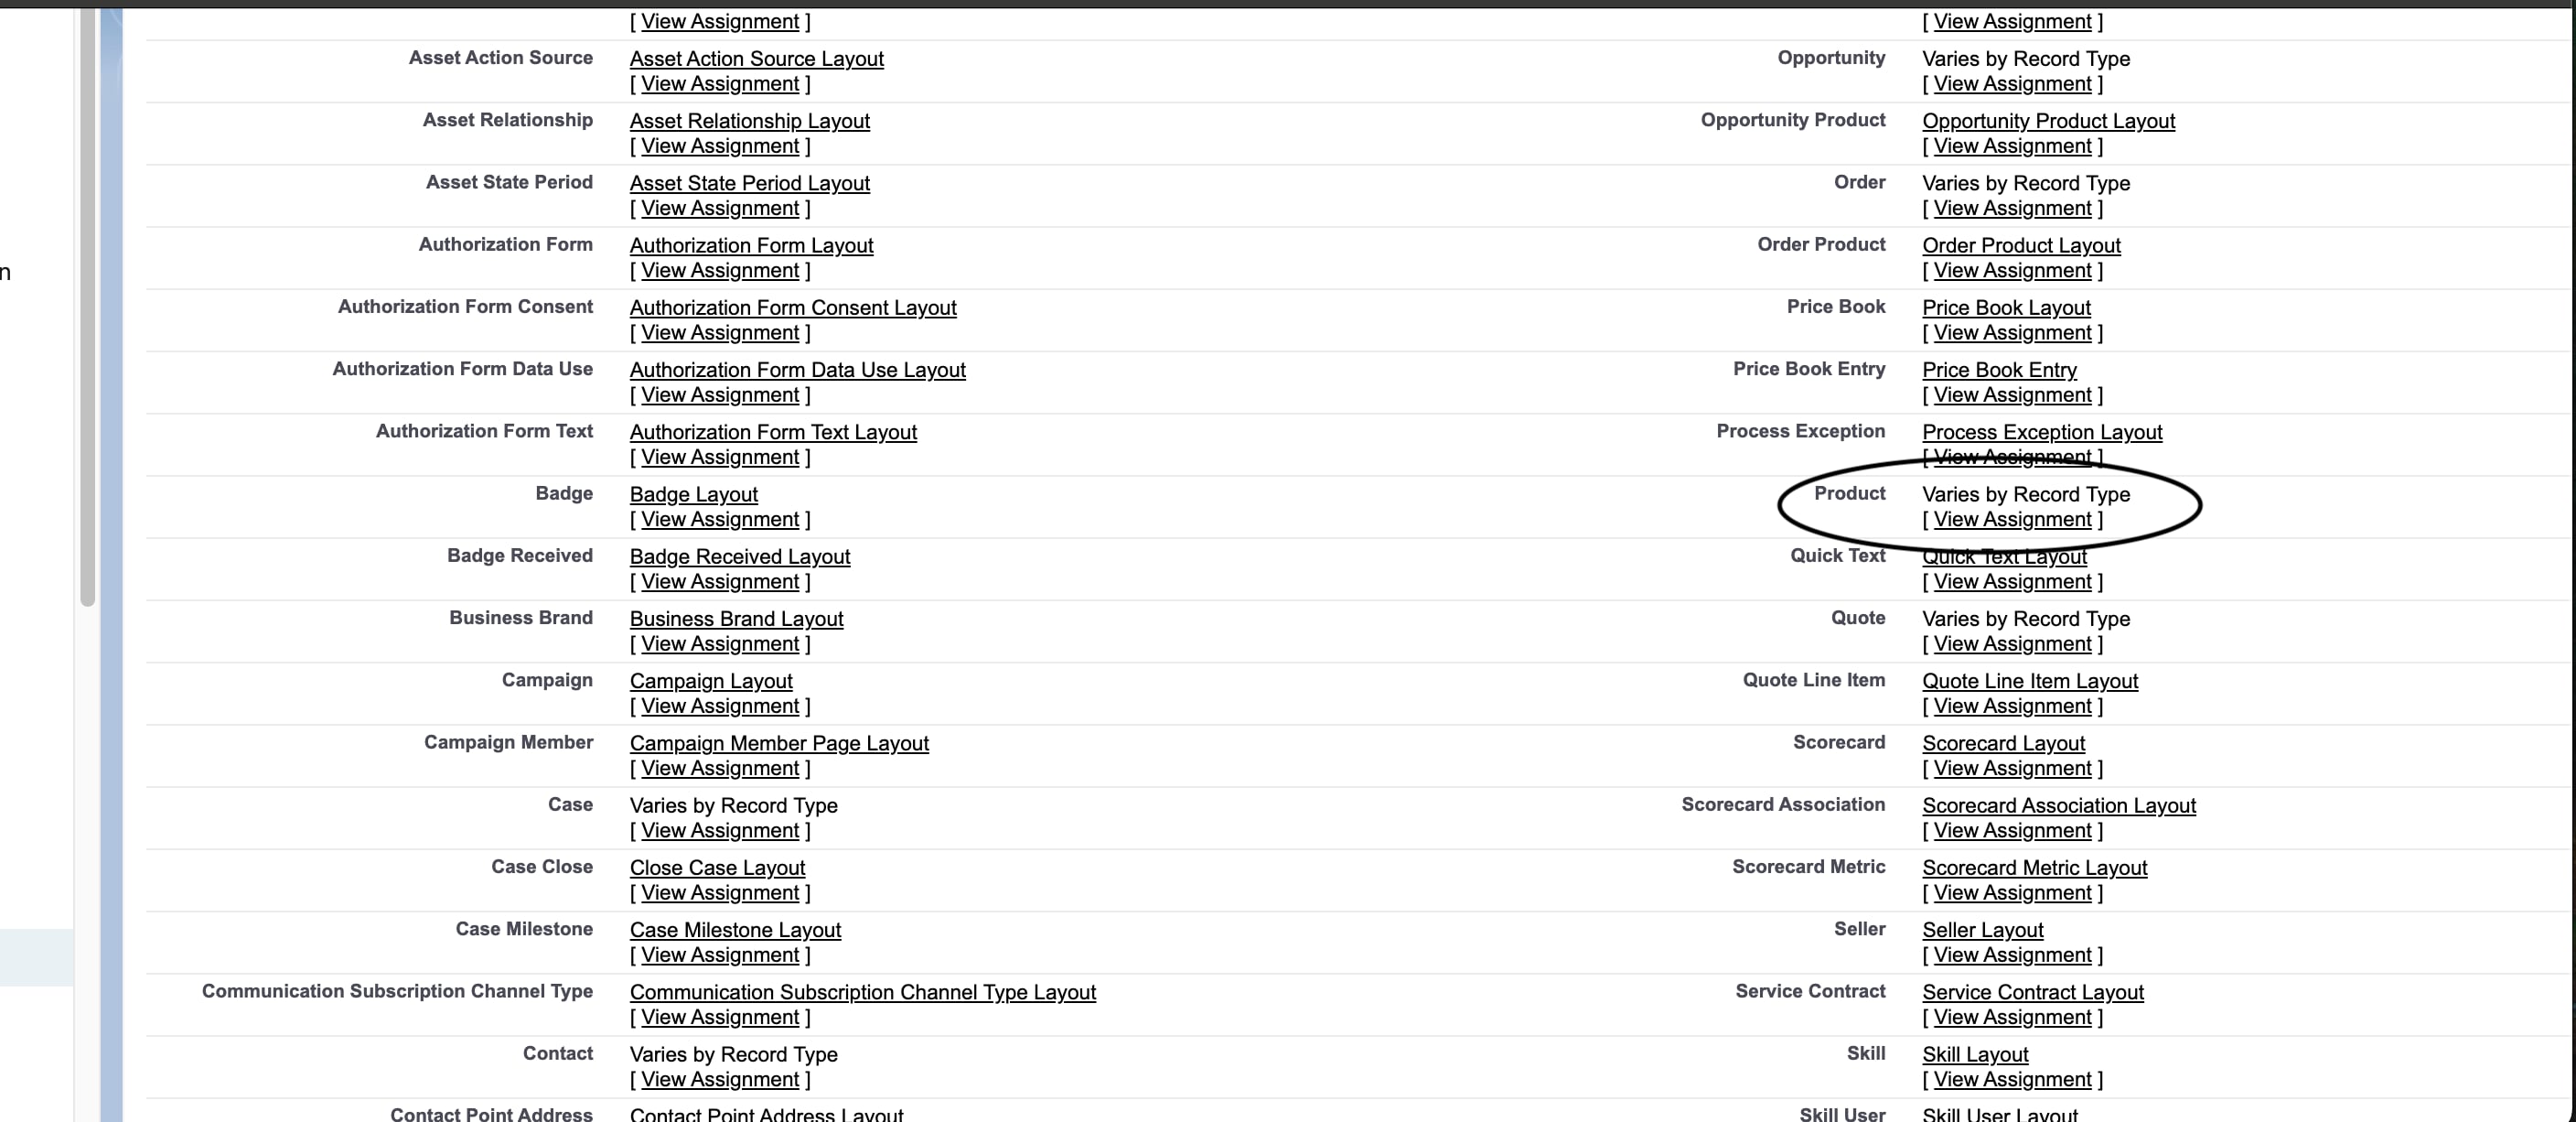
- Select your respective Profiles and Record Types. Select Related Lists as shown in the following figure.
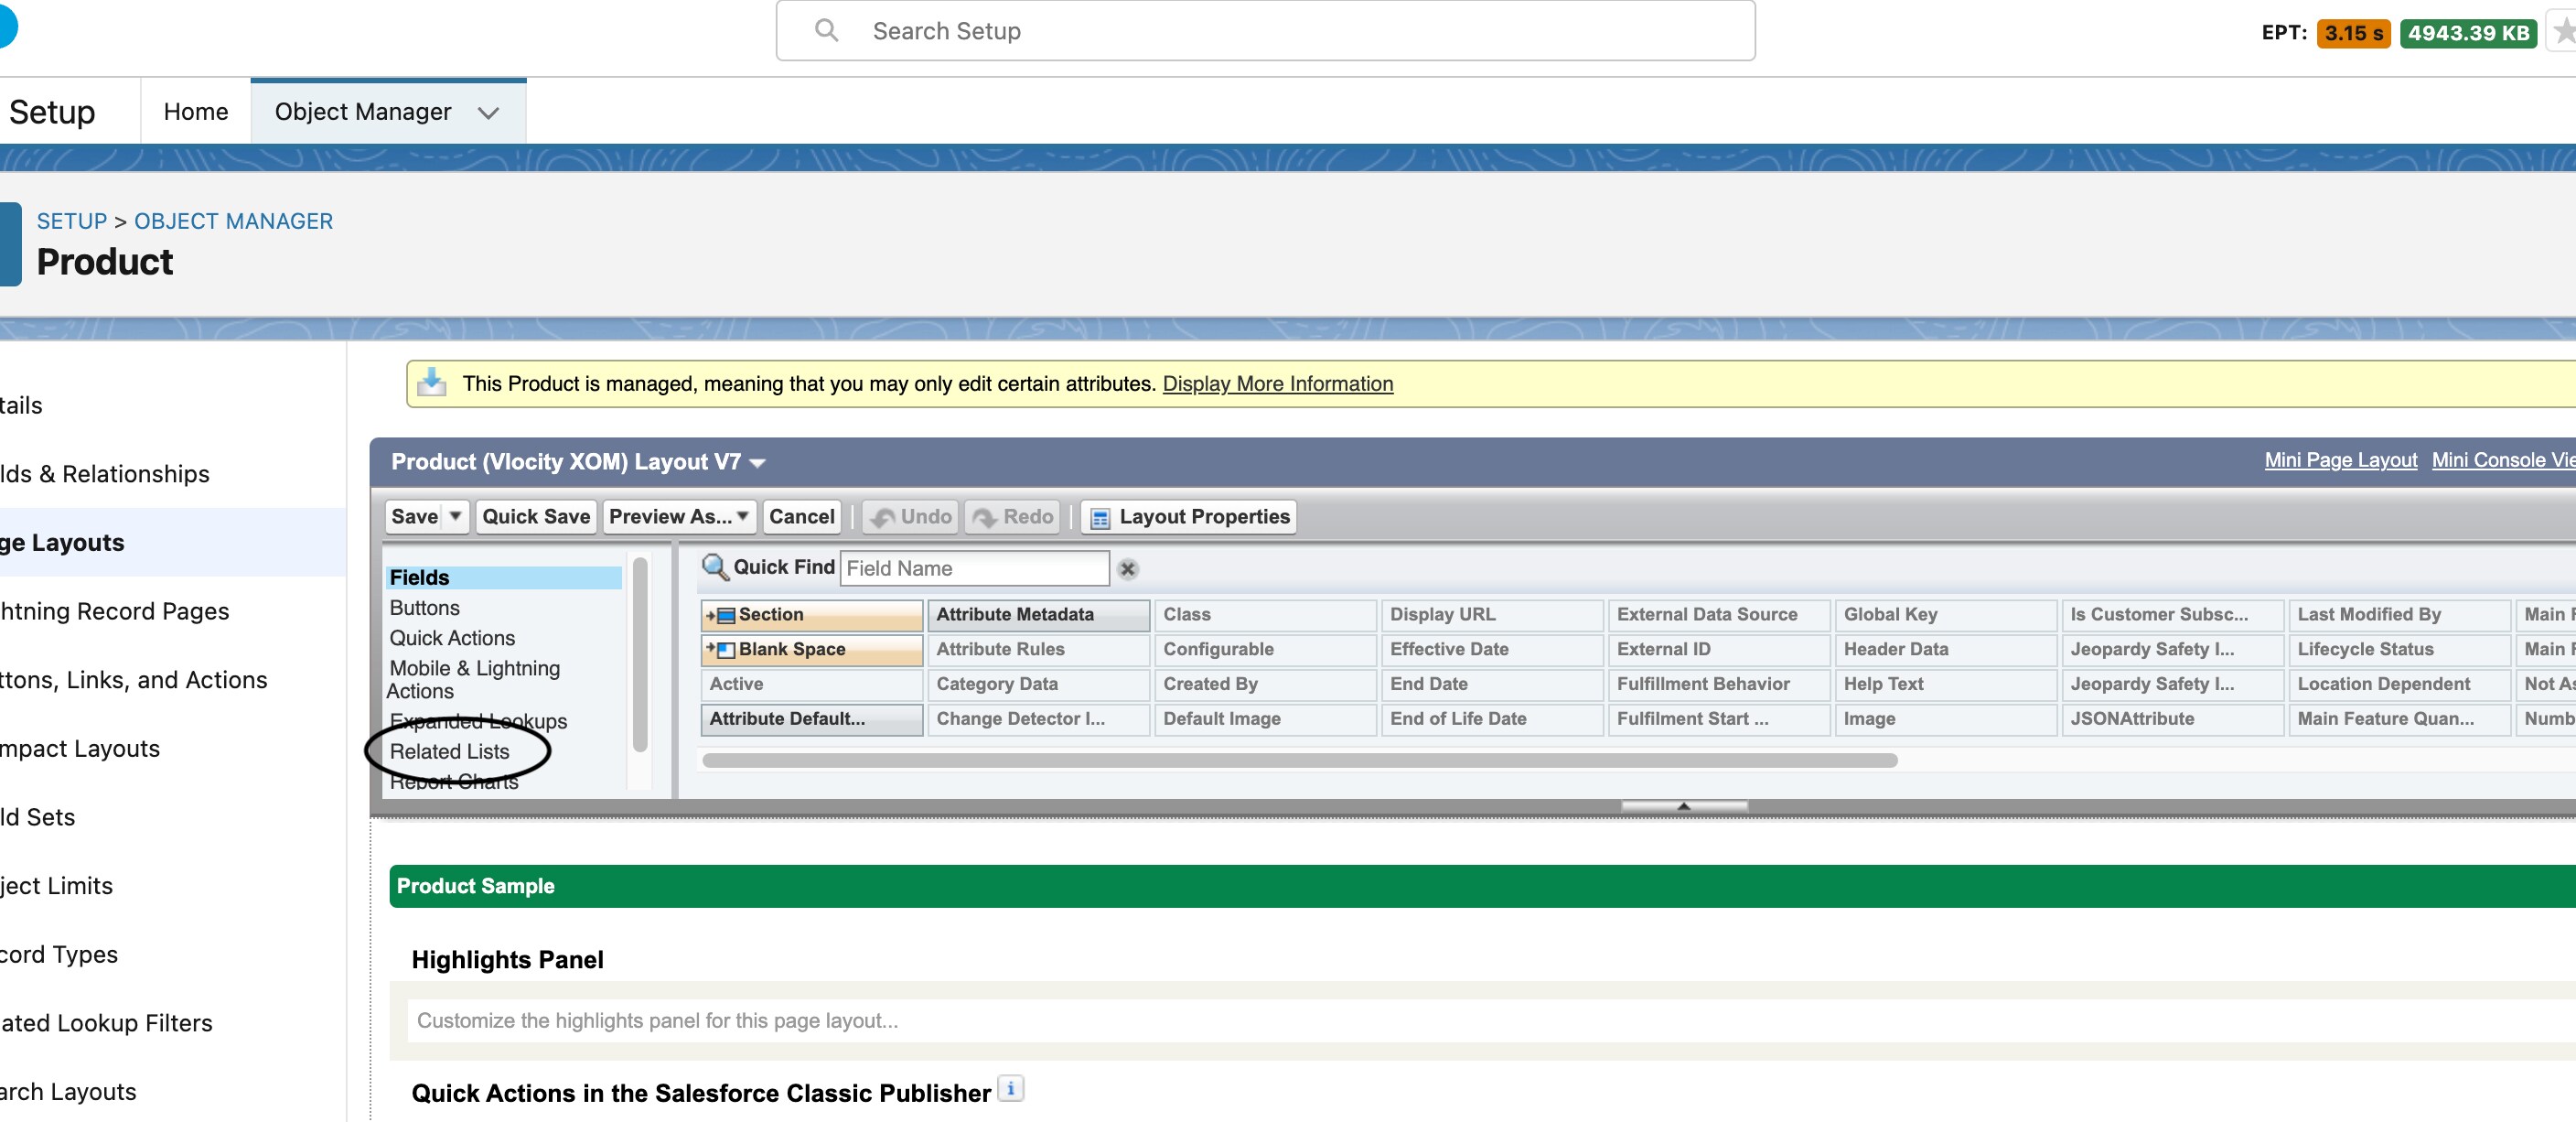
- If Product Publish Events is not present under Related Lists, drag and drop Publish Publish Events layout from the table to the Related Lists.
- Click on the wrench icon and select all the attributes and the order in which you want to display the records. Click OK.
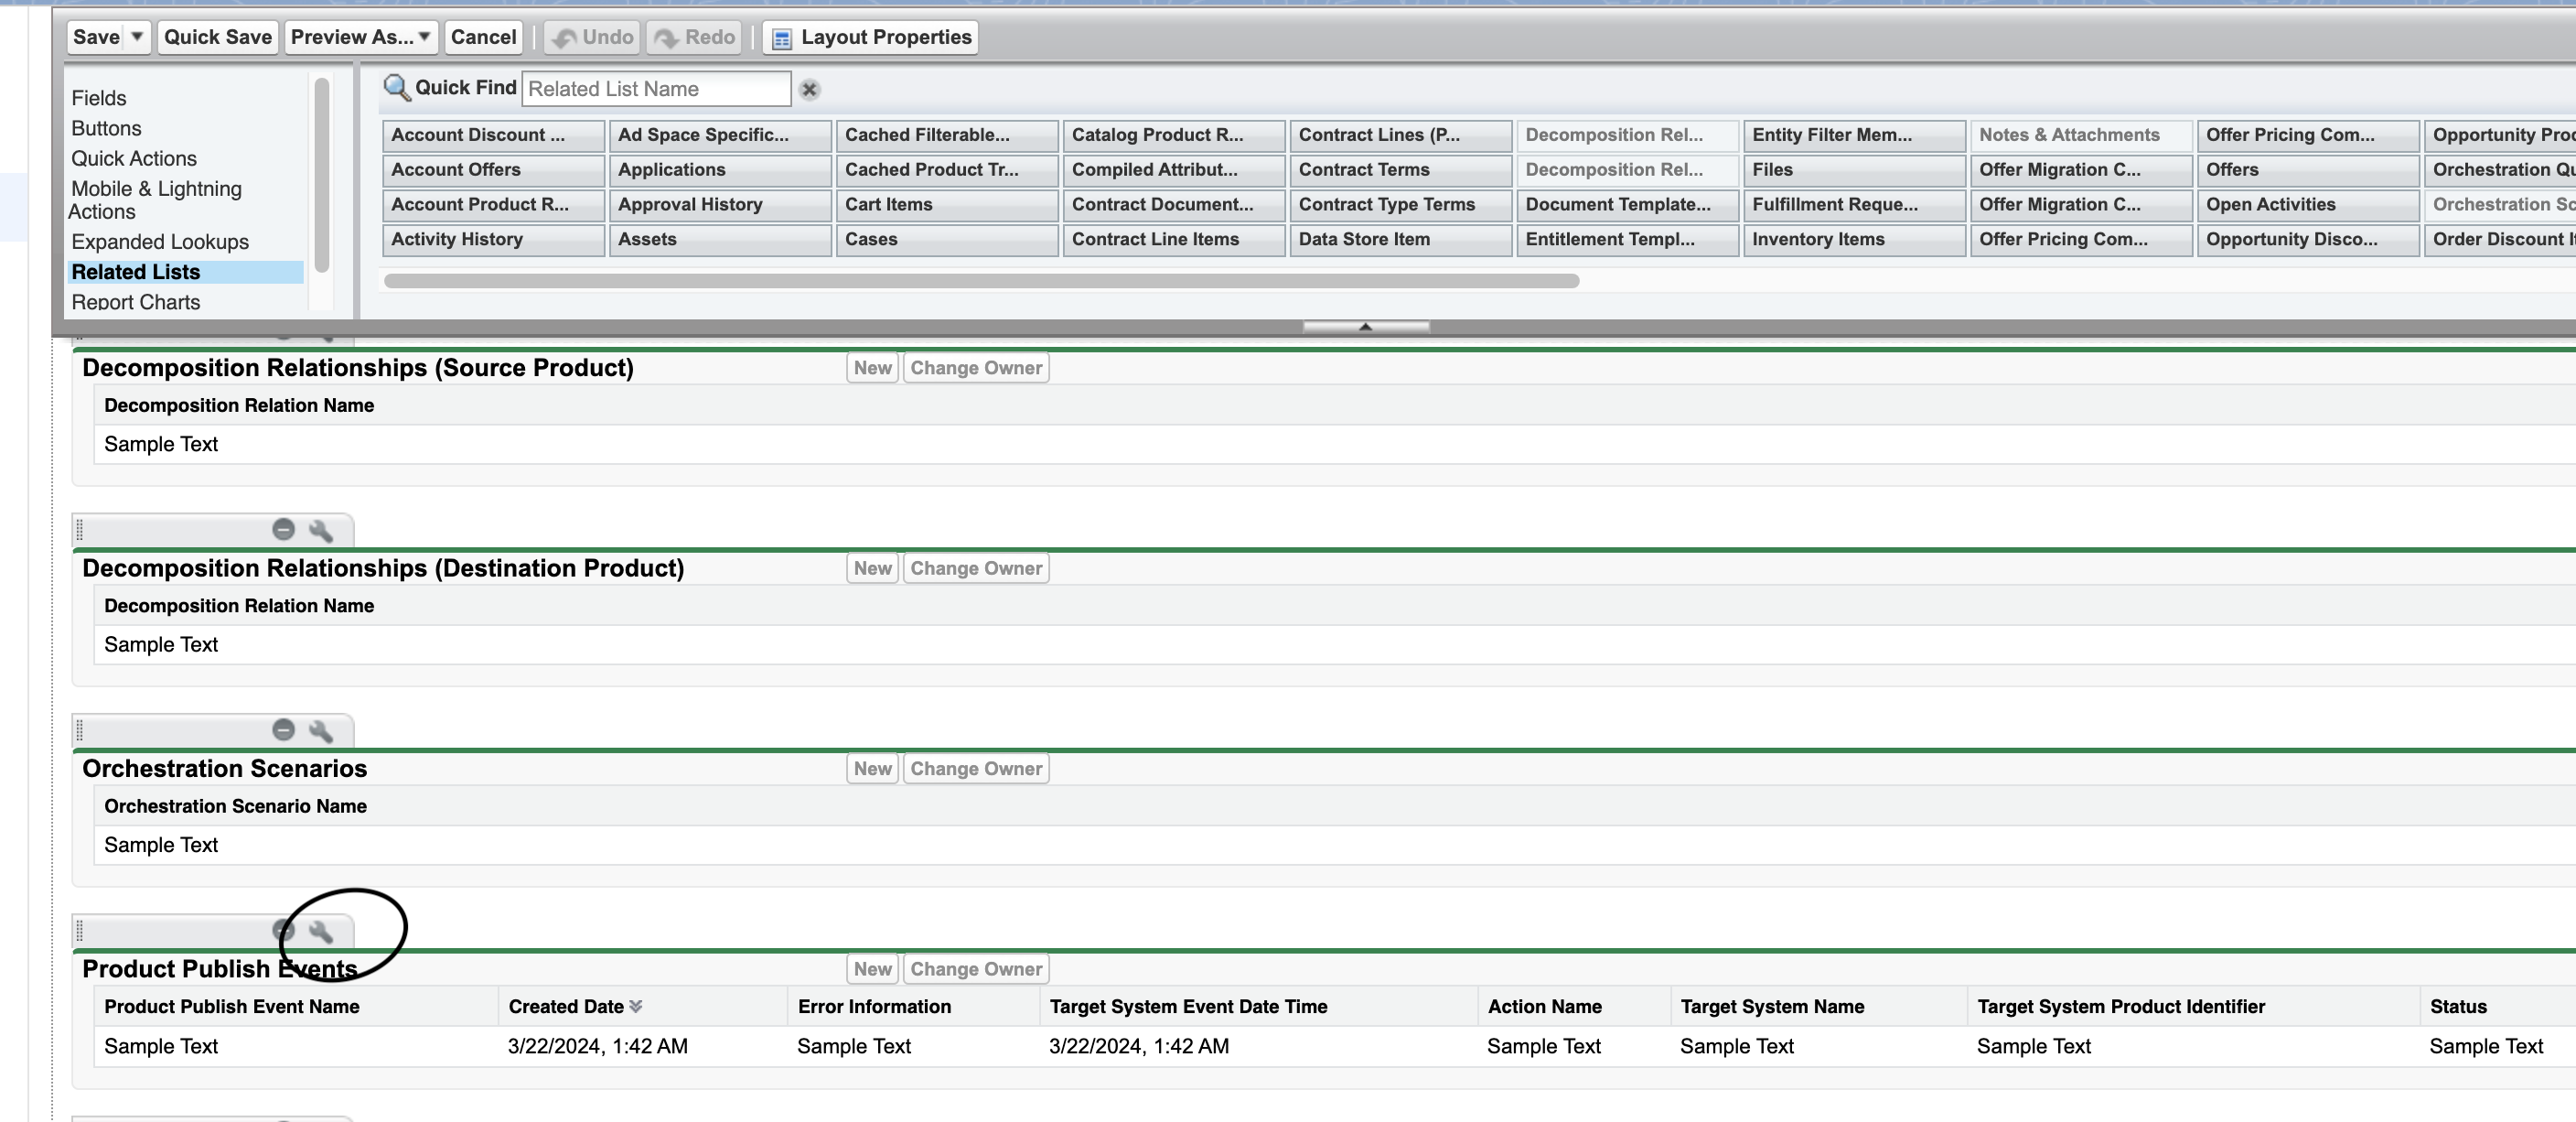
From Publish History tab, now you should be able to view all the attributes in the selected order.